

Professional ASP.NET Security - Jeff Ferguson
.pdfprivate void LoginButton_Click( object sender, System. EventArgs e) { //check the credentials
if (FormsAuthenticat ion. Authenticate (UsernameTextBox.Text , Pas swordTextBox. Value) ) { //set up the authentication cookie and redirect FormsAuthenticat ion. RedirectFromLoginPage
(UsernameTextBox.Text, false) ; }
else
{
//make the error message visible ErrorMessageLabel. Visible = true;
Note that we have added a using System. Web . Security statement so that we can access the FormsAuthentication class easily.
The important part of this code is the LoginButton_Click method. The first thing it does is to use the Authenticate method of the FormsAuthentication class:
if (FormsAuthentication. Authenticate (UsernameTextBox.Text, PasswordTextBox. Value) )
The Authenticate method checks the specified username and password against those stored in the web. conf ig and returns a Boolean value indicating whether a match was found. Remember that the methods of FormsAuthentication are static, so we do not need to create an instance of FormsAuthentication to use them - we simply access them through the name of the class.
If a match was found for the credentials, we use the RedirectFromLoginPage method to create an authentication ticket, encrypt it, write it to a cookie and redirect the user back to their originally requested URL. A lot of functionality for one line of code!
FormsAuthentication. RedirectFromLoginPage (UsernameTextBox.Text, false) ;
The second parameter of RedirectFromLoginPage indicates whether a persistent cookie (that lasts beyond the user closing their browser) should be created. We will look at persistent cookies later; for now, we will use cookies that expire when the browser is closed.
If the users credentials were not correct, we make the error message on the login form visible:
ErrorMessageLabel .Visible = true;
178
Forms Authentication
It is always a good idea to give users friendly feedback, especially in security-related parts of a system. Users can get confused if they do not understand what is happening. This seems to be especially true with security related features. One word of warning though - make sure this feedback does not compromise your security in any way. For example, we could have had separate error messages to tell the user whether they had entered a username that was not recognized or a correct username with the wrong password. This is usually not a good idea - if a malicious user is trying to guess a username and password, their chances increase considerably if we tell them when they have got the username correct. The best rule to adopt is to give as much feedback as possible without giving out any information that could help a malicious user.
Logging Out
Logging a user out of forms authentication is as simple as calling the
FormsAuthentication. SignOut method. We can just add this method call to an event handler for a Log Out button:
private void LogOutButton_Click(object |
sender, |
System. Even tArgs |
e) {
//expire the authentication cookie FormsAuthentication. SignOut () ;
Depending on our application, we may want to redirect the user to another page when they log out in order to prevent them being immediately asked to log in again.
Putting Log In/Out Functionality into a User Control
Sometimes we do not want to have users go to a specific page to log in to our application. We may want to include controls for entering a username and password on every page in the application, allowing users to log in when they want to. A good way of achieving this is to encapsulate the controls and functionality we use for logging users into our system into a user control. We will then be able to include this user control on whatever pages we like.
A nice bonus would be to have the user control detect whether users are already logged in and display a log out button rather than the username and password textboxes.
Here is the presentation code for such a user control (this is the . ascx file):
<%@ Control Language="c#" AutoEventWireup=" false" Codebehind="LoginControl .ascx.cs" Inner its=" basic . LoginControl" Targe tSchema="http: //schemas .microsoft .com/ intelli sense /ie5 "%>
<! — |
controls |
for anonymous user |
— > |
<span |
id="AnonymousUserControls" |
runat=" server "> |
|
<asp:textbox |
id="UsernameTextBox" |
runat=" server" |
|
Width="89px" ToolTip=" enter your username here">username</asp: textbox>
<INPUT id="PasswordTextBox" style= "WIDTH: 93px; HEIGHT: 22px" type= "password" size="10" runat=" server ">
179
<asp:button id="Log!nButton" runat="server" Text="Log In"x/asp:button> </span>
<!— controls for authenticated user —>
<span id="AuthenticatedUserControls" runat="server"> <asp:Label id="Logged!nTextLabel" runat="server"> You are logged in as </asp:Label>
<asp:Label id="UsernameLabel" runat="server"></asp:Label>
<asp:Button id="LogOutButton" runat="server" Text="Log Out" Width="59px"></asp:Button>
<asp:RegularExpressionValidator id="UsernameRegExValidator" runat="server" ControlToValidate="UsernameTextBox"
ValidationExpression="[a-z|A-Z 0-9]*"> </asp:RegularExpressionValidator>
<asp:RegularExpressionValidator id="PasswordRegExValidator" runat="server" ControlToValidate="PasswordTextBox"
ValidationExpression="[a-z A-Z 0-9 !£$%&*@?]*"> </asp:RegularExpressionValidator> </span>
Note that we have included two sets of controls here - one for a user who has not yet logged in (an anonymous user) and one for a user who has logged in (an authenticated user). Each set of controls is inside a serve-side <span> tag. This will allow us to control which set of controls to display. The advantage of this approach (as opposed to setting the visibility of each control separately) is that we can include additional formatting tags or text in the <span> tags. This additional HTML will be shown or not shown along with the rest of the controls.
The controls for the anonymous user are very similar to those we used in the login.aspx login form -a textbox, a password input, and a login button.
We use the same validation techniques as before but this time, we do not display an error message - we just refuse to accept the input.
The controls for the authenticated user consist of a label that holds a greeting, another label that we will populate with the user's username and a button that they can use to sign out.
Here is the code behind file (LoginControl .ascx. cs) for this control:
namespace basic { using System; using System.Data;
using System.Drawing; using Systern.Web;
using Systern.Web.UI.WebControls; using System.Web.UI.HtmlControls; using System.Web. Security;
180
Forms Authentication
public abstract class LoginControl : System. Web. UI .UserControl { protected System. Web. UI .WebControls .TextBox UsernameTextBox; protected System. Web. UI .WebControls. Label LoggedlnTextLabel; protected System. Web. UI .WebControls .Button LogOutButton; protected System. Web. UI .WebControls .Button LoglnButton; protected System. Web. UI .WebControls .Label UsernameLabel;
protected Sys tern. Web. UI .HtmlControls .HtmllnputText PasswordTextBox;
protected System. Web. UI .HtmlControls .HtmlContainerControl AnonymousUserControls ; protected System. Web.
UI .HtmlControls .HtmlContainerControl AuthenticatedUserControls ;
private void Page_Load( object sender, System. EventArgs e) { //check whether the user is logged in
if (Request . IsAuthenticated)
{
//display the log out button DisplayLogOutControls ( ) ; } else
//display the log in controls DisplayLoglnControls ( ) ;
private void LogInButton_Click (object sender, Sys tern. EventArgs e) { //check credentials against web.config if
(FormsAuthenticat ion. Authenticate
(UsernameTextBox. Text, PasswordTextBox. Value) ) { //create an authentication ticket and persist it in an //encrypted cookie
FormsAuthentication.SetAuthCookie (UsernameTextBox. Text, false) ;
//reload the page to authenticate the userResponse. Redirect (Request .Url .LocalPath) ;
private void LogOutButton_Click (object sender, System. EventArgs e) { //expire the authentication cookie
FormsAuthentication.SignOut ( ) ;
//display controls for anonymous user DisplayLoglnControls ( ) ;
private void DisplayLoglnControls() { AnonymousUserControls.Visible = true; AuthenticatedUserControls.Visible = false;
private void DisplayLogOutControls()
AnonymousUserControls.Visible = false;
AuthenticatedUserControls.Visible = true;
//populate the username label UsernameLabel.Text = Context.User.Identity.Name;
We use the Page_Load method to determine which set of controls should be displayed. We do this with the Request . IsAuthenticated property, which is true for requests by users who have been successfully authenticated:
if (Request . IsAuthenticated)
We then call one of two methods that we define inside the class. DisplayLoglnControls makes the controls for anonymous users visible, and the controls for authenticated users invisible:
private void DisplayLoglnControls ( ) { AnonymousUserControls .Visible = true; AuthenticatedUserControls .Visible = false;
DisplayLogOutControls does the reverse:
private void DisplayLogOutControls ( ) { |
|
|
AnonymousUserControls .Visible = |
false; |
|
AuthenticatedUserControls. Visible |
= |
true; |
//populate the username label
UsernameLabel .Text = Context .User . Identity .Name;
It also populates the label we set up for holding the username.
The LoglnButtonClick method handles the click event of the Log In button (displayed when the user is anonymous). It works in a similar way to the code we used for logging users in with our login . aspx login form. It slightly different, because we don't want to redirect the user to an originating URL if they are successfully authenticated.
182
Forms Authentication
First we check the user's credentials against the web. conf ig, exactly how we did before:
if(FormsAuthentication.Authenticate(UsernameTextBox.Text, PasswordTextBox.Value))
If the credentials are correct, we want to set up an authentication cookie and send it to the user's browser but we do not want to redirect them to an originating page. We cannot, therefore, use RedirectFromLcginPage. The SetAuthCookie method of FormsAuthentication does just what we want - it creates an authentication ticket, encrypts it and writes it as a cookie to the HTTP response:
FormsAuthentication.SetAuthCookie(UsernameTextBox.Text,false);
As with RedirectFromLoginPage, the second parameter indicates that we do not want to use a persistent cookie.
Once we have set the cookie, we want to force the user to reload the current page, in order that their authentication cookie will be picked up by the forms authentication module and they will be an authenticated user:
Response.Redirect(Request.Url.LocalPath);
The LogOutButtonClick method handles the click event of the Log Out button (displayed to authenticated users) and is very simple. First, it uses the SignOut method of FormsAuthentication to expire the authentication cookie:
PormsAuthentication.SignOut(); Finally, it forces a reload of the page to ensure that
the user is now treated as anonymous:
Response.Redirect(Request.Url.LocalPath); Here is
and when a user is logged in:
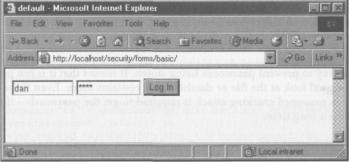
what the control looks like when no user is logged in:
i oo
http: //localhost/security/rorms/basic/D efault. aspx
You are logged in as dan t-Og Out
We now have a user control that we can add to any page, allowing users to log in and out of our application as often as they like and wherever they like.
Hashing Passwords for Storage
We discussed hashing as a method for protecting 'secrets' in Chapter 2. Here is a quick recap. Hashing algorithms take a piece of data and create a representation of it, known as the hash. If the hashing algorithm is sound and uses a cryptographically strong key, it is impractical for anyone who does not have the key to create data that will lead to a matching hash. It is impossible to recreate the original data from the hash.
In Chapter 2, we discussed the fact that hashing data is a very good way of storing data that we do not need to access directly, but rather we need to compare with another piece of data. By hashing the new data with the same algorithm as the old data, we can compare the hashes. If the hashes match, the two sets of original data match too. This technique can be very usefully applied to passwords. In fact, most modern operating systems store user passwords as hashes. Storing hashes rather than the original password makes it impossible to steal the passwords directly.
The downside to hashing our passwords is that, once hashed, the original passwords cannot be recovered, even by the person who generated the hashes. This means that if a user forgets their password, we cannot simply tell them what it is - all we have is the hash. Some solutions to this problem were discussed in Chapter 4:
J Setting the users' password to a new value and then sending that to them
Q Allowing the user to reset their password through a special link that is mailed to them
Hashing is a great way to prevent passwords being stolen. It means that it is not possible to see the passwords with a casual look at the file or database that contains them. Even if the password hashes are stolen, a brute force password cracking attack is required to get the passwords - if the passwords are strong, this will take a long time.
It is important to weigh up the advantages and disadvantages of hashing for each application. If it is important to be able to recover the actual passwords, hashing is not an option. However, since there are other ways to deal with users who have forgotten their passwords, hashing is an attractive way to guard against password theft.
184
Forms Authentication
Hashed Passwords in the web.config File
As we saw earlier, we can store user credentials in the <credentials> element of the web.config. The passwordFormat attribute allows us to set what sort of hashing should be applied. Up to now, we have been using "Clear" to indicate that no hashing is in use. If we use one of the other possible values, " SHA1" or "MD5 ", the relevant hashing algorithm will be used when checking credentials against the web. conf ig. The entered password will be hashed using the algorithm and the hash compared to the nashed password stored for the user in the web.config.
The following <authentication> section, is equivalent to the example we used before, with the same passwords now converted into MD5 hashes:
outhentication mode="Forms"> <forms name="DansApplication" loginUrl="login.aspx" timeout="30" path="/"
protection="All">
<credentials passwordFormat="MD5"> <user name="dan"
password="F3277F51A727336lE85F31EBD542D608" /> <user name="jenny"
password="431D76CA439EA33F17E3CEF99CB982E3" /> </credentials> </forms> </authentication>
The Authenticate method of FormsAuthentication will now hash each entered password using MD5 before comparing the hash to the values in this web. conf ig. We do not have to change our login code. The only problem we have to solve is how to generate the hashed passwords and get them into the web.config in the first place.
There is no automated way to insert hashed passwords into the web. conf ig, but we are provided with an easy way to generate the hashed password strings. Remember the amazingly explicitly named HashPasswordForStoringlnConf igFile method of FormsAuthentication?
We pass HashPasswordForStoringlnConf igFile a password and a string that specifies the hashing algorithm to use ("SHA1" or "MD5") and it returns a string that contains the hashed password.
This method makes it very easy for us to build a simple web form that will generate the hashes for us. Here is the presentation code:
<%@ Page language="c#" Codebehind="default.aspx.cs" AutoEventWireup="false" Innerits="generateHashes._default" %>
<!DOCTYPE HTML |
PUBLIC "-//W3C//DTD HTML 4 . 0 |
Transitional//EN" |
> <HTML><HEAD> |
<title>Generate Hashes</title> </HEAD><body>
<form id="default" method="post" runat="server">
Pas sword :<asp:TextBox |
id="PasswordTextBox" |
runat= " server "> |
||
</asp:TextBox> |
|
|
|
|
<asp: Button id= "CalculateHashesButton" |
runat=" server" |
|||
Text= "Calculate |
Hashes " >< /asp : Button> |
|
|
|
SHA1 hash :<asp: Label |
id="SHA!HashLabel" |
runat="server "></asp:Label> |
||
MD5 hash :<asp: Label |
id="MD5HashLabel" |
runat="server"x/asp:Label> |
||
</p> </form> </body> </HTML>
This is very simple - just a textbox for entering the password, a button to generate the hashes and two labels to display the hashes.
In the code behind, we define a method to handle the click event of the calculate button. This simply uses the HashPasswordForStoringlnConf igFile method to generate the two hashes:
private void CalculateHashesButton_Click( object sender, System.EventArgs e) {
SHAlHashLabel . Text =
FormsAuthentication. HashPasswordForStoringlnConf igFile ( PasswordTextBox . Text , " SHA1 " ) ;
MDBHashLabel.Text =
FormsAuthentication. HashPasswordForStoringlnConf igFile
(PasswordTextBox. Text, "MD5" ) ;
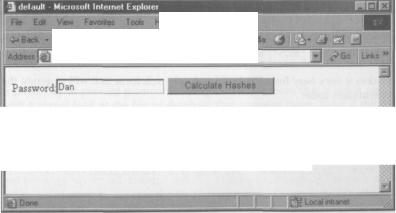
Here is the result when we enter the password for the user Dan from our original web. conf ig:
dp
Seacti^d Favorites
httpi/Vlocalhost/secutity/forms/generateHashesAiefault.aspx
SHAlhash:60B543BFAAF4E1677077510D003F94BAFDFOC999
MD5hash:97CBE6DOD14F4E242C3C37AF68CC376C
We could, of course, use the HashPasswordForStoringlnConf igFile method to build an automated system for adding users to the web. conf ig. If we did this, we would have to be very caret' to ensure that the system was itself secure.
186
Forms Authentication
Persisting the Authentication Cookie
In the examples we have looked at so far, we have used a non-persistent authentication cookie to maintain the authentication ticket between requests. This means that if the user closes their browser, the cookie immediately expires. This is a good default for security because we should think very carefully before we use an authentication cookie that persists beyond the browser being closed.
Remember that the authentication ticket held in the authentication cookie is how our web application identifies users. If a client has a valid authentication ticket for user A, they are considered to be user A. If the authentication cookie persists beyond the browser being closed, there is a much higher risk that an authentication cookie could be used by someone other than its legitimate user. This is a special concern if our web application might be used from shared computers, such as those in libraries or internet cafes.
Despite the increased security risks of using persistent authentication cookies, there are situations where it is appropriate to use them. If we are doing authentication for personalization rather than to control access to restricted resources, we may decide that the usability advantages of not requiring the users to log in on every visit to our site outweigh the increased danger of unauthorized use. (That said, users are more likely to forget passwords if they do not use them for long periods of time.)
Once we have made the decision to use persistent cookies, implementing them is very easy. We simply have to use true rather than false for the second parameter of the RedirectFromLoginPage and SetAuthCookie methods of FormsAuthentication. So, for the example we covered in the Setting Up the Login Page section we could use:
FormsAuthentication. RedirectFromLoginPage (UsernameTextBox. Text, true) ;
while to convert the user control in the Putting Log In/Out Functionality into a User Control section to use persistent cookies, we would use:
FormsAuthentication.SetAuthCookie(UsernameTextBox.Text,true);
By default, persistent cookies do not expire unless the FormsAuthentication. SignOut method is used. Persistent cookies are not affected by the timeout attribute that is set in the <f orms> element of the web.config. If we want to have persistent cookies time out, we have to use the GetAuthCookie method of FormsAuthentication, set the expiry date and time of the cookie and then write it to the HTTP response ourselves.
Here is the Log In method from our first example rewritten to use a persistent cookie with a lifespan of 10 days:
private void LoginButton_Click(object sender, |
System.EventArgs |
|
e) { |
|
|
//check the credentials |
|
|
if(FormsAuthentication.Authenticate |
|
|
(UsernameTextBox.Text, PasswordTextBox.Value)) |
|
|
{ |
|
|
//create a new authentication |
|
|
cookie HttpCookie |
|
|
authenticationCookie = |
|
|
FormsAuthentication.GetAuthCookie(UsernameTextBox.Text, |
true); |
|
1ST