

Microsoft ASP .NET Professional Projects - Premier Press
.pdf<a href="http://localhost/ASPNETSamples/9_Samples/basic/
GetPost/basicservice.asmx/TestFunction?vInput=FALSE">
TestFunction?vInput=False</a>
</body>
</html>
Clicking on any of the function links calls the TestFunction and passes to it the appropriate input parameter. For example, clicking on the vInput = "True" link passes true to the TestFunction. The web service returns the response in XML as follows:
<?xml version="1.0" encoding="utf-8" ?>
<string xmlns="http://tempuri.org/">It is the truth...</string>
Calling the Service Using HTTP Post
In this section, I will make a call to the web service using the HTTP Post protocol. Let's take a look at the WSDL portion that describes the HTTP Post protocol for the function TestFunction. The relevant extract is as follows:
WSDL extract for HTTP Post
<message name="TestFunctionHttpPostIn">
<part name="vInput" type="s:string" />
</message>
<message name="TestFunctionHttpPostOut">
<part name="Body" element="s0:string" />
</message>
In order to call the TestFunction using the HTTP Post protocol, I need to pass the parameter vInput to the web service via an input control residing within form tags. A sample web form that makes this request is shown in Figure 9.3 and its listing is shown below. Please note that the <action> attribute of the <form> tag should be modified to point to your application folder. The source code can be found on the ... \Basic\GetPost subfolder of the samples folder for this chapter at www.premierpressbooks.com/downloads.asp.
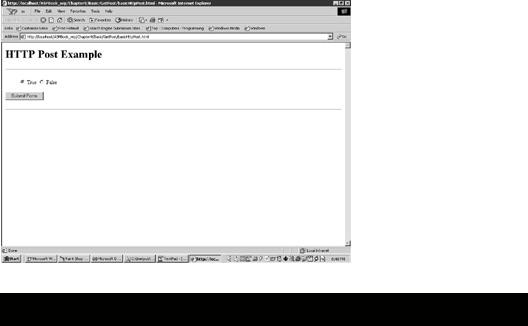
Figure 9.3: A call to the web service using the HTTP Post protocol. basicHTTPPost.html
<html>
<head>
</head>
<body>
<h1>HTTP Post Example</h1> <hr>
<form METHOD="POST" ACTION="http://localhost/ASPNETSamples/ 9_Samples/basic/GetPost/basicservice.asmx/TestFunction">
<blockquote>
<p><input TYPE="RADIO" NAME="vInput" VALUE="True" CHECKED> True <input TYPE="RADIO" NAME="vInput" VALUE="False"> False<br>
</p>
</blockquote>
<input TYPE="SUBMIT" VALUE="Submit Form"> </form>
<hr>
</body>
</html>

Calling Services Using SOAP
SOAP is the most important transport protocol. You will note above that the Get and Post protocols are limited to sending and receiving name/value pairs of data. SOAP is important because we can serialize complex structures like DataSets, complex arrays, custom types, and XML nodes with it. A client makes a SOAP call by sending a message encoded in SOAP's XML vocabulary and transmits it to the server over HTTP. This message has an outer envelope, within which there is an optional header and a required body. The body contains the function name and the parameters that are to be passed to the function. Each of these elements is prefixed with an XML namespace (http://schemas.xmlsoap.org/soap/envelope).
A SOAP request for the TestFunction could be as follows:
<?xml version="1.0"?>
<SOAP:Envelope xmlns:SOAP="http://schemas.xmlsoap.org/soap/envelope"
SOAP:encodingStyle="http://schemas.xmlsoap.org/soap/encoding">
<SOAP:Body>
<TestFunction>
<vInput>True</vInput>
</TestFunction>
</SOAP:Body>
</SOAP:Envelope>
The SOAP request is "posted" to a "SOAP Listener" on the server. The listener is typically the web services form. The communication between the client and server is by HTTP, though in theory you could use transfer mechanisms like sockets, message queuing, or e-mail. The SOAP Listener executes the function called and returns the response in XML. A successful response is enclosed within an element tag, which has the name of the original method and a suffix of response. Thus, the response to the TestFunction would be enclosed within an element tag TestFunctionResponse. The SOAP Body of the response could look like the following:
<?xml version="1.0"?>
<SOAP:Envelope xmlns:SOAP=http://schemas.xmlsoap.org/soap/envelope
SOAP:encodingStyle="http://schemas.xmlsoap.org/soap/encoding">
<SOAP:Body>
<TestFunctionResponse>
<return>it is the truth</return>
</TestFunctionResponse>
</SOAP:Body>
</SOAP:Envelope>
Luckily, we do not have to go into all the intricacies of setting up infrastructures of communicating using SOAP and XML. ASP.NET takes care of all that. You generate a proxy of your web services form using the wsdl.exe utility provided by ASP.NET. This tool reads the WSDL file and generates a proxy using the language of your choice. Whenever the client makes a call to a function, the proxy generates an HTTP request and sends it to the server. When the response is received, the proxy parses and returns the result. I will now show you how to implement the SOAP protocol in ASP.NET. I will follow a step-by-step approach. The sample files for this example can be found in the
.../basic/soap subfolder of the samples folder on the book's Web site at www.premierpressbooks.com/downloads.asp.

1.Create the Web Service file. I have already created the BasicService.asmx file, so I will just copy it to the folder.
2.Create the WSDL file. Open BasicService.asmx so that it goes through IIS (such as http://localhost/your virtual directory/BasicService.asmx). Click on the Service Description hyperlink. Save the resultant file as basicService.wsdl. Note that you can also do the same thing by browsing to http://localhost/your virtual directory/BasicService.asmx?wsdl.
Caution |
You do have to re-create this WSDL file even though there is a |
|
WSDL file in the sample folder. This file is specific to the |
||
|
||
|
application folder on my machine and you have to replace this file |
|
|
with your application folder-specific WSDL file as described above. |
3.Run mbasicService.bat. This bat file does two tasks. First, it makes a proxy using the command-line utility wsdl.exe, which comes with the
.NET SDK. It reads the description of the web services from the WSDL file and creates a proxy class with the extension of .vb (since we are using Visual Basic). This class has the class name specified in the asmx file. Thus, my proxy class is called Testservice.vb. I then compile the proxy class and put the resultant DLL (BasicService.dll) in the bin folder. If everything goes well, you should have two new files created. The proxy file TestService.vb (in the local folder) and the BasicService.dll (in the bin folder). Visual Studio automates this task of creating a proxy, and later in this chapter I shall be looking at creating a web service using Visual Studio. Figure 9.4 shows the output from the console at this stage.
Figure 9.4: Compiling the proxy. mbasicService.bat
REM ------Make Proxy--------
wsdl.exe /l:VB /n:NameSpaceHersh /out:TestService.vb BasicService.Wsdl
REM ------Compile Proxy--------
Rem Remember to change outdir variable to point to your bin folder set outdir=g:\AspNetSamples\bin\BasicService.dll
set assemblies=System.dll,System.Web.dll,System.Data.dll, System.Web.Services.dll,System.Xml.dll
vbc /t:library /out:%outdir% /r:%assemblies% TestService.vb
pause
4.Test the service. I have created a simple web form to test the service. This form calls the TestFunction and passes the parameter true to
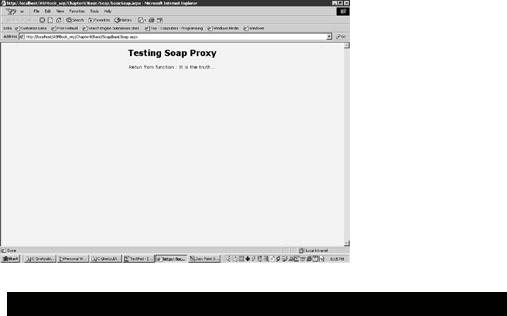
the web service. The return value from the function is written out to the screen. This is shown in Figure 9.5.
Figure 9.5: Testing using the SOAP protocol. basicSoap.aspx
<html>
<script language="VB" runat="server">
Protected Sub Page_Load(Src As Object, E As EventArgs)
Dim t As New NameSpaceHersh.Testservice
Dim s As string
s = t.testfunction(true)
message.text = "Return from function : " + s
End Sub
</script>
<body style="font: 10pt verdana; background-color:beige">
<center>
<h2><b>Testing Soap Proxy</b></h2>
<p />
<form runat="server">
<asp:Label id="Message" runat="server"/>
</form>
</center>
</body>
</html>
Creating a Web Service Using Visual Studio
Building a web service with Visual Studio.NET (VS .NET in short) involves creating a new web services project and adding methods and properties to a web services class form (i.e. an asmx form). This section builds a web service with Visual Studio.NET and demonstrates the use of the integrated VS debugger. A subsequent section will build a Visual Studio.NET project to consume the web service developed here.

You will find the source code for this example in the VSService subfolder of the samples folder for this chapter. To install the sample files on your machine, create a new web service project and import the sample files into the new project. This will create the required application virtual folder on your machine.
1.Start Visual Studio.NET.
2.Select File/New/Project. Figure 9.6 shows VS.NET at this stage.
Figure 9.6: New project.
3.Select Visual Basic Projects from the left pane and Web Service from the right. Figure 9.7 shows VS.NET at this stage.
Figure 9.7: New Web Service.
4.Type in VSService for the name. You might get a Web Access Failed dialog box as shown in Figure 9.8.
Figure 9.8: Web Access Failed dialog box.
Click on OK and Visual Studio.NET will then use file access to open the solution.
5.Visual Studio.NET generates a new Solution, which creates a references folder and four files. The web.config is an XML file, which contains various configuration options (for example, session timeout interval), and

which controls the web service at runtime. The file .disco is an XML file used for dynamic discovery of web services by clients. This means that when we want to use this service in another project, we navigate to this file and VS.NET adds a reference to the service for us. The file globals.asax is where project-wide event handlers (like
ApplicationStart and ApplicationEnd) reside. Figure 9.9 displays the four files in the solution explorer.
Figure 9.9: The Solution pane displaying the four default files.
6.Right -click on Service1.asmx and select Open. If you open this file in Notepad, you will note that this file makes a callout to code that resides in another file (Service1.vb) as follows:
7.<%@ WebService Language="vb" Codebehind="Service1.asmx.vb"
8.Class="VSService.Service1" %>
Add the two functions TestFunction() and add() within the class module as follows:
<WebMethod()> Public Function TestFunction (vInput as Boolean) As
String
If (vInput = TRUE) Then
TestFunction = "It is the truth..."
Else
TestFunction = "False!False!False"
End if
End Function
<WebMethod()> Public Function add( a as integer, b as integer) as string
add = cstr(a+b)
End Function
Figure 9.10 displays VS.NET in the code view at this stage.
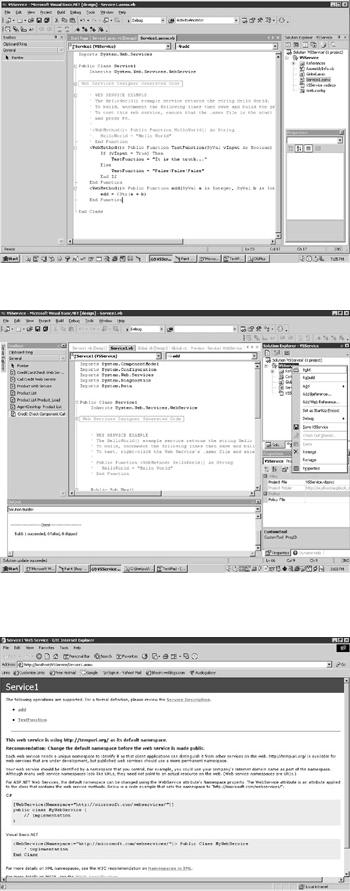
Figure 9.10: Creating the web service.
9.Right -click on the Solution VSService and choose Build as shown in Figure 9.11 (you can also just press F5).
Figure 9.11: Building the solution.
10.Test the service by right-clicking on Service1.asmx and selecting View in Browser. You will see the default test page as shown in Figure 9.12 and can test the functions by supplying the required parameters.
Figure 9.12: Testing the functions.

11.Visual Studio.NET includes a powerful debugger. You can set breakpoints and step through code by pressing F8. To use the debugger, open Service1.asmx and set a breakpoint by double-clicking on the left side (gray) pane, outside the code area. A red dot will appear at the point where the pane is clicked. This is shown in Figure 9.13.
Figure 9.13: Setting a breakpoint.
Start the Debug mode by pressing F5. If prompted for a debug folder, choose any folder not in wwwroot (for example c:\test). The default test page will now be presented. Supply the parameters for the function being debugged. The debugger will bring you back to the breakpoint line. If you bring your mouse on a parameter and leave for a second, you will be able to see the parameter passed as shown in Figure 9.14. Step through the code by pressing F8.
Figure 9.14: Using the debugger.
12.Browse to the bin folder in VSService folder. Note that a compiled DLL called VSService.dll already exists in this folder. Visual Studio.NET created the proxy and compiled it for us.
Calling the Web Service from a Web Form
In this section, I will build a client application, which will use the web service developed in the preceding section. This application is a VS Web Application and is created as explained in the following steps.
1.Start Visual Studio.NET.
2.Select File/New/Project.

3.Select Visual Basic Projects from the left pane and ASP.NET Web Application from the right as shown in Figure 9.15. Type in VSClient for the project name.
Figure 9.15: New Project pane.
4.Drag three textboxes, three labels, and one button onto the form. Rightclick on an empty portion of the form and select Properties. Make sure that the Page Layout property is GridLayout. With GridLayout you are able to drag the controls and position them visually on the form. Change the Text properties of three labels to read Parameter A and Parameter B and Result, respectively, and ID properties of the three textboxes to read Param1 and Param2, and ResultAdd respectively. This form should look like the one displayed in Figure 9.16.
Figure 9.16: Design of the web form.
5.You need to add a reference to the VSService in order to use it in this application. To do this, select Project/Add Web Reference from the main menu or right-click on the project name (VSClient) in the Solution window and select Add Web Reference. On the left side of the window click on the hyperlink Web Reference on Local Web Server. This should show us all the discovery files (*.disco or *.vsdisco) from which we can select VSService.vsdisco. You might get a Directory Listing Denied message. In this case, type the full IIS path of the