

Растяжка расслаблением. П.Цацулин. Англ
.pdfThe free standing one-legged ham stretch is a good one for nearly any level. Make a point of keeping your weight over the leg you are stretching. Also, keep the bent knee of the other leg tracking your slightly turned out foot; never let your knees bow in!
The cool knee-on-the-floor chair stretch is very user friendly, because the kneeling leg is pulling the pelvis in the right direction. Make sure to pad your knee with something soft and to watch your balance. You may surround yourself with a couple of chairs for balance if you wish.

If you choose the same stretch with your foot planted on the floor, pay attention not to wrench the knee of your support leg.
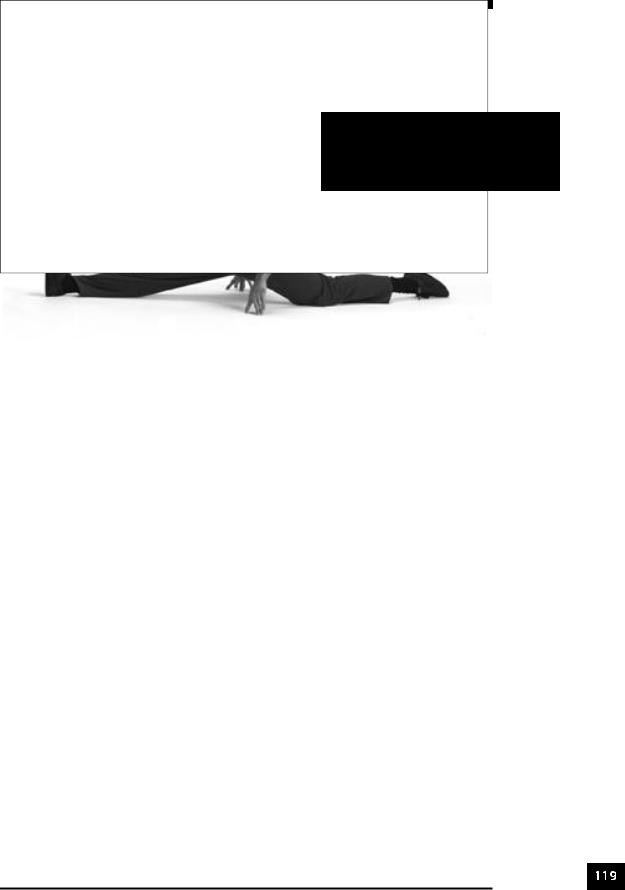
The weird stretch that has you hook the other leg underneath some object, say a heavy table or your training partner, takes advantage of an obscure neurological phenomenon related to locomotion. Basically, the contracting right hamstring will help the left one relax. This stretch is not for weak hamstrings because it places a lot of
weight— relative to the other stretches—on the stretched muscle. Do not hesitate to surround yourself with chairs for safety.

Conventional hamstring stretches encourage more flexibility in the outer hamstrings (biceps femoris) than the inner hamstrings (semimembranosus and semotendinosus). We are anything but conventional, so we shall not worry about the inner hamstrings; they will be taken care of by your groin stretches; concentrate on the outer ones. To feel more loading on the outside than the inside of the hamstring, do two things.
First, make a point of always pointing your toes straight up—and never outward—when stretching your hams.
Second, when you stretch one leg at a time, keep your hips facing squarely forward or even slightly toward the stretched leg—and never away from it!
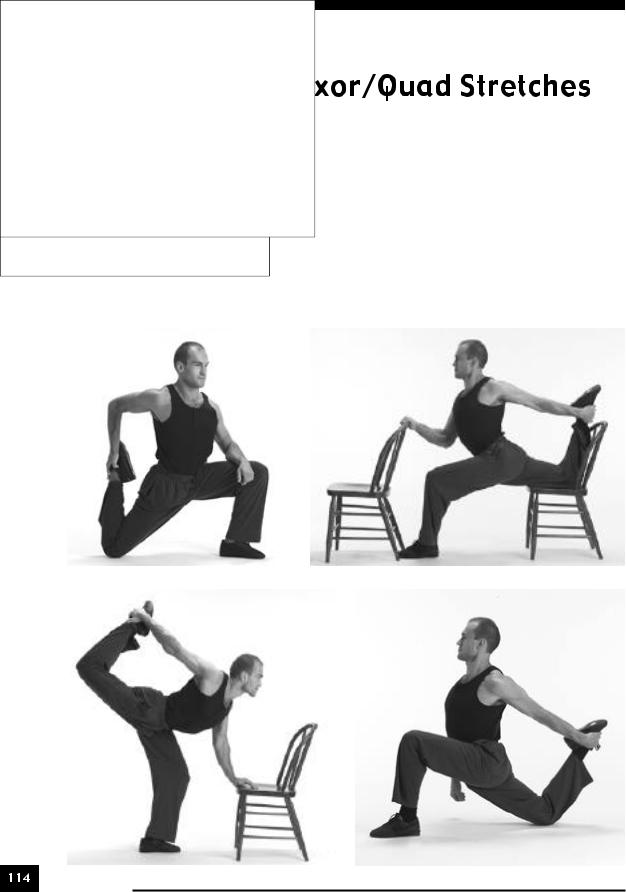
When Comrades complain of tight quads, their problem is usually the hip flexors.
One muscle of the quadriceps group, the rectus femoris, also flexes the hip, so it has been stretched with the previous stretch. If, for some strange reason, you need to work on your knee flexion as well, take your pick of the following modified hip flexor stretches. I do not advise that you attempt them until you get proficient with the basic kneeling hip flexor stretch and the karate stance hip flexor stretch.
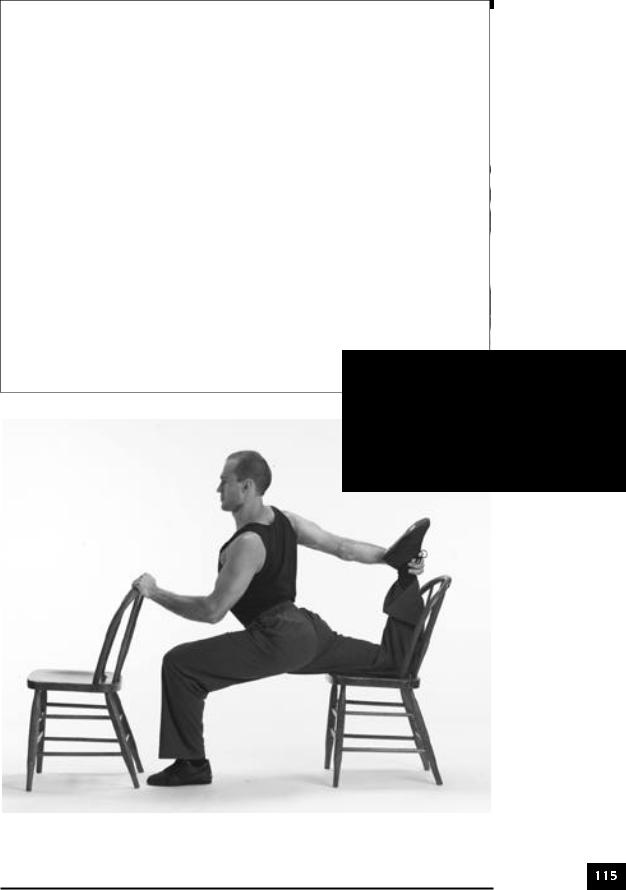
It is essential, for safety and effectiveness, to keep your hips squared off during hip flexor stretches and front splits.
Contracting your glutes hard helps to align your pelvis properly.

Some advanced trainees with a compelling cause may try the kneeling quad stretch. Clear it with your doctor; this stretch is way too rough on most comrades’ knees! The stretch is initiated by imitating the leg extension strength exercise or trying to straighten out your legs against the floor. Be certain not to spend much time in a relaxed position when performing this stretch, to minimize the loading of the knee ligaments.
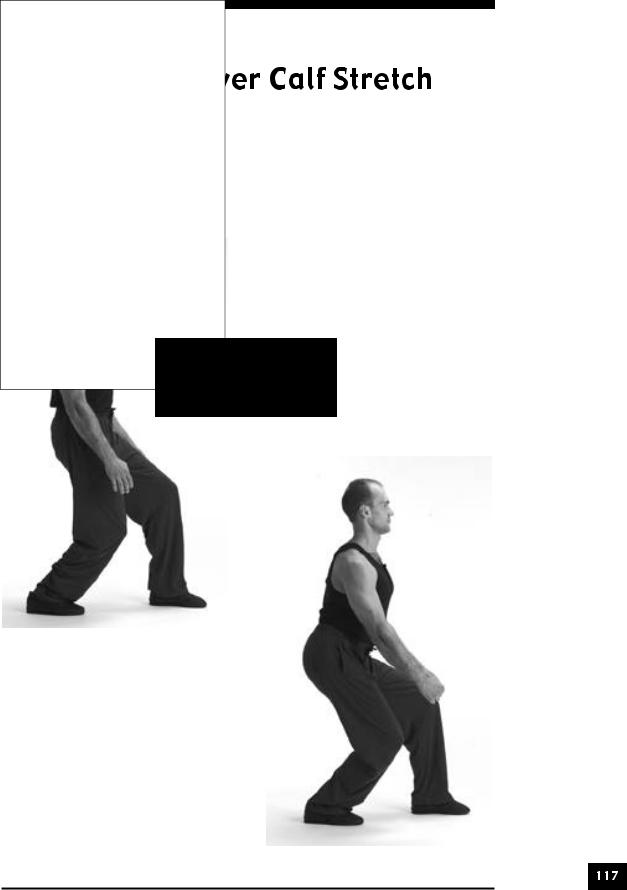
This stretch has found its way into the advanced section because it requires strong quads and above average body awareness. The purpose of the drill is to stretch the lower calf, or soleus, for sports and activities that require good ankle flexibility in positions with a bent knee, for example shotokan karate.
Step forward slightly with one foot while keeping the other one flat on the ground. Sit back on the rear leg while keeping your body vertical.
Sit back on the rear leg while keeping your body vertical.
Contract your rear calf by pushing with the ball of your foot into the ground. Hold the tension—it may take a long time to tire out your calf— then release and sink straight down. Your rear knee will drop down while your heel stays on the ground.
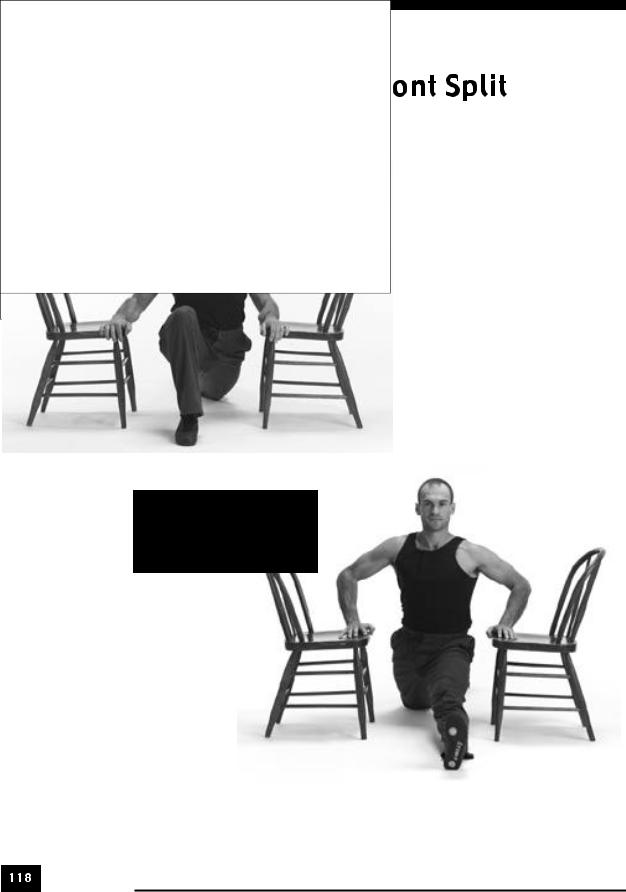
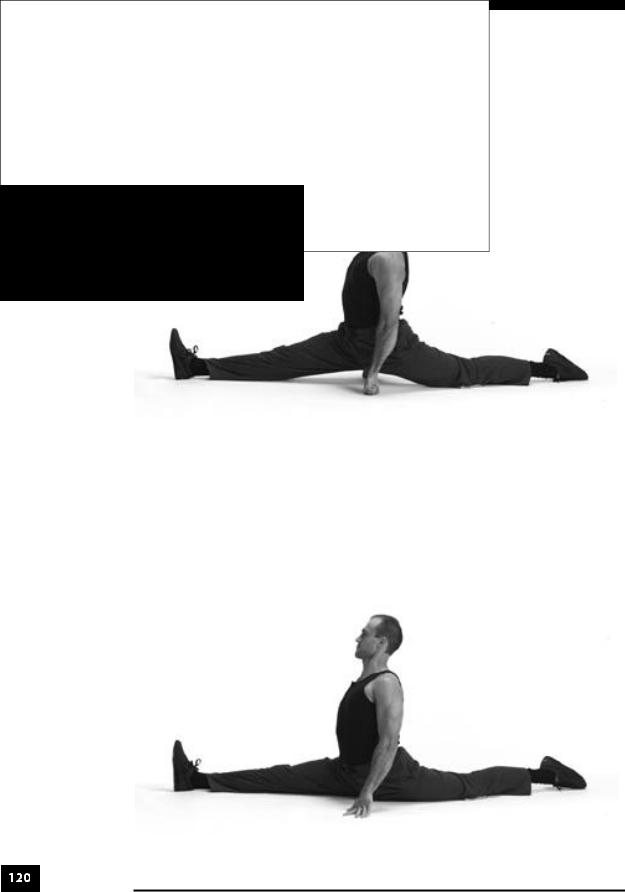
As you are working on your hip flexor and hamstring stretches, periodically test yourself on the front split. Assume the kneeling hip flexor stretch position between chairs. With all of your weight on your arms inhale and push the walls apart—the walls in front and behind you, that is. As with the hip flexor stretches, make a point of keeping your hips squared off and your rear knee facing the floor. It is a good idea to pad that knee—slip sliding magazine covers under both the knee and the feet.
Keep your hips squared off and your rear knee facing the floor.
Do not force yourself down; think of making yourself longer, ‘pulling your hips out of their sockets’. Once you can get within a foot of the floor, you may start practicing the front split. If you cannot, it is better to stick to your hamstring and hip flexor stretches for a while.
Pad the rear knee or wear a roller blading knee pad.
Carefully shift your weight away from your arms; now your hands are barely touching the chairs. Your arms are ready to catch you if you goof up somehow, but they are not carrying any weight unless your leg muscles are very weak.
Once you are very close to the floor—and you are able to rest your fists there without bending over—you may part with the chairs.
Tighten up the stretched muscles and pinch the floor. If you have a hard time doing it, just squeeze your butt and abs and everything else will follow. Do not twist your back knee! If the pressure from the floor bothers the knee—and it will, until you can get your thigh flat on the ground—pad it better. Even wear roller skating pads if you have them. This trick will help you avoid the grave mistake most splitters make—twisting your knee sideways to relieve the pressure.
Maintain steady tension in your legs, glutes, and abs. It is crucial. If you cannot put up with the progressive fatigue and pain of an extended isometric contraction, if you semi-relax your leg muscles now and then, you are wasting your time!
Hold the tension until your hamstrings and hip flexors literally collapse from exhaustion. It may take any time between a few seconds to a few minutes. It will not be enjoyable, which is irrelevant.
When you feel your tired and, perhaps, quivering, muscles involuntarily relaxing, remember the lesson of contrast breathing and let out a sigh of relief. It will help your beat-up hams and thighs go limp.
Once you have released the tension and dropped a little—just a little, to maximize safety! —catch yourself on your arms, then, with the weight on your arms, push the walls apart as you did in the beginning of the stretch. Make sure to stay upright and squared off!
Never force yourself towards the floor! ‘Pull your hips out of your sockets’. ‘Elongate your spine’ and open your chest. ‘Push apart the walls ahead and behind of you.’
Shift your weight back to your front heel and rear knee, flex your stretched muscles, and exhaust them into submission again. Keep plugging away until you get tired, or your range of motion stops improving, whichever comes first.
Alternate the tension with the release and elongation. Eventually you will find yourself in a full split. If you do not look like the photo, if your trunk or knee is twisted and your body is leaning, you cannot claim that you can do a split!