

L3 / 01_Свободная_Балка
.pdfShear and Bending Moment
Problem:
For the loaded beam shown below, develop the corresponding shear force and bending moment diagrams. The beam is in equilibrium. For this problem L= 10 in.

Shear and Bending Moment
Overview
 Anticipated time to complete this tutorial: 45 minutes
Tutorial Overview
This tutorial is divided into six parts:
1)Tutorial Basics
2)Starting Ansys
3)Preprocessing
4)Solution
5)Post-Processing
6)Hand Calculations
Audience
This tutorial assumes minimal knowledge of ANSYS 8.0; therefore, it goes into moderate detail to explain each step. More advanced ANSYS 8.0 users should be able to complete this tutorial fairly quickly.
Prerequisites
1) ANSYS 8.0 in house “Structural Tutorial”
Objectives
1)Learn how to define keypoints, lines, and elements
2)Learn how to apply structural constraints and loads
3)Learn how to find shear and bending moment diagrams
Outcomes
1)Learn how to start Ansys 8.0
2)Gain familiarity with the graphical user interface (GUI)
3)Learn how to create and mesh a simple geometry
4)Learn how to apply boundary constraints and solve problems
2

Shear and Bending Moment
Tutorial Basics
In this tutorial:
Instructions appear on the left.
Visual aids corresponding to the text appear on the right.
All commands on the toolbars are labeled. However, only operations applicable to the tutorial are explained.
The instructions should be used as follows:
Bold > Text in bold are buttons, options, or selections that the user needs to click on
Example: Preprocessor > Element
Type > Add/Edit/DeleteFile would mean to follow the options as shown to the right to get you to the Element Types window
Italics Text in italics are hints and notes
MB1 Click on the left mouse button MB2 Click on the middle mouse
button
MB3 Click on the right mouse button
Some Basic ANSYS functions are:
To rotate the models use Ctrl and MB3.
To zoom use Ctrl and MB2 and move the mouse up and down.
To translate the models use Ctrl and MB1.
3
Shear and Bending Moment
Starting Ansys
For this tutorial the windows version of ANSYS 8.0 will be demonstrated. The path below is one example of how to access ANSYS; however, this path will not be the same on all computers.
For Windows XP start ANSYS by either using:
>Start > All Programs > ANSYS 8.0
>ANSYS
or the desktop icon (right) if present.
Note: The path to start ANSYS 8.0 may be different for each computer. Check with your local network manager to find out how to start ANSYS 8.0.
4
Shear and Bending Moment
Starting Ansys
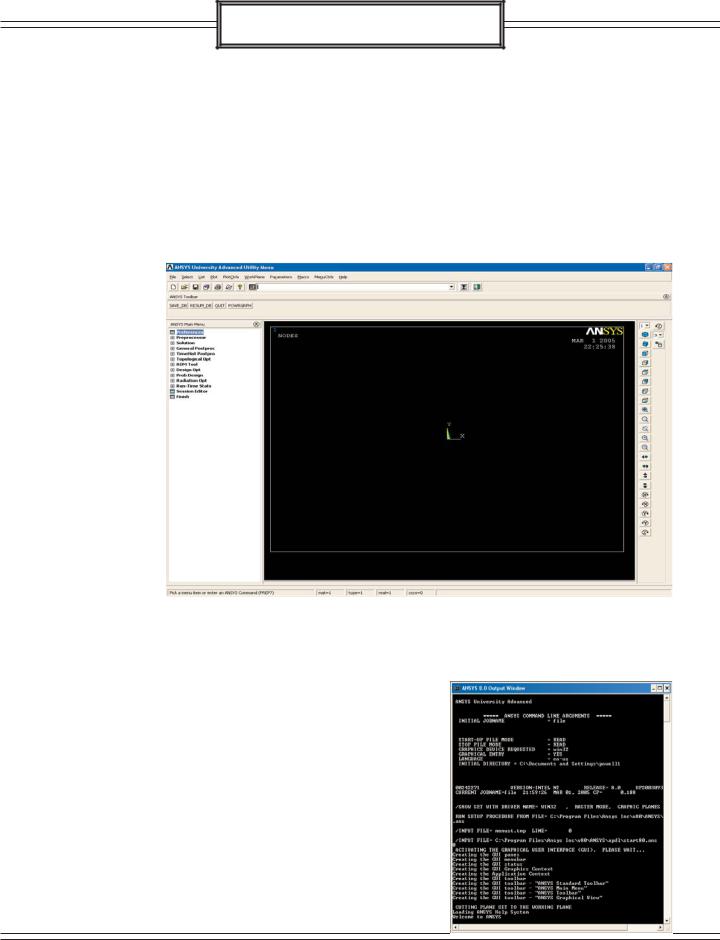
Once ANSYS 8.0 is loaded, two separate windows appear: the main ANSYS Advanced Utility window and the ANSYS Output window.
The ANSYS Advanced Utility window, |
|
also known as the Graphical User Interface |
|
(GUI), is the location where all the user |
Graphical User Interface |
interface takes place. |
Output Window
The Output Window documents all actions taken, displays errors, and solver status.
5
Shear and Bending Moment
Starting Ansys
The main utility window can be broken up into three areas. A short explanation of each will be given.
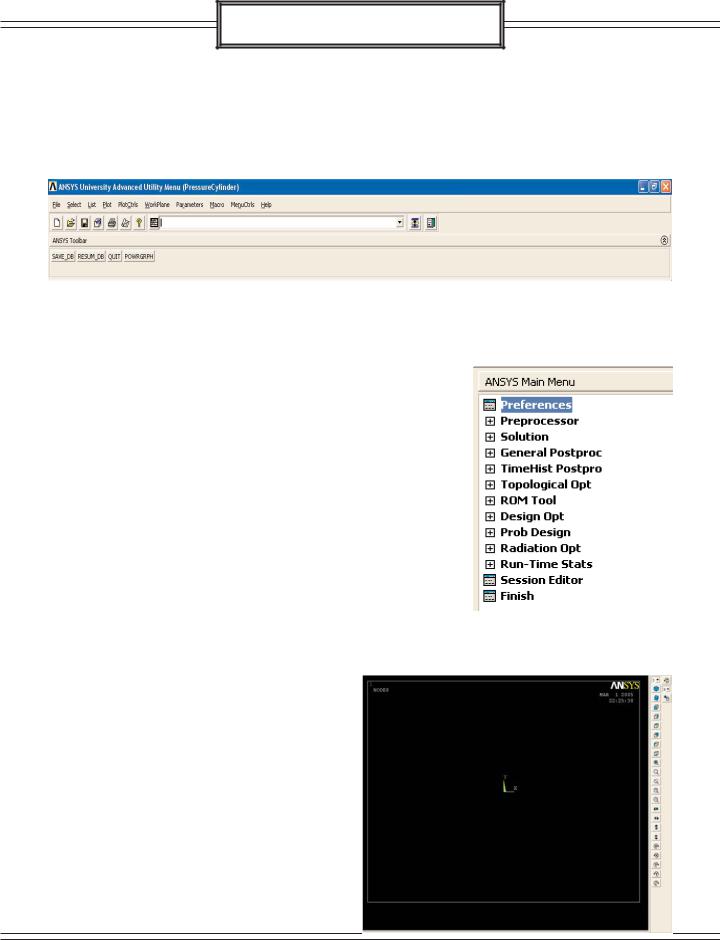
First is the Utility Toolbar:
From this toolbar you can use the command line approach to ANSYS and access multiple menus that you can’t get to from the main menu.
Note: It would be beneficial to take some time and explore these pull down menus and familiarize yourself with them.
Second, is the ANSYS Main Menu, as shown to the right. This menu is designed to use a top down approach and contains all the steps and options necessary to properly preprocess, solve, and postprocess a model.
Third is the Graphical Interface window where all geometry, boundary conditions, and results are displayed.
The tool bar located on the right hand side has all the visual orientation tools that are needed to manipulate your model.
6
Shear and Bending Moment
Starting Ansys
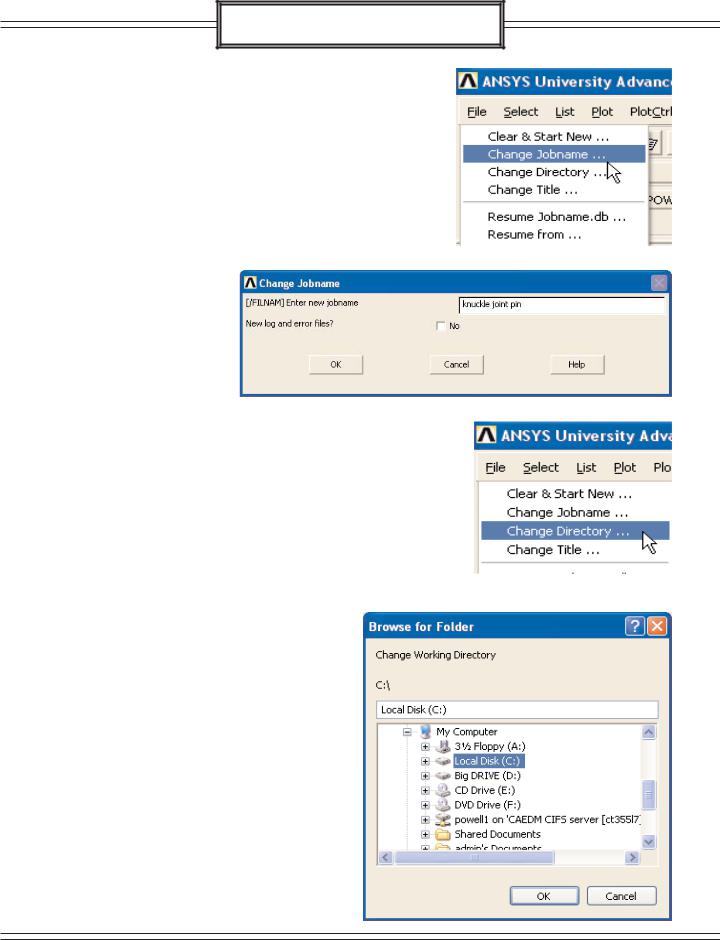
With ANSYS 8.0 open select
> File > Change Jobname
and enter a new job name in the blank field of the change jobname window.
Enter the problem title for this tutorial.
> OK
In order to know where all the output files from ANSYS will be placed, the working directory must be set, in order to avoid using the default folder C:\Documents and
Settings.
> File > Change Directory > then select the location that you want all of the ANSYS files to be saved.
Be sure to change the working directory at the beginning of every problem.
With the jobname and directory set, the ANSYS database (.db) file can be given a title. Following the same steps as you did to change the jobname and the directory, give the model a title.
7
Shear and Bending Moment
Preprocessing
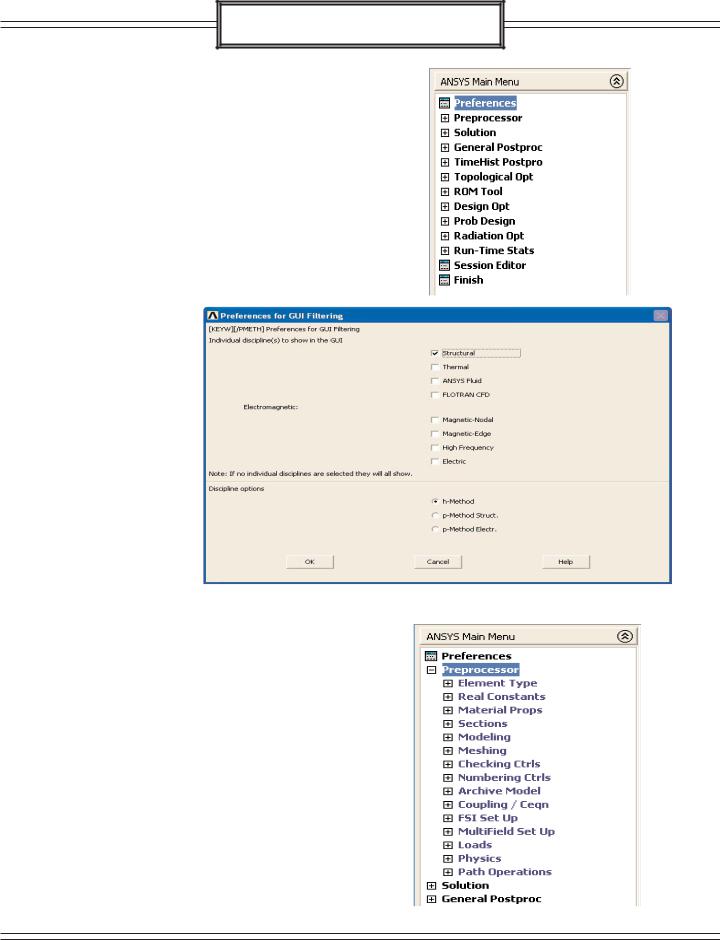
To begin the analysis, a preference needs to be set. Preferences allow you to apply filtering to the menu choices; ANSYS will remove or gray out functions that are not needed. A structural analysis, for example, will not need all the options available for a thermal, electromagnetic, or fluid dynamic analysis.
> Main Menu > Preferences
Place a check mark next to the
Structural box.
> OK
Look at the ANSYS Main Menu. Click once on the “+” sign next to Preprocessor.
> Main Menu > Preprocessor
The Preprocessor options currently available are displayed in the expansion of the Main Menu tree as shown to the right. The most important preprocessing functions are defining the element type, defining real constraints and material properties, and modeling and meshing the geometry.
8

Shear and Bending Moment
Preprocessing
The ANSYS Main Menu is designed in such a way that you should start at the beginning and work towards the bottom of the menu in preparing, solving, and analyzing your model.
Note: This procedure will be shown throughout the tutorial.
Select the “+” next to Element Type or click on Element Type. The extension of the menu is shown to the right.
> Element Type
Select Add/Edit/Delete and the Element Type window appears. Select add and the
Library of Element Types window appears.
> Add/Edit/Delete > Add
In this window, select the types of elements to be defined and used for the problem. For a pictorial description of what each element can be used for, click on the Help button.
For this model 2D Elastic Beam elements will be used. The degrees of freedom for this type of element are UX, UY, and ROTZ, which will suit the needs of this problem.
>Beam > 2D Elastic 3
>OK
In the Element Types window Type 1 Beam3 should be visible signaling that the element type has been chosen.
9
Shear and Bending Moment
Preprocessing
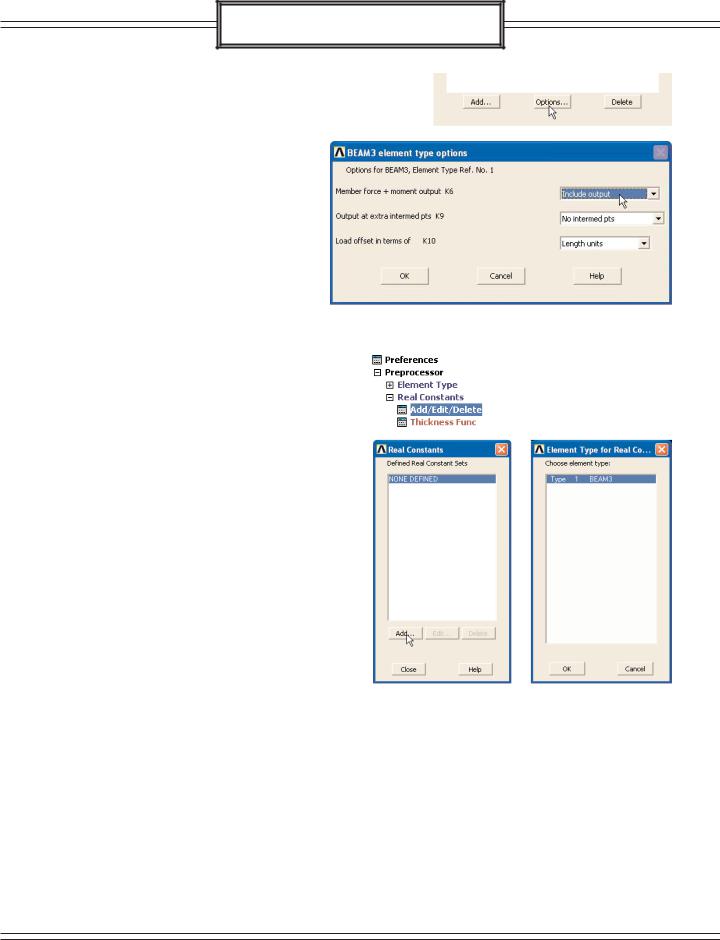
Before closing the Element Type window, and with Beam3 still highlighted select the Options button.
> Options...
In the Beam3 Element Type Options window change the the Member force + moment output from Exclude output to Include output. This tells ANSYS to include the moment and force information needed to create the diagrams.
> OK
Close the Element Types window.
> Close
The properties for the Beam3 element need to be chosen. This is done by adding a Real Constant.
>Preprocessor > Real Constants
>Add/Edit/Delete
The Real Constants window should appear. Select add to create a new set.
> Add
The Element Type for Real Constants window should appear. From this window, select Beam 3 as the element type.
> Type 1 Beam3 > OK
The Real Constant window for Beam3 will appear. From this window you can interactively customize the element type.
10