

presentation / Report
.docx
FACULTY OF INFORMATION TECHNOLOGIES
DEPARTMENT OF COMPUTER SYSTEMS AND SOFTWARE
MOBILE APPLICATION DEVELOPMENT FOR ANDROID
Report
"Address Book"
Done by: Dulatov Madi
Checked by: Melnikov Igor
Almaty 2015
Report:
-
Introduction
-
Main part:
-
Screenshots and description of pages;
-
Main activity;
-
Add contacts;
-
View data of contacts(Deleting, adding contacts);
-
Used technologies;
-
Conclusion
Screenshots and description of pages.
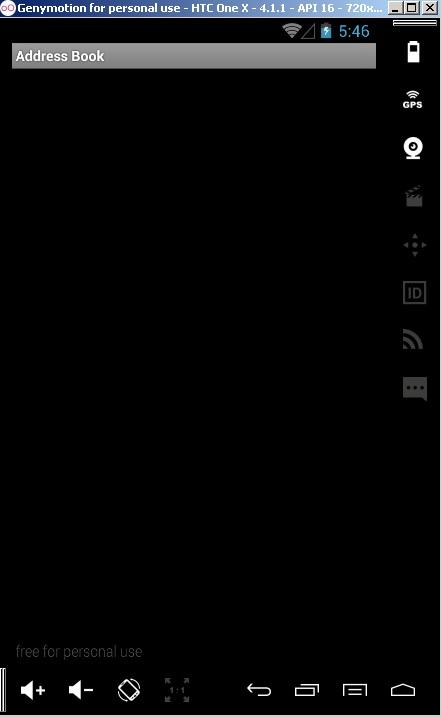

This activity will shown you, when you open app first. If you touch menu, then you will see next picture.(1'st pic.)
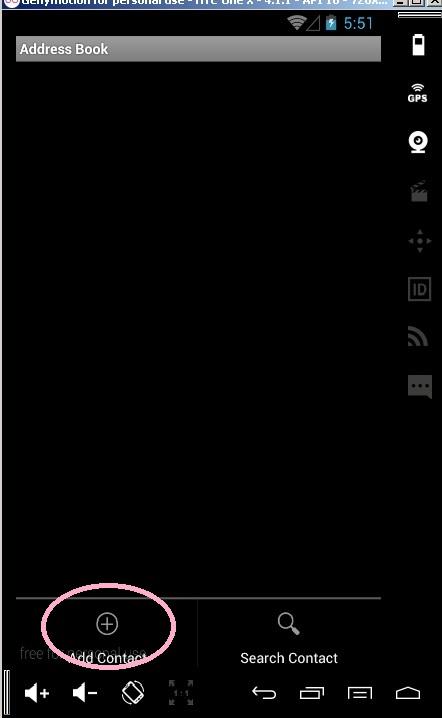
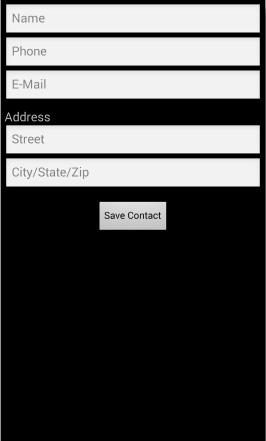
Here, you can add contact by clicking "Add contact" button. (2'nd pic.)

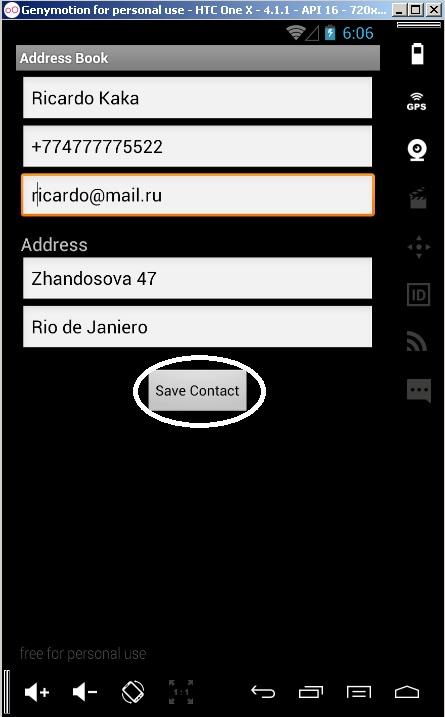
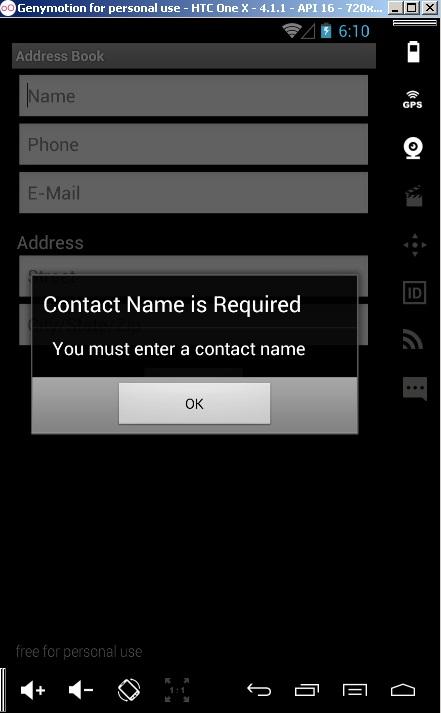
Here, you can add information about person and save data by clicking "Save contact" button. If text fields is empty, alert dialog window will be shown you. (3'rd pic.)


If you add some information, you will be moved to main page, where stored list of contacts . (Its shown in next picture). (4'th pic.)
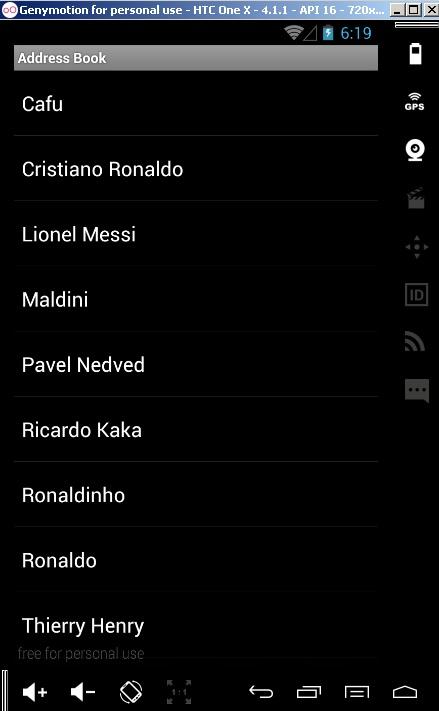
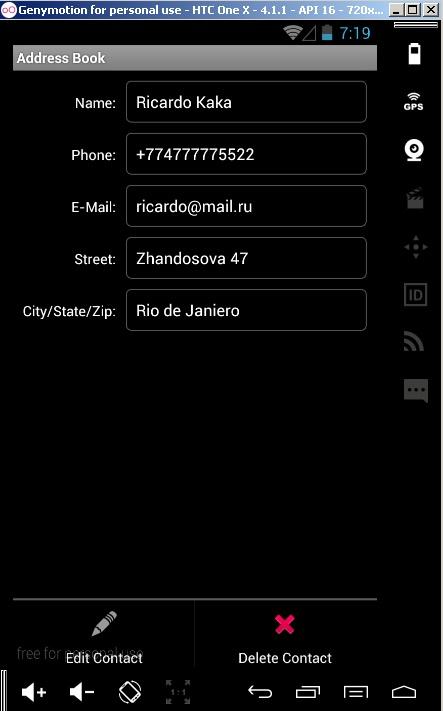
After choosing person (touch his name), will be shown an activity, which contains detailed data.(In next picture) (5'th pic.)

To edit contact and delete contact touch menu. If you click "Edit Contact" you will see activity, which shown in 3'rd picture. Clicking "Delete Contact" button, you can delete contact after confirmation in dialog window. (6'th pic.)

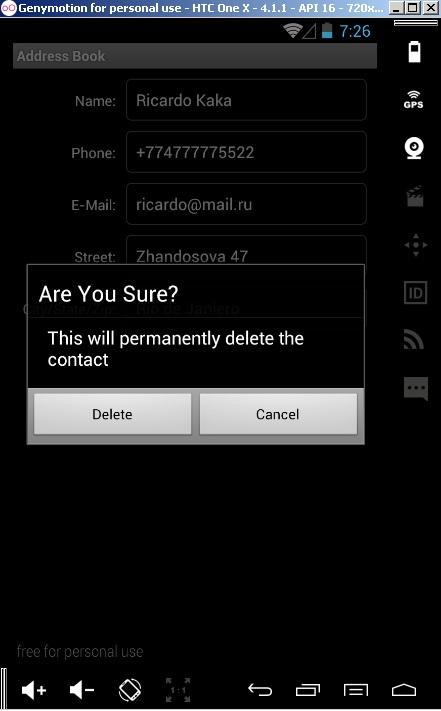
Touching "Delete" button delete contact from database.(7'th pic.)
Main activity.
Here we will talk about class which called "AdressBook". This class extends from ListActivity. The purpose is to display a ListView containing the user’s contacts.
XML's design:
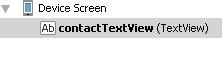

<?xml version="1.0" encoding="utf-8"?> <TextView xmlns:android="http://schemas.android.com/apk/res/android" android:id="@+id/contactTextView" android:layout_width="match_parent" android:layout_height="wrap_content" android:padding="8dp" android:textSize="20sp" android:textColor="@android:color/white" android:minHeight="?android:attr/listPreferredItemHeight" android:gravity="center_vertical">
</TextView>
public static final String ROW_ID = "row_id";//Intent extra key private ListView contactListView; //the ListActivity's ListView private CursorAdapter contactAdapter; //adapter for ListView @Override public void onCreate(Bundle savedInstanceState) { super.onCreate(savedInstanceState); contactListView = getListView();//get the built-in ListView
contactListView.setOnItemClickListener(viewContactListener); // map each contact's name to a TextView in the ListView layout String[] from = new String[] { "name" }; int[] to = new int[] { R.id.contactTextView }; contactAdapter = new SimpleCursorAdapter( AddressBook.this, R.layout.contact_list_item, null, from, to); setListAdapter(contactAdapter); // set contactView's adapter }
In this class also announced a menu items. Below design and XML-code:
<menu xmlns:android="http://schemas.android.com/apk/res/android"> <item android:id="@+id/addContactItem" android:title="@string/menuitem_add_contact" android:icon="@android:drawable/ic_menu_add" android:titleCondensed="@string/menuitem_add_contact" android:alphabeticShortcut="e"></item> </menu>

Add contacts.
After the first run the application, the contact list is empty. Touch menu item, and then select "Add Contact" button to display screen for adding information about person. After fill text fields, click "Save Contact" button to save contact in database and you will return to main page.
The codes below are written in AddEditContact class.
Here we can see, that in AddEditContact class we use "add_contact" layout. Its design:
Used AsyncTask class(package android.os) to perform
operations in a single stream and obtaining execution results in the flow GUI. details create and manipulate threads are implemented using class AsyncTask, Examples than the result of manipulation of the class passed into the flow AsyncTask GUI.
public void onClick(View v) { if (nameEditText.getText().length() != 0) { AsyncTask<Object, Object, Object> saveContactTask = new AsyncTask<Object, Object, Object>() { @Override protected Object doInBackground(Object... params) { saveContact();//save contact to Database return null; } @Override protected void onPostExecute(Object result) { finish(); } }; saveContactTask.execute((Object[]) null); } else { AlertDialog.Builder builder = new AlertDialog.Builder(AddEditContact.this); builder.setTitle(R.string.errorTitle); builder.setMessage(R.string.errorMessage); builder.setPositiveButton(R.string.errorButton, null); builder.show(); // display the Dialog } } // end method onClick };
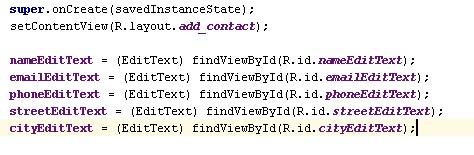
private void saveContact() { DatabaseConnector databaseConnector = new DatabaseConnector(this); if (getIntent().getExtras() == null) { // insert the contact information into the database databaseConnector.insertContact( nameEditText.getText().toString(), emailEditText.getText().toString(), phoneEditText.getText().toString(), streetEditText.getText().toString(), cityEditText.getText().toString()); } else { // if text fields are not empty databaseConnector.updateContact(rowID, nameEditText.getText().toString(), emailEditText.getText().toString(), phoneEditText.getText().toString(), streetEditText.getText().toString(), cityEditText.getText().toString()); } }
View data of contacts.
To view additional information about the contact, add to the list, touch
his name. How its looks you can see in 6'th picture.
private class LoadContactTask extends AsyncTask<Long, Object, Cursor> { DatabaseConnector databaseConnector = new DatabaseConnector(ViewContact.this); // perform the database access @Override protected Cursor doInBackground(Long... params) { databaseConnector.open(); // get a cursor containing all data on given entry return databaseConnector.getOneContact(params[0]); } // end method doInBackground // use the Cursor returned from the doInBackground method @Override protected void onPostExecute(Cursor result) { super.onPostExecute(result); result.moveToFirst(); // move to the first item // get the column index for each data item int nameIndex = result.getColumnIndex("name"); int phoneIndex = result.getColumnIndex("phone"); int emailIndex = result.getColumnIndex("email"); int streetIndex = result.getColumnIndex("street"); int cityIndex = result.getColumnIndex("city"); // fill TextViews with the retrieved data nameTextView.setText(result.getString(nameIndex)); phoneTextView.setText(result.getString(phoneIndex)); emailTextView.setText(result.getString(emailIndex)); streetTextView.setText(result.getString(streetIndex)); cityTextView.setText(result.getString(cityIndex)); result.close(); // close the result cursor databaseConnector.close(); // close database connection } // end method onPostExecute } // end class LoadContactTask
public boolean onCreateOptionsMenu(Menu menu) { super.onCreateOptionsMenu(menu); MenuInflater inflater = getMenuInflater(); inflater.inflate(R.menu.view_contact_menu, menu); return true; } // end method onCreateOptionsMenu // handle choice from options menu @Override public boolean onOptionsItemSelected(MenuItem item) { switch (item.getItemId()) // switch based on selected MenuItem's ID { case R.id.editItem: // create an Intent to launch the AddEditContact Activity Intent addEditContact = new Intent(this, AddEditContact.class); // pass the selected contact's data as extras with the Intent addEditContact.putExtra(AddressBook.ROW_ID, rowID); addEditContact.putExtra("name", nameTextView.getText()); addEditContact.putExtra("phone", phoneTextView.getText()); addEditContact.putExtra("email", emailTextView.getText()); addEditContact.putExtra("street", streetTextView.getText()); addEditContact.putExtra("city", cityTextView.getText()); startActivity(addEditContact); // start the Activity return true; case R.id.deleteItem: deleteContact(); // delete the displayed contact return true; default: return super.onOptionsItemSelected(item); } // end switch } // end method onOptionsItemSelected // delete a contact private void deleteContact() { // create a new AlertDialog Builder AlertDialog.Builder builder = new AlertDialog.Builder(ViewContact.this); builder.setTitle(R.string.confirmTitle); // title bar string builder.setMessage(R.string.confirmMessage); // message to display // provide an OK button that simply dismisses the dialog builder.setPositiveButton(R.string.button_delete, new DialogInterface.OnClickListener() { @Override public void onClick(DialogInterface dialog, int button) { final DatabaseConnector databaseConnector = new DatabaseConnector(ViewContact.this); // create an AsyncTask that deletes the contact in another // thread, then calls finish after the deletion AsyncTask<Long, Object, Object> deleteTask = new AsyncTask<Long, Object, Object>() { @Override protected Object doInBackground(Long... params) { databaseConnector.deleteContact(params[0]); return null; } // end method doInBackground @Override protected void onPostExecute(Object result) { finish(); // return to the AddressBook Activity } // end method onPostExecute }; // end new AsyncTask // execute the AsyncTask to delete contact at rowID deleteTask.execute(new Long[] { rowID }); } // end method onClick } // end anonymous inner class ); // end call to method setPositiveButton builder.setNegativeButton(R.string.button_cancel, null); builder.show(); // display the Dialog } // end method deleteContact } // end class ViewContact
Used technologies.
Database:
The contact information is stored in the application database SQLite. Database management system SQLite (www.sqlite.org) - the most popular database in the world. Classes Activity, used in applications that interact with the database using SQLite class utility DatabaseConnector. Within this you can use a nested class subclass SQLiteOpenHelper (package android.database.sqlite), which simplifies the creation of a database and allows you to use an object SQLiteDatabase (package android.database.sqlite) to work with the contents of the database. To control the results of a database query uses the class Cursor (package android.database).
Defining Styles and Applying Them to GUI Components:
You can define common GUI component attribute–value pairs as XML style resources you can then apply the styles to all components that share those values by using the style attribute. Any subsequent changes you make to a style are automatically applied to all GUI components that use the style.
Specifying a Background for a TextView:
By default TextViews do not have a border. To define one, you can specify a Drawable as the value for the TextView’s android:background attribute. The Drawable could be an image, but in this app we’ll define a new type of Drawable using an XML representation of a shape. The XML file for such a Drawable is placed in the app’s drawable folder, which you must create in the app’s res folder.
Specifying the Format of a ListView’s Items:
This app uses a ListView (package android.widget) to display the contact list as a list of items that is scrollable if the complete list cannot be displayed on the screen. You can specify the layout resource that will be used to display each ListView item.
Extending Class ListActivity to Create an Activity That Contains a ListView When an Activity’s primary task is to display a scrollable list of items, you can extend class ListActivity which uses a ListView that occupies the entire screen as its default layout. ListView is a subclass of AdapterView (package android.widget)—a GUI component is bound to a data source via an Adapter object (package android.widget). In this app, we’ll use a CursorAdapter (package android.widget) to display the results of a database query in the ListView. Several types of AdapterViews can be bound to data using an Adapter.
Conclusion:
Using this application, you can add, edit, delete, view contact information that's stored in SQLite Database. I used all subjects, what we learned in this course(except fragment). I want to develop this application, and add in the future ability, which allow users to add field of information whatever they want. Also I'll add search method and group of contacts and sort them by some facts.