

Appendix 2: Soldering Tutorial
Appendix 2: Soldering Tutorial
I’ve got a pretty good soldering station that I inherited from a company that I worked for that went belly-up. They couldn’t pay me for the last month’s work I did, so they let me load up on equipment which was either generous of them or saved them from paying to have it hauled off. But since this text is trying to get the most educational value for the least educational buck, I thought I’d get the cheapest soldering iron I could find and see if it would work well enough for student use. The iron in Figure 40 was less than three bucks from JAMECO and worked just fine.
First warning: these things get hot, cause fires, and char skin. If you burn yourself more than once, join the club. Some of us are just harder to train. Saying don’t set up your soldering station near anything flammable, seems silly, but remember, my nickname is Smokey Joe and there are reasons for that.
Second warning: the solder has a rosin core and produces a nice trail of smoke that contains God-knows-what kind of chemicals and heavy metals. This smoke is very intelligent and will head straight for your nose. If you want to see real magic at work, try changing your position and soldering techniques to avoid the smoke: nothing works! Smart smoke will find you. Use a cheap fan to blow away from your soldering area and share the toxic crap with everybody in the room.
I’ve also included solder wick on the JAMECO list. This is braided copper wire and does what its name implies, it wicks solder. Just stick it to the bad glob you want to remove, heat it up and watch the power of capillary action and note that your are holding the copper between your thumb and forefinger about one inch from the tip of the soldering iron which quickly teaches you that copper is a poor insulator. Yeouch… is a common soldering term.
275
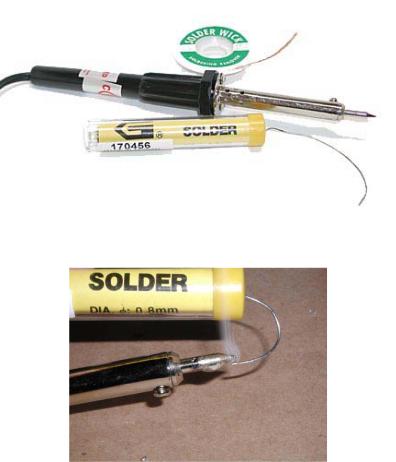
Appendix 2: Soldering Tutorial
Figure 40: Cheap soldering iron, solder and wick from JAMECO
Figure 41: Seasoning the tip
When you first plug in your soldering iron stand by with the solder and as soon as the tip heats up (takes a while on a cheap iron) liberally coat it with solder as shown in Figure 41. The rest of the tip will rapidly loose its shiny newness and develop a burned look. The seasoned part will remain shiny and useful.
Get an old cellulose or natural sponge to use to clean the excess solder off the tip. Keep it moist and when the tip gets crapped up with charred resin, circuit board, and finger-burn goo, just wipe it on the sponge and … ssssssttt… it’s all clean and shiny again. Don’t use a synthetic sponge unless you really like the stench of burning plastic.
276
Appendix 2: Soldering Tutorial
Now go and scrounge some broken circuit boards from a dumpster somewhere. You might have to bust open some discarded electronic device, the older and cheaper the better. Now look at those solder joins. That’s what a good join is supposed to look like. It looks like the solder melted, adhered, and slumped around whatever it is on. Now use the wick to clean off some joins, and then try to resolder them. Heat the join area and put the solder to it. Don’t heat the solder and stick it to the join. Don’t take too long, get it on and get the tip away. ‘Too long’ is subjective, just get the join soldered as quickly as possible. Piece of cake. If your join is bulbous or looks like it is sitting on the join and didn’t slump into it, it is a bad solder. If it looks dull and crinkly rather than smooth and shiny, it is a bad solder. This isn’t rocket science; you should be an expert in a couple of minutes. And be thankful that we won’t be using any surface mount parts. That ain’t easy to do with a cheap iron.
277