

Beginning ASP.NET 2
.0.pdfCode
directly with the delivery company’s tracking system. Using the If statement would result in the following code:
Dim del As String = DeliveryDropDownList.SelectedValue
If del = “Next Day Post” Then
‘pack in a normal box and stick lots of stamps on it ElseIf del=”3 Day Post” Then
‘pack in a normal box and stick one stamp on it ElseIf del=”Courier” Then
‘pack in a courier specific box and book a pickup
Else
‘pack in a large crate and take to the freight company End If
You can see that all those ElseIf statements and the layout make this hard to read. In situations like this it’s best to use the Select statement, which would turn this code into the following:
Select Case DeliveryDropDownList.SelectedValue
Case “Next Day Post”
‘pack in a normal box and stick lots of stamps on it Case “3 Day Post” Then
‘pack in a normal box and stick one stamp on it
Case “Courier” Then
‘pack in a courier specific box and book a pickup Case Else
‘pack in a large crate and take to the freight company End Select
This code is much neater, easier to read, and less error prone. It works in a similar way to the previous example, where the expression is on the first line — the selected value from the drop-down list. This is then compared to each of the values in the Case statements, starting at the top and working down. The first match causes the code block under that Case statement to be executed, and all other Case statements are ignored. If there is no match, the code block under the Case Else statement is run.
The Select statement is much more flexible than shown in the preceding code, because it allows matching multiple selections or ranges. The syntax for this is as follows:
Select Case condition
Case test1
‘code to run if condition matches test1 Case test2
‘code to run if condition matches test2
Case else
‘code to run if the condition matches no tests
End Select
The Select Case starts the selection process, with each selection being preceded by a Case keyword. Once again, you have to think of the program as a person making decisions; in this case do that, and so on.
For example, consider a membership system that requests the age when the member is created, perhaps to customize the membership pack (free crayons for kids!):
319

Chapter 9
Select Profile.Age
Case 0
‘wow, that’s starting really early Case 1, 2, 3, 4, 5
‘add some free crayons
Case 8 To 15
‘add leaflet about junior training camp Case Is <= 21
‘add leaflet about under 21 side
Case Is > 65
‘ add leaflet about bingo evenings
End Select
Here there are a variety of ways in which selection is done. The first Case matches a single value, and the second matches any of the values 1, 2, 3, 4, or 5. The third Case matches a range of values, and the fourth Case matches any value less than or equal to 21, with the final match being for values over 65. You need to be careful with the Is keyword and comparison operators, because these could mask matches further down in the list (remember these are tested in order). So placing Case Is <= 21 first would catch all numbers below 22 irrespective of whether more specific matches were declared further down in the Select statement. Notice that there is no Case Else statement, so nothing happens if the age is between 22 and 65. This is fine under these circumstances, but when using a Select statement with user input it’s always best to include an Else statement to ensure that you catch data that is outside your range checking.
Loops
Loops provide a way to repeat actions, either a fixed number of times or until some condition is met. The decision of which loop to use depends on whether you know in advance how many times you need to loop, or whether some external factor influences this. For example, when a DataReader object provides a way to read through some records from a database, this has a Read method that returns False when there are no more records. This is a case of not knowing in advance the number of times you need to loop.
The While and Do Loops
To perform looping until some condition is met you can use the While or Do loops, both of which are dependent upon an expression. Take the While loop first, using the case of data from a database:
Dim conn As New SqlConnection(“...”)
Dim cmd As New SqlCommand(“SELECT * FROM Products”, conn)
Dim rdr As SqlDataReader = cmd.ExecuteReader()
While rdr.Read()
‘ do something with the data record End While
rdr.Close()
Ignore the SQL statement, because it’s not that important for this example; all that’s important is that a number of records will be returned when the SQL command is run. This statement is simple — the While loop continues execution of its code block while the condition is True. The Read method returns True if it has a record, and False if it doesn’t, so this loop continues until there are no more records. So, the first time the While statement is encountered the expression is tested. If it is True, the code between the
320

Code
While and End While statements is executed, and when the End While is encountered, the loop starts again, testing the expression once more. This continues until the expression is False, in which case processing continues with the statement after the End While. This happens irrespective of the initial value of the condition, so if the condition is initially False, the contents of the loop are never executed.
If you need to stop processing a loop, that is, break out of it in the middle, you can use the Exit While statement. For example:
While rdr.Read()
If rdr(“ItemCost”) < 0 Then
Exit While
End If
End While
Now on to the Do loop, which has two forms, the first of which is where the condition is tested before the contents of the loop are executed. For example:
Do While rdr.Read() ‘ loop contents
Loop
In this case the Do loop is no different from a While loop; looping continues while the condition is true. This can be reversed by use of the Until statement, where the loop continues until the condition is true:
Do Until condition
‘ loop contents Loop
Both the While and Do loops in the form shown test the condition before the loop starts, which means that the code block for the loop might never get executed. To guarantee at least one execution you can use the Do loop with the condition at the end:
Do
‘ loop contents Loop While condition
Alternatively, you can use the Until statement in the place of the While statement:
Do
‘ loop contents Loop Until condition
Because the condition is not tested until after the loop contents have been executed the first time, this type of loop is not suitable for use with a data reader. For example, you cannot do this:
Do
If rdr(“ItemCost”) < 0 Then
Exit While
End If
Loop While rdr.Read()
321

Chapter 9
Though this is perfectly valid, the code will fail unless Read has already been called. The reason for this is that when a data reader is first opened it doesn’t point at the first record, but rather before it. So the act of calling Read moves to the first record. In the preceding code, if no Read has been called, the access to rdr(“ItemCost”) will fail because there will not be a valid record.
The For Loop
The For loop is useful when the number of iterations is known, and is most often used when counting through numeric values or performing some action a set number of times. For example:
Dim counter As Integer
For counter = 1 To 10
‘ loop code Next
Here the loop code is executed 10 times. The variable counter starts at 1 and is incremented by 1 each time through the loop. The default increment can be changed by using the Step statement, as shown in the following code:
Dim counter As Integer
For counter = 1 To 10 Step 2
‘ loop code Next
This time the loop is executed five times because counter is incremented by 2 each time through the loop. You’re not limited to incrementing either, because looping can be done backwards:
Dim counter As Integer
For counter = 10 To 1 Step -1
‘ loop code Next
Here the loop starts at 10 and 1 is subtracted from counter each time. Like the While and Do loops, For loops can be exited during processing:
Dim counter As Integer For counter = 1 To 10
‘ loop code
If SomeFunction(counter) Then
Exit For
End If
‘ loop code Next
Here if SomeFunction returns True, the loop is executed directly. Any code below the Exit For statement is ignored.
322

Code
The For Each Loop
The For Each loop is used for looping through collections or arrays and has a variety of uses, and unlike the For loop you don’t need to know in advance the number of times the loop will run. Regardless of what you’re looping through the syntax is the same:
For Each LoopVariable As Type In Collection
Next
The parts of this are as follows:
Collection is the object containing the items to be looped through. It doesn’t have to be a collection (from System.Collections), but can be an array.
LoopVariable is the name of the variable that will be assigned to each individual entry from
Collection.
Type is the data type of LoopVariable.
For example, consider the following code that loops through a string array:
Dim Names() As String = {“Dave”, “Dan”, “Chris”, “Chris”, “John”}
Dim AllNames As String
For Each Name As String In Names
AllNames &= Name & “ “
Next
This first creates an array of names, plus a variable to hold all of the names concatenated together. When the loop starts, Name is assigned to the first entry in the array, Dave, and this is appended to the AllNames variable. The next time around the loop, Name is assigned to the next entry in the array, Dan, and so on. When all items in the array have been processed the loop ends.
There is a second form of this loop where the loop variable is declared outside of the loop:
Dim Name As String
For Each Name In Names
AllNames &= Name & “ “
Next
For the purposes of the loop this is exactly the same as declaring the variable in the loop itself, but it does affect the scope of the variable (more on that in the “Variable Scope and Lifetime” section later in the chapter).
Collections and lists are used a lot in .NET programming, so For Each is very useful. In Wrox United ForEach is used as part of the shop, when the checkout is reached (this is Checkout.aspx). The shop allows you to buy multiple items, and these are put into a shopping cart — this is a custom object called Cart, which contains a collection of CartItem objects. You’ll look at the creation of the shopping cart later, but when you check out, the items in the cart need to be added to the database, and because it is a collection, For Each is ideal.
323

Chapter 9
The checkout function won’t be discussed in complete detail, but here’s what you have:
A ShoppingCart object that contains the cart. This is stored in the Profile as Cart (the profile is covered in Chapter 11).
A collection of CartItem objects. This is stored as the Items property of the ShoppingCart.
In order to iterate through the items in the cart you could use the following code:
For Each item As CartItem In Profile.Cart.Items
Next
Each time through the loop, item would contain the actual item from the cart. When the user proceeds to the checkout, here is what you need to do:
Create an order in the database, adding it into the Orders table.
Loop through the items in the cart and add each item to the OrderLines table.
This sounds like a lot of work, and is actually quite a lot of code (around 80 lines or so including comments), but is really simple. It builds on some of the data techniques seen in Chapter 8, and although those aren’t covered in detail the code should be familiar. Here’s where the actual items from the cart are added to the database:
cmd.CommandText = “INSERT INTO OrderLines(OrderID, ProductID, “ & _ “Quantity, Price)” & _
“ VALUES (@OrderID, @ProductID, @Quantity, @Price)”
cmd.Parameters.Add(“@OrderID”, Data.SqlDbType.Int) cmd.Parameters.Add(“@ProductID”, Data.SqlDbType.Int) cmd.Parameters.Add(“@Quantity”, Data.SqlDbType.Int) cmd.Parameters.Add(“@Price”, Data.SqlDbType.Money)
cmd.Parameters(“@OrderID”).Value = OrderID
For Each item As CartItem In Profile.Cart.Items cmd.Parameters(“@ProductID”).Value = item.ProductID cmd.Parameters(“@Quantity”).Value = item.Quantity cmd.Parameters(“@Price”).Value = item.Price
cmd.ExecuteNonQuery() Next
‘ clear the cart Profile.Cart.Items.Clear()
The first line simply sets the SQL statement used to insert the items, and the following lines create the parameters and set the OrderID. The object cmd is a SqlCommand object, with an associated connection. Within the loop the details of each item are copied to the parameters, and then the query is executed — this happens for each order item, so the SQL statement happens each time. Once all of the items have been added to the database the Items collection of the shopping cart is cleared.
324
Code
Give all of this looping and testing a try by working out how well Wrox United is doing. In the following Try It Out you loop through the fixtures to see how many goals have been scored and how many games have been won, lost, or drawn.
Try It Out |
Looping and Making Decisions |
1.Create a new Web Form called Decisions.aspx and set this as the start page. Remember to place the code in a separate file when you create the Web Form.
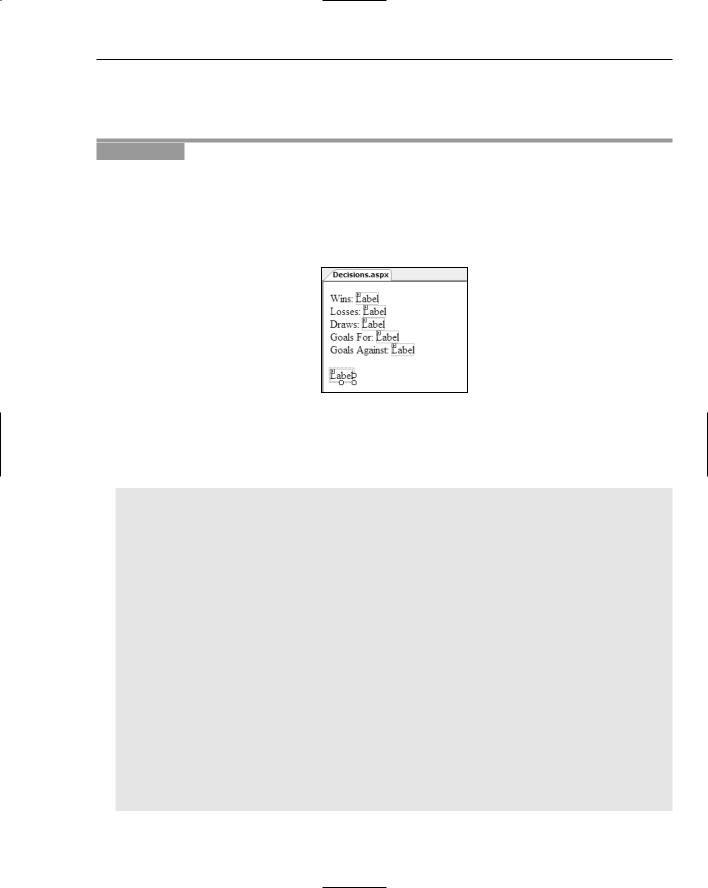
2.Add six labels and some text, so the page looks like Figure 9-7. You can just type the text directly onto the page, and make sure you add the labels in top to bottom order, so Label1 is at the top and Label6 is at the bottom:
Figure 9-7
3.Create the Page_Load event procedure by opening the code file and selecting (Page Events) from the first list and Page_Load from the second. In the Page_Load event add the following code (remember you can copy if from the finished samples if you don’t want to type it all in):
Dim conn As New SqlConnection( _ ConfigurationManager.ConnectionStrings(“WroxUnited”).ConnectionString)
Dim cmd As New SqlCommand(“select * from Fixtures”, conn) Dim rdr As SqlDataReader
Dim wins As Integer = 0
Dim losses As Integer = 0
Dim draws As Integer = 0
Dim goalsFor As Integer = 0
Dim goalsAgainst As Integer = 0
Dim winRatio As Integer
conn.Open()
rdr = cmd.ExecuteReader(CommandBehavior.CloseConnection)
While rdr.Read()
goalsFor += Convert.ToInt32(rdr(“GoalsFor”)) goalsAgainst += Convert.ToInt32(rdr(“GoalsAgainst”))
If goalsFor > goalsAgainst Then wins += 1
ElseIf goalsFor < goalsAgainst Then losses += 1
Else
325

Chapter 9
draws += 1 End If
End While
Label1.Text = wins.ToString()
Label2.Text = losses.ToString()
Label3.Text = draws.ToString()
Label4.Text = goalsFor.ToString()
Label5.Text = goalsAgainst.ToString()
If losses = 0 Then
Label6.Text = “No losses - a perfect season.”
Return
End If
winRatio = Convert.ToInt32((wins / losses) * 100)
Select Case winRatio
Case 0
Label6.Text = “No wins. Relegation is a certainty.”
Case Is < 25
Label6.Text = “Less than 25%. Very poor.”
Case Is < 50
Label6.Text = “Under half. Could do better.”
Case Is < 75
Label6.Text = “Winning more than losing. Excellent.”
Case Else
Label6.Text = “A high ratio - near the top of the table.”
End Select
4.At the top of the code file add the following two Imports statements (don’t worry about what these are — they are covered later in the “Namespaces” section):
Imports System.Data
Imports System.Data.SqlClient
5.Save the files and run the page to see Figure 9-8.
Figure 9-8
The output isn’t spectacular, but it’s the code that’s interesting, so let’s see how it works.
326

Code
How It Works
First you have the variable declarations, starting with a connection to the database, a command to fetch the fixtures, and a reader to iterate through the fixtures:
Dim conn As New SqlConnection( _ ConfigurationManager.ConnectionStrings(“WroxUnited”).ConnectionString)
Dim cmd As New SqlCommand(“select * from Fixtures”, conn) Dim rdr As SqlDataReader
Next you have the variables to hold the counts of the wins, losses, draws, goals scored, and the win ratio:
Dim wins As Integer = 0
Dim losses As Integer = 0
Dim draws As Integer = 0
Dim goalsFor As Integer = 0
Dim goalsAgainst As Integer = 0
Dim winRatio As Integer
Once the variables are declared the database is opened and the data fetched:
conn.Open()
rdr = cmd.ExecuteReader(CommandBehavior.CloseConnection)
With the data reader full of data, the loop is started; the Read method returns a Boolean value of False when it has read the last record. This will continue until there are no more records:
While rdr.Read()
Within the loop the totals are incremented, the values from the reader being converted into integers before being used to increment the totals:
goalsFor += Convert.ToInt32(rdr(“GoalsFor”)) goalsAgainst += Convert.ToInt32(rdr(“GoalsAgainst”))
Now comes the first decision, incrementing the number of wins, losses, and draws:
If goalsFor > goalsAgainst Then wins += 1
ElseIf goalsFor < goalsAgainst Then losses += 1
Else
draws += 1 End If
End While
Once the loop has finished, the totals can be displayed in the labels:
Label1.Text = wins.ToString()
Label2.Text = losses.ToString()
Label3.Text = draws.ToString()
Label4.Text = goalsFor.ToString()
Label5.Text = goalsAgainst.ToString()
327

Chapter 9
The ratio of wins to losses needs to be counted next (despite the fact that given the team’s performance you can almost assume this will be zero!). However, before you do the calculation you need to ensure that the number of losses isn’t zero, otherwise a division by zero exception would occur. So if the number of losses is zero, a message is displayed and Return forces the Page_Load event handler to exit:
If losses = 0 Then
Label6.Text = “No losses - a perfect season.”
Return
End If
If the team has lost at least one match, the ratio is calculated:
winRatio = Convert.ToInt32((wins / losses) * 100)
Now the message can be displayed depending on the win ratio. Remember that the Case statements are tried in the order in which they are declared, so the Case Else will match a win ratio of higher than 75%:
Select Case winRatio
Case 0
Label6.Text = “No wins. Relegation is a certainty.”
Case Is < 25
Label6.Text = “Less than 25%. Very poor.”
Case Is < 50
Label6.Text = “Under half. Could do better.”
Case Is < 75
Label6.Text = “Winning more than losing. Excellent.”
Case Else
Label6.Text = “A high ratio - near the top of the table.”
End Select
All of these statements, the loops and decisions, are fairly simple on their own, but together they show you the power of what code can do. You can build up functionality with more and more statements, as the complexity of your applications requires.
The next section introduces the topic of namespaces, a fundamental way in which code can be arranged.
Namespaces
Namespaces are simply a way to logically group related code, and a namespace is simply a name, and that name can include periods to provide grouping. For example, the namespace for the data handling code of ADO.NET is in System.Data, whereas the SQL Server-specific code is in System.Data.SqlClient. All of the data types are in the System namespace. Namespaces can also be created for your own code, so for the Wrox United code the namespace is Wrox.Web — this is defined in the classes within the App_Code directory.
Namespaces are important for several reasons:
Grouping related code means it’s easier to find related items. For example, if you want to find all of the data handling code you know it’s located within the System.Data namespaces. This can be useful when using the documentation.
328