

Blog Design Solutions (2006)
.pdfB L O G D E S I G N S O L U T I O N S
2. You should see a welcome message like this:
3. The most common problem is getting an error message like this instead:
It means that mysqld, the MySQL server, is not running. Use the MySQL control panel in System Preferences to start the server.
Another common problem is for Terminal to report command not found. That means you have either mistyped the command or that you haven’t added the MySQL program files directory to your PATH, as described in the previous section.
4.Assuming that you have logged in successfully, as described in step 2, type the following command at the mysql> prompt:
use mysql
5.This command tells MySQL that you want to use the database called mysql, which contains all the details of authorized users and the privileges they have to work on database files. You should see the message Database changed, which means MySQL is ready for you to work on the files controlling administrative privileges. Now enter the command to set a password for the root user. Substitute myPassword with the actual password you want to use. Also make sure you use quotes where indicated and finish the command with a semicolon.
UPDATE user SET password = PASSWORD('myPassword') WHERE user = 'root';
6.Next, remove anonymous access to MySQL:
DELETE FROM user WHERE user = '';
The quotes before the semicolon are two single quotes with no space in between.
7.Tell MySQL to update the privileges table:
FLUSH PRIVILEGES;
66

C R E AT I N G A L O C A L T E S T E N V I R O N M E N T F O R Y O U R B L O G
The sequence of commands should produce a series of results like this:
2
8.To exit the MySQL monitor, type exit, followed by Return. This simply ends your session with the MySQL monitor. It does not shut down the MySQL server.
9.Now try to log back in by using the same command as in step 2. MySQL won’t let you in. Anonymous access and password-free access have been removed. To get in this time, you need to tell MySQL that you want to use a password:
mysql -u root -p
10.When you press Return, you will be prompted for your password. Nothing will appear onscreen as you type, but as long as you enter the correct password, MySQL will let you back in. Congratulations, you now have a secure installation of MySQL.
Using MySQL with phpMyAdmin (Windows and Mac)
Once your blogging package has been set up, it will communicate directly with your database. Before you can get to that stage, though, you need to perform a few administrative chores. Although you can do everything using MySQL monitor, it’s a lot easier to use a graphic interface called phpMyAdmin. Many hosting companies provide it as the standard interface to MySQL, so it’s useful to experiment with it on your own computer to get a feel for how it works.
As the name suggests, phpMyAdmin is a PHP-based administrative system for MySQL. It has been around since 1998 and constantly evolves to keep pace with MySQL developments. It works on Windows, Mac OS X, and Linux, and it currently supports all versions of MySQL from 3.23.32 to 5.0. phpMyAdmin is open source and is free.
67

B L O G D E S I G N S O L U T I O N S
Downloading and installing phpMyAdmin
.net and download the latest stable is frequently followed by pl and a and indicates a fix for a bug or security
in three types of compressed file: BZIP2, you have the decompression software for. likely to be ZIP (3.4MB). Mac OS X users
is the smallest download (1.9MB).
the contents to a folder called the version number.
your computer’s clipboard. On Windows, web server root (C:\htdocs, if you foland want phpMyAdmin to be available to
HD:Library:WebServer:Documents, rather
to this: phpMyAdmin.
a text file to store all the configuration in December 2005), this was called make the changes directly inside that file. been renamed config.default.php, and store your own personal configuration
config.inc.php.
actually quite straightforward. Instead of lines long to find the right command, you and if you upgrade to a later version of
the file to your new installation.
on Windows or TextWrangler on Mac OS X)
may include a script to automate the it by hand isn’t difficult, though. Just so copy the commands carefully. Sample
the download files for this chapter.
6.
68

C R E AT I N G A L O C A L T E S T E N V I R O N M E N T F O R Y O U R B L O G
7.If your circumstances dictate the need to password-protect access to phpMyAdmin, use the following code instead of that shown in step 6:
<?php
$cfg['Servers'][$i]['extension'] = 'mysqli'; $cfg['Servers'][$i]['auth_type'] = 'http'; ?>
2
You will be prompted for a username and password each time you launch phpMyAdmin. Log in the first time as root. After setting up individual user accounts and privileges as described later in the chapter, you can log in with a different username, but your privileges will be limited to those granted to that particular user.
8.Save the file as config.inc.php in the main phpMyAdmin folder.
9.Open a browser and enter http://localhost/phpMyAdmin/ in the address bar (on a Mac, if you put phpMyAdmin in your Sites folder, use http://localhost/ ~username/phpMyAdmin/).
If you used the code in step 6, you should see the phpMyAdmin welcome screen right away, as shown in Figure 2-8.
If you used the code in step 7, enter root as the username and your MySQL root password when prompted.
10.In the unlikely event that phpMyAdmin reports that it cannot auto-detect the correct URL, add the following line (shown in bold) to config.inc.php:
<?php
$cfg['PmaAbsoluteUri'] = 'http://localhost/phpMyAdmin/'; $cfg['Servers'][$i]['extension'] = 'mysqli';
On a Mac, use http://localhost/~username/phpMyAdmin/ if you put phpMyAdmin in your Sites folder.
Left frame: |
Main frame: |
for navigating to |
used for database administration, including |
databases and tables |
table definition, editing, and backups |
Return to Welcome screen
Figure 2-8. phpMyAdmin is a very user-friendly and stable graphical interface to MySQL.
69
B L O G D E S I G N S O L U T I O N S
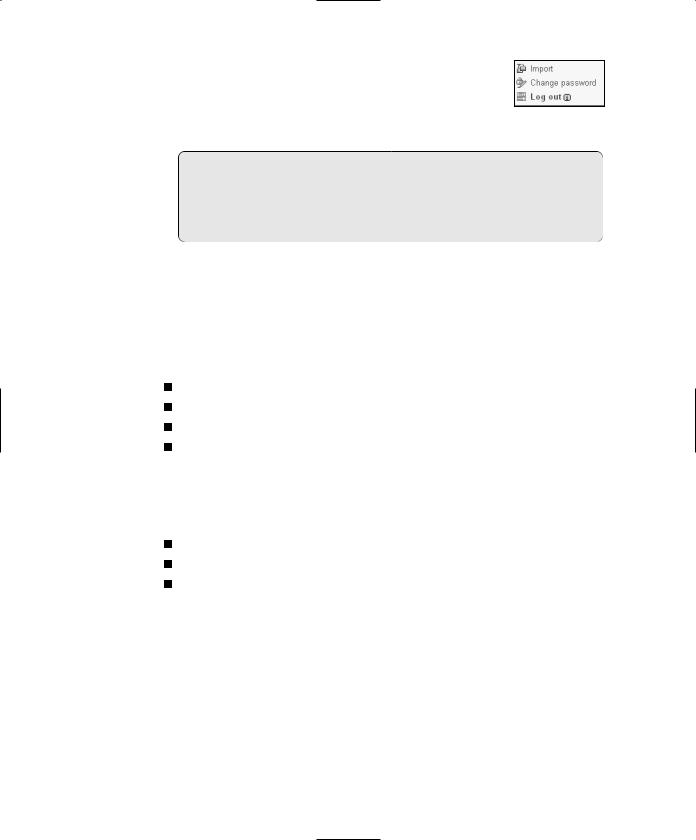
11.If you opted for the http login method in step 7, you will find two more options listed at the bottom of the MySQL section of the front page, just beneath Import (as shown in the screenshot). These are self-explanatory: They allow you to
change your login password and to log out of phpMyAdmin once you have finished.
If you get a message saying that the server is not responding or that the socket is not correctly configured, make sure that the MySQL server is running. If you still have problems, load index.php, the PHP test file that you created earlier, into your browser and check that the mysql and mysqli extensions are listed in your PHP configuration.
Setting up your blog database with phpMyAdmin
phpMyAdmin is a frames-based web interface to MySQL. As shown in Figure 2-8, the left frame is used for navigation and stays onscreen at all times. The main frame on the right displays screens that allow you to create databases, define tables, browse through records and edit them, perform backups, and much more. However, I plan to concentrate only on those areas that you need to get your blog up and running:
Creating a database
Creating a user account for the database
Giving the user account the necessary privileges
Backing up and moving a database to another server
The Database drop-down menu in the left frame is the main way to navigate through phpMyAdmin. Each name in the list is a hyperlink that can be used to load details of a particular table into the main frame. On a brand new installation of MySQL, the drop-down menu contains just three entries:
information_schema(16)
mysql (17)
test (-)
The first entry, information_schema, is a virtual database created automatically by MySQL, and it contains details of all your databases. It’s a read-only database, so any attempt to edit it will result in an error. (It’s new to MySQL 5.0, so you won’t see it if you’re using an earlier version of MySQL.) The mysql database controls user access to all your databases, so don’t make any changes while exploring. In fact, you should normally never work directly inside the mysql database because phpMyAdmin has a much more user-friendly interface for administering user accounts.
Each blogging engine uses a different database structure, so you will need to set up a separate database for each one. In the following pages, I’ll show you how I set up everything for a WordPress blog (WordPress is covered in detail in Chapter 5).
70

C R E AT I N G A L O C A L T E S T E N V I R O N M E N T F O R Y O U R B L O G
Creating a new database
launch phpMyAdmin in your browser.
new datadatabase
of the 2 here.
the sort the default and most
. Click
you with a screen reporting that the database has been the opportunity to create a new table. Most blogging automatically. So let’s move straight on to setting up the to work with your new database.
instructions for how to define database tables in Chapter 7, a blog of your own.
icon (the little house
screen (it’s the seventh opens. If you have user: root. Click the
in the Password field
Information table
71

B L O G D E S I G N S O L U T I O N S
4.Beneath the Login Information table is one labeled Global privileges, which give a user privileges on all databases, including the mysql one (which contains sensitive information). This is insecure, so leave the Global privileges table unchecked, and click the Go button at the bottom of the page.
5.The next page confirms that the user has been created, and displays many options that you can edit, beginning with the Global privileges table again. Scroll down below to the section labeled Database-specific privileges. Activate the drop-down menu, as shown here, to display a list of all databases on your system. Select the name of your blog database.
6.The next screen allows you to set the privileges for this user on just the selected database. Click Check All, and then deselect GRANT. The Database-specific privileges table should look like the screenshot. Click the top Go button, as shown.
phpMyAdmin frequently offers you a variety of options on the same page, each of which normally has its own Go button. Always click the one at the foot of or next to the section that relates to the options you want to set.
7.
72

C R E AT I N G A L O C A L T E S T E N V I R O N M E N T F O R Y O U R B L O G
Editing a user account’s privileges |
|
|
|
1. |
If you ever need to make any changes to a user’s privileges, launch phpMyAdmin |
|
|
|
and click the Privileges link on the Welcome screen. |
|
|
2. |
Locate the name of the user account in the User overview table, and click the Edit |
|
|
|
Privileges icon to the right of the listing, as shown. You can also delete users by |
2 |
|
selecting the check box to the left of the User column and then selecting the method of deletion in Remove selected users before clicking Go. The default method just deletes the users, so they remain active until the privileges table is reloaded or the MySQL server is restarted.
Edit
Privileges
Backing up and transferring your blog to another server
You can’t just copy a MySQL database file from your hard drive and upload it to your website, which can be very confusing. Even if you find the right files (on Windows, they’re located in C:\Program Files\MySQL\MySQL Server 5.0\data), you are likely to damage them unless the MySQL server is turned off. Anyway, most hosting companies won’t permit you to upload the raw files because it would also involve shutting down their server, causing a great deal of inconvenience for everyone.
Nevertheless, moving a database from one server to another is very easy. All it involves is creating a backup dump of the data, and loading it into the other database with phpMyAdmin. The dump is a text file that contains all the necessary Structured Query Language (SQL) commands to populate an individual table or even an entire database elsewhere. phpMyAdmin can create backups of your entire MySQL server, individual databases, selected tables, or individual tables. To make things simple, the following instructions show you how to back up only a single database.
These instructions do not work until you actually have some data in your database. Bookmark this section to come back to later after you have worked with at least one of the other chapters.
73

B L O G D E S I G N S O L U T I O N S
Creating a backup
1.Launch phpMyAdmin and select the database that you want to back up from the drop-down menu in the navigation frame.
2.When the database details have loaded into the main frame, select Export from the tabs along the top of the screen, as shown here.
3.The rather fearsome looking screen shown in Figure 2-9 opens. In spite of all the options, you need to concern yourself with only a few.
Figure 2-9. phpMyAdmin offers a wide range of choices when exporting data from MySQL.
74

C R E AT I N G A L O C A L T E S T E N V I R O N M E N T F O R Y O U R B L O G
4.The Export section on the left of the screen lists all the tables in your database. Click Select All and leave the radio buttons on the default SQL.
5.If the database has never been transferred to the other server before, the only option that you need to set on the right side of the screen is the drop-down menu
labeled SQL export compatibility. The setting depends on the version of MySQL running on the other server (only the first two numbers, such as 3.23, 4.0, 4.1, or
5.0 are important): |
2 |
||
|
|
If the other server is running the same version of MySQL, choose NONE. |
|
|
|
|
|
|
|
|
|
|
|
If transferring between MySQL 4.1 and MySQL 5.0 (in either direction), choose |
|
|
|
|
|
|
|
|
|
|
|
NONE. |
|
|
|
If the other server is running MySQL 3.23, choose MYSQL323. |
|
|
|
|
|
|
|
|
|
If the other server is running MySQL 4.0, choose MYSQL40.
6. If the database has already been transferred on a previous occasion, select Add DROP TABLE in the Structure section. The existing contents of each table are dropped and are replaced with the data in the backup file.
7. Put a check mark in the box alongside Save as file at the bottom of the screen. The default setting in File name template is __DB__, which automatically gives the backup file the same name as your database. So, in this case, it will become wordpress.sql. If you add anything after the final double underscore, phpMyAdmin will add this to the name. For instance, you might want to indicate the date of the backup, so you could add 20060228 for a backup made on February 28, 2006. The file would then be named wordpress20060228.sql.
Loading data from a backup file
remote server. (This isn’t necessary if you are transferof MySQL on your local computer.)
name doesn’t already exist on the target server, create any tables.
phpMyAdmin, which is used by the target server, and select transfer the data to. Click the Import tab in the main added in phpMyAdmin 2.7.0. If your hosting company uses , click the SQL tab. At the bottom of the screen dialog box similar to that shown in step 4. It works in the
75