

Raju V.'Hello world' with an AVR
.pdfDiscarding local symbol outside any compilation unit:
.do_copy_data_loop
Discarding local symbol outside any compilation unit:
.do_clear_bss_start
Discarding local symbol outside any compilation unit:
.do_clear_bss_loop
> Process Exit Code: 0
Now that the Extended COFF file is created, launch AVR Studio using the windows
“ Start” Menu. Choose “ File->Open File… ” to bring up the “ Open’ Dialog box. Navigate to the “ Hello World in C” directory and open the “ HelloWorld.cof” file that you just created. AVR Studio will automatically create a new project with the object files and the sources and open an I/O view. Use the “ Debug” menu to control the program execution and simulate the code.
Programming the chip
Once you have verified that the code is running correctly with the simulator, it is now ready to be burnt into the FLASH memory of the chip.
Connect the dongle provided with the kit to the parallel port and connect the programming cable (long 10-core ribbon cable) between the dongle and the connector

marked ISP on the EVK01 board. Next connect the adapter provided with the kit to the socket marked POWER and plug it into a normal wall socket. Power on the EVK01 by pressing the switch marked POWER. The red POWER LED should now glow.
Begin by installing PonyProg, the programming software on the CD. You can find the PonyProg installer in the software section of the EVK01 CD or on the PonyProg Website. To install PonyProg simply launch the installer and follow the simple on screen instructions. When the installation is complete, launch PonyProg from the windows
“ Start” menu.
When you run PonyProg for the first time you will be prompted to run the “ Interface setup” and “ Calibration” . To calibrate PonyProg© choose “ Setup->Calibration” and follow the on-screen instructions. To setup PonyProg© for programming, choose “ Setup- >Interface Setup” and select the following options in the dialog box that appears:
Select “ Parallel” , “ Avr ISP I/O” and “ LPT1”
∙ |
Make sure that all the check boxes in the “ Polarity of Control lines” |
section are |
|
not ticked, so that none of the control lines are inverted. |
|
∙ |
Press the “ Probe” button at the bottom of the dialog box. PonyProg© |
will check |
|
for the dongle and should display a “ Test Ok” message. |
|
∙Select Ok to close the “ Interface Setup” dialog box.
On the toolbar in the main window choose “ AVR Micro” and “ AT90S8515” in the device selection drop boxes.
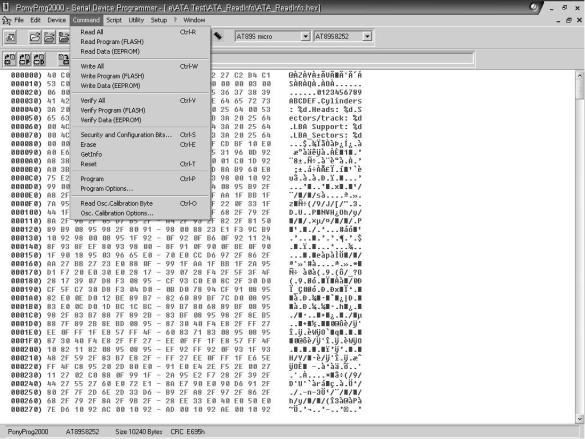
Use “ File->Open Device File” to load your assembled Intel Hex file “ Hello World.hex” into the PonyProg buffer. Use the “ Command->Erase” first to erase any existing program on the chip. Now program the FLASH on the chip with “ Command -> Write Program (FLASH)” . An automatic verification of the data is performed by PonyProg.
Executing the code:
The code begins executing immediately after the programming is done and PonyProg releases the RESET pin of the processor. To see the LEDs blink simply connect one of the I/O cables (shorter 10-core ribbon cable) between connectors marked PORTA and LEDS on the EVK.
EEKS! I don’t own an EVK01:
Coming Soon…