

Creating tables in M 259
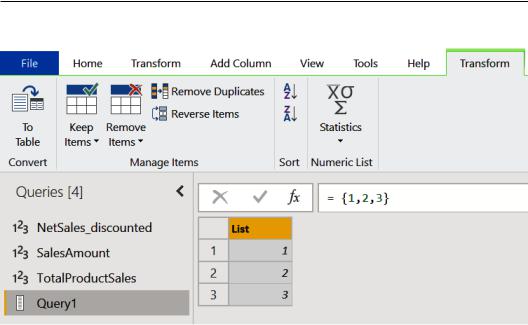
3. You can see how a list was created with the values defined in the previous step:
Figure 7.47 – List in Power Query UI
You can convert this list into a table or keep it as a list and use it as a parameter (please refer to the Filtering with parameters recipe in Chapter 6, Optimizing Power Query Performance). You can define a series of values and custom logic by exploring all of M's possibilities.
You have seen how you can write free code without depending necessarily on a data source and how you can derive values, integrating both calculations coming from data sources and custom logic defined natively in Power Query.
Creating tables in M
Thanks to M language, you can create complex tables from scratch without necessarily defining them inside an external data source and then importing them in Power Query. One common example is the definition of a list of dates that can then be customized.
Getting ready
In this recipe, you only need to have Power BI Desktop running on your PC.
260 Leveraging the M Language
How to do it…
Once you open your Power BI Desktop application, you are ready to perform the following steps:
1.Click on Get Data and select the Blank query connector.
2.The Power Query UI will pop up and you will see an empty query with its default name as Query1:
Figure 7.48 – Blank query
3.Browse to the Home tab and click on Advanced Editor.
We want to create a list of dates that starts at 01/01/2011 and ends on the current date. In order to define this logic, we have to use the List.Dates expression and its syntax is as follows:
List.Dates(start as date, count as number, step as duration) as list
This expression consists of the following parts:
a)start: starting date.
b)count: values that refer to the number of dates to be retrieved.
c)step: type of increment (for example, daily, monthly, and so on).
Given our requirements, we have to obtain the following:
a)start: #date(2011,01,01).
b)count: Duration.Days (DateTime.Date(DateTime.LocalNow())
-#date(2011,01,01)), where we performed a subtraction to calculate the number of days between the current date (DateTime.Date(DateTime. LocalNow())) and the date defined as our start date.
c)step: #duration(1,0,0,0), where we defined one day as the value to increment the list of dates by.
Creating tables in M 261
In this way, we will get a list of dates that will look like the following:
01/01/2011
02/01/2011
…
Current date
The code to be inserted in the Advanced Editor will look like the following example. Insert this, and then click on Done:
let
datelist = List.Dates(#date(2011,01,01),Duration.Days (DateTime.Date(DateTime.LocalNow()) - #date(2011,01,01) ), #duration(1,0,0,0))
in
datelist
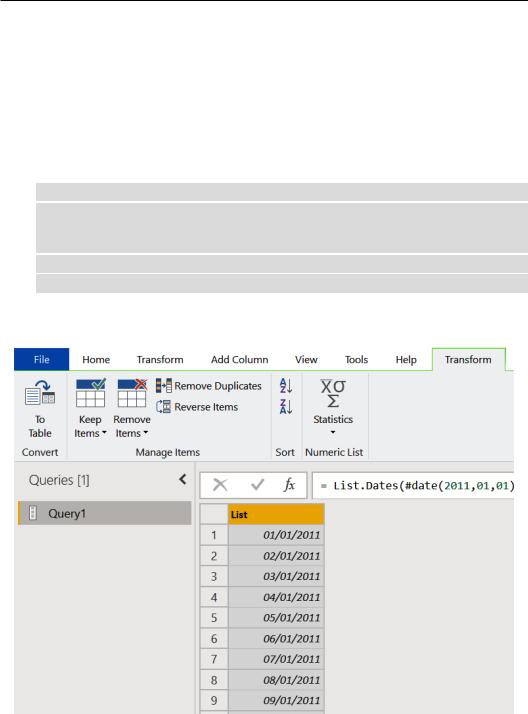
4.You can see how a list of dates has been created with the logic defined in the previous steps:
Figure 7.49 – Date list in the Power Query UI
262Leveraging the M Language
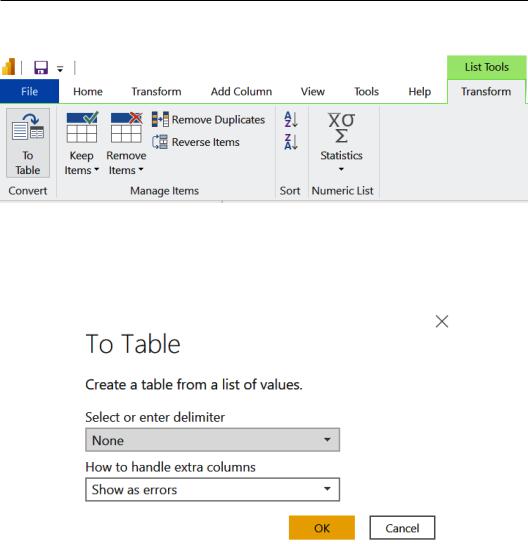
5.Browse to the Transform section under List Tools and click on To Table:
Figure 7.50 – To Table button
6.The To Table window will appear, and you will find that None as Select or enter delimiter and Show as errors as How to handle extra columns are selected by default. Leave it as it is and click on OK:
Figure 7.51 – To Table window
Creating tables in M 263
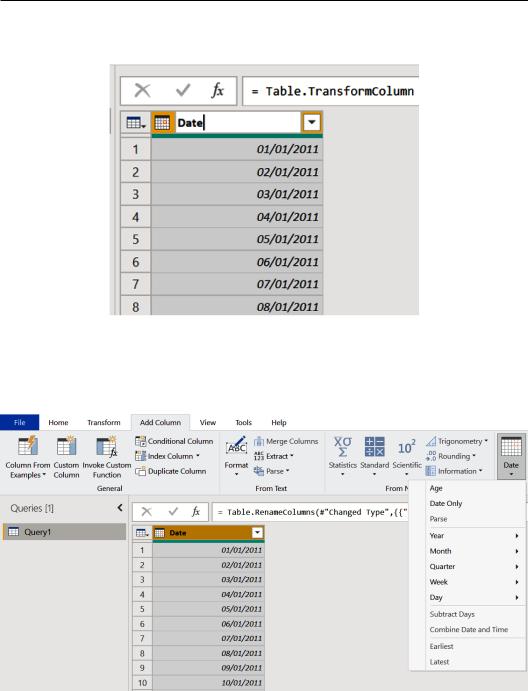
7.You will see that the list is converted to a table, and you will be able to customize your date table. First, change the column type to Date and rename the column to Date:
Figure 7.52 – Changed type and renamed to Date
8.Now you can browse to the Add Column tab, click on Date, and select which columns to add referencing to the Date column. You can add Year, Month, or Quarter and build your Date table:
Figure 7.53 – Converting list into a table