

calendar-guide
.pdfYour guide to
Google calendar

Welcome to Google calendar
This guide outlines some of the key settings and features of Google Calendar.
Getting started |
|
How to access your Google Calendar |
page 3 |
Settings and personalisation |
page 4 |
What you will see in your Google calendar |
page 4 |
Setting up meetings |
page 5 |
Adding an event to another person’s calendar |
|
page 6 |
|
Sending invitations |
page 6 |
Meetings with multiple guests |
page 7 |
Day notes/events |
page 8 |
Repeating events |
page 8 |
Accepting/declining invitations |
page 10 |
Rooms and other resource calendars |
page 11 |
Tips and tricks |
page 12 |
Working offline |
page 12 |
Labs |
page 13 |
Secondary calendars |
page 13 |
Colour-coding |
page 13 |
Agenda View |
page 13 |
5 guiding principles for calendar use |
page 14 |
Further information and support |
page 16 |
Google Calendar user guide

Getting started
How to access your Google Calendar
We recommend using the Chrome web browser to view your Google Calendar, as this provides the most integrated experience.
You can log in directly through your Google account in any browser (once in Google you’ll see a Calendar link in the toolbar across the top of your screen). Accessing your Gmail account will take you there (see Gmail guide).
You will also be able to log in directly to Google Calendar from the IT Services Google Calendar support site: bristol.ac.uk/it-services/calendar/.
From any computer or mobile device worldwide, you can log in directly from Google at calendar. google.com. If you wish to log in this way you will need to submit your password to Google through bristol.ac.uk/password (see Gmail guide for details).
Settings and personalisation
All of your calendar settings can be altered by clicking on the cog symbol in the top right of the screen and selecting Settings.
This will open a series of tabs, which control all of your calendar settings. We would like to draw your attention to a few specific settings which you may find useful.
Useful settings
1.Under the general settings you can:
• Show/hide events you have declined
• Set your working hours so colleagues will get a warning if they invite you to events outside of them.
2.Under the ‘Calendars’ tab under Settings, you can view and change:
•General reminder settings: by default, two 10 minute reminders (one desktop pop-up and one email) will be included into every new event. You can change this here.
•Sharing (who sees your calendar entries): the default is to share with all staff and PGRs within the University (see 5 guiding principles of calendar use on page 14). In the ‘Calendars’ tab under Settings, click on the ‘Shared: edit settings’ link to give someone delegate access to your calendar or give someone outside the University access to your calendar.
Page 3
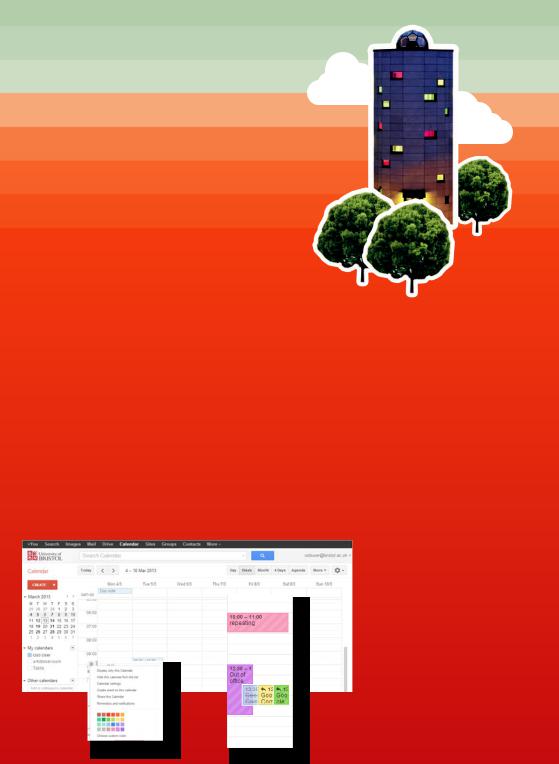
What you will see in Google Calendar
1. In the middle:
Your calendar, which by default will show a week’s view.
2. At the top:
Google Apps menu, search box, Buttons for moving to previous or next screen, changing the view and settings.
3. On the left-hand side
•The ‘Create’ button (see p. 4)
•A small month’s view calendar - click on a date in here to go to it.
•‘My calendars’: includes your primary calendar, any calendar s you have admin access to (including resources such as rooms) and your Task list.
• ‘Other Calendars’: where you can enter a colleague’s University email address to view their calendar.
Google Calendar user guide
•Their calendar will remain listed under this heading so you can view it with one click in future. If you don’t need to see it again, hover your mouse over the calendar’s name in the list. A drop-down arrow appears to the right of the calendar name, click this and select ‘Hide this calendar from the list’ in the menu that appears.
From this menu you can also switch off viewing all other calendars: select ‘Displayonly thiscalendar’.
In this view, Google layers any calendar you are viewing. Here for example, the people
with the blue, yellow and green calendars are in the same meeting, while the person with the purple calendar has a clashing event and the person with the pink calendar has a meeting earlier, but they all have free time in between. Click on a calendar in the list to switch it on or off. When you can see its colour on the left of the name, it is on.
There is also a way to look at several calendars side by side, see p. 7.
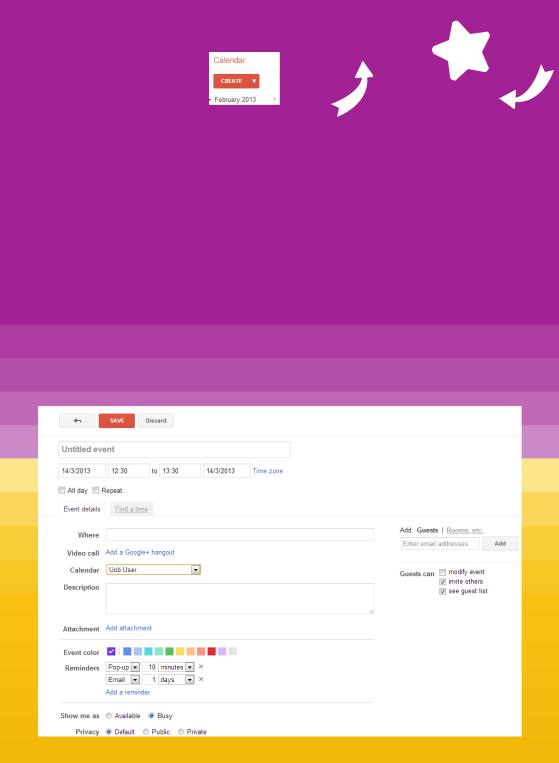
Setting up meetings
Click the red ‘CREATE’ button on the top left of the main screen (see p.4).
This takes you directly to the page where you can set/edit your meeting/event:
•Add event name, time, duration etc.
•Tick the ‘Repeat’ box to set up a series of meeting.
•To add guests to a meeting go to ‘Add:guests’. Google is pre-populated with University staff and your contact directory, which will bring up suggestions when you start typing a guest’s name. Click the ‘Add’ button.To invite external attendees or students, type or paste their full email address.
•Click ‘Add:Rooms etc.’ to see a list of rooms you can book.
• Click |
to see guests’ calendars |
by side (see p. 7) |
|
•For a confidential meeting, tick ‘Private’in the
Privacy section. This will block out the time but show it only as ‘busy’ to others.
•Add any other details as appropriate
•When you have finished, click ‘Save’
Note: there is no “tentative” setting in Google calendar. To mark a meeting as tentative, we recommend you write it in the title. This is how existing tentative markers will appear in entries that have been migrated.
Tip: You can also quickly create a meeting by dragging or clicking inside the day you want the event to be.
Page 5
Adding an event to someone else’s calendar
Events you create will be in your calendar by default.
If you have delegate access to someone’s calendar, you can add a meeting directly to their calendar if it is open on its own, or by selecting their calendar in the event’s calendar drop-down menu.
To add an event you are not attending to a calendar you do not have delegate access to:
•Invite them to the meeting (see p.5).
•Decline the meeting.(see p.11).
If you set up a lot of meetings for others, there are other methods you may wish to consider. see: bristol.ac.uk/it-services/calen- dar/
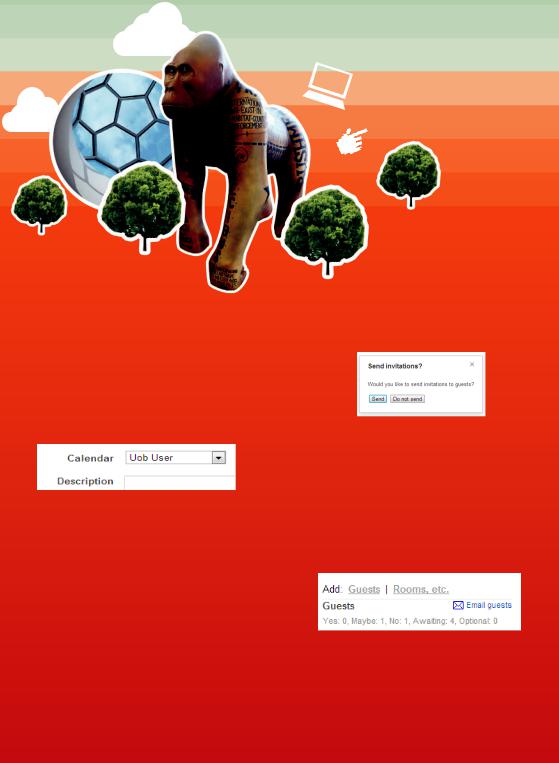
Sending invitations
When you save your event, Google calendar asks you whether you would like to send an automatic invitation to your guests. This will
include all of the entry’s details (including the description notes and RSVP links), but can’t be personalised.
Personalising invitations
If you would prefer to send a personalised email, click ‘do not send and re-open the event.
You will see a link called ‘Email guests’ above the guests list, which allows you to send a personalised email to all or any combination of guests.
Note: there is no ‘intray’ in Google Calendar, therefore it is very important to notify guests when putting a meeting in their diary as they won’t otherwise know a new meeting has been added until they check their Google calendar for that day.
Google Calendar user guide
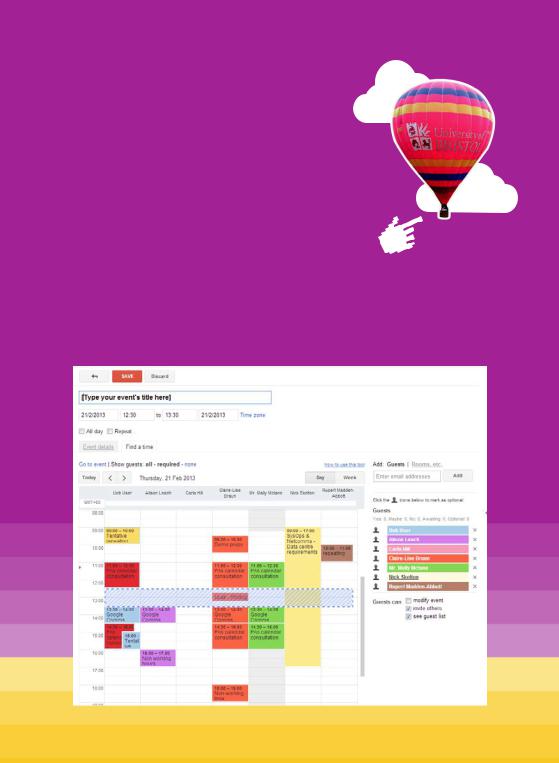
Meetings with multiple guests
•The ‘Find a time’ tab allows you to see the availability of any guests you invite to the event. In this view, you will only see meetings that have a status of ‘busy’ and you will not see meetings that your guests have declined.
•The shaded blue rectangle can be dragged and extended and its position is automatically reflected in the meeting start and end time at the top.
•You can click on the guests’ names to show and hide their calendars in the group view.
•Clicking on a sillouhette on the left of the name allows you to mark this guest as optional. You can then toggle between the ‘all’ and ‘required’ options under ‘Show guests’.
•You can toggle between day and week views.
Tip:youcanusethenameofanexistingGmailcontactgroupin‘Add:
Guests’todisplaytheavailabilityofitsmembersinoneclick.
Page 7
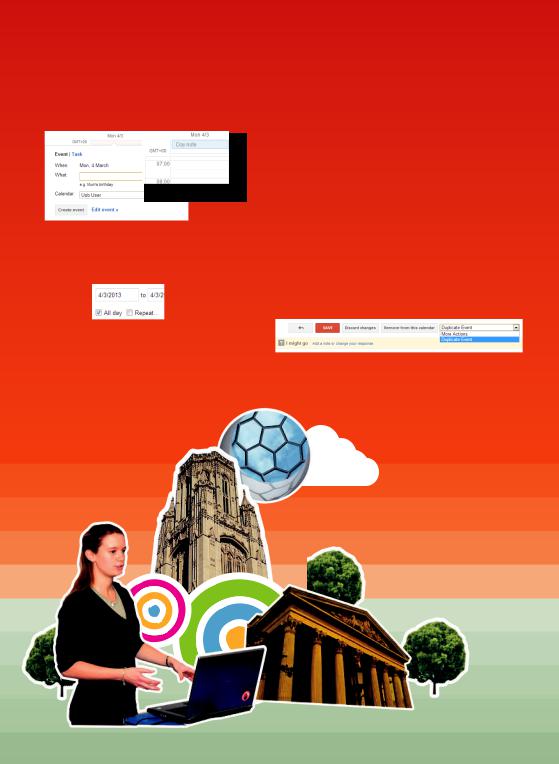
Day notes/events
You can create a day note by clicking the rectangle just under the date. The entry will then appear in that rectangle.
You can also do this by creating a regular entry and ticking the ‘All day’ box
Repeating events
As well as ticking the “Repeat’ box in the event details to create a series (see p.4), you can add individual instances of an existing meeting - including extra ones on the same day as the original entry:
1.Open the meeting
2.In the ‘More Actions’ menu, select ‘Duplicate Event’
3.This creates a duplicate instance of the same meeting. You can change any parameters you like (date, time, guests etc).
4.Click ‘Save’
Tip:Youcanmoveindividualentriesofa
repeatingseriesbydragginganddropping orbychanging thetimesintheindividualentry.
Google Calendar user guide

List repeating events
To see a list of recurring meetings/events, use ‘Search Calendar’.
Type in your search term in the Search box.
For most specific results, paste or type in the meeting’s full name in quote marks. You can also search on keywords.
In this view, by clicking on the + sign at the left of the meeting name, you can see a lot of the event’s information, change its colour, email individual guests, RSVP, delete the event or click Edit Event to go to the full editing screen.
Page 9
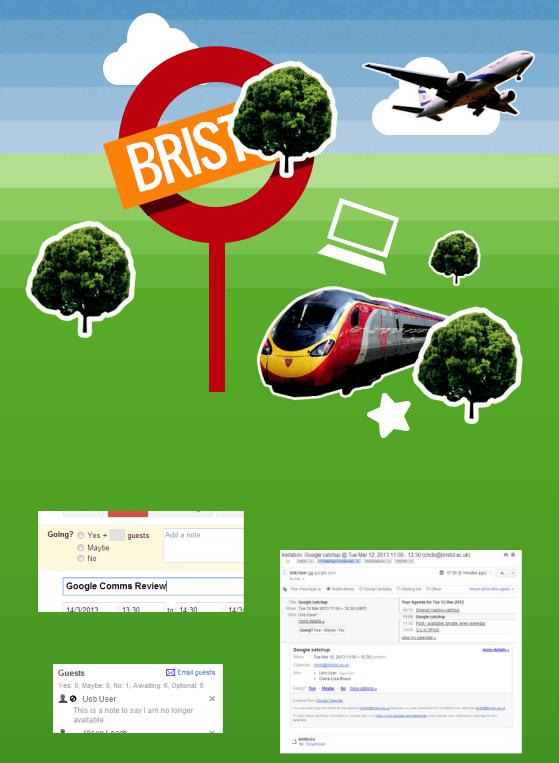
Accepting/declining
You can RSVP to an event by opening it in your calendar and ticking your response in the yellow section above the title.
You can add a note here if you wish.The note will be visible under your name in the guest list.
If the meeting organiser sent the automated notification upon creating the event, you can
RSVP directly from it. The email gives you all the details about the event along with what is already in your calendar for that day.
Google Calendar user guide