

You Can Program In C++ (2006) [eng]
.pdf8 |
OVERVIEW OF C++ |
compiler will not try to second-guess you and refuse to compile code simply because the result might be dangerous.
One of the more famous problems that C++ has inherited from C is the concept of a buffer overrun (a problem that is by no means exclusive to these languages). C++ expects that when you provide storage for input you will make sure that you provide sufficient storage or add a mechanism to prevent excessive input overwriting other data. If you program carelessly you produce programs that are vulnerable to being overloaded with data. In these days of the Internet, many of us have discovered the bad consequences of such carelessness. Pascal would probably have died out many years ago were it not for the efforts of a single company, Borland. Borland created a version of Pascal with a considerable number of extensions. Those extensions provided a safe and correct way to do many of the things programmers wanted but which were prevented by Standard Pascal.
More recently Borland further enhanced Pascal with features to support object-oriented programming. That extended dialect of Pascal is called Delphi. In addition, they then enhanced their C++ development tools to support mixing of C++ and Delphi. The result is that if you are a Delphi programmer you must be very careful that you do not fall into the trap of believing that C++ is what you get when you use Borland C++ Builder (their implementation of C++) in its Delphi compatibility mode (which is very tempting because you then have the use of an extensive third-party library, written in Delphi but accessible from Borland’s extended C++).
In general, Pascal programmers have to learn to trust themselves to get code correct and not trust the compiler to reject dangerous constructs.
Fundamental C++ for Functional Programmers
If you come from a background of functional programming (perhaps having learned Haskell, Scheme, or ML) you will likely be shocked by what C++ so cavalierly calls a function. In C++, not only are functions allowed to have side effects, but they usually do. Perhaps one day we will have a mechanism to tell a C++ compiler that something really is a function in the mathematical/functional-programming sense but that day is not here yet.
By default, C++ variables are indeed variable. Like other programming languages, C++ allows and even encourages assignment. If you are a functional programmer, you are first going to have to master the instinctive revulsion you may feel for such an ‘ill-disciplined’ language.
For the purpose of this book, you are going to have to put much that you have learned to one side. But do not discard it, because when you move on to less fundamental C++ (not in this book but perhaps the next one) you will find that many of those ideas and idioms that you are familiar with allow you to become a fluent user of some of the advanced aspects of generic programming and metaprogramming. Indeed the very best C++ programmers often deliberately choose to learn a language such as Haskell in order to enhance their C++ skills.
Fundamental C++ for Lisp and Logo Programmers
It is hard to know where to start if you have mastered Lisp. First, you must have been lucky to have been taught by someone who understood how Lisp works. I say that because far too much Lisp is taught by instructors for whom it is a third or fourth language. The problem is that they often do not think in Lisp; they know its syntax but for them it is like an English speaker writing Japanese by using a dictionary and a grammar to translate from English.
The same problem applies to those who have truly learnt Logo (usually by trial and error). If your knowledge of Logo stopped with Turtle Graphics then you may not have too big a struggle with learning C++ but if you went much further then you will need to focus on the fundamental ideas of functions, repetition

OVERVIEW OF C++ |
9 |
and decisions. The semantics of those are common to all computer languages but the syntax is significantly different.
Just as those that learn Lisp or Logo as a third or fourth language struggle because they keep trying to impose the structures of procedural languages onto the new language they are learning, those going the other way will have to abandon the thinking they have developed to handle list processing and imperative languages. At least you will have to suspend those ways of thought until you have mastered the fundamentals of C++.
Fundamental C++ for Object-Oriented Programmers
From time to time people describe C++ as an object-oriented programming language (OOPL). It is not; it is a language in which you can do some forms of object-oriented programming (OOP). If you want to do pure OOP, try a language such as Smalltalk. However, if you come from such a background be very careful, because the C++ form of OO is significantly different from what you will have learned. There is enough similarity to lull you into a sense of security and enough difference to make that a false one.
By default, methods (well, we call them member functions in C++) are statically bound. That is, implementation code is selected at compile time, not at execution time. C++ provides a mechanism for delaying binding until execution time (so-called dynamic binding), but the programmer has to make a positive decision that that is what they want.
In C++, not everything is an object in the sense usually meant by an OOPL. When we talk about objects in C++, we do not mean exactly what a Smalltalk programmer would mean by an object. The concept is near but not an exact duplicate.
Fundamental C++ for Every Programmer
There are many other languages that you might have learned. Fortran, Modula 2 or 3, Forth, and Prolog are just a few that I know to a greater or (usually) lesser extent. If you are old enough you might be fluent in PL/1, and if you are a mathematician you might use APL (an outstanding interpreted language for those who think mathematically–and almost impossible for the rest to grasp). You might also have learned Ada. If you really dig into the odder corners you might have learned SNOBOL. I just throw that last one in because it was a great language that did not catch on. However, I believe Andy Koenig has a set of libraries and other tools to enable SNOBOL mechanisms and idioms to be used in C++.
Whatever language or languages you already know, C++ has something to offer you, and your prior knowledge and skills have something to offer your study of C++. The most important thing is that you do not try to make C++ just another way to write the language you already know. This is particularly important if you are learning C++ because you want to broaden your job opportunities. Knowing enough C++ to get through a job interview will not help you if you then try to write Xlang in C++ clothes.
Good programmers write fluently in many computer languages; bad programmers write the same bad code in many computer languages. I hope that by the time you finish your study of C++, you are both a better programmer and a good C++ one.

C H A P T E R 1
Getting Started
This chapter introduces you to the tools that I have provided on the CD for your use as you read this book. You may prefer to use some that you already have, or you may prefer to use the IDE provided on the CD. Whatever choice you make, it will be to your advantage to work through this chapter and check that each step behaves correctly (or that you can achieve the equivalent with the tools of your choice). If you use MinGW Developer Studio (which I will refer to as MDS), you will be able to check that you are doing the right thing by comparing what you see on your screen with the screenshots in this chapter. If you are using JGrasp from the CD, you will be able to check the alternative version of this chapter that is on the CD. If you are using some other tools, you should still work through this chapter to make sure that you understand how to use them to produce a simple program. Most importantly, you will need to check that you can use my library with your choice of tools.
Before you go any further, read the file Read First.txt in the root directory of the CD. That will tell you what is on the CD and where to find the instructions for installing the software for the operating system used by your computer (Microsoft Windows or a UNIX derivative such as Linux or Mac OS X). When you have done that, or have installed some other development tools of your choice, continue from here.
It may be that you are familiar with the kind of tools used with a compiled language because one of the languages you already use has similar tools. If so, please excuse me for taking time explaining things for the benefit of other readers.
In this book, I assume that you are using an Integrated Development Environment (IDE), which is the programmer’s equivalent of a carpenter’s workbench. Some programmers are used to using the command line; that is fine if you understand how to write your own makefiles. If you do not (or even have no idea what those are), you would probably be better off using an IDE that will automate much of the interaction between the stages of writing, compiling, linking and debugging your code.
I am now going to walk through the process of producing two simple programs from scratch. The first program is the traditional ‘Hello World’. The second one is to check that everything has been correctly set up to use my graphics library. These programs are deliberately simple so that we can focus on the process of creating a program from source code and libraries. As I go, I will add information that may be new to you if you are used to a language that is substantially different from C++.
12 |
CHAPTER 1 |
Creating a ‘Hello World’ Program
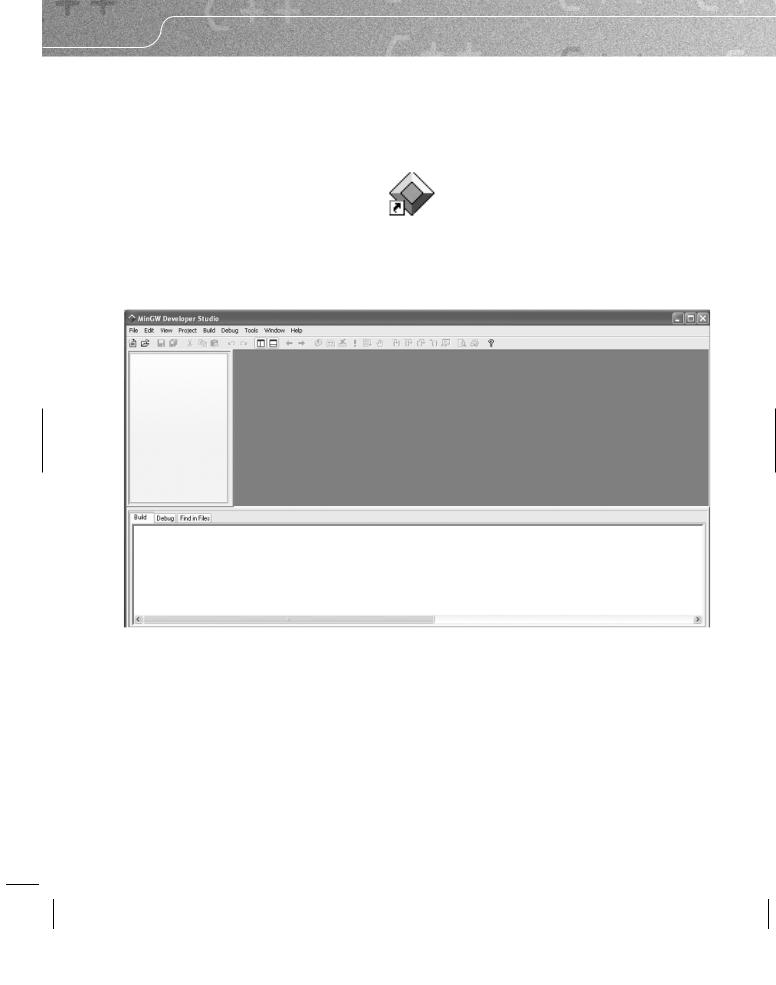
The first step is to launch, or start, the IDE. I always have the IDE icon on my desktop. If you accepted that option when you installed the software from the CD, you will find this icon somewhere on your desktop:
If you chose otherwise, you will have to launch MDS differently. When you have launched MDS, you should see this window on your screen:
The various panes are adjustable and we will see what each is for as we go. If you are familiar with using an IDE, you will probably recognize most of what is on the screen. If you start pulling down menus, you will notice that most of the entries are ‘grayed out’. Most of the icons are grayed out too, but unless you have disabled the feature, you will get a tool-tip if you let the mouse cursor hover over an icon. These tips are minimal, but I find the inclusion of the default hotkey in the tip a useful feature.
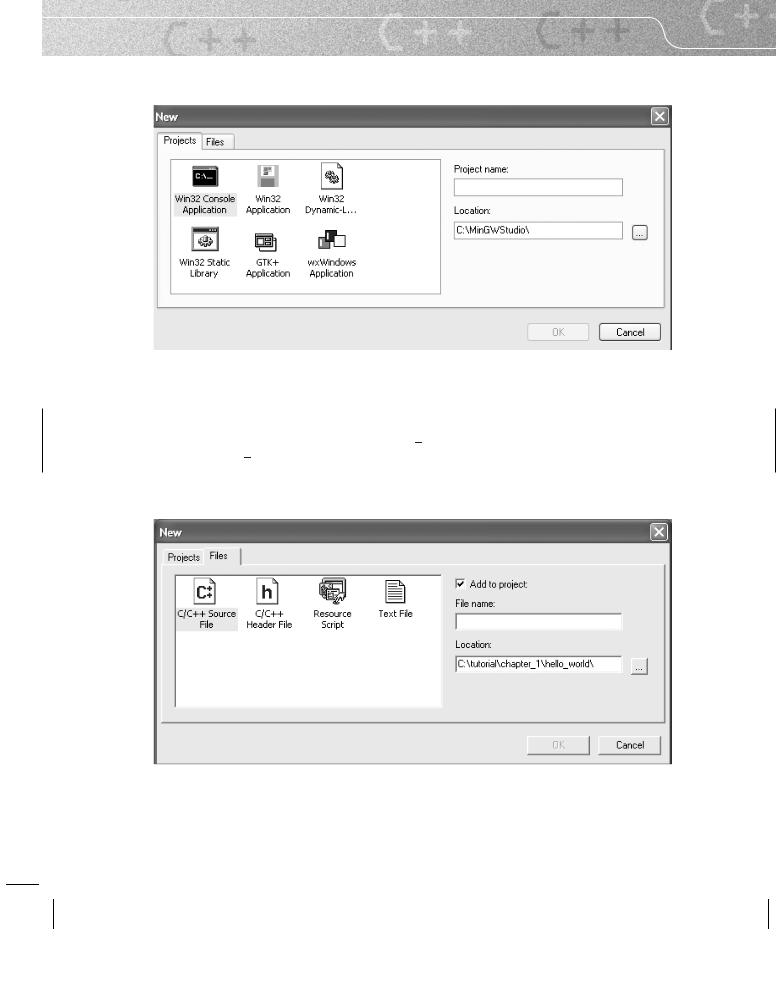
Your next step is to go to the Project menu and select New Project (Ctrl+N if you prefer to use hotkeys).
GETTING STARTED |
13 |
When you do this, you will see a data-capture window that looks like this:
The default project type is a console application, and that is what you will want through most of this book. You need to tell the IDE the name of the project and the location of your files for this project. You are less likely to make a mistake if you identify the location first. If you look at the lower text box, you will see a small gray button on the right. Click on it and then navigate to the appropriate subdirectory. If you installed MDS, by default that will be C:\tutorial\chapter 1. Now go to the upper box and give your project a name. Type in hello world (note that MDS does not correctly handle file names that contain spaces) and click on the OK button.
Next you need to create a file for the source code (the correct term for what we write; the compiler turns that into object code). Select New from the File menu and you will see:

14 |
CHAPTER 1 |
The defaults are correct (or they should be). You are creating a C/C++ source file and adding it to the project; the location of the file is the same place that you placed the project itself. All you need to do is give the file a name. Type hellomain into the File name box. After I have opened the FileView tree (in the left-hand pane), the top left of my work window looks like this:
Type the following into the file pane (the right-hand one, which has a ‘1’ in the dark-gray margin zone):
// First program written on 21/07/04 #include <iostream>
int main( ){
std::cout << "Hello World";
}
Make sure you press Enter after the closing brace, so that the file ends with a newline character.
As you type, MDS tries to give help by its use of color. When you type an unmatched bracket (parenthesis, brace, or square bracket) it first displays it in red. You can use Ctrl+B to go from one bracket to the matching one (if there is one). The MDS editor also supports code folding (the ability to hide code leaving only a header element); try clicking on the minus sign to the left of ‘int main’ and you will see what I mean. It is not
GETTING STARTED |
15 |
very useful here, but can be helpful when you want to hide extraneous details while you focus on some other section of code.
When you have typed in the code, select Compile from the Build menu. If you have done everything correctly, you should see
hellomain.o - 0 error(s), 0 warning(s)
in the bottom pane. If you forgot to press Enter after the closing brace of the source code, you will get a warning. The compiler issues a warning because C++ files can include other files; a missing empty line at the end of a file could cause a problem because the compiler might append the next line of code to that line. If you are used to using an interpreted language such as Python, you may be wondering what you have achieved so far. A tool called a compiler has converted your text (source code) into a form (object code) that the linker can use to produce an executable program. We will look at the rest of the source code shortly, but for now I want you to produce an executable program and run it. You can do that step by step, by selecting Build from the Build menu and then Execute from the same menu; or you can just select Build and execute. The choice is entirely yours. You can even select Execute directly, and MDS will ask if you want to build the executable.
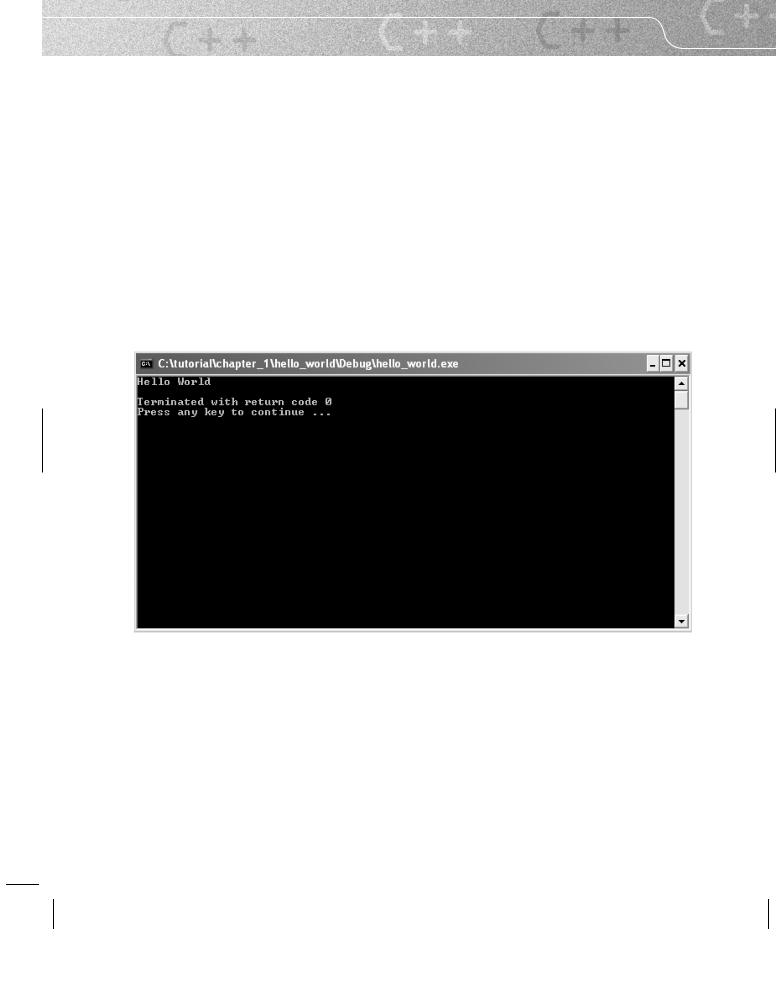
However you execute the program, you should finish up with the following console window:
MDS inserts a closing message (after your program has finished) so that the window will stay open until you are finished looking at the results. ‘Terminated with return code 0’ means that the program finished satisfactorily.
I want you to try several things before we go on. First, I want you to change the project settings. Select Settings from the Project menu. Now select the Compile tab and check all the warning boxes except for the last one (making all warnings into errors is usually overkill). For now, leave everything else as it is.
The settings can be separately set for a debug version and for a release version. While we are developing a program, we are usually willing to accept slower performance and a much larger program file in exchange for more help if the program encounters some problem while it is running.

16 CHAPTER 1
However, when we are ready to share our work with others, we probably do not want to have a very big, slow program, so we produce a release version. The release version is normally much smaller and possibly appreciably faster, because the compiler has worked hard to strip out all unnecessary details.
Do not worry about the other tabs in the Project Settings dialog box. We will only be using the Compile and Link panes.
Next I would like you to take some time experimenting with the source code (try adding extra lines of output, leaving out a semicolon, and introducing other typos) until you are confident with compiling, building, and executing it. You are going to spend a lot of time with these tools, so it is worthwhile spending a little time gaining some fluency with them. That is one reason for starting with such a silly little program: it allows us to focus on the basics of our tools before we use them to write programs with more substance.
What the Code Means
Let us look briefly at the six lines that made up the ‘Hello World’ program.
The first line is a comment. Whenever the compiler meets a //, it ignores everything from there to the end of the line. Comments are for humans and sometimes for special code-analysis tools; they are not for compilers. In this case, the comment is almost redundant, and I have included it only as an example.
The second line tells the compiler that the following code may use names from the part of the Standard C++ Library concerned with streaming data in and out through the console. We call the part in the angle brackets a ‘header’; it tells the compiler to get relevant information from wherever it keeps such details. Different compilers may obtain the information in different ways. In practice, a header is usually a text file in one of the compiler’s subdirectories. (If you are interested, you will find the corresponding iostream file in MinGWStudio\MinGW\include\c++\3.4.2, but I doubt that it will make much sense to you yet.)
The blank line has no significance and is there purely to separate the introductory part of the source code from the rest. The next line (int main( ){) must exist exactly once in every program. Effectively it determines where a program starts. There are some variants that allow the provision of data at program start-up, but that is all.
The fifth line is the substance of the program. std::cout is the name of a console output object. In other words, it is the name we use to designate an object that represents the console on the computer where the program will run; the console is usually a window on the monitor screen. The part of the name before the double colon tells us that we are dealing with a name from the C++ Standard Library.
Language Note: C programmers will recognize << as being the left-shift operator. In the context of an output object or destination, C++ reuses that operator as a streaming operator, to insert data into an output stream.
The text in quotation marks tells the compiler that you want this text displayed. We call such quoted text a string literal. The final element of the statement is the semicolon. That ends the statement and is the C++ equivalent of a period in English. Try leaving it out and then attempting to compile the code; you will see the kind of error message that results.
The last line of the program is a simple closing brace to match the opening brace at the end of the line with main in it. In general, we refer to code between an opening and closing brace as a ‘block’. In
GETTING STARTED |
17 |
this context, the code between the opening brace and the closing brace is the definition of this version of main and specifies what will happen when the program executes. We call a block that defines a function the ‘function body’. So
{
std::cout << "Hello World";
}
is the body of the function main( ).
Our Second Program – An Empty Playpen
From time to time, we are going to use a very special graphics window that I designed and several of my colleagues helped to implement. It is called the Playpen. (As you use it, I think you will come to appreciate the choice of name.) This is a fixed size (512 by 512) graphics window, with each pixel limited to one of 256 colors. Modern computers are usually capable of displaying many more colors than that, but I wanted something that was very portable as well as something that would allow you to learn about simple graphics systems. For now, we are going to use the Playpen with its default palette. (Later we will discover that we can choose different sets of 256 colors.)
Start up MDS and select New from the Project menu. Make sure that the location is correct (you are probably going to have to add ‘chapter 1’ to what it offers you – at least that is what I have to do on my machine). Now enter ‘playpen’ as the project name and press Enter.
Next, using the File menu or Ctrl+N, create a new C/C++ source file called emptyplaypen, and type in the following short program:
// written on 21/07/04 #include "playpen.h" #include <iostream>
int main( ){ fgw::playpen blank;
std::cout << "Please press the 'ENTER' key"; std::cin.get( );
}
Try to compile the source-code file (Ctrl+F7). It will fail with four or more error messages. The only useful one is the first, where it says it cannot find playpen.h. The reason for that is that we need to tell it where to look for header files. (Headers are part of the C++ Standard, but header files are a bit different: they are provided by third-party programmers and relate to third-party code in much the same way that headers relate to the Standard C++ Library.)
Choose Settings from the Project menu and select the Compile tab. In the box labeled ‘Additional include directories’, at the bottom of the Compile pane, enter ‘C:\tutorial\fgw headers’ (or a variant of that if you installed the CD to some other drive or directory). In other words, tell the compiler to look in a subdirectory called fgw headers that is in the tutorial directory on drive C. While you are dealing with the location of this header file, check that the same warnings are selected as for the first project.