

Configuring a Control's Anchoring Behavior |
|
C# and the .NET Platform, Seco |
d Edition |
by Andrew Troelsen |
ISBN:1590590554 |
When you are creating a Form containing widgets, you need to decide whether the Form should be
Apress © 2003 (1200 pages)
resizable. Typically speaking, main windows are resizable, whereas dialog boxes are not. To configure the
This comprehensive text starts with a brief overview of the
resizability of yourC#Form,languageadjustandthethenFormBorderStylequickly moves topropertykey technicalto anyandof the values described in Table 15-
15. |
architectural issues for .NET developers. |
|||||
|
Table 15-15: FormBorderStyle Properties |
|||||
Table of Contents |
|
Meaning in Life |
|
|||
C#FormBorderStyleand the .NET Platform,PropertySecond Edition |
|
|
||||
|
|
|
|
|
||
|
|
Introduction |
|
A nonresizable, three-dimensional border |
|
|
|
|
Fixed3D |
|
|
|
|
Part One - Introducing C# and the .NET Platform |
|
|||||
|
||||||
ChaptFixedDialogr 1 - The Philosophy of .NET |
|
A thick, nonresizable dialog box-style border |
|
|||
|
|
|
|
|
||
|
|
Chapter 2 - Building C# Applications |
|
A nonresizable, single-line border |
|
|
|
|
FixedSingle |
|
|
||
Part Two - The C# Programming Language |
|
|
|
|||
|
|
|
||||
ChaptFixedToolWindowr 3 - C# Language Fundamentals |
|
A tool window border that is not resizable |
|
|||
|
|
|
|
|
||
|
|
Chapter 4 - Object-Oriented Programming |
with C# |
|
||
|
|
None |
|
|
No border at all |
|
|
|
Chapter 5 - Exceptions and Object Lifetime |
|
|
|
|
|
|
|
|
|
||
|
ChapterSizable6 |
- Interfaces and Collections |
|
A resizable border |
|
|
|
||||||
|
|
Chapter 7 - Callback Interfaces, Delegates, |
|
and Events |
|
|
|
|
SizableToolWindow |
|
A resizable tool window border |
|
|
|
|
Chapter 8 |
- Advanced C# Type Construction |
|
Techniques |
|
Part Three - Programming with .NET Assemblies
Assume that you have configured your Form to be resizable. This brings up some interesting questions
Chapter 9 - Understanding .NET Assemblies
regarding the contained controls. For example, if the user makes the Form smaller than the rectangle
Chapter 10 - Processes, AppDomains, Contexts, and Threads
needed to display each control, should the controls adjust their size (and possibly location) to morph
Chapter 11 - Type Reflection, Late Binding, and Attribute-Based Programming correctly with the Form?
Part Four - Leveraging the .NET Libraries
In the Windows Forms worldview, the Anchor property is used to define a relative fixed position in which
Chapt r 12 - Object Serialization and the .NET Remoting Layer
the control should always be rendered. Every Control-derived type has an Anchor property, which can be
Chapter 13 - Building a Better Window (Introducing Windows Forms)
set to any of the values from the AnchorStyles enumeration described in Table 15-16.
Chapter 14 - A Better Painting Framework (GDI+)
Chapter 15 - Programming with Windows Forms Controls
|
Table 15-16: AnchorStyles Values |
||||
|
Chapter 16 - The System.IO Namespace |
||||
|
|
Chapter 17 - Data Access with |
|
ADO.NET |
|
|
|
AnchorStyles Value |
|
Meaning in Life |
|
Part Five - Web Applications and |
|
XML Web Services |
|
||
|
|
||||
|
ChapterBottom18 - ASP.NET Web Pages |
|
Theand WebcontrolControlsis anchored to the bottom edge of its container. |
|
|
|
|
|
|
|
|
|
|
Chapter 19 - ASP.NET Web Applications |
|
||
|
|
Left |
|
The control is anchored to the left edge of its container. |
|
|
|
Chapter 20 - XML Web Services |
|
|
|
|
|
|
The control is not anchored to any edges of its container. |
|
|
|
|
None |
|
|
|
Index |
|
|
|
||
|
|
|
|
|
|
List of Figures |
|
The control is anchored to the right edge of its container. |
|
||
|
|
Right |
|
|
|
List of Tables |
|
|
|
||
|
The control is anchored to the top edge of its container. |
|
|||
|
|
Top |
|
|
|
|
|
|
|
|
|
To anchor a widget at the upper left corner, you are free to "OR" styles together (e.g., AnchorStyles.Top | AnchorStyles.Left). Again, the idea behind the Anchor property is to configure which edges of the control are anchored to the edges of its container. For example, if you configure a Button with the following Anchor value:
// Anchor this widget relative to the right position.
myButton.Anchor = AnchorStyles.Right;
you are ensured that as the Form is resized, this Button maintains its position relative to the right side of the Form.

ConfiguringC#aandControl'sthe .NET PlatfDockingrm, SecondBehaviorEdition
by Andrew Troelsen |
ISBN:1590590554 |
Another aspect of Windows Forms programming is establishing the docking behavior of your controls. If
Apress © 2003 (1200 pages)
you so choose, you can set a widget's Dock property to configure which side (or sides) of a Form the
This comprehensive text starts with a brief overview of the
widget should beC#attachedlanguageto.andThethenvaluequicklyyou assignmovestotoakeycontrol'stechnicalDockandproperty is honored, regardless of the Form's currentarchitecturaldimensionsissues. Tablefor15.NET-17developersdescribes.possible options.
Table 15-17: DockStyle Values
|
|
|
|
|
|
|
Table of Contents |
|
MeaningSecond Editionin Life |
|
|
||
C#DockStyleand the .NET Platform, |
|
|
|
|||
IntroductionValue |
|
|
|
|
||
|
|
|
|
|
||
Part One - Introducing C# and the .NET Platform |
|
|
||||
|
Bottom |
|
|
The control's bottom edge is docked to the bottom of its containing control. |
|
|
|
Chapter 1 |
- The Philosophy of .NET |
|
|
||
|
|
|
||||
|
ChapterFill 2 |
- Building C# ApplicationsAll the control's edges are docked to all the edges of its containing control |
|
|
||
Part Two - The C# Programmingand sizedLanguageappropriately. |
|
|
||||
|
|
|
|
|
|
|
|
Chapter 3 |
- C# Language |
|
Fundamentals |
|
|
|
Left |
|
|
The control's left edge is docked to the left edge of its containing control. |
|
|
|
Chapter 4 |
- Object-Oriented Programming with C# |
|
|
||
|
|
|||||
|
ChapterNone5 |
- Exceptions |
|
andTheObjectcontrolLifetimeis not docked. |
|
|
|
|
|||||
|
Chapter 6 |
- Interfaces |
|
and Collections |
|
|
|
Right |
|
|
The control's right edge is docked to the right edge of its containing control. |
|
|
|
Chapter 7 |
- Callback |
|
Interfaces, Delegates, and Events |
|
|
|
|
|
|
|||
|
Top |
- Advanced |
|
The control's top edge is docked to the top of its containing control. |
|
|
|
Chapter 8 |
C# Type Construction Techniques |
|
|
||
|
|
|
|
|
|
|
Part Three - Programming with .NET Assemblies
So, for example, if you want to ensure that a given widget is always docked on the left side of a Form, you
Chapter 9 - Understanding .NET Assemblies
would write the following:
Chapter 10 - Processes, AppDomains, Contexts, and Threads
Chapter 11 - Type Reflection, Late Binding, and Attribute-Based Programming
// This item is always located on the left of the Form, regardless
Part Four - Leveraging the .NET Libraries
// of the Form's current size.
Chapter 12 - Object Serialization and the .NET Remoting Layer
myButton.Dock = DockStyle.Left;
Chapter 13 - Building a Better Window (Introducing Windows Forms) Chapter 14 - A Better Painting Framework (GDI+)
Chapter 15 - Programming with Windows Forms Controls
Using the topmost menu system, you can select from a set of AnchorStyles and DockStyles values and
Chapter 16 - The System.IO Namespace
observe the change in behavior of the Button type (Figure 15-20).
Chapter 17 - Data Access with ADO.NET
Part Five - Web Applications and XML Web Services
Chapter
Chapter
Chapter
Index
List of
List of
Figure 15-20: The AnchoringControls application
SOURCE |
To explore the various anchor and docking styles, check out the AnchoringControls |
CODE |
application under the Chapter 15 directory. |

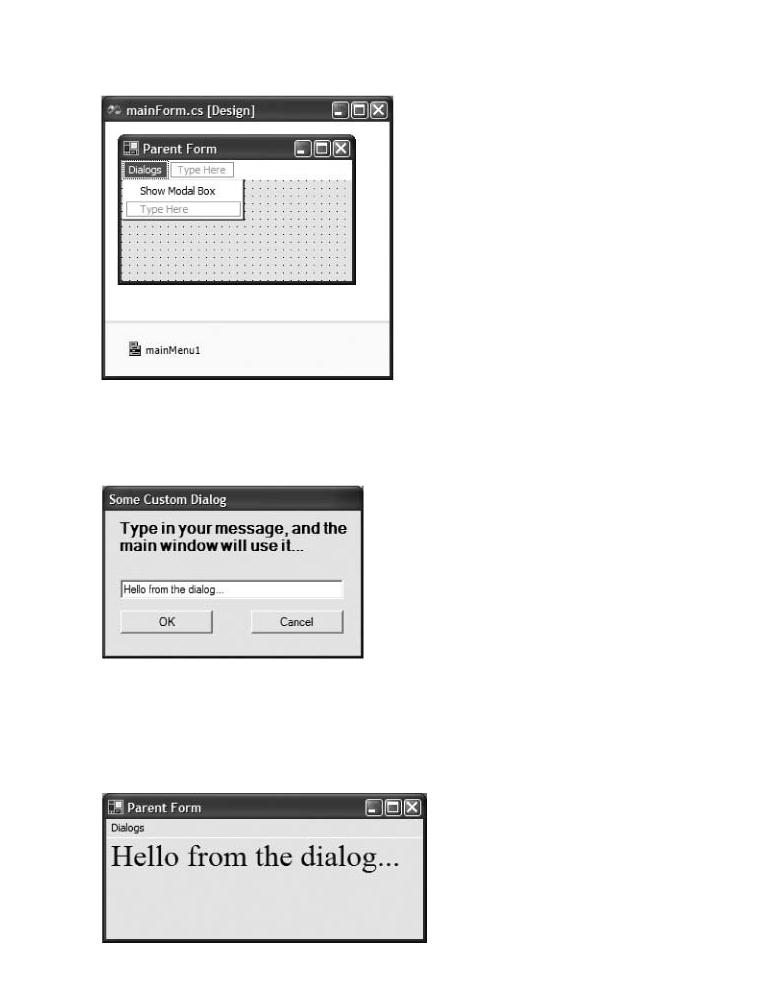
mainForm that supports a topmost menu, allowing the user to launch a modal dialog box (Figure 15-21).
C# and the .NET Platform, Second Edition
by Andrew Troelsen |
ISBN:1590590554 |
brief overview of the
key technical and
Table
C# and
Part
Chapter
Chapter
Part
Chapter
Chapter
Chapter
Chapter
Chapter
Figure 15-21: The main Form
Chapter 8 - Advanced C# Type Construction Techniques
Part Three - Programming with .NET Assemblies
When the user selects this option, a simple dialog box is displayed. The goal is to allow the user to type in
Chapter 9 - Understanding .NET Assemblies
some text, which is then painted on the parent Form (but only if the OK Button is selected). Figure 15-22
Chapter 10 - Processes, AppDomains, Contexts, and Threads |
|
shows the UI of your dialog box. |
|
Chapter 11 - Type Reflection, Late Binding, and Attribute-Based Programming |
|
Part Four - Leveraging the .NET Libraries |
|
Chapter |
Layer |
Chapter |
Windows Forms) |
Chapter
Chapter
Chapter
Chapter
Part
Chapter
Chapter
Chapter
IndexFigure 15-22: The dialog box Form
List of Figures
List of Tables
When the user clicks the OK Button, the end result is that the string is extracted from the TextBox maintained by the custom dialog box and painted in the parent Form's client area. Moreover, if the user reactivates the dialog box, the parent Form assigns the previous text message to the dialog box's TextBox (Figure 15-23).

Figure 15-23: Obtaining information from the dialog box
C# and the .NET Platform, Second Edition
The code representingby Andrewthe customTroelsendialog box should be of no ISBN:1590590554surprise, given that a dialog box is nothing
more than a FormApresswith minor© 2003 modifications(1200 pages) . Here is the relevant code:
This comprehensive text starts with a brief overview of the
C# language and then quickly moves to key technical and
// The dialog box.
architectural issues for .NET developers.
public class SomeCustomForm : System.Windows.Forms.Form
{
private System.Windows.Forms.Button btnCancel;
Table of Contents
private System.Windows.Forms.Button btnOK;
C# and the .NET Platform, Second Edition
private System.Windows.Forms.Label label1;
Introduction
private System.Windows.Forms.TextBox txtMessage;
Part One - Introducing C# and the .NET Platform
public SomeCustomForm()
Chapter 1 - The Philosophy of .NET
{
Chapter 2 - Building C# Applications
InitializeComponent();
Part Two - The C# Programming Language
this.StartPosition = FormStartPosition.CenterParent;
Chapter 3 - C# Language Fundamentals
}
Chapter 4 - Object-Oriented Programming with C#
...
Chapter 5 - Exceptions and Object Lifetime
private void InitializeComponent()
Chapter 6 - Interfaces and Collections
{
Chapter 7 - Callback Interfaces, Delegates, and Events
...
Chapter 8 - Advanced C# Type Construction Techniques
// OK Button configuration.
Part Three - ProgrammingbtnOK.DialogResultwith .NET Assemblies= System.Windows.Forms.DialogResult.OK;
Chapter 9 - UnderstandingbtnOK.Size.NET= Assembliesnew System.Drawing.Size (96, 24);
Chapter 10 - Processes,btnOK.TextAppDomains,= "OK";Contexts, and Threads
Chapter 11 - Type// Reflection,Cancel ButtonLate Binding,configurationand Att ibute-Based. Programming
Part Four - LeveragingbtnCancelthe .NET.DialogResultLibraries = System.Windows.Forms.DialogResult.Cancel;
btnCancel.Size = new System.Drawing.Size (96, 24);
Chapter 12 - Object Serialization and the .NET Remoting Layer
btnCancel.Text = "Cancel";
Chapter 13 - Building a Better Window (Introducing Windows Forms)
// Form configured to function as dialog box.
Chapter 14 - A Better Painting Framework (GDI+)
this.Text = "Some Custom Dialog";
Chapter 15 - Programming with Windows Forms Controls
this.MaximizeBox = false;
Chapter 16 - The System.IO Namespace
this.ControlBox = false;
Chapter 17 - Data Access with ADO.NET
this.MinimizeBox = false;
Part Five - Web Applications and XML Web Services
}
Chapter 18 - ASP.NET Web Pages and Web Controls
}
Chapter 19 - ASP.NET Web Applications Chapter 20 - XML Web Services
IndexThe first point of interest is in the constructor of the Form. Notice that you are setting the StartPosition
Listpropertyof Figureson startup. Earlier, you directly called CenterToScreen() to ensure that the Form was centered
Listcorrectlyof Tables. Using the StartPosition property (and the FormStartPosition enumeration), you can gain a finer level of granularity. Usually you should use FormStartPosition.CenterParent to ensure that the location of the dialog box is centered with regard to the parent (regardless of the parent's location on the screen), as shown here:
// Place dialog box centered to parent.
public SomeCustomForm()
{
InitializeComponent();
this.StartPosition = FormStartPosition.CenterParent;
}
Another important aspect of dialog box programming is to assign the termination Buttons to a value defined by the DialogResult enumeration. As you know, most dialog boxes define an OK button that says, in effect, "I am happy with my selections. Please use them in the program." Furthermore, most dialog

boxes have a Cancel button that allows the user to back out of a selection. To configure how the dialog
C# and the .NET Platform, Second Edition
box's button should respond with respect to dialog box processing, use the DialogResult property, as
shown here: |
by Andrew Troelsen |
ISBN:1590590554 |
Apress © 2003 (1200 pages) |
|
|
|
|
This comprehensive text starts with a brief overview of the
private void InitializeComponent()
C# language and then quickly moves to key technical and
{architectural issues for .NET developers.
...
// OK Button configuration.
Table of btConOKtents.DialogResult = System.Windows.Forms.DialogResult.OK;
// Cancel Button configuration.
C# and the .NET Platform, Second Edition
btnCancel.DialogResult = System.Windows.Forms.DialogResult.Cancel;
Introduction
}
Part One - Introducing C# and the .NET Platform
Chapter 1 - The Philosophy of .NET
Chapter 2 - Building C# Applications
PartValidatingTwo - The C#FormPr grammingDataL nguagewith the DialogResult Property
Chapter 3 - C# Language Fundamentals
What exactly does it mean to assign a Button's DialogResult value? First of all, when a Button has been
Chapter 4 - Object-Oriented Programming with C#
set to DialogResult.OK or DialogResult.Cancel, the Form automatically closes (meaning it is invisible but
Chapter 5 - Exceptions and Object Lifetime
still in memory). Also, you can query this property back in the code that launched this dialog box to see
Chapter 6 - Interfaces and Collections
which Button the user selected, as shown here:
Chapter 7 - Callback Interfaces, Delegates, and Events
Chapter 8 - Advanced C# Type Construction Techniques
protected void mnuModalBox_Click (object sender, System.EventArgs e)
Part Three - Programming with .NET Assemblies
{
Chapter 9 - Understanding .NET Assemblies
// Style props set in Form.
Chapter 10 - Processes, AppDomains, Contexts, and Threads
SomeCustomForm myForm = new SomeCustomForm();
Chapter 11 - Type Reflection, Late Binding, and Attribute-Based Programming
// Passing in a reference to the launching dialog box is optional.
Part Four - Leveraging the .NET Libraries
myForm.ShowDialog(this);
Chapter 12 - Object Serialization and the .NET Remoting Layer
if(myForm.DialogResult == DialogResult.OK)
Chapter 13 - Building a Better Window (Introducing Windows Forms)
{
Chapter 14 - A Better Painting Framework (GDI+)
// User hit OK, do whatever.
Chapter 15 - Programming with Windows Forms Controls
}
Chapter 16 - The System.IO Namespace
DoSomeMoreWork();
Chapter 17 - Data Access with ADO.NET
}
Part Five - Web Applications and XML Web Services
Chapter 18 - ASP.NET Web Pages and Web Controls
ChapterThe DialogResult19 - ASP.NETenumerationWeb Applicationsspecifies the following values:
Chapter 20 - XML Web Services
Index
public enum System.Windows.Forms.DialogResult
List{ of Figures
List of TaAbort,les Cancel, Ignore, No,
None, OK, Retry, Yes
}
Grabbing Data from a Dialog Box
Now that you can configure, launch, and test for a dialog box's Button click, you need to understand how to obtain the information from the dialog box. Your current dialog box allows the user to enter a custom string, which is used in the parent Form. Thus, the first step you need to take is to add some number of member variables that represent the data the dialog box is responsible for, as shown here:
public class SomeCustomForm : System.Windows.Forms.Form
{
public SomeCustomForm()
{


protected void mainForm_Paint (object sender, PaintEventArgs e)
C# and the .NET Platform, Second Edition
{
by Andrew Troelsen ISBN:1590590554
// Paint the message obtained from the dialog box.
Apress © 2003 (1200 pages)
Graphics g = e.Graphics;
DrawString(Th s comprehensive text starts with a brief overview of the
g. dlgMsg, new Font("times New Roman", 24),
C# language and then quickly moves to key technical and
Brushes.Blue, this.ClientRectangle); architectural issues for .NET developers.
}
Table of Contents
C# and the .NET Platform, Second Edition
SOURCE The SimpleDialog application is included under the Chapter 15 directory.
Introduction
CODE
Part One - Introducing C# and the .NET Platform
Chapter 1 - The Philosophy of .NET
Chapter 2 - Building C# Applications
Part Two - The C# Programming Language
Chapter 3 - C# Language Fundamentals
Chapter 4 - Object-Oriented Programming with C#
Chapter 5 - Exceptions and Object Lifetime
Chapter 6 - Interfaces and Collections
Chapter 7 - Callback Interfaces, Delegates, and Events
Chapter 8 - Advanced C# Type Construction Techniques
Part Three - Programming with .NET Assemblies
Chapter 9 - Understanding .NET Assemblies
Chapter 10 - Processes, AppDomains, Contexts, and Threads
Chapter 11 - Type Reflection, Late Binding, and Attribute-Based Programming
Part Four - Leveraging the .NET Libraries
Chapter 12 - Object Serialization and the .NET Remoting Layer
Chapter 13 - Building a Better Window (Introducing Windows Forms)
Chapter 14 - A Better Painting Framework (GDI+)
Chapter 15 - Programming with Windows Forms Controls
Chapter 16 - The System.IO Namespace
Chapter 17 - Data Access with ADO.NET
Part Five - Web Applications and XML Web Services
Chapter 18 - ASP.NET Web Pages and Web Controls
Chapter 19 - ASP.NET Web Applications
Chapter 20 - XML Web Services
Index
List of Figures
List of Tables

UnderstandingC# andFormthe .NETInheritancePlatform, Second Edition
by Andrew Troelsen |
ISBN:1590590554 |
As you are aware, inheritance is the pillar of OOP that allows one class to extend the functionality of
Apress © 2003 (1200 pages)
another class. Typically, when you speak of inheritance, you envision one non-GUI type (e.g., SportsCar)
This comprehensive text starts with a brief overview of the
deriving from anotherC# lanonguage-GUIandtypethen(Car)quickly. However,moves intothekeyworldtechnicalof Windowsand Forms, it is possible for one Form to derive fromarchitecanotheruralFormissuesandfor .inNETthedevelopersprocess inherit. the base class' widgets and implementation. Form-level inheritance is a very powerful technique, as this allows you to build a base Form that provides core-level functionality for a family of related dialog boxes. If you were to bundle these base-level Forms
Table of Contents
into a .NET assembly, other members of your team could extend these types using the .NET language of
C# and the .NET Platform, Second Edition
their choice.
Introduction
For the sake of illustration, assume you have placed the CarConfigForm.cs file in a new C# code library
Part One - Introducing C# and the .NET Platform
application named CarConfigLib (be sure to add a reference to System.Windows.Forms.dll). Once you
Chapter 1 - The Philosophy of .NET
compile this *.dll, create a new Windows Application project workspace. To derive one Form from another,
Chapter 2 - Building C# Applications
the first step is to set a reference to the external assembly (in this case, CarConfigLib.dll). Next, specify the
Part Two - The C# Programming Language
base Form using standard C# syntax, as shown here:
Chapter 3 - C# Language Fundamentals
Chapter 4 - Object-Oriented Programming with C#
// The namespace of the base Form.
Chapter 5 - Exceptions and Object Lifetime
using CarConfig;
Chapter 6 - Interfaces and Collections
Chapter 7 - Callback Interfaces, Delegates, and Events
// Your new Form is really a subclass of CarConfigForm!
Chapter 8 - Advanced C# Type Construction Techniques
public class DerivedForm : CarConfig.CarConfigForm
Part Three - Programming with .NET Assemblies
{ ...}
Chapter 9 - Understanding .NET Assemblies
Chapter 10 - Processes, AppDomains, Contexts, and Threads
Chapter 11 - Type Reflection, Late Binding, and Attribute-Based Programming
Part Four - Leveraging the .NET Libraries
If you now save and reopen the DerivedForm type, you will see that the new class has inherited all the
Chapter 12 - Object Serialization and the .NET Remoting Layer
widgets! Like any inheritance scenario, be aware that any controls in the base Form that have been Chapterdeclared13as- Buildingprivate mayBetternot beWindowrepositioned(Introducingby theWindowsderivedForms)type. However, if you were to update the logic
Chaptin therCarConfigLib14 - A Better.dllPaintingto specifyFrameworkprotected(GDI+)members, the derived type is free to reposition these items
Chapterusing the15design- Progratimemingtemplatewith Windows. Forms Controls
Chapter 16 - The System.IO Namespace
At this point, you are free to extend this derived Form any way you choose. For test purposes, simply add a
Chapter 17 - Data Access with ADO.NET
new MainMenu that allows the user to exit this application (Figure 15-24).
Part Five - Web Applications and XML Web Services
Chapter 18 - ASP.NET Web Pages and Web Controls
Chapter
Chapter
Index
List of
List of
Figure 15-24: Building the derived Form
The Click event handler simply shuts down the application, as shown here:
private void mnuFileExit_Click(object sender, System.EventArgs e)
{

this.Close();
} |
C# and the .NET Platform, Second Edition |
|
|
by Andrew Troelsen |
ISBN:1590590554 |
|
|
|
|
||
|
Apress © 2003 (1200 pages) |
|
|
It is worth pointingThisoutcomprehenthat the Visualive textStudiostarts.NETwithIDEa briefprovidesov rviewan integratedof the |
wizard (named the |
||
Inheritance Picker)C#tolanguagecreate derivedand thenFormsquickly. Tomovesaccessto keyits functionality,technic l andactivate the Project | Add Inherited
architectural issues for .NET developers.
Form menu item. Once you provide a name for your new class, you are asked to specify the name of the assembly that contains the base class Form. At that point, the IDE will automatically create a new class
type derived from the specified base Form.
Table of Contents
C# andSOURCEthe .N T Platform,The MyDerivedFormSecond Editi n and CarConfigLib applications are included under the Chapter 15
IntroductionCODE directory.
Part One - Introducing C# and the .NET Platform
At this point in the game, you should have a firm understanding of the core set of Windows Forms
Chapter 1 - The Philosophy of .NET
controls. As you would expect, the remaining widgets expose their unique set of properties, methods and
Chapter 2 - Building C# Applications
events, which I assume you will examine at your leisure. To close this chapter, we'll now spend some time
Part Two - The C# Programming Language
learning the process of building custom Windows Forms controls.
Chapter 3 - C# Language Fundamentals
Chapter 4 - Object-Oriented Programming with C#
Chapter 5 - Exceptions and Object Lifetime
Chapter 6 - Interfaces and Collections
Chapter 7 - Callback Interfaces, Delegates, and Events
Chapter 8 - Advanced C# Type Construction Techniques
Part Three - Programming with .NET Assemblies
Chapter 9 - Understanding .NET Assemblies
Chapter 10 - Processes, AppDomains, Contexts, and Threads
Chapter 11 - Type Reflection, Late Binding, and Attribute-Based Programming
Part Four - Leveraging the .NET Libraries
Chapter 12 - Object Serialization and the .NET Remoting Layer
Chapter 13 - Building a Better Window (Introducing Windows Forms)
Chapter 14 - A Better Painting Framework (GDI+)
Chapter 15 - Programming with Windows Forms Controls
Chapter 16 - The System.IO Namespace
Chapter 17 - Data Access with ADO.NET
Part Five - Web Applications and XML Web Services
Chapter 18 - ASP.NET Web Pages and Web Controls
Chapter 19 - ASP.NET Web Applications
Chapter 20 - XML Web Services
Index
List of Figures
List of Tables
Building CustomC# and theWindows.NET Platform,FormsSecondControlsEdition
by Andrew Troelsen |
ISBN:1590590554 |
If you have a background in classic COM, you are no doubt aware of the use of ActiveX controls. These
Apress © 2003 (1200 pages)
coclasses are simply types that implement a (huge) number of (quite complex) COM interfaces that
This comprehensive text starts with a brief overview of the
provide behaviorsC#forlanguagerenderingandgraphicalthen quicontent,kly movespersistingto key technicthe statel andof the coclass, and enabling control/host containerrchitecturalcommunicationissues for(among.NET developersother duties). . While ActiveX controls can now be regarded as a legacy technology, their spirit lives on under .NET.
TableAs youf Contentsare already well aware, a class is a type that serves as a blueprint for discrete variables of this type. C#In and.NET,theyour.NETcustomPlatform,classesSecondcanEditionderive from other types, implement any number of interfaces, serve as
the basis for additional types, and typically support any number of properties, methods, and events. In
Introduction
addition to this (obvious) definition, generic classes are unique in that they do not support any design time
Part One - Introducing C# and the .NET Platform
manipulation. For example, if you have a simple C# class named Car, you are unable to interact with its
Chapter 1 - The Philosophy of .NET
members using the VS .NET Properties window. Furthermore, when you are programming with generic
Chapter 2 - Building C# Applications
class types, you do not drag the item onto a Form-derived type as you would a Windows Forms Button
Part Two - The C# Programming Language
widget. In essence, a simple class is a non-GUI type that is directly manipulated through code.
Chapter 3 - C# Language Fundamentals
Chapter 4 - Object-Oriented Programming with C#
Acontrol is also a class type, meaning it derives from a parent class (typically
Chapter 5 - Exceptions and Object Lifetime
System.Windows.Forms.Control) and inherits a good deal of functionality in the process. Each of the GUI
Chapter 6 - Interfaces and Collections
widgets you have examined during this chapter is considered a control type. Like a simple class, controls
Chasupportter 7 - Callback Interfaces, Delegates, and Events
a set of public members and can be manipulated directly by code. In addition, however, controls Chapterdo support8 -aAdvancedGUI, andC#areTypetypicallyConstructionconfiguredTechniquesusing various design time tools (such as the VS .NET
PartPropertiesTh ee - window)Programmingand arewith"drawn".NET Assemblionto thesowning host using the Toolbox. To be sure, like any intrinsic
ChapterWindows9 Forms- Understandingcontrols, your.NET customAs embliescontrols inherit the same set of behaviors from each class in the
Chapterinheritance10 - chainProcesses,. AppDomains, Contexts, and Threads
Chapter 11 - Type Reflection, Late Binding, and Attribute-Based Programming
Next you have user controls. Like a control type, user controls also support a runtime GUI and are fully
Part Four - Leveraging the .NET Libraries
configurable at design time. The key difference is that user controls do not derive directly from
Chapter 12 - Object Serialization and the .NET Remoting Layer
System.Windows.Forms.Control. Rather, user controls derive from System.Windows.Forms.UserControl,
Chapter 13 - Building a Better Window (Introducing Windows Forms)
which in turn derives directly from ContainerControl. Recall that ContainerControl (and its base class
Chapter 14 - A Better Painting Framework (GDI+)
ScrollableControl) provide additional members that allow you to configure scrolling, tab order, and focus
Chapter 15 - Programming with Windows Forms Controls
logic. When you wish to build a reusable GUI widget that maintains numerous related widgets that need to
Chapter 16 - The System.IO Namespace
work together as a whole, you will want to derive your custom class directly from UserControl (in fact, this
Chapter 17 - Data Access with ADO.NET
is the default base class from which your custom controls derive). However, if you are not interested in
Part Five - Web Applications and XML Web Services
building a widget that hosts interrelated composite controls, you are free to change the wizard-generated
Chapter 18 - ASP.NET Web Pages and Web Controls code to derive directly from Control itself.
Chapter 19 - ASP.NET Web Applications
Finally, you have components. Components can best be thought of as a middle-of-the-road alternative
Chapter 20 - XML Web Services
between a simple class and a full-fledged (user) control. Like a simple class, components do not support
Index
a runtime user interface. However, components can be selected from the VS .NET Toolbox window and
List of Figures
configured using the integrated Property window at design time. For example, check out the Components
List of Tables
tab in Figure 15-25.

Second Edition
ISBN:1590590554
starts with a brief overview of the moves to key technical and
developers.
Table
C# and
Part
Chapter
Chapter
Part
Chapter
Chapter 4 - Object-Oriented Programming with C#
Figure 15-25: The Components tab
Chapter 5 - Exceptions and Object Lifetime
ChapterAs you6can- see,Interfacestheseaintrinsicd Collecomponentstions are not necessarily GUI in nature, but they do lend themselves
Chapterwell to 7a design- CallbacktimeInterfaces,environmentDelegates,. If you dropand Eventsa component (such as the EventLog) onto your hosting
ChapterForm-derived8 - Advancedtype, youC#willTypenoticeConstructionthat the desigTechniquestime representation is placed in the designer's icon tray
Part(asThreewell as- Programmingmember variablewith .NETin theAssembliesForm-derived type being created). Once you select the component, Chapteryou are9able- Understandingto set various.NETpropertiesAss mbliesusing the Properties window.
Chapter 10 - Processes, AppDomains, Contexts, and Threads
Programmatically speaking, what marks a type as a component is the fact that it implements the System.ComponentModel.IComponent interface. Most of the time, however, you will not directly flesh out the details of this interface by hand, but rather derive your type from
System.ComponentModel.Component (and thus receive the canned implementation).
Chapter 13 - Building a Better Window (Introducing Windows Forms) Chapter 14 - A Better Painting Framework (GDI+)
Chapter 15 - Programming with Windows Forms Controls
Chapter 16 - The System.IO Namespace
Chapter 17 - Data Access with ADO.NET
Part Five - Web Applications and XML Web Services
Chapter 18 - ASP.NET Web Pages and Web Controls
Chapter 19 - ASP.NET Web Applications
Chapter 20 - XML Web Services
Index
List of Figures
List of Tables
Building a Custom# and the .UserControlNET Platf rm, Second Edition
by Andrew Troelsen |
ISBN:1590590554 |
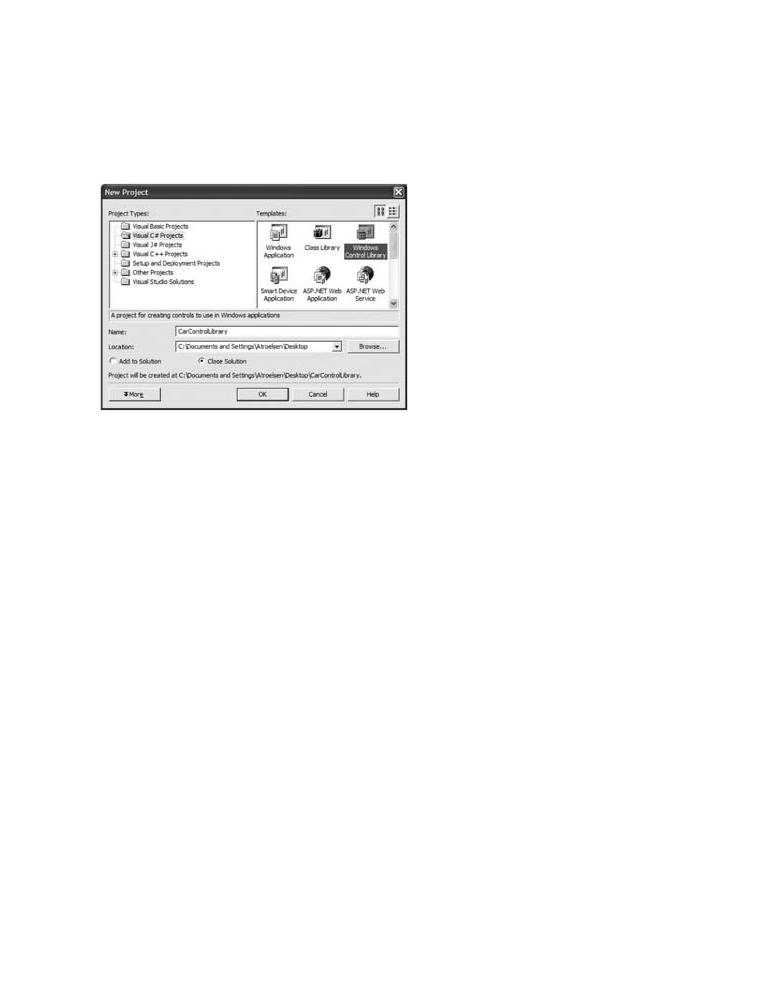
During the next several pages, you construct a custom UserControl named CarControl. To begin, fire up
Apress © 2003 (1200 pages)
Visual Studio .NET and select a new Windows Control Library workspace named CarControlLibrary
This comprehensive text starts with a brief overview of the
(Figure 15-26). WhenC# langyouageareandfinished,t n quicklyrenamemovesthe initialto keyC#technicalclass toandCarControl (note that the base class of your type is UserControl)architectural. issues for .NET developers.
Table
C# and
Part
Chapter
Chapter
Part
Chapter
Chapter
Chapter
Chapter
Chapter
Chapter
Part Three - Programming with .NET Assemblies
Figure 15-26: Creating a new Windows Control Library workspace
Chapter 9 - Understanding .NET Assemblies
Chapter 10 - Processes, AppDomains, Contexts, and Threads
Before we get far along, let's establish the big picture of where you are going with this example. The
ChapterCarControl11 - typeTypeisReflection,responsibleLateforBinding,animatingd throughAttributea-BasedseriesPrograof bitmapsmingthat will change based on the
PartinternalFour state- Leveragingof the automobilethe .NET Librari. If thescar's current speed is safely under the car's maximum speed limit,
Chapterthe CarControl12 - ObjectloopsSerializationthrough threeand thebitmap.NETimagesRemotingthatLayerrender an automobile driving safely along. If the
Chaptcurrentr 13speed- BuisldingtenamilesB tterbelowWindowthe (Introdmaximumcingspeed,Win owstheForms)CarControl loops through four images, with the Chapterfourth image14 - AshowingBetter Paintingthe carFrameworkbreaking down(GDI+). Finally, if the car has surpassed its maximum speed, the
CarControl loops over five images, where the fifth image represents a doomed automobile.
Chapter 15 - Programming with Windows Forms Controls Chapter 16 - The System.IO Namespace
Chapter 17 - Data Access with ADO.NET
Part Five - Web Applications and XML Web Services
Chapter 18 - ASP.NET Web Pages and Web Controls
Chapter 19 - ASP.NET Web Applications
Chapter 20 - XML Web Services
Index
List of Figures
List of Tables

Creating theC#Imagesand the .NET Platform, Second Edition
by Andrew Troelsen |
ISBN:1590590554 |
Given our design notes, the first order of business is to create a set of five *.bmp files for use by the
Apress © 2003 (1200 pages)
animation loop. If you wish to create custom images, begin by activating the Project | Add New Item menu
This comprehensive text starts with a brief overview of the
selection and insertC#fivelanguagenew Bitmapand thenresourcesquickly moves. If youtowouldkey technicalrather notandshowcase your artistic abilities, feel free to use the imagesarchitecturalthat accompanyissues for .thisNETsampledevelopersapplication. (keep in mind, I in no way consider myself a graphic artist). The first of these three images (Lemon1.bmp, Lemon2.bmp, and Lemon3.bmp) illustrates a car navigating down the road in a safe and orderly fashion. The final two bitmap images
Table of Contents
(AlmostDead.bmp and Dead.bmp) represent a car approaching its maximum upper limit and its ultimate
C# and the .NET Platform, Second Edition
demise.
Introduction
Part One - Introducing C# and the .NET Platform
Chapter 1 - The Philosophy of .NET
Chapter 2 - Building C# Applications
Part Two - The C# Programming Language
Chapter 3 - C# Language Fundamentals
Chapter 4 - Object-Oriented Programming with C#
Chapter 5 - Exceptions and Object Lifetime
Chapter 6 - Interfaces and Collections
Chapter 7 - Callback Interfaces, Delegates, and Events
Chapter 8 - Advanced C# Type Construction Techniques
Part Three - Programming with .NET Assemblies
Chapter 9 - Understanding .NET Assemblies
Chapter 10 - Processes, AppDomains, Contexts, and Threads
Chapter 11 - Type Reflection, Late Binding, and Attribute-Based Programming
Part Four - Leveraging the .NET Libraries
Chapter 12 - Object Serialization and the .NET Remoting Layer
Chapter 13 - Building a Better Window (Introducing Windows Forms)
Chapter 14 - A Better Painting Framework (GDI+)
Chapter 15 - Programming with Windows Forms Controls
Chapter 16 - The System.IO Namespace
Chapter 17 - Data Access with ADO.NET
Part Five - Web Applications and XML Web Services
Chapter 18 - ASP.NET Web Pages and Web Controls
Chapter 19 - ASP.NET Web Applications
Chapter 20 - XML Web Services
Index
List of Figures
List of Tables
Building theC#Designand the .NETTimePlatform,GUISecond Edition
by Andrew Troelsen |
ISBN:1590590554 |
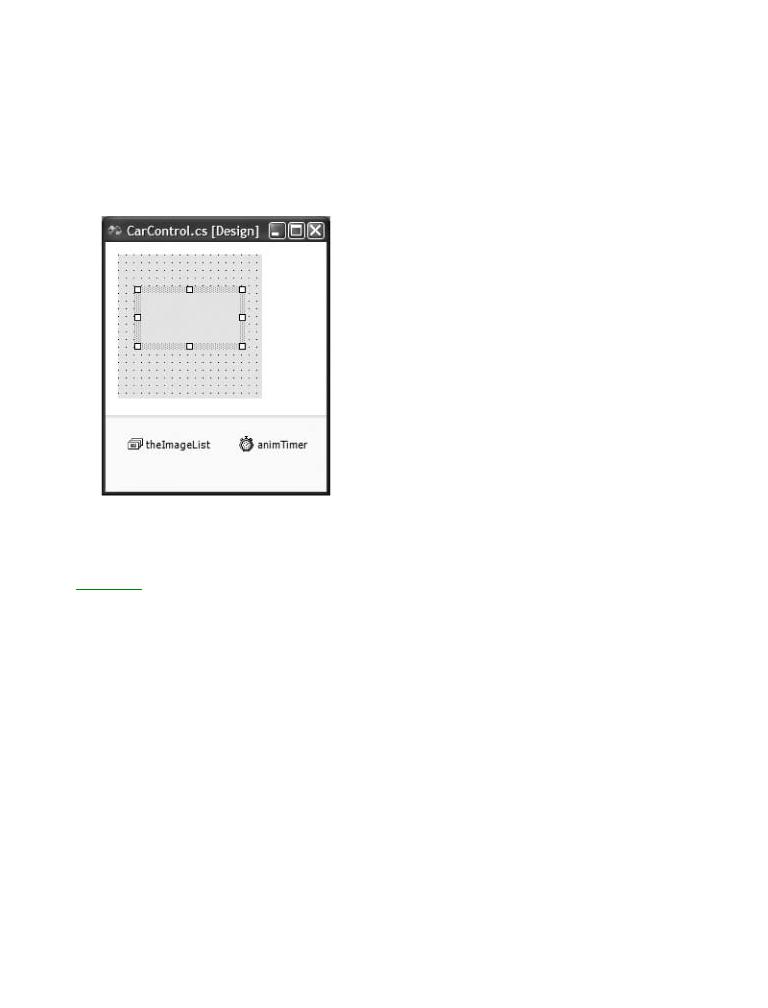
The next step is to open the design time editor for the CarControl type. As you can see, you are presented
Apress © 2003 (1200 pages)
with a Form-like designer that represents the client area of the control under construction. Using the
This comprehensive text starts with a brief overview of the
Toolbox window,C#addlanguagean ImageListand thentypequickly(to holdmoveseachtoofkeythetechnicalbitmaps),anda Timer type (to control the animation cycle),architecturaland a PictureBoxissues(tof rhold.NETthed velopcurrentrs.image). Don't worry about configuring the size or location of the PictureBox type, as you will programmatically position this widget within the bounds of the CarControl.Figure 15-27 shows the story thus far.
Table of Contents
C# and the .NET Platform, Second Edition
Part
Chapter
Chapter
Part
Chapter |
|
Chapter |
C# |
Chapter |
|
Chapter |
|
Chapter |
Events |
Chapter |
Techniques |
Part |
|
Chapter |
|
Chapter |
and Threads |
Chapter |
Attribute-Based Programming |
Part |
|
Chapter |
Remoting Layer |
Figure 15-27: Creating the design time GUI
Chapter 13 - Building a Better Window (Introducing Windows Forms)
Chapter 14 - A Better Painting Framework (GDI+)
Now, using the Properties window, configure the ImageList's Images collection by adding each bitmap to
Chapter 15 - Programming with Windows Forms Controls
the list. Be aware that you will want to add these items sequentially (Lemon1.bmp, Lemon2.bmp,
Chapter 16 - The System.IO Nabmp,espace
Lemon3.bmp, AlmostDead. Dead.bmp) to ensure a linear animation loop. As you recall from ChapterChapter1714-,DatawhenAccessyou incorporatewith ADO.NETresources (such as bitmaps) into your VS .NET solutions, the
PartunderlyingFive - Web*.resxApplicationsfile is automaticallyand XML WebupdatedServices. Therefore, the images will be embedded into your assembly
Chapterwith no18extra- ASPwork.NETonWebyourPagesbehalfand. Web Controls
Chapter 19 - ASP.NET Web Applications
Also be aware that the default width and height of *.bmp files inserted using VS .NET are 47×47 pixels.
Chapter 20 - XML Web Services
Thus, the ImageSize of the ImageList should also be set to 47×47 (or else you will have some skewed
Index
rendering). Finally, configure the state of your Timer type such that the Interval property is set to 200 and is
List of Figures initially disabled.
List of Tables

ImplementingC# andthetheCarControl.NET Platfo m, Second Edition
by Andrew Troelsen |
ISBN:1590590554 |
With this GUI prep work out of the way, you can now turn to implementation of the type members. To
Apress © 2003 (1200 pages)
begin, create a new public enumeration named AnimFrame, which has a member representing each item
This comprehensive text starts with a brief overview of the
maintained by theC#ImageListl nguage. Asandyouthenwillquicklysee, youmovesmaketo keyusetechnof thiscalenumerationand to determine the current frame to render intoarchitthecturalPictureBox:issues for .NET developers.
// Helper enum for images.
Table of Contents
public enum AnimFrames
C# and the .NET Platform, Second Edition
{
Introduction
Lemon1, Lemon2,
Part One - Introducing C# and the .NET Platform
Lemon3, AlmostDead, Dead
Chapter 1 - The Philosophy of .NET
}
Chapter 2 - Building C# Applications
Part Two - The C# Programming Language
ChapterThe CarControl3 - C# Languagetype maintainsFundamentalsgood number of private data points to represent the animation logic.
ChapterHere is4the- rundownObject-Orientedof eachProgrammingmember: with C#
Chapter 5 - Exceptions and Object Lifetime
Chapterpublic6 class- InterfacesCarControland Collections: System.Windows.Forms.UserControl
Chapter{ 7 - Callback Interfaces, Delegates, and Events
Chapter//8 State- AdvanceddataC#. Type Construction Techniques
Part Threeprivate- ProgrammingSystemwith.ComponentModel.NET Assemblies.IContainer components;
private AnimFrames currFrame = AnimFrames.Lemon1;
Chapter 9 - Understanding .NET Assemblies
private AnimFrames currMaxFrame = AnimFrames.Lemon3;
Chapter 10 - Processes, AppDomains, Contexts, and Threads
private bool IsAnim;
Chapter 11 - Type Reflection, Late Binding, and Attribute-Based Programming
private int currSp = 50;
Part Four - Leveraging the .NET Libraries
private System.Windows.Forms.PictureBox pictureBox;
Chapter 12 - Object Serialization and the .NET Remoting Layer
private int maxSp = 100;
Chapter 13 - Building a Better Window (Introducing Windows Forms)
private System.Windows.Forms.Timer animTimer;
Chapter 14 - A Better Painting Framework (GDI+) private string carPetName= "NoName";
Chapter 15 - Programming with Windows Forms Controls
private Rectangle bottomRect = new Rectangle();
Chapter 16 - The System.IO Namespace
private System.Windows.Forms.ImageList theImageList;
Chapter 17 - Data Access with ADO.NET
...
Part Five - Web Applications and XML Web Services
}
Chapter 18 - ASP.NET Web Pages and Web Controls
Chapter 19 - ASP.NET Web Applications
ChapterAs you20can- see,XML Webyou haveServicesdata points that represent the current and maximum speed, the pet name of the Indexautomobile, and two members of type AnimFrame. The currFrame variable is used to specify which
member of the ImageList is to be rendered. The currMaxFrame variable is used to mark the current upper
List of Figures
limit in the ImageList (recall that the CarControl loops through three to five images based on the current
List of Tables
speed). The IsAnim data point is used to determine if the car is currently in animation mode. Finally, you have a Rectangle member (bottomRect) that is used to represent the bottom region of the CarControl type. Later, you render the pet name of the automobile into this piece of screen real estate.
To divide the CarControl into two rectangular regions, create a private helper function named StretchBox(). The role of this member is to calculate the correct size of the bottomRect member as well as to ensure that the PictureBox widget is stretched out over the upper two thirds (or so) of the CarControl type.
private void StretchBox()
{
// Configure picture box.
pictureBox.Top = 0;
pictureBox.Left = 0;
pictureBox.Height = this.Height - 50;

pictureBox.Width = this.Width;
C# and the .NET Platform, Second Edition pictureBox.Image =
by Andrew Troelsen ISBN:1590590554 theImageList.Images[(int)AnimFrames.Lemon1];
Apress © 2003 (1200 pages)
// Figure out size of bottom rect.
This comprehensive text starts with a brief overview of the bottomRect.X = 0;
C# language and then quickly moves to key technical and bottomRect.Y = this.Height - 50;
architectural issues for .NET developers. bottomRect.Height = this.Height - pictureBox.Height;
bottomRect.Width = this.Width;
}
Table of Contents
C# and the .NET Platform, Second Edition
Introduction
Once you have carved out the dimensions of each rectangle, call StretchBox() from the default
Part One - Introducing C# and the .NET Platform
constructor.
Chapter 1 - The Philosophy of .NET
Chapter 2 - Building C# Applications
Defining the Custom Events
Part Two - The C# Programming Language
Chapter 3 - C# Language Fundamentals
The CarControl type supports two events that are fired back to the host Form based on the current speed
Chapter 4 |
- Object-Oriented Programming with C# |
|
of the automobile. The first event, AboutToBlow, is sent out when the CarControl's speed approaches the |
||
Chapter 5 |
- Exceptions and Object Lifetime |
|
upper limit. BlewUp is sent to the container when the current speed is greater than the allowed maximum. |
||
Chapter 6 |
- Int rfaces and Collections |
|
Each of these events leverages a custom delegate (CarEventHandler) that can hold the address of any |
||
Chapter 7 |
- Callback Interfaces, |
and Events |
method returning void and takingDelegates,single System.String as its sole parameter. You'll fire these events in
Chapterjust a moment,8 - Advancedbut forC#theTypetimeConstructionbeing, add theT chniquesfollowing members to the public sector of the CarControl:
Part Three - Programming with .NET Assemblies
Chapter 9 - Understanding .NET Assemblies
// Car events / custom delegate.
Chapter 10 - Processes, AppDomains, Contexts, and Threads
publicdelegate void CarEventHandler(string msg);
Chapter 11 - Type Reflection, Late Binding, and Attribute-Based Programming publicevent CarEventHandler AboutToBlow;
PartpublicFour event- L veragingCarEventHandlerthe .NET LibrariesBlewUp;
Chapter 12 - Object Serialization and the .NET Remoting Layer
Chapter 13 - Building a Better Window (Introducing Windows Forms)
Chapter 14 - A Better Painting Framework (GDI+)
Defining the Custom Properties
Chapter 15 - Programming with Windows Forms Controls
ChapterLike any16class- Thetype,Systemcustom.IO Namespacecontrols may define a set of properties to allow the outside world to interact
Chapterwith the17state- Dataof theAccesswidgetwith. ForADOyour.NETcurrent purposes, you are only interested in defining three properties.
PartFirst,Fiveyou- WebhaveApplicationsAnim. This propertyand XMLenablesWeb Servicesor disables the Timer type:
Chapter 18 - ASP.NET Web Pages and Web Controls
Chapter 19 - ASP.NET Web Applications
// Used to configure the internal Timer type.
Chapter 20 - XML Web Services
public bool Anim
Index{
List of Figuresget {return IsAnim;}
List of Tablesset
{
IsAnim = value; animTimer.Enabled = IsAnim;
}
}
The PetName property is as you would expect, and requires no comment. Do notice, however, that when the user sets the pet name, you make a call to Invalidate() to render the name of the CarControl into the bottom rectangular area of the widget (you do this step in just a moment):
// Configure pet name.
public string PetName
{
get{return carPetName;}


ControllingC#theandAnimationthe .NET Platform, Second Edition
by Andrew Troelsen |
ISBN:1590590554 |
The next detail to attend to is ensuring that the Timer type advances the current frame to render within the
Apress © 2003 (1200 pages)
PictureBox. Again, recall that the number of frames to loop through depends on the current speed of the
This comprehensive text starts with a brief overview of the
automobile. You C#onlylanguagewant to botherand thenadjustingq ickly movesthe imageto keyin thetechnPictureBoxal and if the Anim property has been set to true. Beginarchitecturalby handlingissuesthe Tickforevent.NET developersfor the Timer. type, and flesh out the details as follows:
private void animTimer_Tick(object sender, System.EventArgs e)
Table of Contents
{
C# and the .NET Platform, Second Edition if(IsAnim)
Introduction pictureBox.Image = theImageList.Images[(int)currFrame];
Part One - Introducing C# and the .NET Platform
// Bump frame.
Chapter 1 - The Philosophy of .NET
string s = Enum.Format(typeof(AnimFrames), currFrame, "D");
Chapter 2 - Building C# Applications int i = int.Parse(s);
Part Two - The C# Programming Language
int nextFrame = i + 1;
Chapter 3 - C# Language Fundamentals
currFrame = (AnimFrames)nextFrame;
Chapter 4 - Object-Oriented currMaxFrames)Prog amming with C# if (currFrame >
Chapter 5 -currFrameExceptions and= ObjectAnimFramesLifetime.Lemon1;
Chapter} 6 - Interfaces and Collections
Chapter 7 - Callback Interfaces, Delegates, and Events
Chapter 8 - Advanced C# Type Construction Techniques
Part Three - Programming with .NET Assemblies
Chapter 9 - Understanding .NET Assemblies
Chapter 10 - Processes, AppDomains, Contexts, and Threads
Chapter 11 - Type Reflection, Late Binding, and Attribute-Based Programming
Part Four - Leveraging the .NET Libraries
Chapter 12 - Object Serialization and the .NET Remoting Layer
Chapter 13 - Building a Better Window (Introducing Windows Forms)
Chapter 14 - A Better Painting Framework (GDI+)
Chapter 15 - Programming with Windows Forms Controls
Chapter 16 - The System.IO Namespace
Chapter 17 - Data Access with ADO.NET
Part Five - Web Applications and XML Web Services
Chapter 18 - ASP.NET Web Pages and Web Controls
Chapter 19 - ASP.NET Web Applications
Chapter 20 - XML Web Services
Index
List of Figures
List of Tables

Rendering C#theandPettheName. ET Platform, Second Edition
by Andrew Troelsen |
ISBN:1590590554 |
Before you can take your control out for a spin, you have one final detail to attend to: displaying the car's
Apress © 2003 (1200 pages)
moniker. To do this, handle the Paint event for your CarControl, and within the handler, render the
This comprehensive text starts with a brief overview of the
CarControl's pet C#namelanguageinto theandbottomhen quicklyrectangularmovesregionto keyoftechnicalthe clientandarea:
architectural issues for .NET developers.
private void CarControl_Paint(object sender,
System.Windows.Forms.PaintEventArgs e)
Table of Contents
{
C# and the .NET Platform, Second Edition
// Render the petname on the bottom of the control.
Introduction
Graphics g = e.Graphics;
Part One - Introducing C# and the .NET Platform
g.FillRectangle(Brushes.GreenYellow, bottomRect);
Chapter 1 - The Philosophy of .NET
g.DrawString(PetName, new Font("Times New Roman", 15),
Chapter 2 - Building C# Applications
Brushes.Black, bottomRect);
Part Two - The C# Programming Language
}
Chapter 3 - C# Language Fundamentals
Chapter 4 - Object-Oriented Programming with C#
At this point, the initial crack at the CarControl is complete. Go ahead and build your project.
Chapter 5 - Exceptions and Object Lifetime Chapter 6 - Interfaces and Collections
Chapter 7 - Callback Interfaces, Delegates, and Events
Chapter 8 - Advanced C# Type Construction Techniques
Part Three - Programming with .NET Assemblies
Chapter 9 - Understanding .NET Assemblies
Chapter 10 - Processes, AppDomains, Contexts, and Threads
Chapter 11 - Type Reflection, Late Binding, and Attribute-Based Programming
Part Four - Leveraging the .NET Libraries
Chapter 12 - Object Serialization and the .NET Remoting Layer
Chapter 13 - Building a Better Window (Introducing Windows Forms)
Chapter 14 - A Better Painting Framework (GDI+)
Chapter 15 - Programming with Windows Forms Controls
Chapter 16 - The System.IO Namespace
Chapter 17 - Data Access with ADO.NET
Part Five - Web Applications and XML Web Services
Chapter 18 - ASP.NET Web Pages and Web Controls
Chapter 19 - ASP.NET Web Applications
Chapter 20 - XML Web Services
Index
List of Figures
List of Tables

C# and the .NET Platform, Second Edition
private void mainForm_Load(object sender, System.EventArgs e)
{ |
by Andrew Troelsen |
ISBN:1590590554 |
Apress © 2003 (1200 pages) |
||
|
carControl1.Anim = true; |
|
|
lblCurrSpThis.Textcomprehensive= |
text starts with a brief overview of the |
|
C# language and then quickly moves to key technical and |
|
|
string.Format("Speed is: {0}", carControl1.Speed.ToString()); |
|
architectural issues for .NET developers.
}
Table of Contents
The final aspect of this client-side design is to capture the incoming events from the CarControl widget.
C# and the .NET Platform, Second Edition
Like all other Windows Forms GUI types, you are able to handle events using the Properties window.
Introduction
Handle the AboutToBlow and BlewUp events, and write some informative message to the output Label:
Part One - Introducing C# and the .NET Platform
Chapter 1 - The Philosophy of .NET
// Client-side event handlers.
Chapter 2 - Building C# Applications
private void carControl1_AboutToBlow(string msg)
Part Two - The C# Programming Language
{
Chapter 3 - C# Language Fundamentals
lblEventMsg.Text = msg;
Chapter 4 - Object-Oriented Programming with C#
}
Chapter 5 - Exceptions and Object Lifetime
private void carControl1_BlewUp(string msg)
Chapter{ 6 - Interfaces and Collections
ChapterlblEventMsg7 - Callback Int.Textrfaces,= Delegates,msg; and Events
Chapter} 8 - Advanced C# Type Construction Techniques
Part Three - Programming with .NET Assemblies
Chapter 9 - Understanding .NET Assemblies
At this point, you are able to run your client application and interact with the CarControl. As you can see,
Chapter 10 - Processes, AppDomains, Contexts, and Threads
building and using custom controls is a fairly straight-forward task, given what you already know about
Chapter 11 - Type Reflection, Late Binding, and Attribute-Based Programming
OOP, GDI+, and Windows Forms.
Part Four - Leveraging the .NET Libraries
Chapter 12 - Object Serialization and the .NET Remoting Layer
While you do have enough information to continue exploring the process of .NET Windows Control
Chapter 13 - Building a Better Window (Introducing Windows Forms)
development, there is one additional programmatic aspect to contend with: design time functionality. ChapterBefore14I describe- A Bettexactlyr PaintingwhatFramewthis boilsrk (GDI+)down to, you need to understand the role of a key design time-
Chapcentricer 15namespace- Programming. with Windows Forms Controls
Chapter 16 - The System.IO Namespace
Chapter 17 - Data Access with ADO.NET
Part Five - Web Applications and XML Web Services
Chapter 18 - ASP.NET Web Pages and Web Controls
Chapter 19 - ASP.NET Web Applications
Chapter 20 - XML Web Services
Index
List of Figures
List of Tables
Select MembersC# and theof.theNET Platform,SystemSecond.ComponentModelEditi Namespace
by Andrew Troelsen |
ISBN:1590590554 |
The System.ComponentModelApress © 2003 (1200namespacepages) |
defines a number of such types that allow you to describe how |
your custom controls and components should display themselves at design time. For example, you can
This comprehensive text starts with a brief overview of the
opt to supply a textualC# languagedescriptionand oftheneachquicklyproperty,movesdefineto k yatechnicaldefault event,and or group related members into a custom categoryarchitectural(for displayisspurposeses for .NETwithindevelopersthe Properties. window). When you are interested in making
the sorts of modifications previously mentioned, you will want to make use of the following core attributes (Table 15-18).
Table of Contents
C# and the .NET Platform, Second Edition |
|
|
|
|||||||
|
Table 15-18: Select Members of System.ComponentModel |
|||||||||
|
|
Introduction |
|
AppliedPlatform |
|
|
Meaning in Life |
|
|
|
PartSystem.ComponentModelOne - Introducing C# and the .NET |
|
|
|
|
||||||
|
ChapterAttribute1 - The Philosophy of .NET |
to |
|
|
|
|
|
|||
|
|
|
|
|
|
|
|
|
|
|
|
|
Chapter 2 |
- Building C# Applications |
|
Properties |
|
|
Specifies whether a property or an event |
|
|
|
|
BrowsableAttribute |
|
|
|
|
|
|||
Part Two - The C# Programming Language |
|
|
should be displayed in the property browser. |
|
|
|||||
|
|
|
|
|
and events |
|
|
|
|
|
Chapter 3 |
- C# Language Fundamentals |
|
|
By default, all custom properties and events |
|
|
||||
Chapter 4 |
- Object-Oriented Programming with C# |
|
|
can be browsed. |
|
|
||||
|
|
|
|
|
|
|
|
|
||
|
|
Chapter 5 |
- Exceptions and Object Lifetime |
|
|
Specifies the name of the category in which |
|
|
||
|
|
CategoryAttribute |
Properties |
|
|
|
|
|||
|
Chapter 6 |
- Interfaces and Collections |
and events |
|
|
to group a property or event. |
|
|
||
|
|
|
|
|
|
|
|
|
||
|
Chapter 7 |
- Callback Interfaces, Delegates, and Events |
|
|
|
|
|
|||
|
|
|
|
|
|
|||||
|
|
|
|
|
|
|
|
|
|
|
|
Chapter 8 |
- Advanced C# Type Construction Techniques |
|
|
Defines a small block of text to be displayed |
|
|
|||
|
|
DescriptionAttribute |
Properties |
|
|
|
|
|||
Part Three - Programming with .NET Assemblies |
|
|
at the bottom of the property browser when |
|
|
|||||
|
|
|
|
|
and events |
|
|
|
|
|
Chapter 9 |
- Understanding .NET Assemblies |
|
|
the user selects a property or event. |
|
|
||||
|
|
|
|
|
|
|
|
|||
|
|
Chapter 10 |
- Processes, AppDomains, |
|
Contexts, and Threads |
|
|
|||
|
|
DefaultPropertyAttribute |
|
Properties |
Specifies the default property for the |
|
|
|||
|
Chapter 11 |
- Type Reflection, Late Binding, and Attribute-Based Programming |
|
|
||||||
Part Four - Leveraging the .NET Libraries |
component. This property is selected in the |
|
|
|||||||
property browser when a user clicks the |
|
|
||||||||
Chapter 12 |
|
|
|
|
|
|
|
|||
- Object Serialization and the .NET Remoting Layer |
|
|
||||||||
|
|
|
|
|
|
|
|
control. |
|
|
|
Chapter 13 |
- Building a Better Window |
|
(Introducing Windows Forms) |
|
|
||||
|
|
|
|
|||||||
|
ChapterDefaultValueAttribute14 - A Better Painting FrameworkProperties(GDI+) |
Sets a simple default value for a property that |
|
|
||||||
|
Chapter 15 |
- Programming with Windows Forms Controlswill be applied when the control is reset to its |
|
|
||||||
|
Chapter 16 |
- The System.IO Namespace |
|
|
|
default state. |
|
|
||
|
|
|
|
|
|
|||||
|
|
Chapter 17 |
- Data Acc ss with ADO.NET |
|
|
|
|
Specifies that a property may be localized. |
|
|
|
|
LocalizableAttribute |
|
Properties |
|
|
|
|
||
Part Five - Web Applications and XML |
|
Web Services |
|
|
Any properties that have this attribute are |
|
|
|||
Chapter 18 |
- ASP.NET Web Pages and |
|
Web Controls |
|
|
automatically persisted into the resources file |
|
|
||
Chapter 19 |
- ASP.NET Web Applications |
|
|
|
|
when a user chooses to localize a Form. |
|
|
||
|
|
|
|
|
|
|
|
|
|
|
|
|
Chapter 20 |
- XML Web Services |
|
Events |
|
|
Specifies the default event for the |
|
|
|
|
DefaultEventAttribute |
|
|
|
|
|
|||
Index |
|
|
|
|
|
component. When a user double-clicks the |
|
|
||
List of Figures |
|
|
|
|
|
|
||||
|
|
|
|
control type, stub code is automatically |
|
|
||||
List of Tables |
|
|
|
|
|
|
||||
|
|
|
|
written for the default event. |
|
|
||||
|
|
|
|
|
|
|
|
|
|
|
|
|
|
|
|
|
|
|
|
|
|

EnhancingC#theandDesignthe .NET Platform,Time AppearanceSecond Edition of CarControl
by Andrew Troelsen |
ISBN:1590590554 |
To illustrate the use of some of these new attributes, assume you want to create a custom category
Apress © 2003 (1200 pages)
(called "Car Configuration") to which each property and event of the CarControl belong. Also, let's supply
This comprehensive text starts with a brief overview of the
a friendly descriptionC# langufor eachge andmemberthen quicklyand defaultmovesvalueto keyfortechnicaleach propertyand . To do so, simply update each of the properties andrchitecturalevents ofissuthesCarControlfor .NET developerstype to support. the [Category], [DefaultValue], and [Description] attributes. For example:
Table of Contents
using System.ComponentModel;
C# and the .NET Platform, Second Edition
...
Introduction
public class CarControl : System.Windows.Forms.UserControl
Part One - Introducing C# and the .NET Platform
{
Chapter 1 - The Philosophy of .NET
...
Chapter 2 - Building C# Applications
[Category("Car Configuration"),
Part Two - The C# Programming Language
Description("Sent when the car is approaching terminal speed.")]
Chapter 3 - C# Language Fundamentals
public event CarEventHandler AboutToBlow;
Chapter 4 - Object-Oriented Programming with C#
...
Chapter[Category("Car5 - Exceptions andConfiguration"),Object Lifetime
ChapterDescription("Pet6 - Interfaces and Collectionsname for your auto."),
ChapterDefaultValue("No7 - Callb ck Interfaces,Name")]Delegates, and Events
public string PetName {...}
Chapter 8 - Advanced C# Type Construction Techniques
}
Part Three - Programming with .NET Assemblies
Chapter 9 - Understanding .NET Assemblies
Chapter 10 - Processes, AppDomains, Contexts, and Threads
Now, let me make a comment on what it means to assign a default value to a property, because I can guarantee you it is not what you would (naturally) assume. Simply put, the [DefaultValue] attribute does
not ensure that the underlying value of the data point wrapped by a given property will be automatically
Chapter 12 - Object Serialization and the .NET Remoting Layer
initialized to the default value. Thus, although you specify a default value of "No Name" to the PetName
Chapter 13 - Building a Better Window (Introducing Windows Forms)
property, the carPetName member variable will not be set to "No Name" unless you do so via the type's
Chapter 14 - A Better Painting Framework (GDI+) constructor or via member initialization syntax:
Chapter 15 - Programming with Windows Forms Controls
Chapter 16 - The System.IO Namespace
private string carPetName= "NoName";
Chapter 17 - Data Access with ADO.NET
Part Five - Web Applications and XML Web Services
ChapterRather,18the- [DefaultValue]ASP.NET Web Pattributeges and comesWeb Cointotrolsplay when the programmer "resets" the value of a given
Chaptpropertyr 19using- ASPthe.NETPropertiesWeb Applicationswindow. To reset a property using VS .NET, select the property of interest,
Chapright-erclick20 the- XMLdescriptionWeb Servicespane, and click "Reset". Also note the description appears in the lower pane of
IndthexProperties window (Figure 15-29).
List of Figures
List of


toolbox bitmap image. Currently, when the user selects the CarControl, the VS .NET IDE will make show
C# and the .NET Platform, Second Edition
this type on the ToolBox using the default "gear" icon. If you wish to specify a custom image, your first step
by Andrew Troelsen ISBN:1590590554
is to insert a new *.bmp file into your project (CarControl.bmp) that is configured to be 16×16 pixels in size
Apress © 2003 (1200 pages)
(established via the Width and Height properties).
This comprehensive text starts with a brief overview of the
Once you have createdC# languagethe imageand thenas youq icklysee movesfit (andtosetkeythetechnicalBuild Actionand value to Embedded Resource to
architectural issues for .NET developers.
ensure the image data is contained within the assembly), your final task is to make use of the [ToolboxBitmap] attribute, which is applied at the type level. The first argument is the type information for
the control itself, while the second argument is the friendly name of the *.bmp file.
Table of Contents
C# and the .NET Platform, Second Edition
[ToolboxBitmap(typeof(CarControl), "CarControl")]
Introduction
[DefaultEvent("BlewUp"), DefaultProperty("Anim")]
Part One - Introducing C# and the .NET Platform
public class CarControl : System.Windows.Forms.UserControl
Chapter 1 - The Philosophy of .NET
{...}
Chapter 2 - Building C# Applications
Part Two - The C# Programming Language
ChaptOncer 3 - C# Language Fundamentals
you do so, you will find that when the programmer adds the widget to the toolbox, your custom
Chapterimage will4 -beObjectdisplayed-Orientedon theProgrammingVS .NET Toolboxwith C#.
Chapter 5 - Exceptions and Object Lifetime
So, that wraps up our examination of the process of building custom Windows Forms controls. Obviously,
Chapter 6 - Interfaces and Collections
complete coverage of this topic (especially programming for design time support) would require a book all
Chapter 7 - Callback Interfaces, Delegates, and Events
of its own. If you are interested in additional details regarding developing custom Windows Forms controls,
Chapter 8 - Advanced C# Type Construction Techniques
pick up a copy of User Interfaces in C#: Windows Forms and Custom Controls (MacDonald, Apress
Part Three - Programming with .NET Assemblies
2002).
Chapter 9 - Understanding .NET Assemblies
Chapter 10 - Processes, AppDomains, Contexts, and Threads
SOURCE The CarControl and CarControlTestForm projects are included under the Chapter 15
Chapter 11 - Type Reflection, Late Binding, and Attribute-Based Programming
CODE directory.
Part Four - Leveraging the .NET Libraries
Chapter 12 - Object Serialization and the .NET Remoting Layer
Chapter 13 - Building a Better Window (Introducing Windows Forms)
Chapter 14 - A Better Painting Framework (GDI+)
Chapter 15 - Programming with Windows Forms Controls
Chapter 16 - The System.IO Namespace
Chapter 17 - Data Access with ADO.NET
Part Five - Web Applications and XML Web Services
Chapter 18 - ASP.NET Web Pages and Web Controls
Chapter 19 - ASP.NET Web Applications
Chapter 20 - XML Web Services
Index
List of Figures
List of Tables