

Beginning Visual C++ 2005 (2006) [eng]-2
.pdfChapter 1
|
Events: |
|
|
Keyboard |
Press Left |
Press Right |
|
Mouse |
Mouse |
||
Input |
|||
Button |
Button |
||
|
WINDOWS
Process |
Process |
Process |
|
Right |
|||
Keyboard |
Left Mouse |
||
Mouse |
|||
Input |
Button |
||
Button |
|||
|
|
Program Data
Your Program
Figure 1-2
What Is the Integrated Development
Environment?
The Integrated Development Environment (IDE) that comes with Visual C++ 2005 is a completely selfcontained environment for creating, compiling, linking, and testing your C++ programs. It also happens to be a great environment in which to learn C++ (particularly when combined with a great book).
Visual C++ 2005 incorporates a range of fully integrated tools designed to make the whole process of writing C++ programs easy. You will see something of these in this chapter, but rather than grind
through a boring litany of features and options in the abstract, first take a look at the basics to get a view of how the IDE works and then pick up the rest in context as you go along.
8

Programming with Visual C++ 2005
Components of the System
The fundamental parts of Visual C++ 2005, provided as part of the IDE, are the editor, the compiler, the linker, and the libraries. These are the basic tools that are essential to writing and executing a C++ program. Their functions are as follows.
The Editor
The editor provides an interactive environment for you to create and edit C++ source code. As well as the usual facilities, such as cut and paste, which you are certainly already familiar with, the editor also provides color cues to differentiate between various language elements. The editor automatically recognizes fundamental words in the C++ language and assigns a color to them according to what they are. This not only helps to make your code more readable but also provides a clear indicator of when you make errors in keying such words.
The Compiler
The compiler converts your source code into object code, and detects and reports errors in the compilation process. The compiler can detect a wide range of errors that are due to invalid or unrecognized program code, as well as structural errors, where, for example, part of a program can never be executed.
The object code output from the compiler is stored in files called object files. There are two types of object code that the compiler produces. These object codes usually have names with the extension .obj.
The Linker
The linker combines the various modules generated by the compiler from source code files, adds required code modules from program libraries supplied as part of C++, and welds everything into an executable whole. The linker can also detect and report errors — for example, if part of your program is missing or a non-existent library component is referenced.
The Libraries
A library is simply a collection of pre-written routines that supports and extends the C++ language by providing standard professionally produced code units that you can incorporate into your programs to carry out common operations. The operations that are implemented by routines in the various libraries provided by Visual C++ 2005 greatly enhance productivity by saving you the effort of writing and testing the code for such operations yourself. I have already mentioned the .NET Framework library, and there are a number of others — too many to enumerate here — but I’ll mention the most important ones.
The Standard C++ Library defines a basic set of routines common to all ISO/ANSI C++ compilers. It contains a wide range of routines including numerical functions such as calculating square roots and evaluating trigonometrical functions, character and string processing routines such as classifying characters and comparing character strings, and many others. You’ll get to know quite a number of these as you develop your knowledge of ISO/ANSI C++. There are also libraries that support the C++/CLI extensions to ISO/ANSI C++.
Native window-based applications are supported by a library called the Microsoft Foundation Classes (MFC). The MFC greatly reduces the effort needed to build the graphical user interface for an application. You’ll see a lot more of the MFC when you finish exploring the nuances of the C++ language. Another library contains a set of facilities called Windows Forms that are roughly the equivalent of the MFC for window-based applications that executed with the .NET Framework. You’ll be seeing how you make use of Windows Forms to develop applications, too.
9

Chapter 1
Using the IDE
All program development and execution in this book is performed from within the IDE. When you start Visual C++ 2005, notice an application window similar to that shown in Figure 1-3.
Figure 1-3
The window to the left in Figure 1-3 is the Solution Explorer window, the top-right window presently showing the Start page is the Editor window, and the window at the bottom is the Output window. The Solution Explorer window enables you to navigate through your program files and display their contents in the Editor window and to add new files to your program. The Solution Explorer window has up to three additional tabs (only two are shown in Figure 1-3) that display Class View, Resource View, and Property Manager for your application, and you can select which tabs are to be displayed from the View menu. The Editor window is where you enter and modify source code and other components of your application. The Output window displays messages that result from compiling and linking your program.
Toolbar Options
You can choose which toolbars are displayed in your Visual C++ window by right-clicking in the toolbar area. A pop-up menu with a list of toolbars (Figure 1-4) appears, and the toolbars that are currently displayed have check marks alongside.
10

Programming with Visual C++ 2005
Figure 1-4
This is where you decide which toolbars are visible at any one time. You can make your set of toolbars the same as those shown in Figure 1-3 by making sure the Build, Class Designer, Debug, Standard, and View Designer menu items are checked. Clicking in the gray area to the left of a toolbar checks it if it unchecked and results in it being displayed; clicking a check mark hides the corresponding toolbar.
You don’t need to clutter up the application window with all the toolbars you think you might need at some time. Some toolbars appear automatically when required, so you’ll probably find that the default toolbar selections are perfectly adequate most of the time. As you develop your applications, from time to time you might think it would be more convenient to have access to toolbars that aren’t displayed.
You can change the set of toolbars that are visible whenever it suits you by right-clicking in the toolbar area and choosing from the context menu.
11
Chapter 1
Similar to many other Windows applications, the toolbars that make up Visual C++ 2005 come complete with tooltips. Just let the mouse pointer linger over a toolbar button for a second or two and a white label displays the function of that button.
Dockable Toolbars
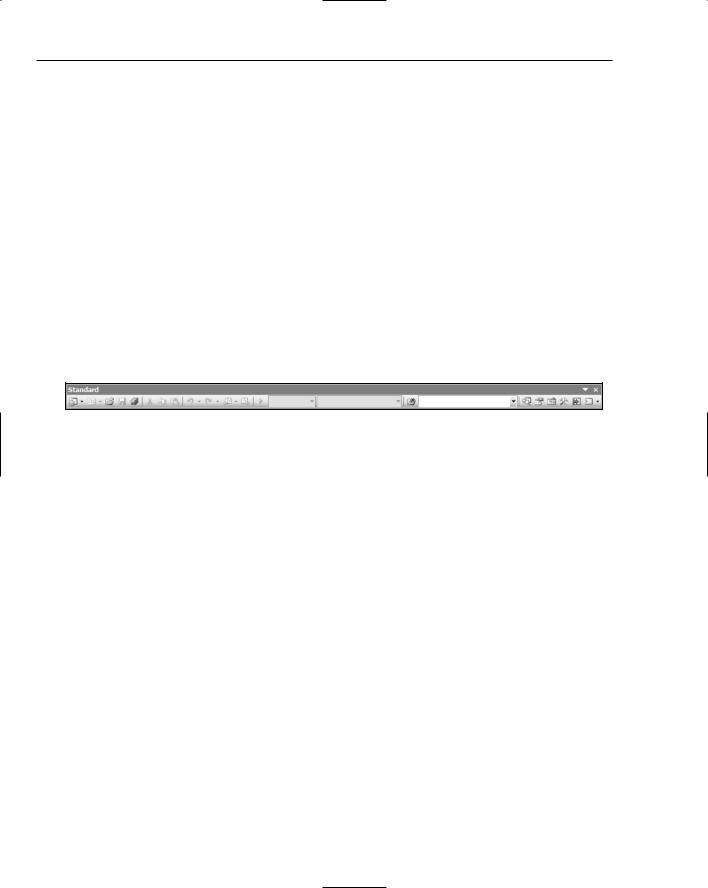
A dockable toolbar is one that you can drag around with the mouse to position at a convenient place in the window. When it is placed in any of the four borders of the application, it is said to be docked and looks similar to the toolbars you see at the top of the application window. The toolbar on the upper line of toolbar buttons that contains the disk icons and the text box to the right of a pair of binoculars is the Standard toolbar. You can drag this away from the toolbar by placing the cursor on it and dragging it with the mouse while you hold down the left mouse button. It then appears as a separate window you can position anywhere.
If you drag any dockable toolbar away from its docked position, it looks like the Standard toolbar you see in Figure 1-5, enclosed in a little window — with a different caption. In this state, it is called a floating toolbar. All the toolbars that you see in Figure 1-3 are dockable and can be floating, so you can experiment with dragging any of them around. You can position them in docked positions where they revert to their normal toolbar appearance. You can dock a dockable toolbar at any side of the main window.
Figure 1-5
You’ll become familiar with many of the toolbar icons that Visual C++ 2005 uses from other Windows applications, but you may not appreciate exactly what these icons do in the context of Visual C++, so I’ll describe them as we use them.
Because you’ll use a new project for every program you develop, looking at what exactly a project is and understanding how the mechanism for defining a project works is a good place to start finding out about Visual C++ 2005.
Documentation
There will be plenty of occasions when you’ll want to find out more information about Visual C++ 2005. The Microsoft Development Network (MSDN) Library provides comprehensive reference material on all the capabilities on Visual C++ 2005 and more besides. When you install Visual C++ 2005 onto your machine, there is an option to install part or all of the MSDN documentation. If you have the disk space available I strongly recommend that you install the MSDN Library.
12

Programming with Visual C++ 2005
Press the F1 function to browse the MSDN Library. The Help menu also provides various routes into the documentation. As well as offering reference documentation, the MSDN Library is a useful tool when dealing with errors in your code, as you’ll see later in this chapter.
Projects and Solutions
A project is a container for all the things that make up a program of some kind — it might be a console program, a window-based program, or some other kind of program, and it usually consists of one or more source files containing your code plus possibly other files containing auxiliary data. All the files for a project are stored in the project folder and detailed information about the project is stored in an XML file with the extension .vcproj that is also in the project folder. The project folder also contains other folders that are used to store the output from compiling and linking your project.
The idea of a solution is expressed by its name, in that it is a mechanism for bringing together all the programs and other resources that represent a solution to a particular data processing problem. For example, a distributed order entry system for a business operation might be composed of several different programs that could each be developed as a project within a single solution; therefore, a solution is a folder in which all the information relating to one or more projects is stored, so one or more project folders are subfolders of the solution folder. Information about the projects in a solution is stored in two files with the extensions .sln and .suo. When you create a project, a new solution is created automatically unless you elect to add the project to an existing solution.
When you create a project along with a solution, you can add further projects to the same solution. You can add any kind of project to an existing solution, but you would usually add only a project that was related in some way to the existing project or projects in the solution. Generally, unless you have a good reason to do otherwise, each of your projects should have its own solution. Each example you create with this book will be a single project within its own solution.
Defining a Project
The first step in writing a Visual C++ 2005 program is to create a project for it using the File > New > Project menu option from the main menu or you can press Ctrl+Shift+N. As well as containing files that define all the code and any other data that goes to make up your program, the project XML file in the project folder also records the Visual C++ 2005 options you’re using. Although you don’t need to concern yourself with the project file — it is entirely maintained by the IDE — you can browse it if you want to see what the contents are, but take care not to modify it accidentally.
That’s enough introductory stuff for the moment. It’s time to get your hands dirty.
Try It Out |
Creating a Project for a Win32 Console Application |
You’ll now take a look at creating a project for a console application. First select File > New > Project to bring up the New Project dialog box, shown in Figure 1-6.
13

Chapter 1
Figure 1-6
The left pane in the New Project dialog box displays the types of projects you can create; in this case, click Win32. This also identifies an application wizard that creates the initial contents for the project. The right pane displays a list of templates available for the project type you have selected in the left pane. The template you select is used by the application wizard when creating the files that make up the project. In the next dialog box, you have an opportunity to customize the files that are created when you click the OK button in this dialog box. For most of the type/template options, a basic set of program source modules are created automatically.
You can now enter a suitable name for your project by typing into the Name: edit box — for example, you could call this one Ex1_01, or you can choose your own project name. Visual C++ 2005 supports long file names, so you have a lot of flexibility. The name of the solution folder appears in the bottom edit box and, by default, the solution folder has the came name as the project. You can change this if you want. The dialog box also allows you to modify the location for the solution that contains your project — this appears in the Location: edit box. If you simply enter a name for your project, the solution folder is automatically set to a folder with that name, with the path shown in the Location: edit box. By default the solution folder is created for you if it doesn’t already exist. If you want to specify a different path for the solution folder, just enter it in the Location: edit box. Alternatively, you can use the Browse button to select another path for your solution. Clicking the OK button displays the Win32 Application Wizard dialog box shown in Figure 1-7.
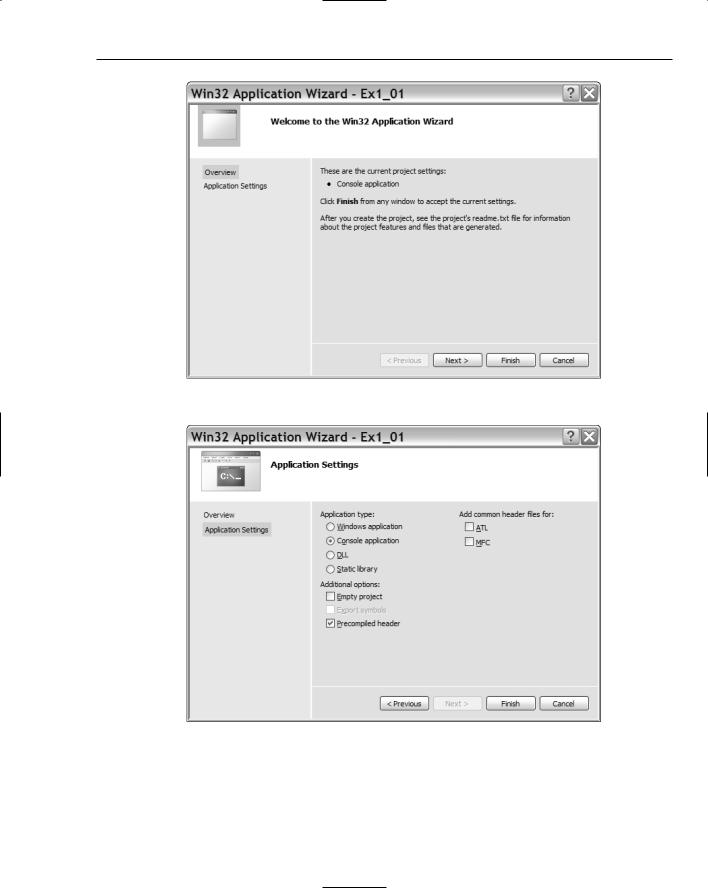
This dialog box explains the settings currently in effect. If you click the Finish button, the wizard creates all the project files based on this. In this case you can click Applications Settings on the left to display the Application Settings page of the wizard shown in Figure 1-8.
14
Programming with Visual C++ 2005
Figure 1-7
Figure 1-8
The Application Settings page allows you to choose options that you want to apply to the project. For most of the projects you’ll be creating when you are learning the C++ language, you select the Empty project checkbox, but here you can leave things as they are and click the Finish button. The application wizard then creates the project with all the default files.
15

Chapter 1
The project folder will have the name that you supplied as the project name and will hold all the files making up the project definition. If you didn’t change it, the solution folder has the same name as the project folder and contains the project folder plus the files defining the contents of the solution. If you use Windows Explorer to inspect the contents of the solution folder, you’ll see that it contains three files:
A file with the extension .sln that records information about the projects in the solution.
A file with the extension .suo in which user options that apply to the solution will be recorded.
A file with the extension .ncb that records data about Intellisense for the solution. Intellisense is the facility that provides auto-completion and prompting for code in the Editor window as you enter it.
If you use Windows Explorer to look in the project folder, notice there are six files initially, including a file with the name ReadMe.txt that contains a summary of the contents of the files that have been created for the project. The one file that ReadMe.txt may not mention is a file with a compound name of the form Ex1_01.vcproj.ComputerName.UserName.user used to store options you set for the project.
The project you have created will automatically open in Visual C++ 2005 with the left pane as in Figure 1-9. I have increased the width of this pane so that you can see the complete names on the tabs.
Figure 1-9
The Solution Explorer tab presents a view of all the projects in the current solution and the files they contains — here there is just one project of course. You can display the contents of any file as an additional tab in the Editor pane just by double-clicking in name in the Solution Explorer tab. In the edit pane you can switch instantly between any of the files that have been displayed just by clicking on the appropriate tab.
16

Programming with Visual C++ 2005
The Class View tab displays the classes defined in your project and also shows the contents of each class. You don’t have any classes in this application, so the view is empty. When we discuss classes, you will see that you can use the Class View tab to move around the code relating to the definition and implementation of all your application classes quickly and easily.
The Property Manager tab shows the properties that have been set for the Debug and Release versions of your project. I’ll explain these versions a little later in this chapter. You can change any of the properties shown by right-clicking a property and selecting Properties from the context menu; this displays a dialog box where you can set the project property. You can also press Alt+F7 to display the properties dialog box at any time; I’ll also discuss this in more detail when we go into the Debug and Release versions of a program.
The Resource View shows the dialog boxes, icons, menus toolbars, and other resources that are used by the program. Because this is a console program, no resources are used; however, when you start writing Windows applications, you’ll see a lot of things here. Through this tab you can edit or add to the resources available to the project.
Like most elements of the Visual C++ 2005 IDE, the Solution Explorer and other tabs provide contextsensitive pop-up menus when you right-click items displayed in the tab and in some cases in the empty space in the tab, too. If you find that the Solution Explorer pane gets in your way when writing code, you can hide it by clicking the Autohide icon. To redisplay it, click the name tab on the left of the IDE window.
Modifying the Source Code
The Application wizard generates a complete Win32 console program that you can compile and execute. Unfortunately, the program doesn’t do anything as it stands, so to make it a little more interesting you need to change it. If it is not already visible in the Editor pane, double-click Ex1_01.cpp in the Solution Explorer pane. This file is the main source file for the program that the Application wizard generated and it looks like that shown in Figure 1-10.
Figure 1-10
17