

ASP.NET 2.0 Visual Web Developer 2005 Express Edition Starter Kit (2006)
.pdfChapter 7
Try It Out |
The Shopping Cart Data Layer |
1.In VWD, click on the App_Code directory, and select the Add New Item . . . menu item. From the Add New Item window select Class, and change the Name to StoredShoppingCart.vb (see Figure 7-9).
Figure 7-9: Adding a new class
2.The new class will look like Figure 7-10.
Figure 7-10: The new StoredShoppingCart class
3.Below the existing Imports statement, add the following:
Imports System.Collections.Generic
Public Class StoredShoppingCart
End Class
4.Within the class, underneath the Public Class StoredShoppingCart declaration, add the following methods for the shopping cart:
214

Placing an Order
Public Shared Function Read() As ShoppingCart
Return FetchCart()
End Function
Public Shared Function Update(ByVal DeliveryCharge As Decimal) As Integer
Dim cart As ShoppingCart = FetchCart()
cart.DeliveryCharge = DeliveryCharge
End Function
5.Next, add the following methods for the items:
Public Shared Function ReadItems() As List(Of CartItem)
Dim cart As ShoppingCart = StoredShoppingCart.FetchCart()
Return cart.Items
End Function
Public Shared Function UpdateItem(ByVal MenuItemID As Integer, _ ByVal ItemSize As String, ByVal Quantity As Integer) As Integer
Dim cart As ShoppingCart = StoredShoppingCart.FetchCart()
cart.Update(MenuItemID, ItemSize, Quantity)
End Function
Public Shared Function DeleteItem(ByVal MenuItemID As Integer, _
ByVal ItemSize As String) As Integer
Dim cart As ShoppingCart = StoredShoppingCart.FetchCart()
cart.Delete(MenuItemID, ItemSize)
End Function
Public Shared Function InsertItem(ByVal MenuItemID As Integer, _ ByVal ItemName As String, ByVal ItemSize As String, _
ByVal Quantity As Integer, ByVal ItemPrice As Decimal) As Integer
Dim cart As ShoppingCart = StoredShoppingCart.FetchCart()
cart.Insert(MenuItemID, ItemSize, ItemName, ItemPrice, Quantity)
End Function
215

Chapter 7
6.Finally, add the private method to fetch the cart from the session:
Private Shared Function FetchCart() As ShoppingCart
Dim cart As ShoppingCart = _ DirectCast(HttpContext.Current.Session(“Cart”), ShoppingCart)
If cart Is Nothing Then cart = New ShoppingCart()
HttpContext.Current.Session(“Cart”) = cart End If
Return cart
End Function
7.Save the file.
How It Works
Like the ShoppingCart class, the first thing we did was to add a reference to the System.Collections
.Generic namespace, so that ASP.NET knows where to find the generic List class:
Imports System.Collections.Generic
Then there were two methods for the shopping cart. The first, Read, simply returns the stored cart, which it fetches by calling FetchCart, a private method we’ll examine shortly.
Public Shared Function Read() As ShoppingCart
Return FetchCart()
End Function
One important thing to note is the use of the keyword Shared in the method declaration. Shared means that you don’t have to create an instance of a class. Normally, a class must be created with the New keyword, such as the following:
Dim NewItem As New CartItem()
This creates a new class instance, with properties and methods, and private variables. Some classes, however, are only wrappers for methods — they don’t have any properties or private variables, and each method stands alone, not relying on anything else in the class. The StoredShoppingCart class is one of those and exists only because you can’t have methods outside of a class. If the methods weren’t shared, to use them you would have to use the following code:
Dim ssc As New StoredShoppingCart()
Dim cart As ShoppingCart = ssc.Read()
With a Shared method, however, you don’t have to instantiate the class. So, you can have the following:
Dim cart As ShoppingCart = StoredShoppingCart.StoredShoppingCart.Read()
216
Placing an Order
In this code, instead of using a class instance variable ssc, we simply use the class name. Using Shared methods reduces the overhead that ASP.NET has when managing variables, so not only does it make the code shorter and easier to read, but it also helps with performance.
The second method of the StoredShoppingCart class, Update, fetches the cart, and updates the delivery charge. This will be used on the checkout page where the user will select the delivery area.
Public Shared Function Update(ByVal DeliveryCharge As Decimal) As Integer
Dim cart As ShoppingCart = FetchCart()
cart.DeliveryCharge = DeliveryCharge
End Function
Next are the methods for the items, starting with ReadItems:
Public Shared Function ReadItems() As List(Of CartItem)
Dim cart As ShoppingCart = StoredShoppingCart.FetchCart()
Return cart.Items
End Function
This fetches the cart and returns the Items collection. This will be used to display a list of the items in the cart.
Then there are the methods to update, delete, and insert items in the cart. These simply fetch the cart and call the appropriate method on the cart itself. For example, the UpdateItem method calls the Update method on the cart.
Public Shared Function UpdateItem(ByVal MenuItemID As Integer, _ ByVal ItemSize As String, ByVal Quantity As Integer) As Integer
Dim cart As ShoppingCart = StoredShoppingCart.FetchCart()
cart.Update(MenuItemID, ItemSize, Quantity)
End Function
Public Shared Function DeleteItem(ByVal MenuItemID As Integer, _
ByVal ItemSize As String) As Integer
Dim cart As ShoppingCart = StoredShoppingCart.FetchCart()
cart.Delete(MenuItemID, ItemSize)
End Function
Public Shared Function InsertItem(ByVal MenuItemID As Integer, _
ByVal ItemName As String, ByVal ItemSize As String, _
217

Chapter 7
ByVal Quantity As Integer, ByVal ItemPrice As Decimal) As Integer
Dim cart As ShoppingCart = StoredShoppingCart.FetchCart()
cart.Insert(MenuItemID, ItemSize, ItemName, ItemPrice, Quantity)
End Function
These methods show that the StoredShoppingCart class is just a wrapper around the actual cart; it knows where the cart is stored and has equivalent methods to the cart.
The FetchCart method is only used internally by the StoredShoppingCart class, and it returns a ShoppingCart object — the cart stored in the session.
Private Shared Function FetchCart() As ShoppingCart
Fetching the cart from the session is the first thing this method does:
Dim cart As ShoppingCart = _ DirectCast(HttpContext.Current.Session(“Cart”), ShoppingCart)
This requires a little explanation. Earlier in the chapter, we showed how to store items in, and fetch them from, the session, and this is just an extension of that. The first thing to know is that the Session object is part of the ASP.NET page, and this is a class, so we don’t automatically have access to the Session object. For that reason, we have to access it indirectly — don’t worry about what the HttpContext
.Current means; it’s just how we access the Session object from within a class.
The second thing to consider is that, when fetching items from the Session object, these items are returned as an Object type (Object is a distinct type, just like String and Integer). We know that the cart isn’t an Object, but a ShoppingCart class, so we have to cast the type. Casting is a way of telling ASP.NET that an object of one type should be treated as a different type, and we use DirectCast for that, the syntax of which is as follows:
DirectCast(object, DataType)
This converts the object into the DataType. So, our code is converting an object into a ShoppingCart. Another way of casting, or converting types, is to use CType, the syntax of which is:
CType(object, DataType)
The difference between CType and DirectCast is that DirectCast will raise an exception if the object is not of the correct DataType. We know that we’ve stored a ShoppingCart object into the Session, so either conversion method could be used, but DirectCast was picked for an added degree of protection. If something did go wrong with the Session storage, then the error would occur during the conversion, and not later on in the code. At this stage, we have a variable called cart, which contains the cart from the session. However, if this is the first time this code has been run, the cart will not have been placed into the session, so the cart variable might be Nothing (remember, Nothing tells us that the variable doesn’t contain anything). If cart is Nothing, then we need to create a new cart object and place it into the session:
218

Placing an Order
If cart Is Nothing Then cart = New ShoppingCart()
HttpContext.Current.Session(“Cart”) = cart End If
Return cart
End Function
The reason we used the FetchCart method is because it contains code that is needed in all of the other methods — they need to fetch the cart from the session. But because the cart might not exist and might have to be created, all of this code would be needed in every method. Instead of repeating the code, it is better to create a separate method with the repeated code and just call that method from the others.
The reason for creating the StoredShoppingCart class is that it keeps the storage of the cart separate from the cart itself. This means that the internals of the cart could be completely changed without affecting the rest of the application, since the application uses the StoredShoppingCart to access it. As long as the public methods remain the same, the application will still work. Likewise, the storage of the cart could be change without affecting the cart class itself. For example, if we wanted to store the cart in a database instead of the session, then only the StoredShoppingCart class would need to be changed.
Now that the guts of the cart have been done, let’s look at how to use this code by creating an order page.
Creating the Order Page
The order page is created as a separate page purely to keep it separate from the book perspective. The order page is actually based upon the menu page, and in reality there would probably be only one page on the real Web site, but we’ve made it a different page so that you can keep the two pages separate.
The difference to the look of the page is small, adding a link and image, which when clicked adds the item to the shopping cart. Let’s build this page.
Try It Out |
Creating the Order Page |
1.Open Order.aspx — this is the order page completed in Chapter 5, but without any code.
2.Currently the ItemTemplate of the Repeater contains the following:
<span style=”color: Firebrick”>
<%# Eval(“ItemSize”) %>: <%#Eval(“ItemPrice”, “${0:F2}”)%> </span>
3.This just displays the item size and price, and we need to have a button that adds the item to the shopping cart. Change the code within the ItemTemplate to the following:
<span style=”color: Firebrick;”>
<asp:LinkButton ID=”OrderItem” runat=”server” ToolTip=”Add item to order” style=”text-decoration:none;”
CommandName=’<%# Eval(“ItemSize”) %>’ CommandArgument=’<%# Eval(“ItemPrice”) %>’>
<asp:Image ID=”Image1” runat=”server”
219
Chapter 7
ImageUrl=”~/images/cartIcon.gif” AlternateText=”Add item to order button” />
<%# Eval(“ItemSize”) %>: <%#Eval(“ItemPrice”, “${0:F2}”)%> </asp:LinkButton>
</span>
4.Save the file.
5.Switch to Design view and double-click anywhere on the gray background, which will open the code-behind file and create an empty Page_Load event for you.
6.Open Order.aspx.vb.txt from the page-content directory, and copy all of the code into the
Page_Load event in Order.aspx.vb.
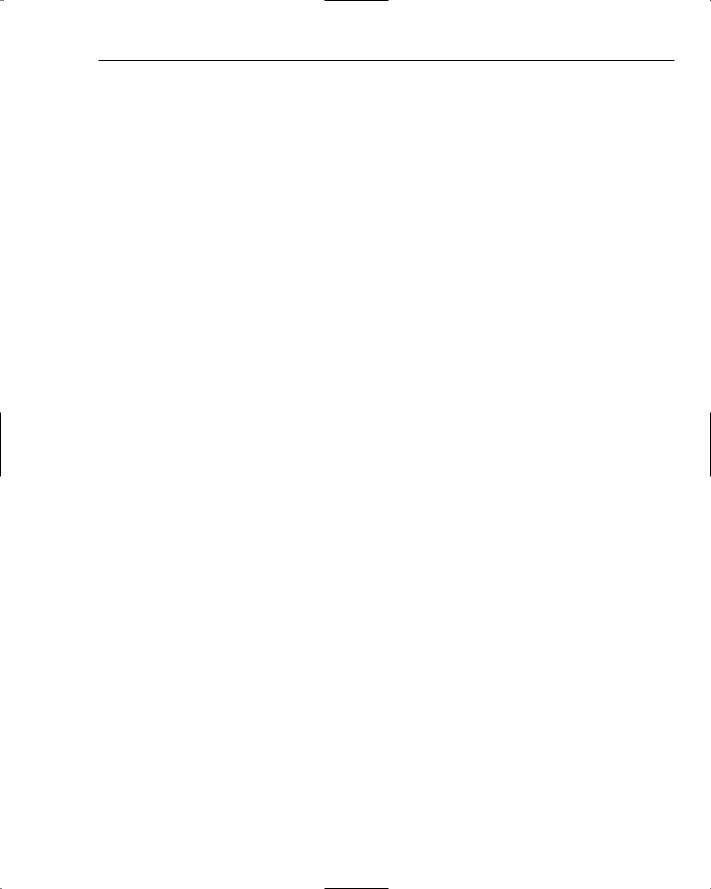
7.Next, you need to create an event for the ItemDataBound event of the DataList, so switch to Order.aspx in Design view. Select the DataList and view the events by clicking the events icon (see Figure 7-11) in the Properties area.
Figure 7-11: Viewing the events for a control
8.Double-click into the space next to the ItemDataBound event to have the empty event procedure created for you.
9.Within the event procedure, add the following code:
If e.Item.ItemType = ListItemType.Item OrElse _ e.Item.ItemType = ListItemType.AlternatingItem Then
Dim rpt As Repeater = DirectCast(e.Item.FindControl(“Repeater1”), Repeater)
Dim ItemID As HiddenField = New HiddenField
Dim ItemName As HiddenField = New HiddenField
ItemID.ID = “ItemID”
ItemName.ID = “ItemName”
ItemID.Value = e.Item.DataItem(“MenuItemID”)
ItemName.Value = e.Item.DataItem(“ItemName”)
rpt.Controls.Add(ItemID)
rpt.Controls.Add(ItemName) End If
220

Placing an Order
10.Next, you need to create an event handler for the ItemCommand of the Repeater, so switch back to Order.aspx in Design view. Select the DataList, and from the DataList Tasks select Edit Templates (see Figure 7-12).
Figure 7-12: Editing the DataList templates
11.Select the Repeater and, from the Properties area, click the events icon (the one that looks like a lightning bolt, as seen in Figure 7-11).
12.Double-click in the blank area to the right of the ItemCommand event. This will switch to the code-behind file and create an empty event procedure for you.
13.Within the event procedure, add the following code:
Dim rpt As Repeater = DirectCast(source, Repeater)
Dim IDControl As HiddenField = _
DirectCast(rpt.FindControl(“ItemID”), HiddenField)
Dim NameControl As HiddenField = _
DirectCast(rpt.FindControl(“ItemName”), HiddenField)
Dim ItemID As Integer = Convert.ToInt32(IDControl.Value)
Dim ItemName As String = NameControl.Value
Dim ItemSize As String = e.CommandName.ToString()
Dim ItemPrice As Decimal = Convert.ToDecimal(e.CommandArgument)
StoredShoppingCart.InsertItem(ItemID, ItemName, ItemSize, 1, ItemPrice)
Label1.Text = String.Format(“{0} ({1}) added to the shopping cart”, _ ItemName, ItemSize)
14.Save both files, run the application, and pick Select Pizza from the Order menu. Notice how the size and price are clickable, as is the shopping cart item (see Figure 7-13).
Figure 7-13: Adding an item to the shopping cart
221

Chapter 7
You can click this link, or the same link on any of the items, and at the top of the page you will see a label telling you that the selected item has been added to the cart. We haven’t built the page that displays the cart yet, but the item has definitely been added. Let’s see how this code works.
How It Works
We’ll start by looking at the changes to the ItemTemplate of the Repeater. Within the span (which hasn’t changed), we first create a LinkButton:
<span style=”color: Firebrick;”>
<asp:LinkButton ID=”OrderItem” runat=”server” ToolTip=”Add item to order” style=”text-decoration:none;”
CommandName=’<%# Eval(“ItemSize”) %>’ CommandArgument=’<%# Eval(“ItemPrice”) %>’>
A LinkButton is a control that acts like a button but that looks like a link. We’ve used one here because it looks nicer than a normal button. The ToolTip is the text shown when you hover the cursor over the button, and the style sets how the text looks — in this case, the text has no decoration, so appears normally (the default is to have the text underlined, like a hyperlink). The CommandName property is set to the size of the item displayed (the ItemSize column from the database), and the CommandArgument property is set to the price of the item (the ItemPrice from the database). These values are set using the same Eval method of data binding as shown in earlier chapters. The CommandName and CommandArgument properties are used to pass the size and price of the item to the event procedure when the button is clicked — you’ll see how that’s used a little later.
Next, we include an image, a small shopping cart icon, just to make the page look a little nicer.
<asp:Image ID=”Image1” runat=”server” ImageUrl=”~/images/cartIcon.gif” AlternateText=”Add item to order button” />
Next, there is the display of the item size and price, and this is the same display as used in the menu page.
<%# Eval(“ItemSize”) %>: <%#Eval(“ItemPrice”, “${0:F2}”)%>
Finally the LinkButton and span elements are closed.
</asp:LinkButton>
</span>
An important point to note here is that the LinkButton encloses the image and the text for the size and price, which means that these controls become part of the link. This technique allows users to click either the image or the text to add the item to the cart.
Now, onto the code, and we will ignore the Page_Load event because that contains exactly the same code as for the menu page, and you looked at that in Chapter 5. Before we dive into the code added to the page though, we need some theory first. Remember that this page is using master-detail type data binding, with the pizza and drink types being the master, and the sizes and prices being the details. We want to allow the user to click one of the detail items, at which point the item will be added to the cart. Since we
222

Placing an Order
are clicking a detail item, we can easily get access to the size and price, but the ID and Name of the pizza or drink is more problematic because they are contained within the master record, rather than the child record. This means that we have to find some way of making the ID and Name available, and the way we do it is by adding the ID and Name as HiddenControls within the repeater. But we do this within code. (There are ways to get around code if using different data bound controls, but those different controls don’t provide the features that we need.)
So, let’s now look at the code for the ItemDataBound event of the DataList. Remember that the DataList displays the item types — the pizzas and drinks, and the ItemDataBound event will be raised by ASP.NET every time a pizza or drink is bound. It will also be raised when other rows are bound, such as the header and footer rows. So, the first thing our code does is to check to see which type of row is being bound. This is easy because one of the parameters to this event is of type DataListItemEventArgs:
Protected Sub DataList1_ItemDataBound(ByVal sender As Object, _ ByVal e As System.Web.UI.WebControls.DataListItemEventArgs) _ Handles DataList1.ItemDataBound
The parameter e contains information about the item being bound and has an Item property, which represents the row being bound. The Item property has a property of its own, ItemType, which defines the template type being bound, and we want to run our code only for items or alternating items — that’s each and every other row.
If e.Item.ItemType = ListItemType.Item OrElse _ e.Item.ItemType = ListItemType.AlternatingItem Then
For rows and alternating rows, we want to find the Repeater contained within the template because this will show the item sizes and prices. When using templates, controls aren’t directly accessible, because ASP.NET generates them dynamically, so we use the FindControl method to find the Repeater. We know the repeater is within the row of the DataList, and that row is represented by e.Item. FindControl returns a variable of type Object, so we use DirectCast to convert it to a
Repeater.
Dim rpt As Repeater = DirectCast(e.Item.FindControl(“Repeater1”), Repeater)
Next, we create two HiddenField controls, one for the ID of the item, and one for the Name, and the ID properties of these are set to ItemID and ItemName, respectively. Different names are used because the ID of a control has to be unique.
Dim ItemID As HiddenField = New HiddenField
Dim ItemName As HiddenField = New HiddenField
ItemID.ID = “ItemID”
ItemName.ID = “ItemName”
Now, we need to set the Value property of these HiddenField controls to the ID and name of the menu item. Once again, we use e.Item, which represents the row being bound, this time using the DataItem property. The DataItem property gives us access to the underlying data — the data from the database — so we can look up the values by using the column names — MenuItemID and ItemName.
ItemID.Value = e.Item.DataItem(“MenuItemID”)
ItemName.Value = e.Item.DataItem(“ItemName”)
223