

Visual CSharp 2005 Recipes (2006) [eng]
.pdf148 C H A P T E R 5 ■ F I L E S, D I R E C TO R I E S, A N D I / O
How It Works
The FileInfo.Attributes and DirectoryInfo.Attributes properties represent file attributes such as archive, system, hidden, read-only, compressed, and encrypted. (Refer to the MSDN reference for the full list.) Because a file can possess any combination of attributes, the Attributes property accepts a combination of enumerated values. To individually test for a single attribute or change a single attribute, you need to use bitwise arithmetic.
■Note The Attributes setting is made up (in binary) of a series of ones and zeros, such as 00010011. Each 1 represents an attribute that is present, while each 0 represents an attribute that is not. When you use a bitwise AND (&) operation, it compares each individual digit against each digit in the enumerated value. For example, if you bitwise AND a value of 00100001 (representing an individual file’s archive and read-only attributes) with the enumerated value 00000001 (which represents the read-only flag), the resulting value will be 00000001—it will have a 1 only where it can be matched in both values.
The Code
The following example takes a read-only test file and checks for the read-only attribute.
using System; using System.IO;
namespace Apress.VisualCSharpRecipes.Chapter05
{
static class Recipe05_02
{
static void Main()
{
//This file has the archive and read-only attributes. FileInfo file = new FileInfo("data.txt");
//This displays the string "ReadOnly, Archive " Console.WriteLine(file.Attributes.ToString());
//This test fails, because other attributes are set. if (file.Attributes == FileAttributes.ReadOnly)
{
Console.WriteLine("File is read-only (faulty test).");
}
//This test succeeds, because it filters out just the
//read-only attribute.
if ((file.Attributes & FileAttributes.ReadOnly) == FileAttributes.ReadOnly)
{
Console.WriteLine("File is read-only (correct test).");
}
// Wait to continue. Console.WriteLine(Environment.NewLine); Console.WriteLine("Main method complete. Press Enter."); Console.ReadLine();
}
}
}

C H A P T E R 5 ■ F I L E S, D I R E C TO R I E S, A N D I / O |
149 |
When setting an attribute, you must also use bitwise arithmetic, as demonstrated in the following example. In this case, it’s needed to ensure that you don’t inadvertently clear the other attributes.
// This adds just the read-only attribute.
file.Attributes = file.Attributes | FileAttributes.ReadOnly;
// This removes just the read-only attribute. file.Attributes = file.Attributes & ~FileAttributes.ReadOnly;
5-3. Copy, Move, or Delete a File or a Directory
Problem
You need to copy, move, or delete a file or directory.
Solution
Create a System.IO.FileInfo object for a file or a System.IO.DirectoryInfo object for a directory, supplying the path in the constructor. You can then use the object’s methods to copy, move, and delete the file or directory.
How It Works
The FileInfo and DirectoryInfo classes include a host of valuable methods for manipulating files and directories. Table 5-2 shows methods for the FileInfo class, and Table 5-3 shows methods for the DirectoryInfo class.
Table 5-2. Key Methods for Manipulating a FileInfo Object
Method |
Description |
CopyTo |
Copies a file to the new path and filename specified as a parameter. |
|
It also returns a new FileInfo object that represents the new |
|
(copied) file. You can supply an optional additional parameter of |
|
true to allow overwriting. |
Create and CreateText |
Create creates the specified file and returns a FileStream object |
|
that you can use to write to it. CreateText performs the same task, |
|
but returns a StreamWriter object that wraps the stream. For more |
|
information about writing files, see recipes 5-7 and 5-8. |
Open, OpenRead, OpenText, |
Open a file (provided it exists). OpenRead and OpenText open a file in |
and OpenWrite |
read-only mode, returning a FileStream or StreamReader object. |
|
OpenWrite opens a file in write-only mode, returning a FileStream |
|
object. For more information about reading files, see recipes 5-7 |
|
and 5-8. |
Delete |
Removes the file, if it exists. |
Encrypt and Decrypt |
Encrypt/decrypt a file using the current account. This applies to |
|
NTFS file systems only. |
MoveTo |
Moves the file to the new path and filename specified as |
|
a parameter. MoveTo can also be used to rename a file without |
|
changing its location. |
Replace |
Replaces contents of a file by the current FileInfo object. This |
|
method could also take a backup copy of the replaced file. |
|
|

150 C H A P T E R 5 ■ F I L E S, D I R E C TO R I E S, A N D I / O
Table 5-3. Key Methods for Manipulating a DirectoryInfo Object
Method |
Description |
Create |
Creates the specified directory. If the path specifies multiple directories |
|
that do not exist, they will all be created at once. |
CreateSubdirectory |
Creates a directory with the specified name in the directory represented by |
|
the DirectoryInfo object. It also returns a new DirectoryInfo object that |
|
represents the subdirectory. |
Delete |
Removes the directory, if it exists. If you want to delete a directory that |
|
contains other directories, you must use the overloaded Delete method |
|
that accepts a parameter named recursive and set it to true. |
MoveTo |
Moves the directory (contents and all) to a new path. MoveTo can also be |
|
used to rename a directory without changing its location. |
|
|
The Code
One useful feature that is missing from the DirectoryInfo class is a copy method. Fortunately, you can write this logic easily enough by relying on recursive logic and the FileInfo object.
The following example contains a helper function that can copy any directory, and its contents.
using System; using System.IO;
namespace Apress.VisualCSharpRecipes.Chapter05
{
static class Recipe05_03
{
static void Main(string[] args)
{
if (args.Length != 2)
{
Console.WriteLine("USAGE: " +
" Recipe05_03 [sourcePath] [destinationPath]"); return;
}
DirectoryInfo sourceDir = new DirectoryInfo(args[0]);
DirectoryInfo destinationDir = new DirectoryInfo(args[1]);
CopyDirectory(sourceDir, destinationDir);
// Wait to continue. Console.WriteLine(Environment.NewLine); Console.WriteLine("Main method complete. Press Enter."); Console.ReadLine();
}
static void CopyDirectory(DirectoryInfo source, DirectoryInfo destination)
{
if (!destination.Exists)
{
destination.Create();
}

C H A P T E R 5 ■ F I L E S, D I R E C TO R I E S, A N D I / O |
151 |
// Copy all files.
FileInfo[] files = source.GetFiles(); foreach (FileInfo file in files)
{
file.CopyTo(Path.Combine(destination.FullName,
file.Name));
}
// Process subdirectories.
DirectoryInfo[] dirs = source.GetDirectories(); foreach (DirectoryInfo dir in dirs)
{
// Get destination directory.
string destinationDir = Path.Combine(destination.FullName, dir.Name);
// Call CopyDirectory() recursively. CopyDirectory(dir, new DirectoryInfo(destinationDir));
}
}
}
}
5-4. Calculate the Size of a Directory
Problem
You need to calculate the size of all files contained in a directory (and optionally, its subdirectories).
Solution
Examine all the files in a directory and add together their FileInfo.Length properties. Use recursive logic to include the size of files in contained subdirectories.
How It Works
The DirectoryInfo class does not provide any property that returns size information. However, you can easily calculate the size of all files contained in a directory using the FileInfo.Length property.
The Code
The following example calculates the size of a directory and optionally examines contained directories recursively.
using System; using System.IO;
namespace Apress.VisualCSharpRecipes.Chapter05
{
static class Recipe05_04
{
static void Main(string[] args)
{

152 C H A P T E R 5 ■ F I L E S, D I R E C TO R I E S, A N D I / O
if (args.Length == 0)
{
Console.WriteLine("Please supply a directory path."); return;
}
DirectoryInfo dir = new DirectoryInfo(args[0]);
Console.WriteLine("Total size: " +
CalculateDirectorySize(dir, true).ToString() +
"bytes.");
//Wait to continue. Console.WriteLine(Environment.NewLine); Console.WriteLine("Main method complete. Press Enter."); Console.ReadLine();
}
static long CalculateDirectorySize(DirectoryInfo directory, bool includeSubdirectories)
{
long totalSize = 0;
//Examine all contained files. FileInfo[] files = directory.GetFiles(); foreach (FileInfo file in files)
{
totalSize += file.Length;
}
//Examine all contained directories. if (includeSubdirectories)
{
DirectoryInfo[] dirs = directory.GetDirectories(); foreach (DirectoryInfo dir in dirs)
{
totalSize += CalculateDirectorySize(dir, true);
}
}
return totalSize;
}
}
}
5-5. Retrieve Version Information for a File
Problem
You want to retrieve file version information, such as the publisher of a file, its revision number, associated comments, and so on.
Solution
Use the static GetVersionInfo method of the System.Diagnostics.FileVersionInfo class.

C H A P T E R 5 ■ F I L E S, D I R E C TO R I E S, A N D I / O |
153 |
How It Works
The .NET Framework allows you to retrieve file information without resorting to the Windows API. Instead, you simply need to use the FileVersionInfo class and call the GetVersionInfo method with the filename as a parameter. You can then retrieve extensive information through the FileVersionInfo properties.
The Code
The FileVersionInfo properties are too numerous to list here, but the following code snippet shows an example of what you might retrieve.
using System;
using System.Diagnostics;
namespace Apress.VisualCSharpRecipes.Chapter05
{
static class Recipe05_05
{
static void Main(string[] args)
{
if (args.Length == 0)
{
Console.WriteLine("Please supply a filename."); return;
}
FileVersionInfo info = FileVersionInfo.GetVersionInfo(args[0]);
//Display version information. Console.WriteLine("Checking File: " + info.FileName); Console.WriteLine("Product Name: " + info.ProductName);
Console.WriteLine("Product Version: " + info.ProductVersion); Console.WriteLine("Company Name: " + info.CompanyName); Console.WriteLine("File Version: " + info.FileVersion); Console.WriteLine("File Description: " + info.FileDescription); Console.WriteLine("Original Filename: " + info.OriginalFilename); Console.WriteLine("Legal Copyright: " + info.LegalCopyright); Console.WriteLine("InternalName: " + info.InternalName); Console.WriteLine("IsDebug: " + info.IsDebug); Console.WriteLine("IsPatched: " + info.IsPatched); Console.WriteLine("IsPreRelease: " + info.IsPreRelease); Console.WriteLine("IsPrivateBuild: " + info.IsPrivateBuild); Console.WriteLine("IsSpecialBuild: " + info.IsSpecialBuild);
//Wait to continue.
Console.WriteLine(Environment.NewLine); Console.WriteLine("Main method complete. Press Enter."); Console.ReadLine();
}
}
}
Usage
If you run the command Recipe05_05 c:\windows\explorer.exe, the example produces the following output.

154C H A P T E R 5 ■ F I L E S, D I R E C TO R I E S, A N D I / O
Checking File: c:\windows\explorer.exe
Product Name: Microsoftr Windowsr Operating System Product Version: 6.00.2900.2180
Company Name: Microsoft Corporation
File Version: 6.00.2900.2180 (xpsp_sp2_rtm.040803-2158) File Description: Windows Explorer
Original Filename: EXPLORER.EXE
Legal Copyright: c Microsoft Corporation. All rights reserved. InternalName: explorer
IsDebug: False IsPatched: False IsPreRelease: False IsPrivateBuild: False IsSpecialBuild: False
5-6. Show a Just-in-Time Directory Tree in the
TreeView Control
Problem
You need to display a directory tree in a TreeView control. However, filling the directory tree structure at startup is too time-consuming.
Solution
Fill the first level of directories in the TreeView control and add a hidden dummy node to each directory branch. React to the TreeView.BeforeExpand event to fill in subdirectories in a branch just before it’s displayed.
How It Works
You can use recursion to build an entire directory tree. However, scanning the file system in this way can be slow, particularly for large drives. For this reason, professional file management software programs (including Windows Explorer) use a different technique. They query the necessary directory information when the user requests it.
The TreeView control is particularly well suited to this approach because it provides a BeforeExpand event that fires before a new level of nodes is displayed. You can use a placeholder (such as an asterisk or empty TreeNode) in all the directory branches that are not filled in. This allows you to fill in parts of the directory tree as they are displayed.
To use this type of solution, you need the following three ingredients:
•A Fill method that adds a single level of directory nodes based on a single directory. You will use this method to fill directory levels as they are expanded.
•A basic Form.Load event handler that uses the Fill method to add the first level of directories for the drive.
•A TreeView.BeforeExpand event handler that reacts when the user expands a node and calls the Fill method if this directory information has not yet been added.

C H A P T E R 5 ■ F I L E S, D I R E C TO R I E S, A N D I / O |
155 |
The Code
The following shows the full-form code for this solution.
using System;
using System.Windows.Forms; using System.IO;
namespace Apress.VisualCSharpRecipes.Chapter05
{
public partial class DirectoryTree : Form
{
public DirectoryTree()
{
InitializeComponent();
}
private void DirectoryTree_Load(object sender, EventArgs e)
{
// Set the first node.
TreeNode rootNode = new TreeNode(@"C:\"); treeDirectory.Nodes.Add(rootNode);
// Fill the first level and expand it. Fill(rootNode); treeDirectory.Nodes[0].Expand();
}
private void treeDirectory_BeforeExpand(object sender, TreeViewCancelEventArgs e)
{
//If a dummy node is found, remove it and read the
//real directory list.
if (e.Node.Nodes[0].Text == "*")
{
e.Node.Nodes.Clear();
Fill(e.Node);
}
}
private void Fill(TreeNode dirNode)
{
DirectoryInfo dir = new DirectoryInfo(dirNode.FullPath);
//An exception could be thrown in this code if you don't
//have sufficient security permissions for a file or directory.
//You can catch and then ignore this exception.
foreach (DirectoryInfo dirItem in dir.GetDirectories())
{
// Add node for the directory.
TreeNode newNode = new TreeNode(dirItem.Name); dirNode.Nodes.Add(newNode); newNode.Nodes.Add("*");
}
}
}
}
156 C H A P T E R 5 ■ F I L E S, D I R E C TO R I E S, A N D I / O
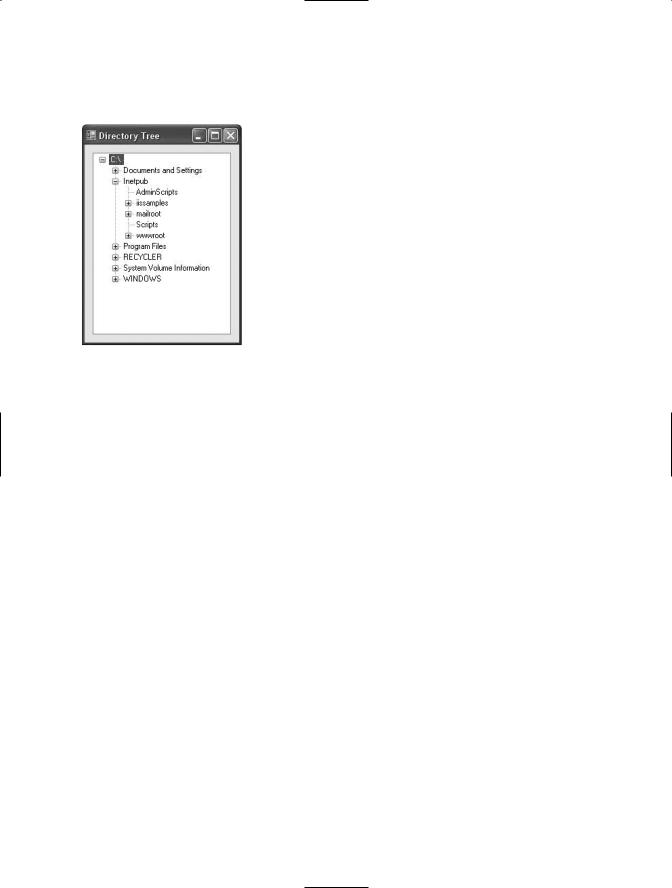
Figure 5-1 shows the directory tree in action.
Figure 5-1. A directory tree with the TreeView
5-7. Read and Write a Text File
Problem
You need to write data to a sequential text file using ASCII, Unicode, or UTF-8 encoding.
Solution
Create a new System.IO.FileStream object that references the file. To write the file, wrap the FileStream in a System.IO.StreamWriter and use the overloaded Write method. To read the file, wrap the FileStream in a System.IO.StreamReader and use the Read or ReadLine method.
How It Works
The .NET Framework allows you to write or read text with any stream by using the StreamWriter and StreamReader classes. When writing data with the StreamWriter, you use the StreamWriter.Write method. This method is overloaded to support all the common C# .NET data types, including strings, chars, integers, floating-point numbers, decimals, and so on. However, the Write method always converts the supplied data to text. If you want to be able to convert the text back to its original data type, you should use the WriteLine method to make sure each value is placed on a separate line.
The way a string is represented depends on the encoding you use. The most common encodings include the following:

C H A P T E R 5 ■ F I L E S, D I R E C TO R I E S, A N D I / O |
157 |
•ASCII, which encodes each character in a string using 7 bits. ASCII-encoded data cannot contain extended Unicode characters. When using ASCII encoding in .NET, the bits will be padded and the resulting byte array will have 1 byte for each character.
•Full Unicode (or UTF-16), which represents each character in a string using 16 bits. The resulting byte array will have 2 bytes for each character.
•UTF-7 Unicode, which uses 7 bits for ordinary ASCII characters and multiple 7-bit pairs for extended characters. This encoding is primarily for use with 7-bit protocols such as mail, and it is not regularly used.
•UTF-8 Unicode, which uses 8 bits for ordinary ASCII characters and multiple 8-bit pairs for extended characters. The resulting byte array will have 1 byte for each character (provided there are no extended characters).
The .NET Framework provides a class for each type of encoding in the System.Text namespace. When using StreamReader and StreamWriter, you can specify the encoding you want to use or simply use the default UTF-8 encoding.
When reading information, you use the Read or ReadLine method of StreamReader. The Read method reads a single character, or the number of characters you specify, and returns the data as a char or char array. The ReadLine method returns a string with the content of an entire line. The ReadToEnd method will return a string with the content starting from the current position to the end of the stream.
The Code
The following console application writes and then reads a text file.
using System; using System.IO; using System.Text;
namespace Apress.VisualCSharpRecipes.Chapter05
{
static class Recipe05_07
{
static void Main()
{
// Create a new file.
using (FileStream fs = new FileStream("test.txt", FileMode.Create))
{
//Create a writer and specify the encoding.
//The default (UTF-8) supports special Unicode characters,
//but encodes all standard characters in the same way as
//ASCII encoding.
using (StreamWriter w = new StreamWriter(fs, Encoding.UTF8))
{
// Write a decimal, string, and char. w.WriteLine(124.23M); w.WriteLine("Test string"); w.WriteLine('!');
}
}
Console.WriteLine("Press Enter to read the information."); Console.ReadLine();