

Beginning Ubuntu Linux - From Novice To Professional (2006)
.pdf168 C H A P T E R 1 1 ■ U B U N T U R E P L A C E M E N T S F O R W I N D O W S P R O G R A M S
Figure 11-4. OpenOffice.org Base
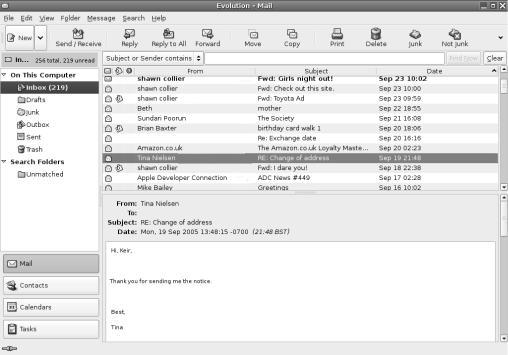
E-Mail/Personal Information Manager: Evolution
Evolution is a little like Microsoft Outlook in that, in addition to being an e-mail client, it can also keep track of your appointments and contacts.
Before using the program, you’ll need to set it up with your incoming and (if applicable) outgoing mail server settings, as detailed in Chapter 8. Evolution is compatible with POP/SMTP, IMAP, Novell GroupWise, and Microsoft Exchange servers.
Once the program is up and running, as shown in Figure 11-5, you can create a new message by clicking the New button on the toolbar. To reply to any e-mail, simply select it in the list, and then click the Reply or Reply To All button, depending on whether you want to reply to the sender or to all the recipients of the message.
To switch to Contacts view, click the relevant button on the bottom left. If you reply to anyone via e-mail, they’re automatically added to this Contacts list. You can also add entries manually by either right-clicking someone’s address in an open e-mail or right-clicking in a blank space in the Contacts view.
Clicking the Calendar view shows a day-and-month diary. To add an appointment, simply select the day, and then double-click the time you want the appointment to start. You can opt to set an alarm when creating the appointment, so that you’re reminded of it when it it’s scheduled.
C H A P T E R 1 1 ■ U B U N T U R E P L A C E M E N T S F O R W I N D O W S P R O G R A M S |
169 |
Finally, by clicking the Tasks button, you can create a to do list. To add a task, click the bar at the top of the list. Once an entry has been created, you can put a check in its box to mark it as completed. Completed tasks are marked with strike-through, so you can see at a glance what you still need to do.
In addition to the setup guide in Chapter 8, you’ll find a full explanation of Evolution’s features in Chapter 27.
Figure 11-5. Evolution
Web Browser: Firefox
You might already know of Mozilla Firefox under Windows, where it’s firmly established itself as the alternative browser of choice. The good news is that the Linux version of Firefox is nearly identical to its Windows counterpart.
When the program starts, as shown in Figure 11-6, you can type an address into the
URL bar to visit a web site. If you wish to add a site to your bookmarks list, click Bookmarks Bookmark This Page. Alternatively, you can press Ctrl+D.

170 C H A P T E R 1 1 ■ U B U N T U R E P L A C E M E N T S F O R W I N D O W S P R O G R A M S
Figure 11-6. Mozilla Firefox
Searching is very easy within Firefox, using its search bar at the top right of the window. By default, Firefox uses Google for searches. To choose from other search engines, click the small down arrow on the left side of the search box. You can even enter your own choice of site if your favorite isn’t already in the list.
The main benefit of Firefox over Internet Explorer is the principle of tabbed browsing, which means you can have more than one site open at once. To open a new tab, type Ctrl+T. You can move between the tabs by clicking each.
■Tip When Firefox starts, tabs aren’t activated. If you would like to keep tabs in view all the time, click Edit Preferences, and then click the Advanced icon. In the Tabbed Browsing section of the window, remove the check from “Hide the tab bar when only one web site is open.”
Firefox is compatible with the same range of extensions you might have used under the Windows version of the browser. You can download new extensions from https://addons. mozilla.org/extensions. In addition, Firefox under Ubuntu can work with Flash animations, although you’ll need to download the Flash Player software first. See the instructions in Chapter 19 to learn more.

C H A P T E R 1 1 ■ U B U N T U R E P L A C E M E N T S F O R W I N D O W S P R O G R A M S |
171 |
Audio Playback: Rhythmbox and CD Player
Ubuntu’s multimedia software is basic but effective. It can play back the majority of audio files, as long as it’s properly configured, which is to say after additional software has been installed. I’ll describe how to set up this software in Chapter 18, and if you’re thinking of playing audio files on your computer, you may want to read that chapter immediately.
Rhythmbox is the audio file player. The simply titled CD Player application will automatically start whenever an audio CD is inserted into the drive. Figure 11-7 shows both of these applications.
Figure 11-7. Rhythmbox and CD Player
When Rhythmbox is run for the first time, it will attempt to find and then catalog your music collection. You might be used to this kind of functionality with Windows utilities like iTunes. After the initial file search has taken place, whenever Rhythmbox runs, you will find your tracks listed by artist or name, providing they have the relevant tag information embedded in them (such as ID3 tags in MP3 music).
■Note Unlike iTunes, Rhythmbox can’t play Digital Rights Management (DRM)-protected files.

172 C H A P T E R 1 1 ■ U B U N T U R E P L A C E M E N T S F O R W I N D O W S P R O G R A M S
To start playing a music track, double-click it in the list. To make the player smaller so that it doesn’t dominate the screen, click View Small Display.
The CD Player works just like virtually every other CD Player application you might have used. It features tape-recorder-like controls to stop and pause playback, and skip ahead/back buttons to change tracks. It is able to automatically look up the artist and track information about most CDs online, and then save the information for future reference.
You can control the output volume within the applications themselves or use the volume control applet, which is located at the top-right side of the Ubuntu desktop, near the clock. Simply click and then drag the slider to alter the volume.
Movie Playback: Totem Movie Player
Totem Movie Player is able to handle the majority of video files you might own, as long as some additional software is installed. Totem can also play back DVD movies, which, again, requires the installation of software. I’ll cover setting up this software in Chapters 18 and 19; if you intend to play back videos and DVDs, these chapters should be your first port of call.
As with Rhythmbox and CD Player, Totem is a simple and uncomplicated application, as shown in Figure 11-8. The video file will play in the top left of the window. A playlist detailing movies you have queued appears in the top-right area of the program window. You can remove this, to give the video window more room, by clicking the Sidebar button.
Figure 11-8. Totem Movie Player

C H A P T E R 1 1 ■ U B U N T U R E P L A C E M E N T S F O R W I N D O W S P R O G R A M S |
173 |
You can control video playback using the tape-recorder-like controls at the bottom left. In addition, provided a compatible video format is being played, you can use the Time bar to move backward and forward within the video file. You can switch to full-screen playback by clicking View Fullscreen. To switch back, simply press the Escape key (labeled Esc on some keyboards). If you’re watching a program that has been ripped from TV, you might want to use the Deinterlace feature on the View menu to remove any interference patterns.
Provided the software described in Chapter 19 is installed, DVD playback will start automatically as soon as a disc is inserted, and you should be able to use the mouse with any on-screen menus. In addition, you can skip between chapters on the disc using the Go menu, and also return to the DVD’s main or submenu systems. To switch between the various languages on a DVD (if applicable), click Sound Languages and choose from the list.
CD/DVD Burning: Nautilus and Serpentine
As soon as you insert a blank writable disc, whether it’s a CD or DVD, Ubuntu will detect it and offer you a range of choices. You can then create a data, music, or photo disc. If you choose to create a music CD, the Serpentine Audio-CD Creator application will open. If you choose to create a data or photo CD/DVD, a Nautilus file browser window will open in CD/DVD Creator mode.
To use Serpentine to create an audio CD, simply drag-and-drop your music files onto the program window, and then click the Write to Disc button. Keep an eye on the disc graphic at the bottom left. This is like a pie chart; when the white portion is full, the disc is full. Note that you won't be able to write certain audio files, like MP3s, to CDs unless you have the relevant codecs installed. See Chapter 18 to learn more.
Using the Nautilus CD/DVD Creator, shown in Figure 11-9, is similar to using Serpentine. Just drag-and-drop files onto the window to create shortcuts to the files. When it comes time to burn, Nautilus will take the files from their original locations. When you’ve finished choosing files, click the Write to Disc button on the toolbar. Unfortunately, you won’t see a warning if the disc’s file size has been exceeded until you try to write to the disc. However, by right-clicking an empty space in the Nautilus window and selecting Properties, you can discover the total size of the files. Remember that most CDs hold 700MB, and most DVD+/-R discs hold around 4.3GB (some dual-layer discs hold twice this amount; see the DVD disc packaging for details).
Most modern CD/DVD recorders utilize burn-proof technology, which helps ensure error-free disc creation. To activate this, click Applications System Tools Configuration Editor. Click Edit Find, and type burnproof. Make sure there’s a check in Search Also in Key Names. In the search results at the bottom of the window, click the first result (/apps/nautilus-cd-burner/burnproof) and make sure there’s a check in burnproof at the top right of the window. Then close the Configuration Editor.

174 C H A P T E R 1 1 ■ U B U N T U R E P L A C E M E N T S F O R W I N D O W S P R O G R A M S
Figure 11-9. Nautilus CD/DVD Creator
Photo Editing: The GIMP
While many of the other programs introduced so far mirror the Windows look and feel in some way, The GIMP (Applications Graphics GIMP Image Editor) walks a different path. It has its own unique way of working, which takes a little getting used to. But it’s very much worth the effort, because The GIMP offers photo-editing tools on par with professional products like Adobe Photoshop. It’s certainly more than powerful enough for tweaking digital camera snapshots.
When you initially run The GIMP, it will install itself to your hard disk. Some of the questions it asks look complicated, but you can stick with the default choices throughout.
Once the program is running, you’ll notice that it’s actually little more than a large toolbar on the left side of the screen, as shown in Figure 11-10. Everything else that runs within The GIMP—whether it’s a window containing the image you’re editing or an additional configuration dialog box—uses its own program window. This also means that each program item that you activate gets its own button on the Panel at the bottom of the screen.

C H A P T E R 1 1 ■ U B U N T U R E P L A C E M E N T S F O R W I N D O W S P R O G R A M S |
175 |
Figure 11-10. The GIMP
To open a picture, select File Open and select your image from the hard disk. Once an image file is opened, you can manipulate it using the tools on the toolbar (which are similar to those found in other image editors). On the bottom half of the main program window, you’ll find the settings for each tool, which can be altered, usually via click-and-drag sliders.
To apply filters or other corrective changes, right-click anywhere on the image to bring up a context menu with a variety of options. Simple tools to improve brightness and contrast can be found on the Layer Colors submenu.
For an in-depth look at The GIMP package, see Chapter 20.
Other Handy Applications
Many additional applications might prove useful on a day-to-day basis. Here, I’ll review some of the more common ones.
Calculator
The GNOME Calculator (also known as GCalctool) can be found on the Applications Accessories menu. In its default mode, shown in Figure 11-11, it shouldn’t present any challenges to anyone who has ever used a real-life calculator, although the Bksp key might be new. This simply deletes the last number you typed (handy if you miskey during a calculation).

176 C H A P T E R 1 1 ■ U B U N T U R E P L A C E M E N T S F O R W I N D O W S P R O G R A M S
Figure 11-11. GNOME Calculator
Calculator also has three other modes that you can switch into using the View menu: Advanced, Financial, and Scientific. All offer calculator functions relevant to their settings. The Advanced mode is simply a more complicated version of the basic Calculator. It can store numbers in several memory locations, for example, and carry out less common calculations such as square roots and reciprocals.
Floppy Formatter
The Floppy Formatter is a small and simple program designed, as its name suggests, to format 3.5-inch floppy disks, as shown in Figure 11-12. You can be find it on the Applications System Tools menu. The program can format disks in Linux (ext2) or DOS format. The latter is the best option, bearing in mind you might be sharing disks with others who run Windows. There’s also no harm in doing so, since DOS-formatted disks will work fine under Ubuntu, too.
Figure 11-12. Floppy Formatter

C H A P T E R 1 1 ■ U B U N T U R E P L A C E M E N T S F O R W I N D O W S P R O G R A M S |
177 |
You can choose between Quick, Standard, and Thorough formats. Quick simply wipes the disk’s table of contents, Standard will perform an actual disk format, and Thorough adds in a disk scan to mark up any bad data blocks.
Archive Manager
Archive Manager (also known as File Roller), shown in Figure 11-13, is Ubuntu’s archive tool. It’s the default program that opens whenever you double-click .zip files (or .tar, .gz, or .bzip2 files, which are the native archive file formats under Linux). If you want to start the program manually, click Applications Accessories Archive Manager.
Figure 11-13. Archive Manager
To extract files from an archive, select them (hold down the Ctrl key to select more than one file), and then click the Extract button on the toolbar.
To create an archive, start Archive Manager and click the New button. Give the archive a name, and then drag-and-drop files onto the Archive Manager window. When you’ve finished, simply close the Archive Manager window.
Dictionary
You can use the Dictionary tool to look up the definition of words using either a dictionary stored on the hard disk or one online, at the Cambridge Dictionary web site. The dictionary on the disk is a 1913 edition of Webster’s, so its word definitions are hardly current and don’t take into account any recent vocabulary, but the online dictionary is certainly up-to-date.