

Beginning Mac OS X Tiger Dashboard Widget Development (2006)
.pdfTimbuktu Quick Connect
previousConnections.push(theAddress);
}
launchTB2();
widget.system(“/usr/bin/osascript tb2connect.scpt “ + defaultService + “ “ + theAddress, null);
}
}
The AppleScript is a handler that takes the IP address and attempts to open a session with the remote computer using the service selected in the preferences. Each service that Timbuktu supports is included in the AppleScript and is linked to the appropriate preference on the back of the widget.
on run theParameters
set theService to item 1 of theParameters as text set theAddress to item 2 of theParameters as text tell application “Timbuktu Pro”
activate try
if theService is “send” then
make new outgoing flashnote connecting to internet address {internet name:theAddress, platform:platform unknown} when rejected let user reenter
return “Connected.”
else if theService is “exchange” then
make new exchange session connecting to internet address {internet name:theAddress, platform:platform unknown} when rejected let user reenter
return “Connected.”
else if theService is “control” then
make new control session connecting to internet address {internet name:theAddress, platform:platform unknown} when rejected let user reenter
return “Connected.”
else if theService is “chat” then
make new chat session connecting to internet address {internet name:theAddress, platform:platform unknown} when rejected let user reenter
return “Connected.”
else if theService is “notify” then
make new notify session connecting to internet address {internet name:theAddress, platform:platform unknown} when rejected let user reenter
return “Connected.”
else if theService is “intercom” then
make new intercom session connecting to internet address {internet name:theAddress, platform:platform unknown} when rejected let user reenter
return “Connected.”
else if theService is “invite” then
make new invite session connecting to internet address {internet name:theAddress, platform:platform unknown} when rejected let user reenter
return “Connected.”
else if theService is “profile” then
make new profile session connecting to internet address {internet name:theAddress, platform:platform unknown} when rejected let user reenter
return “Connected.” end if
on error anError number -27
251

Chapter 16
return “User cancelled.” end try
end tell end run
The ipAdressAutoComplete(theKeyPressed) function tries to autoComplete the IP address as you enter it in the text box based on previous IP addresses that you’ve connected to.
function ipAddressAutoComplete(theKeyPressed) {
alert(“‘“ + String.fromCharCode(theKeyPressed.keyCode) + “‘ has a value of “ + theKeyPressed.keyCode.toString());
var found = false; var i = 0;
var ipAddressField = document.getElementById(“ipAddress”);
var ipAddressFieldValue = document.getElementById(“ipAddress”).value;
if ((theKeyPressed.keyCode != 46) && (theKeyPressed.keyCode != 8) && (previousConnections.length >= 1)) {
// Look for the first one that matches:
for (i=0; i<previousConnections.length; i++) {
if (previousConnections[i].toLowerCase().indexOf(ipAddressFieldValue.toLowerCase()) == 0) {
if (previousConnections[i] != ipAddressFieldValue) { ipAddressField.value = previousConnections[i]; ipAddressField.setSelectionRange(ipAddressFieldValue.length,
ipAddressField.value.length);
}
}
}
}
}
Summar y
Like the Amazon Album Art widget (Chapter 15), Timbuktu Quick Connect provides the user with a way to bypass steps in an application. Rather than open Timbuktu and look for the machine to which you want to connect, you can enter the IP address and connect directly to the Macintosh or PC on your network. Additionally, this widget demonstrates how easy it is to run AppleScripts from the command line and pass information from the JavaScript to the AppleScript.
252

17
iPhoto Mini
iPhoto is the digital equivalent of iTunes. It can download photos from most, if not all, digital cameras, and it helps you manage your library of digital photos. iPhoto has some editing features for adjusting the color and tone of photos, removing red-eye, and enhancing or retouching photos. iPhoto also has options that let you order prints of your photos and create a print album of photos. Anyone who has begun using a digital camera in place of their old Instamatic or SLR and is using iPhoto to store and organize digital photos knows how slow iPhoto can become as the libraries become large. Once again, a widget comes to the rescue. iPhoto Mini provides quick access to your digital photo library and provides an additional feature.
iPhoto Mini
Jesus de Meyer’s iPhoto Mini widget gives access to your photo libraries without opening iPhoto. When you install it, iPhoto Mini automatically gets the path to your photo library, inserts the path into its preferences, and displays the first photo in your library. Each time iPhoto Mini loads, a photo in your iPhoto library is displayed.
The main benefit of iPhoto Mini is that it places your photo library only a keystroke away without running iPhoto, but it does have features that iPhoto doesn’t have. iPhoto Mini has a “show random picture” feature that causes the widget to display a different picture each time you invoke Dashboard. Additionally, iPhoto Mini allows you to open a photo directly in an application from your iPhoto library. iPhoto’s Share menu has an option that lets you email a selected photo or photos. Whenever you select Email from the Share menu, the Mail application is loaded and a new message is created with the selected photos attached. iPhoto Mini also lets you email photos directly from it without opening the iPhoto application, though you are limited to the current photo. It also lets you open photos in Preview, Safari, or an application that you choose.
Chapter 17
The Interface
Pictures from your library dominate the interface of iPhoto Mini with the controls situated around the borders of the picture (Figure 17-1). The iPhoto icon in the upper-right corner of the widget allows you to open the application with just a click. The info button is in the upper-right corner instead of the lowerright corner, but that allows all of the photo controls to be grouped along the bottom border of the widget.
Figure 17-1
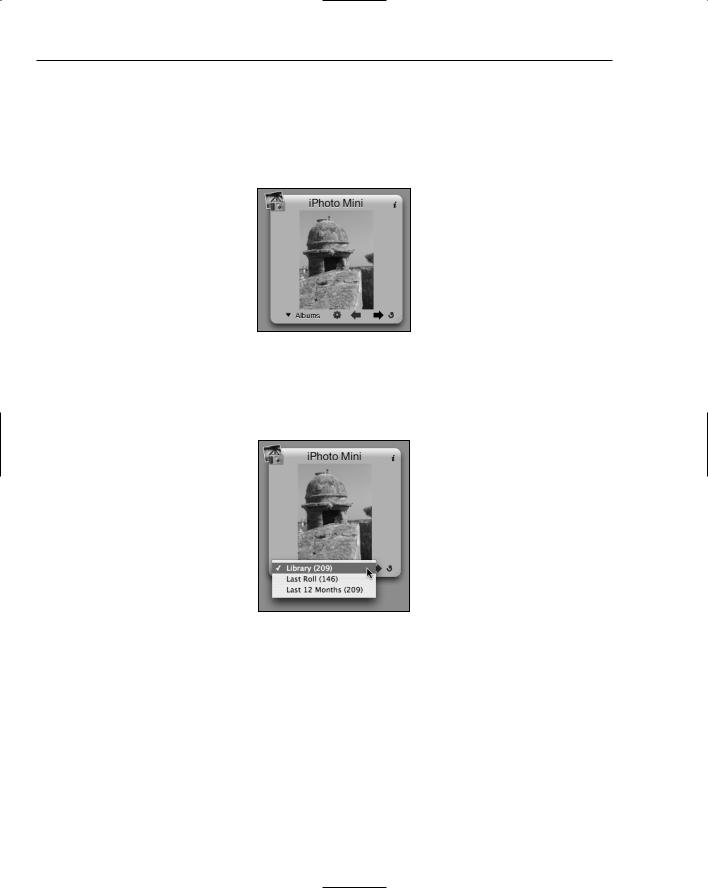
When you click the Albums menu, you see a list of albums that you have created. If you haven’t created any Albums in iPhoto, the Albums menu contains the default albums. The number of pictures in the albums is displayed in parentheses (Figure 17-2).
Figure 17-2
When you click the Actions menu, you see a list of applications (Figure 17-3). Choosing an application from the list opens the photo you are currently viewing in that application. You can specify a different application using the Open in “custom” option at the bottom of the menu.
The left and right arrows at the bottom of the widget let you browse forward or backward in the album that you’ve selected. The Reload button rebuilds the album list after you have added albums in the iPhoto application. In the lower-right corner of the widget is the resize thumb control. iPhoto Mini supports resizing and maintains the proportions of the picture with the resize.
254

iPhoto Mini
Figure 17-3
The back side of the widget contains widget preferences in addition to hot links to the edot studios website and a Donate button (Figure 17-4). The iPhoto Library text box contains the path to your iPhoto library. Should you need to move your library, you can change the path in the text box to point to the new location.
Figure 17-4
The Custom application name text box allows you to specify an application for the Open in “custom” Action menu. If you enter GraphicConverter in this text box, for instance, selecting Open in “custom” from the Actions menu opens the current photo in GraphicConverter. The Show random picture checkbox, as mentioned earlier, causes iPhoto Mini to display a different picture from your albums each time Dashboard is invoked. Beyond the coolness factor, this feature is handy if you can post to your blog using email.
iPhoto Mini Internals
Looking inside the iPhoto Mini widget shows you the usual items (Figure 17-5). Worth mention are the AppleClasses and Images folders. The AppleClasses folder contains the latest versions of the AppleAnimator, AppleButton, and AppleInfoButton JavaScripts. These are included to solve problems with previous versions of 10.4 and provide backward compatibility.
255

Chapter 17
Figure 17-5
The Images folder contains the bits that are used to build the widget from when it is resized. It also contains two versions of the iPhoto icon: in addition to the version that is displayed at the top of the widget, Jesus includes a highlighted version to display when your arrow is over the icon. An error image is also available when iPhoto Mini cannot find the iPhoto library (Figure 17-6).
Figure 17-6
Info.plist
When you look at the properties list for the widget, you see that only one access key is set. The AllowFileAccessOutsideOfWidget is set because iPhoto Mini needs access to the pictures in your directory. Because iPhoto Mini does not access any network or Internet resources, none of the other access keys is set.
<plist version=”1.0”> <dict>
256

iPhoto Mini
<key>AllowFileAccessOutsideOfWidget</key>
<true/>
<key>BackwardsCompatibleClassLookup</key>
<true/>
<key>CFBundleDisplayName</key>
<string>iPhotoMini</string>
<key>CFBundleIdentifier</key> <string>com.edot-studios.widget.iphotomini</string> <key>CFBundleName</key> <string>iPhotoMini</string> <key>CFBundleShortVersionString</key> <string>1.2</string>
<key>CFBundleVersion</key>
<string>1.2</string>
<key>CloseBoxInsetX</key>
<integer>13</integer>
<key>CloseBoxInsetY</key>
<integer>13</integer>
<key>Height</key>
<integer>215</integer>
<key>MainHTML</key>
<string>iPhotoMini.html</string>
<key>Plugin</key>
<string>iPhotoLoader.widgetplugin</string>
<key>Width</key>
<integer>216</integer>
</dict>
</plist>
You’ll also notice the BackwardsCompatibleClassLookups key is set. This key provides backward compatibility for OS X 10.4.3 and later versions while maintaining forward compatibility. When Dashboard sees this key combined with a <script> tag referencing AppleClasses, it loads the AppleClass files in /System/Library/WidgetResources/ instead of the copy included in the widget. If the widget is installed on a 10.4.5 system, it uses the AppleClasses that shipped with that version of the system. If the widget is loaded on a 10.4 system, it uses the AppleClasses installed in the widget.
HTML/CSS
When you look at the iPhotoMini.html file, you can see the AppleClasses inside of the widget referenced at the top of the file to provide backward compatibility on older versions of Tiger.
<!--
© 2005, e dot studios
License:
YOU MAY USE THIS PROGRAM AT YOUR OWN RISK. WE (“E DOT STUDIOS”) CANNOT BE HELD RESPONSIBLE FOR ANY DAMAGE THAT WAS CAUSED TO YOUR COMPUTER. THIS PRODUCT MAY NOT BE SOLD NOR MAY IT BE PLACED ON ANY REMOVABLE MEDIA WITHOUT FIRST CONTACTING THE AUTHOR. YOU ARE ALLOWED TO MAKE 1 (ONE) COPY FOR BACK UP PURPOSES, INTERNET BACK UP OR UPLOADING THIS PRODUCT TO AN INTERNET DRIVE OR SERVER IS PROHIBITED.
257

Chapter 17
The source code is provided as is. You are not allowed to modify or reuse the code without first contacting the author. This is also true for any plugins that are used.
Contact: contact@edot-studios.com -->
<html>
<head>
<style type=”text/css”> @import “iPhotoMini.css”;
</style>
<script type=”text/javascript” src=”iPhotoMini.js” charset=’utf-8’/> <script type=’text/javascript’ src=’AppleClasses/AppleInfoButton.js’
charset=’utf-8’ />
<script type=’text/javascript’ src=’AppleClasses/AppleAnimator.js’
charset=’utf-8’ />
<script type=’text/javascript’ src=’AppleClasses/AppleButton.js’ charset=’utf- 8’ />
</head>
In the body section of the HTML file, you see the “build widget” comment. Each of the <div>s in this section references a corresponding selector in the “widget image parts” section of the CSS file.
<body onload=”init();”> <div id=”front”>
<!-- build widget --> <div id=”top”>
<div id=”top_left_corner”></div> <div id=”top_edge”>
<div id=”title”>iPhoto Mini</div> </div>
<div id=”top_right_corner”> <div id=’infoButton’></div>
</div>
</div>
<div id=”middle”>
<div id=”left_edge”></div> <div id=”inner”></div> <div id=”right_edge”></div>
<div id=”photoWell”>
<img src=”” id=”photo” /> </div>
</div>
<div id=”bottom_left_corner”></div> <div id=”bottom_edge”></div>
<div id=”bottom_right_corner”></div>
<img id=’resize’ src=’/System/Library/WidgetResources/resize.png’ onmousedown=’mouseDown(event);’/>
258

iPhoto Mini
For instance, the top portions of the widget are built with the top_left_corner, top_edge, and top_right_corner selectors.
#top_left_corner { position: absolute; top: 0px;
left: 0px; bottom: 0px;
width: 28px;
background-image: url(“Images/top_left_corner.png”); background-repeat: no-repeat;
}
#top_edge { position: absolute; top: 0px;
left: 28px; right: 28px; bottom: 0px;
background-image: url(“Images/top_edge.png”); background-repeat: repeat-x;
}
#top_right_corner { position: absolute; top: 0px;
right: 0px; bottom: 0px;
width: 28px;
background-image: url(“Images/top_right_corner.png”); background-repeat: no-repeat;
}
Each of these selectors includes the PNG file from the Images directory inside of the widget. The iPhotoMini.css file also contains selectors for the sides and bottom of the widget. At the end of the “build widget” section of the HTML file, the resize.png in the WidgetResources directory is included to provide a thumb control for the live resizing feature.
The next section in the HTML file, the “add widget elements” section, contains the code for the widget controls and the preferences on the back side of the widget. The icon <div> at the beginning of the section has an onclick function to launch iPhoto whenever you click the icon.
<!-- add widget elements -->
<div id=”icon” onclick=”widget.openApplication(‘com.apple.iPhoto’);”></div>
259

Chapter 17
The icon selector in the iPhotoMini.css file places the icon in the upper-left corner of the widget and references the image in the Images directory.
#icon {
position: absolute; top: 0px;
left: 0px;
background-image: url(“Images/iPhotoIcon.png”); width: 32px;
height: 32px;
}
The sections below icon <div> contain the code for the controls. The onchange function in the popupMenu select id calls the popupChanged(this) JavaScript function to display the list of iPhoto albums in the Albums menu. The actionPopupMenu select id contains the list of options for opening the photo and calls the actionPopupChanged(this) JavaScript function to load the applications.
<img class=”popupMenuImage” src=”Images/popup_menu.png” /> <div id=”popupMenuText”>Albums</div>
<select id=’popupMenu’ onchange=’popupChanged(this);’></select>
<img class=”actionPopupMenuImage” src=”Images/action_popup_menu.png” /> <select id=’actionPopupMenu’ onchange=’actionPopupChanged(this);’> <option value=””>Select an action</option>
<option value=””> </option>
<option value=”Preview”>Open in Preview</option> <option value=”Mail”>Open in Mail</option> <option value=”Safari”>Open in Safari</option> <option value=”custom”>Open in “custom”</option>
</select>
<div id=”leftButton” onclick=”prevImage();” ></div> <div id=”rightButton” onclick=”nextImage();” ></div>
<div id=”reloadButton” onclick=”loadAlbums(true);” ></div> </div>
<div id=”back”> <!--
<div id=”edotIcon” onclick=”widgetOpenURL(‘http://www.edotstudios.com’);”></div>
-->
<div id=”prefs”>
iPhoto Library: <input type=”text” id=”libPath” /><br />
Custom application name: <input type=”text” id=”customApp” /><br /> <input type=”checkbox” id=”randomPic”>Show random picture</input><br />
</div>
<div id=”text_area”>
© 2005 - <a href=”#” onclick=”widget.openURL(‘http://www.edotstudios.com’);”>e dot studios</a>
</div>
<div id=’donateButton’></div> <div id=’doneButton’></div>
</div>
</body>
</html>
260