


582 Project 4 CREATING AN AIRLINE RESERVATION PORTAL
In this chapter, you will learn to deploy a Web application. Deployment can be described as the process of distributing an entire application or even a component to other computers. You will learn about different deployment scenarios and
the situations where you can use a particular method of deployment.
Deployment Scenarios
The process of deployment has undergone a number of changes compared to the deployment model of applications developed using Visual Studio 6.0. In order to deploy a Visual Studio .NET solution, you need to pass on some information to
.NET. This information can be regarding the location, method, and application to be deployed. For deployment purposes, Visual Studio .NET provides templates for four different types of deployment projects, which are as follows:
Merge Module project. This type of project allows you to package all your project files/components into a single module (.msm) file. The Merge Module project enables you to create reusable setup components and share setup code between installers. Merge modules contain components and related files, such as resources and registry entries. Merge modules need to be merged into an installer for each application that uses the component.
Setup project. This type of project is used to create installers for distributing Windows Application projects. The output file is a Windows Installer (.msi) file. The Installer file contains the application files and any dependent files, such as registry entries and setup instructions. The target files are installed in the files system of your local computer.
Web Setup project. This type of project is used to distribute Web Application projects. The files are deployed on a Web server. The Web Setup project automatically takes care of configuration and registration.
DEPLOYING THE APPLICATION |
Chapter 26 |
583 |
|
|
|
|
|
Cab project. This type of project is used primarily to package and distribute ActiveX controls so that they can be downloaded from a Web server. This option is employed when you want the code to run on a client computer instead of a server.
The primary aim of deployment is to install the application on a target computer. You can create a new deployment project or even add an existing deployment project to a solution. I will now discuss the process of creating a deployment project.
1.On the File menu, point to Add and click on New Project.
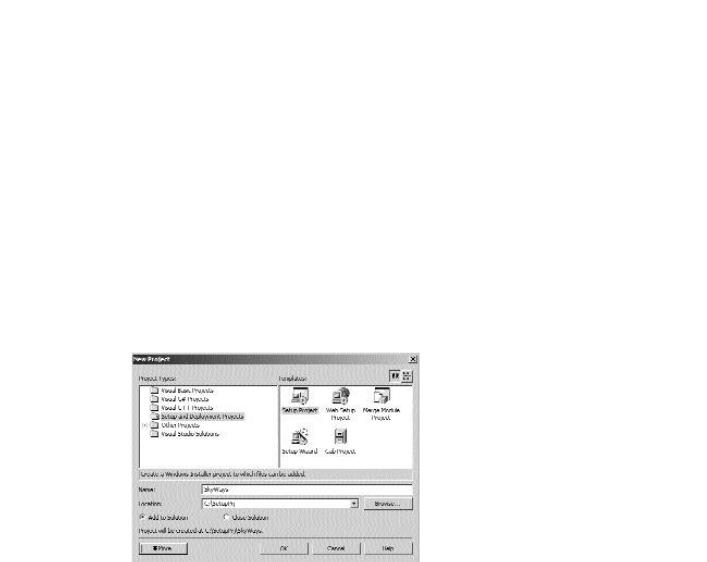
2.In the Add New Project dialog box (refer to Figure 26-1), select the Setup and Deployment option from the Project Types: pane and Setup Project from the Templates: pane.
FIGURE 26-1 The Add New Project dialog box
3.Specify the name for the deployment project in the Name: text box and the path in the Location: text box.
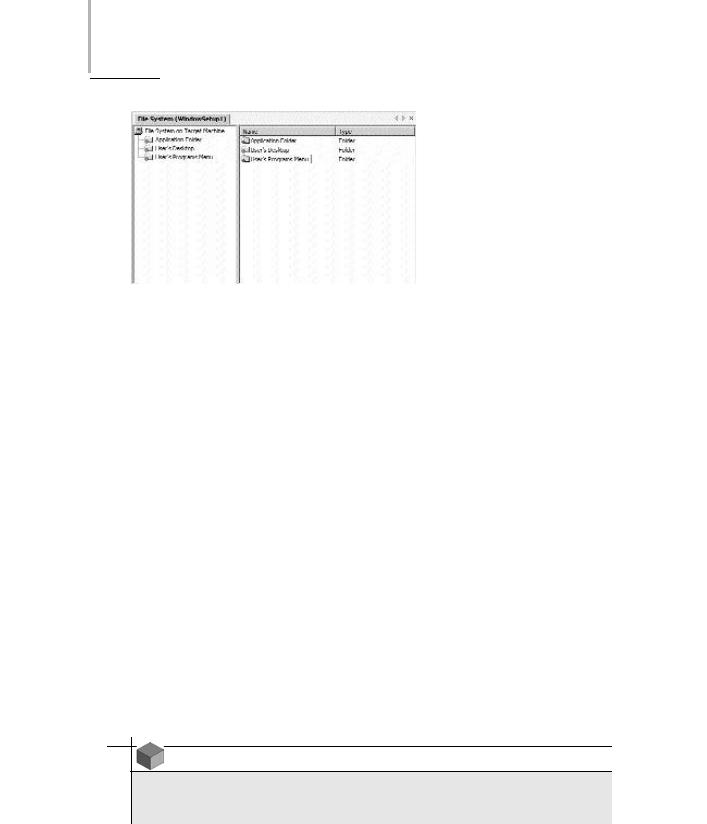
The File System editor is opened (refer to Figure 26-2).
584 Project 4 CREATING AN AIRLINE RESERVATION PORTAL
FIGURE 26-2 The File System editor
Deployment Editors
You might want to specify the location where files should be installed on a target computer and other configuration tasks to be performed during installation. For this purpose, Visual Studio .NET provides you with six deployment editors, which can be used to specify and customize properties and settings for various aspects of deployment. You can open a deployment editor as follows:
1.Select the deployment project in Solution Explorer.
2.On the View menu, point to Editor and then click on the name of the editor that you want to open.
The deployment editors available with Visual Studio .NET are listed as follows:
File System editor
Registry editor
File Types editor
User Interface editor
Customs Action editor
Launch Conditions editor
NOTE
The User Interface editor is not available in the case of Merge Module projects, and no editor is available for Cab projects.

DEPLOYING THE APPLICATION |
Chapter 26 |
585 |
|
|
|
|
|
I will explain each one of the editors in detail.
File System Editor
The File System editor presents the file system view of the target computer. The File System editor uses the concept of abstract folders to ensure that files are installed in the location you specify. For example, the Desktop folder compares to the desktop folder on the target computer.
Registry Editor
The Registry editor enables you to specify the registry keys and values to be added to the registry of the target computer. By default, the Registry editor displays the standard Windows registry keys. You can add your own keys to any registry key or subkey.
File Types Editor
The File Types editor is used to specify file associations on the target computer. You can associate a file extension with your application and specify the action to be performed for each file type.
User Interface Editor
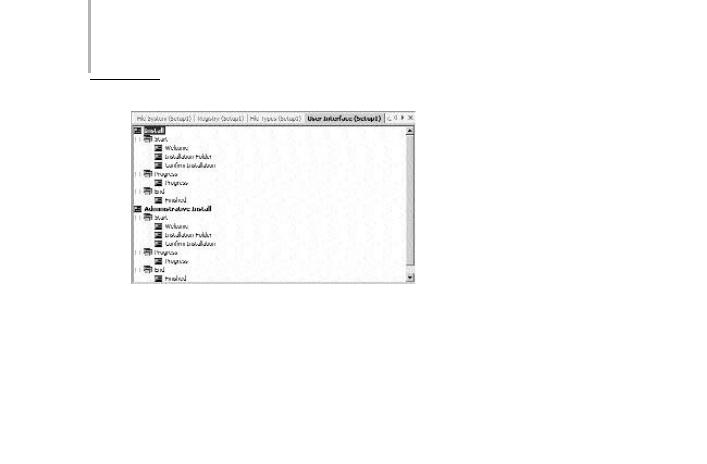
The User Interface editor is used to specify and set properties for dialog boxes displayed during installation on the target computer. This editor is a tree control that contains two sections, Install and Administrative Install. The Install section contains dialog boxes to be displayed when the user runs the installer, and the Administrative Install contains dialog boxes to be displayed when the system administrator uploads the installer to a network location. The User Interface editor is shown in Figure 26-3.
586 Project 4 CREATING AN AIRLINE RESERVATION PORTAL
FIGURE 26-3 The User Interface editor
Customs Action Editor
This editor enables you to specify actions to be performed on the target computer upon the completion of installation.This editor contains four folders, each corresponding to a particular installation phase.The folders are Install, Commit, Rollback, and Uninstall. Custom actions run in the same order in which they are displayed in the editor.
Launch Conditions Editor
You can specify conditions that need to be fulfilled for installation. For example, you might want to check for a file before installation.
Now that you are aware of the different deployment options and the deployments editors available in Visual Studio .NET, I will guide you through the process of creating the deployment project for the SkyShark Airlines application.
Deploying the SkyShark Airlines
Application
As you know, the SkyShark Airlines application is a Web application. In order to create a deployment project for this application, you will need to create a Web Setup project. Apart from creating Windows Installers for distribution through the traditional medium, such as CDs or DVDs, Visual Studio .NET supports its