

Pro Visual C++-CLI And The .NET 2.0 Platform (2006) [eng]-1
.pdf158 |
C H A P T E R 4 ■ A D V A N C E D C + + / C L I |
int a = 5; String^ b = "Hi";
Console::WriteLine("The min of {0} and {1} is {2}", a, b, min(a,b));
The types are compared at compile time and will be found to be incompatible, and a compile-time error will be generated.
All the preceding implementation of the template functions has been implicit. It is also possible to implement the template explicitly. This is done by specifying the data type to use in square brackets after the function name within the function call. Now, because there is no longer any ambiguity of the data type being used, the explicit instantiation of the original min function template would compile.
int a = 5; double b = 6;
Console::WriteLine("The min of {0} and {1} is {2}", a, b, min<double>(a,b));
Class Templates
The idea behind class templates is the same as function templates. This time, though, the template creates data type generic classes. Syntactically, the declaration of a class template is the same as a standard class, except that you prefix the class with a template statement and then use the data type specified by the prefix within the class declaration.
template <class T> ref class Point2D
{
public:
Point2D();
TX;
TY;
static Point2D^ operator*(const Point2D^ lhs, const T rhs);
};
The implementation of the template is a little more involved, as you need to also prefix the methods with the template statement and qualify the method with the class template followed by a template argument list. One thing I find a little odd about the class template implementation is that you don’t need a template argument list when you use a template class within a method, but if you return a template class, you do. Take a closer look at the operator* method to see what I mean:
template <class T>
Point2D<T>::Point2D() : X((T)0), Y((T)0) {}
template <class T>
Point2D<T>^ Point2D<T>::operator*(const Point2D^ lhs, const T rhs)
{
Point2D^ ret = gcnew Point2D(); ret->X = lhs->X * rhs;
ret->Y = lhs->Y * rhs; return ret;
}
Creating an instance of a class template is nearly as easy as creating an instance of a class. You simply need to explicitly specify the data type to be used by the template when you create the instance of the template class using a template argument list:
Point2D<double>^ TopLeft = gcnew Point2D<double>(10.5, 10.9);

C H A P T E R 4 ■ A D V A N C E D C + + / C L I |
159 |
That’s it. From here on, you will be coding just as you would a standard class. One thing you need to note is that each time you create an instance of a template with different data type, you are creating a new copy of the class template or what is known as a new generated class.
■Caution The definition and implementation of a class template must reside within the same file (usually a header file). The reason for this is that a generated class is created when an instantiation occurs during the compile and both the definition and implementation have to be available at that time.
Template Specialization and Partial Specialization
There will come a time when you are going to want to perform special actions when a certain data type is used within the class template. This is what is known as template specialization. For example, let’s say your class will not work properly for a particular data type. By providing a specialization for the generation of that type, you could throw an exception notifying the implementer of the class template of the problem. (I cover exceptions later in this chapter.)
To create a template specialization, you simple create an additional copy of the class template but with an explicit data type in the template argument list:
template <>
ref class Point2D<char>
{
public:
Point2D() { throw gcnew Exception("Data Type is too small"); }
};
You create an instance of a template specialization exactly like a class template:
Point2D<char>^ TopLeft = gcnew Point2D<char>(10.5, 10.9);
Because the compiler finds the specialized data type, it generates the specialization instance instead. A partial specialization is very similar to a specialization except that not all of the template data types are explicitly specified:
// template class
template <class T1, class T2> ref class ACB
{
};
// partial specialization template template <class T1>
ref class ABC<T1, char>
{
};
void main()
{
//generates instance of template class ABC<int,int>^ templateClass = gcnew ABC<int,int>();
//generates instance of partial specialization ABC<int,char>^ partialSpec = gcnew ABC<int,char>();
}
160 |
C H A P T E R 4 ■ A D V A N C E D C + + / C L I |
Template Parameters
Class templates have an additional construct that allows you to specify a default parameter to provide to the class. This comes in handy for things like preinitializing an array within the template. All default parameters are treated like const.
template <class T, int elements> ref class X
{
private:
static array<T>^ iArray = gcnew array<T>(elements); public:
X() {}
};
To create and instance of a template with a parameter, use the following syntax:
X<int,10> x; // - or –
X<int,10>^ x = gcnew X<int,10>();
The managed heap declaration looks like a managed array declaration, doesn’t it? It is also possible to provide default data types and parameters:
template <class T = int, int elements = 10> ref class X
{
};
Now, that everything is defaulted, you can declare the template, like this:
X<> x;
// - or –
X<>^ x = gcnew X<>();
Listing 4-8 is an example of both a function template and a very simple (read: incomplete) Point2D class template. The Point2D class template also has a specialization on the char data type, which throws an exception if implemented.
Listing 4-8. Templates in Action
using namespace System;
// Function Template --------------------------------------
template <class T> T min ( T a, T b)
{
return (a < b) ? a : b;
}
// Class Template -----------------------------------------
template <class T> ref class Point2D
{
C H A P T E R 4 ■ A D V A N C E D C + + / C L I |
161 |
public:
Point2D(); Point2D(T x, T y);
TX;
TY;
static Point2D^ operator-(const Point2D^ lhs, const Point2D^ rhs); static Point2D^ operator*(const Point2D^ lhs, const T rhs);
virtual String^ ToString() override;
};
template <class T>
Point2D<T>::Point2D() : X((T)0), Y((T)0) {}
template <class T>
Point2D<T>::Point2D(T x, T y) : X(x), Y(y) {}
template <class T>
Point2D<T>^ Point2D<T>::operator-(const Point2D^ lhs, const Point2D^ rhs)
{
Point2D^ ret = gcnew Point2D();
ret->X = lhs->X - rhs->X; ret->Y = lhs->Y - rhs->Y;
return ret;
}
template <class T>
Point2D<T>^ Point2D<T>::operator*(const Point2D^ lhs, const T rhs)
{
Point2D^ ret = gcnew Point2D();
ret->X = lhs->X * rhs; ret->Y = lhs->Y * rhs;
return ret;
}
template <class T>
String^ Point2D<T>::ToString()
{
return String::Format("X={0} Y={1}", X, Y);
}
// Class Template Specialization ----------------------------
template <>
ref class Point2D<char>
{
162 C H A P T E R 4 ■ A D V A N C E D C + + / C L I
public:
Point2D() { throw gcnew Exception("Data Type is too small"); }
Point2D(char x, char y) { throw gcnew Exception("Data Type is too small"); }
}; |
|
// main function -------------------------------------------- |
|
void main() |
|
{ |
|
int |
a = 5; |
int |
b = 6; |
double c = 5.1; |
|
Console::WriteLine("The min of {0} and {1} is {2}", a, b, min(a,b)); Console::WriteLine("The min of {0} and {1} is {2}", a, c, min<double>(a,c));
Console::WriteLine("----------------------------");
Point2D<int>^ TopLeftI = gcnew Point2D<int>(10, 10);
Point2D<int>^ BottomRightI = gcnew Point2D<int>(15, 20);
Point2D<int>^ SizeI = BottomRightI - TopLeftI;
Console::WriteLine(SizeI);
SizeI = SizeI * 2;
Console::WriteLine(SizeI);
Console::WriteLine("---------------------------- |
"); |
Point2D<double>^ TopLeft = gcnew Point2D<double>(10.5, 10.9);
Point2D<double>^ BottomRight = gcnew Point2D<double>(15.2, 20.3);
Point2D<double>^ SizeD = BottomRight - TopLeft;
Console::WriteLine(SizeD);
SizeD = SizeD * 0.5;
Console::WriteLine(SizeD);
Console::WriteLine("---------------------------- |
"); |
try
{
Point2D<char>^ TopLeft = gcnew Point2D<char>(10, 10);
}
catch (Exception^ ex)
{
Console::WriteLine(ex->Message);
}
}
Figure 4-2 shows the results of this little program.

C H A P T E R 4 ■ A D V A N C E D C + + / C L I |
163 |
Figure 4-2. Results of Templates.exe
Generics
Let’s get one thing straight right away. Generics are not .NET templates. Yes, they have a similar syntax to templates and some overlap of functionality, as both templates and generics make it possible to create data type generic types. But that is where the similarities end.
So what are generics? They are runtime, subtype constraint–based, instantiated data type, generic objects that are verifiable and have cross-language support. Okay, perhaps this is not the easiest definition to follow. Maybe it will be easier to understand if I compare and contrast a generic with a template, which it closely resembles.
A generic is syntactically coded in nearly an identical fashion as a template. The big differences are that specializations are not allowed and there are no default parameters. Oh, you also use the keyword generic instead of template. In other words, the basic generic is easier to code then a template:
generic<class K, class V> ref class KVClass
{
public:
property K Key; property V Value;
KVClass(K key, V value);
};
generic<class K, class V> KVClass<K,V>::KVClass(K key, V value)
{
Key = key; Value = value;
}
The preceding code will generate an instance for any key/value data type pair. What happens if the generic will only work for a certain subset of data types? That is where the subtype constraint comes into play. Subtype constraints allow you to specify which base class and/or interfaces that each generic parameter supports.
A subtype constraint cannot be a sealed class or value type, including built-in types such as int or double. The reason is that value types and sealed classes cannot have derived classes; thus, only one class would ever be able to satisfy the subtype constraint—the value type or sealed class itself. If you think about it, you only have to rewrite the generic with the parameter replaced with the value type or sealed class to accomplish the same thing.
164 |
C H A P T E R 4 ■ A D V A N C E D C + + / C L I |
To code a subtype constraint, you use the following code placed between the generic statement and the class or method:
where type-parameter_1: [class constraint,] [interface constraint list] //...
where type-parameter_N: [class constraint,] [interface constraint list]
or
generic<class K, class V> where K : IComparable
ref class KVClass
{
};
generic<class K, class V> where K : IComparable
V KVClass<K,V>::isGreater(KVClass ^in)
{
}
One major difference between generics and templates is when they are instantiated. For templates, it happens at compile time, whereas for generics, it happens at runtime. This difference is significant because instantiation at compile time means that the same template instantiated in two different assemblies results in two different types being generate. The reason is that all types are qualified by the assembly in which they are defined. In other words, the data type DType in assembly 1 is not the same as the data type DType in assembly 2, even if DType is defined exactly the same way in both assemblies. So, assembly 1’s myTemplate<T> is a different type from assembly 2’s myTemplate<T>. The generic, on the other hand, because it is instantiated at runtime, is able to create one specialization for all references.
Another difference between templates and generics is that only generics provide .NET crosslanguage support because other languages do not support templates. This means that a generic object created in C++/CLI can be used, for example, by C# or Visual Basic .NET.
Listing 4-9 is an example of a very simple (read: very incomplete) key/value pair generic. You will see in Chapter 7 that the .NET Framework provides a base class for you to inherit to build this type of generic.
Listing 4-9. Generics in Action
using namespace System;
// Generic Class ----------------------------------------
generic<class K, class V> where K : IComparable
ref class KVClass
{
public:
property K Key; property V Value;
KVClass(K key, V value);
V isGreater(KVClass ^in);
};
C H A P T E R 4 ■ A D V A N C E D C + + / C L I |
165 |
generic<class K, class V> KVClass<K,V>::KVClass(K key, V value)
{
Key = key; Value = value;
}
generic<class K, class V> where K : IComparable
V KVClass<K,V>::isGreater(KVClass ^in)
{
if (Key->CompareTo(in->Key) > 0) return Value;
else
return in->Value;
}
// main function ----------------------------------------
void main()
{
KVClass<int,String^> ^a = gcnew KVClass<int,String^>(5, "Five"); KVClass<int,String^> ^b = gcnew KVClass<int,String^>(6, "Six");
Console::WriteLine(a->isGreater(b));
KVClass<String^,int> ^t = gcnew KVClass<String^,int>("Tomato", 1);
KVClass<String^,int> ^c = gcnew KVClass<String^,int>("Carrot", 2);
Console::WriteLine(t->isGreater(c));
}
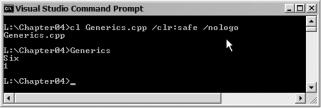
Figure 4-3 shows the results of this little program.
Figure 4-3. Results of Generics.exe
typedef
The typedef operator allows you to create new names for existing data types. These operators are extremely handy when it comes to arrays and templates, because they improve readability and simplify coding. For example, a typedef for an array of integers could be declared as
typedef array<int> intArray;
166 |
C H A P T E R 4 ■ A D V A N C E D C + + / C L I |
Now to create an instance of an array of five integers, you would simply code
intArray^ x = gcnew intArray(5);
Similarly, using typedef with class templates can make things easier to read. Instead of
Point2D<int>^
Point2D<double>^
from the preceding example, you could use the following:
typedef Point2D<int> Int2DPoint; typedef Point2D<double> Double2DPoint;
You could then create instances of the templates like this:
Int2DPoint^ TopLeftI = gcnew Int2DPoint(10, 10);
Double2DPoint^ TopLeftD = gcnew Double2DPoint(10, 10);
The typedef operator also has one more important benefit. If the data type defined by the typedef were ever to change, you would only have to make the change within the typedef statement. If you don’t use the typedef, you would have to scan through all your code looking for and then changing all instances of the data type.
However, the typedef operator can also make your code complicated if not used properly, because there is nothing stopping you from renaming all your date types to meaningless names. For example, you could rename all your data types to animal names. (I’m not sure why you would do this, but you could.)
typedef char mouse; typedef short cat; typedef int elephant; // and so on ...
Exceptions
Error handling should be nothing new to software developers. All programmers have written code that verifies that the processes in their code work properly and, if they don’t, does something special to correct them. Wouldn’t it be nice if nothing could go wrong with your programs, and you could write code without having to worry about whether something might go wrong?
Well, you can use exceptions to do that—sort of. Along with the exception’s normal role of handling all unforeseen problems, it can actually allow you to code in a manner as if nothing will go wrong and then capture all the possible errors at the end. This separation of error handling from the main code logic can make the program much easier to work with. It eliminates multiple layers of if statements with the sole purpose of trapping errors that might occur (but most probably won’t).
With C++/CLI, exceptions have been taken one step further than with traditional C++. Exceptions can now be thrown across language boundaries. That means that if, for example, you code a ref class in C++/CLI, and the ref class is used in some C# code, any exceptions thrown in the C++/CLI class can be caught by the C# code. A major benefit of this is there is that no need for checking the HResult for errors any longer (if implemented using exceptions). You just have to code as if things worked correctly, because if they didn’t, the error would be caught by the exception handler. I won’t go into multilanguage programming in this book, but rest assured it does work.
Basics of Exception Handling
Coding for exceptions is very easy. You break your code up into three parts: the code for successful execution, the errors, and the code to clean up afterward. In C++/CLI, these three parts are known as
C H A P T E R 4 ■ A D V A N C E D C + + / C L I |
167 |
the try block, the catch block, and the finally block. I will describe the try and catch blocks now and examine the finally block at the end of this section.
The process for handling exceptions is a little tricky for new developers because the linear flow of the code is broken. Whenever an error occurs, the program throws an exception. At this point, normal execution flow of the program ends, and the program goes in search of a handler for the exception that it threw. You’ll see how the program searches for exceptions later, in the section “Catching Multiple Exceptions.” If it doesn’t find an exception, the program terminates. Before C++/CLI, this termination would have left programs without cleaning up after themselves, but if you code with ref classes, you don’t have to worry about this.
Exceptions also have to be thrown within a try block, or they will immediately terminate without searching for a handler. The try block is simply a block of code enclosed in curly brackets and prefixed with the keyword try:
try
{
// code body where exception can be thrown
}
After the try block are one or more catch blocks. Each catch block handles a different type of error. A catch block looks similar to a function with one parameter, except that the function name is always catch, there is no return type, and the parameter is the exception type to trap.
catch (ExceptionType e1)
{
// code to handle exception
}
// repeat for all specific exception types catch (ExceptionType eN)
{
// generic code to handle exception
}
Listing 4-10 shows a simple example of an exception. I noted in Chapter 3 that the safe_cast operator throws a System::InvalidCastException when it is unable to convert from one try to another. This coding example shows how to capture this exception so that it can be handled more elegantly than the abrupt termination that would normally happen. The safe_cast operator is actually to smart to be used directly as it knows that class X and class Y are not related, so I had to use the C-cast style type cast, which internally uses the safe_cast operator.
Listing 4-10. CatchException.exe: Simple Exception Handling Example
using namespace System;
ref class X {}; ref class Y {};
void main()
{
X ^x = gcnew X;
try
{
Y ^y = (Y^)x;
Console::WriteLine("No Exception"); // Should not execute
}