

UnrealEngine4Blueprints (6)
.pdf If you have MORE than ONE more Spritesheet:
Step #1 Copy your Flipbook and the children nodes (Ctrl + Click the nodes onebyone and then press Ctrl + C on your keyboard (Alternatively, Right Click [Ctrl + Click] and select Copy).
Step #2 Press Ctrl + V (Right Click [Ctrl + Click] the empty space underneath your Flipbook to create a copy of our Flipbook.
Step #3 Click the Texture Object and in the Properties field, change the Texture to your Second Spritesheet. Remember to also alter the Constants for Row and Columns if need be!
Step #4 Head back to our “If” node. We need to copy this If node, as well as the constant that’s connected to B. So Ctrl + Click both the “If” node and the number “1” which we’ve plugged into “B”. Ctrl + C (Or Right Click [Ctrl + Click] > Copy) to copy them and Ctrl + V (Right Click [Ctrl + Click] > Paste Here) to create the duplicates. Now move these to below our first If statement.
Step #5 Connect our SECOND Flipbook’s “Result” to the second “If” node’s “A<B”. Once this is connected, Connect the righthand pin of the SECOND “If” node to the “A>=B” of the first “If” node and once more to the “A==B”. Once this is done, on the SECOND “If” node’s constant (That’s plugged into “B”), change the property value to “2”. (Look at this screenshot for reference!)
41
Step #6 Our second If node is missing an A connection, but our first If node has one; It’s connected to multiply. Grab the empty “A” pin from our Second If node and drag it into the Multiply we set up for time; This makes sure that all the Flipbooks run on the same time.
Step #7 If you need more than one more Flipbook for your Spritesheet, repeat Step #1 Step #6 until you’re left with an If that has “A”, “B” and “A<B” connected up and a final Flipbook that needs connecting up, then:
Step #8 We’ve connected Spritesheet 1 and 2 together, but we still need to connect Spritesheet 3 (Or if you’re using more then 3, you’ll have 1, 2 and 3 connected and not 4 .etc). If we created another If statement, we’d have too many open pins on the If statement to work.
I mean how can you If “A<B” and “A>==B” if we’re using one value? It would just confuse things.
Here’s how we’ll hand the final Spritesheet!
Step #9 Copy a previous Flipbook and it’s children (The rows constant, the columns constant, the texture and the TextureCoordinate) and paste it under our last Flipbook.
Step #10 Alter the Texture to be your final Spritesheet. (Change the rows and columns if need be too!)
Step #11 Assign the results of our last Flipbook as “A>=B” and “A==B” by dragging the results pin to the empty pins on our If statement.
42

And that’s the basics of Flipbooks and animations! If you’re using three textures, your Blueprint should now look like this:
43

Notice how complicated it looks yet how simple it was to implement. That’s the thing about Blueprints It’s very easy to look complicated, but when you trace the line along to follow what’s going on, you begin to realize just how simple the Blueprints system is!
Sometimes however, they’ll get so complicated that it becomes hard to find your way amongst the spaghetti lines, but we’ll get to how to deal with that a bit later on!
Quick note! Before carrying on, it might be a good time to remention the Emissive Colour. If your animated portal is too dark and you want it to glow, hook the first If statement into Emissive as well as base colour!
44
Creating our Portal!
So we’ve got our material ready for our Portal, but now we need the Portal! There’s a few ways we can go about this, but I’m going to go with the cleanest and most organised way!
First, we’re going to have to be able to see the Engine content folder in our Content Browser.
Step #1 Head over to your Content Browser
Step #2 Click the “View Options” with the eye just before the text.
Step #3 There will be small menu that pops up, “Show Engine Content” should be unticked. We want to see this content, so tick it and in the folder structure on the left, you should now see “Engine” above “Game”.
45

Step #4 Click the nice big “Engine” button on the top left of the Folder view in the content browser.
Step #5 With Engine selected, type in the search box on the right “EditorPlane”.
Step #7 Click the EditorPlane to highlight it. Once Highlight, Right Click [Ctrl + Click] and select “Make Copy…” which will duplicate the EditorPlane. Input any name of your choosing… I’ve gone for “Mesh_Portal”.
NOTE: Once naming your duplicated copy, the Content Browser might kick you out back into the Engine folder. If this happens, simply search in the top bar with the name you gave our copy!
Step #8 Click and Drag your Portal mesh into the folder we created earlier in the tutorial (Or anywhere you’re going to remember where it is!)
Step #9 Once moved, Double click the mesh to open it up in the Static Mesh Editor!
46

So you might be wondering; Why the heck did we just do that?
Well… For our Portal, we need the most inexpensive mesh we can get and you can’t get as less taxing of a mesh than an EditorPlane. But looking ahead into the future, EditorPlane’s can’t have materials assigned to them once we’re in our Portal blueprint.
So we’ve created an EditorPlane that we can alter the Material to so that when it comes to importing it into our Blueprint! Now is the time to alter the material of our EditorPlane (Which is now called “Mesh_Portal” or whatever you have called yours!)
Step #10 In the Static Mesh Editor, on the right you should see “Element 0” under LOD1, with “WorldGridMaterial” assigned to it.
Step #11 Where it says “WorldGridMaterial”, click the little light gray arrow and in the search box that appears, type in the name of the Material you have created.
47

NOTE: If your Material hasn’t applied very well (Falling off the screen, tiled twice or similar problems), then you’ll have to go back into your Material and alter the properties of “TexCoord”. Usually, enabling “Un mirror V” should solve the problem, but it may require you to tinker around with the settings inside TextureCoordinate until it fits your EditorPlane properly. Remember to Apply every time you make a change before checking the EdtiorPlane or it won’t update with the latest Material properties!
Now that our EditorPlane has our Material on it, we are now ready to begin piecing together our Portal Blueprint!
48

Piecing Together our Portal Blueprint
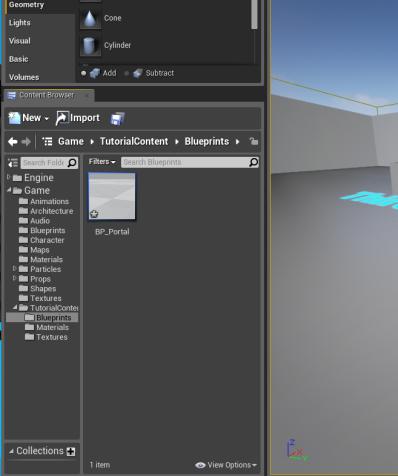
Step #1 Go back to the Content Browser and open up your Portal BP (I’ve called mine “BP_Portal”)
This will open up into our Components tab of the Blueprint editor. If your Blueprint hasn’t opened in the Components tab, you can navigate through the different tabs on the topright of the Blueprint editor.
Step #2 Under the “Compile” and “Save buttons is a dropdown menu called “Add Component”. For good practice, Click this and add a “Scene”. This means that if we do anything to alter the position / rotation of this Blueprint, it’ll alter the 0.0.0 location of inside, which will save your butt more times then you’ll realize.
Note that it doesn’t matter what you call this “Scene” as it’s only there to hold the actors / items / meshes that we put into the Blueprint.
49

Step #3 Once “Scene” has been created, click the “Add Component” dropdown menu again. This time type in “Static Mesh” and click it. This will be our Portal.
Helpful Tip: You should now see in the hierarchy view that it says “Scene1” and the Static Mesh we’ve created has become a child of “Scene1”. If this isn’t the case for you and “Scene1” has become the child of the Static Mesh, just click and drag the “Scene1” up to where the Parent is and it’ll make sure “Scene1” becomes the Daddy/Mommy of everything in the Blueprint.
Step #4 Click the Static Mesh that has been created (Under the “Add Component” menu). If you scroll down the in the “Details” pane, you’ll get to a section called “Static Mesh” with a big white box saying “Static Mesh” with a thin gray box also saying “Static Mesh”.
Step #5 Click the light gray box and search for whatever you called your EditorPlane. I called mine “Mesh_Portal”.
Now the EditorPlane is in the blueprint, some of you can’t see it! Well it’s there! Trust me. There’s just one little thing we need to do if you can’t see it:
50