

(ebook) Programing - Introduction to Visual Basic NET
.pdf1 6 8 C h a p t e r 9 : B u i l d i n g W i n d o w s S e r v i c e s w i t h V B . N E T
If you look at the code further, you should see stubs for the OnStart and OnStop routines. Modify the stubs—and add an OnContinue routine—as shown in the following:
Protected Overrides Sub OnStart(ByVal args() As String) timer1.Enabled = False
Dim file As TextWriter = New StreamWriter(“c:\output.txt”, True) file.WriteLine(“Service Started”)
file.Close() timer1.Interval = 5000 timer1.Enabled = True
End Sub
Protected Overrides Sub OnStop()
Timer1.Enabled = False
Dim file As TextWriter = New StreamWriter(“c:\output.txt”, True) file.WriteLine(“Service Stopped”)
file.Close() End Sub
Protected Overrides Sub OnContinue()
Dim file As StreamWriter = New StreamWriter(“c:\output.txt”, True) file.WriteLine(“Service Restarted”)
file.Close() End Sub
As you can see, when the service starts, the code writes to the text file that the service is staring. Then the timer’s interval is set and the timer is enabled, in case you failed to make the changes described in the last section. If the service is stopped, that fact is recorded in the text file as well. If someone pauses the service and later resumes it, the fact that the service was restarted is written in the text file.
This is all that needs to be written in the service. However, you have to do more to make the service usable: You have to add installers to your application.
Adding Installers to Your Service
You need to return to the designer for your service. Right-click on the designer and choose Add Installer. A new window is added to the designer area, labeled ProjectInstaller.vb [Design]. Two components will be added to the project. One is for installing your service, whereas the other is for installing the process that hosts your service while it is running. All services run in their own process so that they can run independently of any particular user.
Before building the project, you need to perform a couple of tasks because you changed the name of the class from UserService1 to UsageMonitor. On the ProjectInstaller.vb designer, click on the serviceInstaller1 control and change the

C r e a t i n g Yo u r F i r s t W i n d o w s S e r v i c e s P r o j e c t 1 6 9
ServiceName property to UsageMonitor. Then, in the Solution Explorer window, right-click on the LearningVBservice project and choose Properties. In the property pages, change the Startup Object combo box to UsageMonitor.
You are now ready to build the service. Choose Build from the Build menu. Your service will now be built.
Configuring Your Service
Your service is compiled, but the system doesn’t know anything about it yet. You have to install this service before it will be available for starting and stopping in the Service Control Manager. Open a command or console window (that’s a DOS prompt), and go to the directory where the service was compiled. For most of you, this will be C:\Documents and Settings\<your username>\My Documents\Visual Studio Projects\ LearningVBservice\bin. When you’re there, type in the following command:
installutil LearningVBservice.exe
N O T E
InstallUtil.exe must be in the path in order to work in this example. If it is not in the path, you’ll have to type the full pathname.
This will take a moment. A box pops up, asking you to enter the username and password under which you want this service to run. You can see this box in Figure 9.1. Notice that you need to type the name of the server or domain, depending on your setup. After that is done, you are ready to start your service and set its startup options.
Figure 9.1
Installing your Windows service with the Services applet.
Open the Services management tool, which can be found in the Computer Management application in Windows 2000. Your service, UsageMonitor, will appear in the list, as you see in Figure 9.2. Double-click the UsageMonitor service to open the Properties dialog box. You can change the startup type from Manual to Automatic if you want the service to start every time Windows starts, and it will launch and begin operations even if no one logs on. At this point, you can just click the Start button and let the service run for a while. After it runs for a time, stop it. Now you can examine the log that it produced.

1 7 0 C h a p t e r 9 : B u i l d i n g W i n d o w s S e r v i c e s w i t h V B . N E T
Figure 9.2
Your first Web service showing up in the Windows Services Control Manager.
The log file that is produced shows the CPU utilization every five seconds. The service can only be stopped and started. It cannot be paused because the CanPauseAndContinue property is set to False by default, and you did not change that before you built the service. Here is a sample of the file that was produced:
Service Started
CPU Usage: 0 - 2/24/2001 4:21:55 PM
CPU Usage: 9.504132 - 2/24/2001 4:21:57 PM CPU Usage: 9.8 - 2/24/2001 4:22:02 PM
...
CPU Usage: 23 - 2/24/2001 4:24:07 PM
CPU Usage: 1.19760478 - 2/24/2001 4:24:12 PM CPU Usage: 5.61122227 - 2/24/2001 4:24:17 PM CPU Usage: 4.2 - 2/24/2001 4:24:22 PM Service Stopped
The first value for the CPU usage is often a throwaway value. After that, all the numbers look legitimate.
Understanding Windows Services
As you know, Windows Services can run when Windows starts, even if no one logs in. These applications have no user interface and run in the background, independent of any user. They “log in” as the service account or as a specific user, which means they can run under the security context of a specific user, regardless of who is logged in.
Windows Services are unique in several ways. You cannot debug a service by starting it within the IDE because you must install it first so that Windows can manage it. You will see how to debug it later.

U n d e r s t a n d i n g W i n d o w s S e r v i c e s 1 7 1
You had to add installers to this project, something you have not had to do in any other project. This, again, is because the service must be installed so that Windows can handle starting and stopping it.
Because a service does not have a user interface, you should plan to write any messages from the service into the Windows event log. This is the key to a long-running service; nothing blocks execution, such as waiting for a user to click the OK button to clear a message box. You want to have exemplary error handling in your service, capturing errors so that they can be written to the event log instead of causing a message to be displayed to the user, indicating that an error was encountered. If you try to pop up a message box, it will not be visible to the user, and the program might hang, waiting for the dialog box to be cleared.
Service Lifetime and Events
A service has a number of events to which it can respond, and these mirror the stages of a service’s lifetime. For example, you’ve already seen the OnStart event handler. Here are the events to which the service can respond:
• OnStart—OnStart fires when the service starts. As you saw in the code in your service, this event writes to the log file the fact that the service is starting, and the date and time that the start occurred.
• OnPause—If the CanPauseAndContinue property is set to True for your service, the service can be paused from the Service Control Manager. If the service is paused, this eventwhen fires and can perform actions before the processing is actually paused.
• OnContinue—If the CanPauseAndContinue property is set to True for your service, this event fires when the service iswhen continued after being paused.
• OnStop—When the service is stopped, this event is fired before the service stops. There is a CanStop property that when is set to True by default. If the property is set to False, the service does not receive the stop event (but it is still stopped).
• OnShutdown—If the when service is running and the machine is shut down, this event is fired. This is different from an OnStop in that this fires only when Windows is shutting down. There is a CanShutdown property that is set to False by default; this property must be set to True for your service to receive this event.
Your projects also have an AutoLog property, which by default is set to True. This allows your service to log certain events automatically. For example, if you run the service you created earlier, you can check the Event Viewer and, in the application log, you will see information messages about your service starting and stopping. These are created for you, but if you choose to turn them off, simply set AutoLog to False.

1 7 2 C h a p t e r 9 : B u i l d i n g W i n d o w s S e r v i c e s w i t h V B . N E T
After you have installed the service and the Service Control Manager is handling the service, you can set the security context for the service. However, you can also set this inside the project. If you click on the ServiceProcessorInstaller1 control, you’ll see an Account property. By default, this is set to User. You can specify the Username and Password properties for the account under which you want the service to run.
Debugging Your Service
Your service cannot be debugged in the usual sense because it has to be installed into the Service Control Manager first. Because this is a Windows service, the IDE cannot start it for you; you need the Service Control Manager to start it for you. Therefore, to debug your Windows Services application, you’ll have to build it, install it, and start it. This means that you actually are debugging a running application, which had to be installed before you started debugging. The IDE cannot start a service for you.
Place a breakpoint on one of the lines inside the timer1_Tick event handler. Next, choose Processes from the Debug menu. After the Processes dialog box is open, check the Show system processes box. In the list, your service will be listed as the name of the EXE, not the name of the service. Choose LearningVBservice.exe as shown in Figure 9.3. Click the Attach button, and you will see the screen shown in Figure 9.4. Choose Common Language Runtime and click the OK button. Now, click Close on the Processes dialog box.
Figure 9.3
Attaching the Visual Studio.NET debugger to a running process.

S u m m a r y 1 7 3
Figure 9.4
The form that allows you to choose what types of applications you want to debug.
The breakpoint in your program will be hit, and you can now interactively walk through the program as you would any other. Your running service is now in debug mode, so it is no longer running in the normal fashion; instead, it is responding only to your debugging commands. To stop the debugging process, just choose Stop Debugging from the Debug menu.
Before leaving this chapter, you might want to remove your service. To do this, go back to a command prompt, go to the directory holding the EXE for your service, and type the following line:
installutil /u LearningVBservice.exe
Summary
This chapter introduced you to Windows Services. This is a powerful class of applications that can be written in VB for the first time. The example in this chapter was rather simplistic; you might want the data logged to a database instead of a flat file, for example.
The programming model for services is quite simple, but there are a number of caveats when working with Windows Services. Debugging is one of the major differences between these services and most other projects, of course. In addition, don’t forget to avoid any kind of UI.


C H A P T E R 1 0
Upgrading VB6 Projects to VB.NET
So far, this book has focused on learning Visual Basic.NET, and how it differs from VB6. However, most readers have many projects written in VB6, and want to port those applications to VB.NET. Recoding every VB6 application you have is not something most people want to do, so it is helpful to see how VB.NET handles upgrading your applications.
Upgrading applications is a two-part process: First, you use the Visual Basic Upgrade Wizard (sometimes called the Migration Wizard) to convert your VB6 application to a VB.NET application. Second, you will probably need to make some modifications to complete the upgrade process.
You can improve the conversion and minimize the number of changes you need to make by making a few modifications to your VB6 code. For example, avoiding the use of late-bound variables in your VB6 code is helpful to the wizard when it comes time to migrate. There are other suggestions that will be examined later.
Upgrading Your First VB6
Application
To get a feel for what the Migration Wizard does for you and what modifications you’ll need to make, you will create a new, simple VB6 application and then run it through the Migration Wizard.
NET.VB to Projects VB6 Upgrading

1 7 6 C h a p t e r 1 0 : U p g r a d i n g V B 6 P r o j e c t s t o V B . N E T
Start VB6 and create a new Standard EXE project. Put a text box, a list box, and two buttons on the form. Using the property browser, change the Sorted property of the list box to True.
Double-click on the first button to open the code window. Enter the following code in the Command1_Click event procedure:
List1.AddItem Text1
List1.ListIndex = List1.NewIndex
Press F5 to run the application, and notice that each time you click the command button, the contents of the text box are added to the list box. The list box displays the text in alphabetical order, and selects each line of text as it is added. Now, add a second form to your application. Add a label to the form and resize it to make it larger than normal. Double-click on the form and add the following code in the Form_Load event handler:
Label1 = “The text entered on Form1 is: “ & Form1.Text1
Go back to Form1, and add the following code to the Command2_Click event procedure:
Form2.Show
You now have an application with two forms. One button adds the values entered in the text box to a list box on Form1. The second button opens the second form, which has a reference back to the first form. You can run the application to make sure that it works. Save the project as VB6upgrade.vbp and save the forms with any name you choose; I left them as Form1.frm and Form2.frm.
Save the application with the name VB6upgrade. Close VB6 and open VB.NET. Choose to open an existing project and open the VB6upgrade.vbp file you just created. Opening a VB6 project in VB.NET automatically starts the Visual Basic Upgrade Wizard.
The Visual Basic Upgrade Wizard
The Visual Basic Upgrade Wizard starts automatically because you opened a VB6 project in VB.NET. The first screen just displays some general information, so click the Next button to move into the wizard.
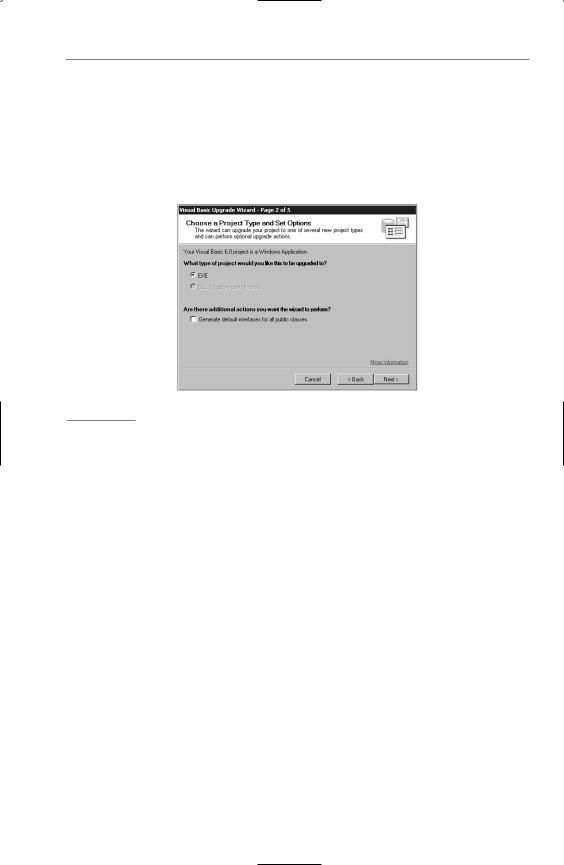
Step 2 of the wizard is shown in Figure 10.1. In most cases, you will leave the options at their default settings, but we will examine the options here for completeness. First, the wizard asks you what type of project you are upgrading. In this case, your only choice is EXE, and that is correct. (If you were upgrading an ActiveX EXE
U p g r a d i n g Yo u r F i r s t V B 6 A p p l i c a t i o n 1 7 7
server, you would have the choice to upgrade it to an EXE or DLL.) Below that is one check box; this option tells the wizard to generate default interfaces for any public classes you created. This is useful if the project is a DLL that exposes base classes that are implemented by other applications. Because you do not have any public classes, you can ignore this option. Leave the page as you see it in Figure 10.1 and click the Next button.
Figure 10.1
Step 2 of the Visual Basic Upgrade Wizard.
Step 3 of the wizard asks for the location of the resulting .NET project. By default, the wizard places the VB.NET project in a new directory inside the VB6 project directory called <projectname>.NET. If you want, you can change the path to another name and click the Next button.
Step 4 of the wizard begins the actual conversion, after which the upgraded project opens in Visual Basic.NET. The wizard always creates a new project; the old VB6 project is left unchanged.
Remember I said that you would have to make some modifications to your project after it is upgraded? Well, the Upgrade Wizard creates an upgrade report in HTML format that lists those modifications. This report shows up in the Solution Explorer, so you’ll need to double-click on it to open it. Even though this was a very simple application, one error is reported, as you can see in Figure 10.2.