

Chapter 28 Your First Cocoa Application
types that Interface Builder knows about, and it’s where you get the interface elements to drag and drop on the window object.
At the bottom of the library is a search field. Type table to filter the list of objects. The first item, Table View, represents an instance of the NSTableView class. You can click on it to see its details.
Edit BNRDocument.xib
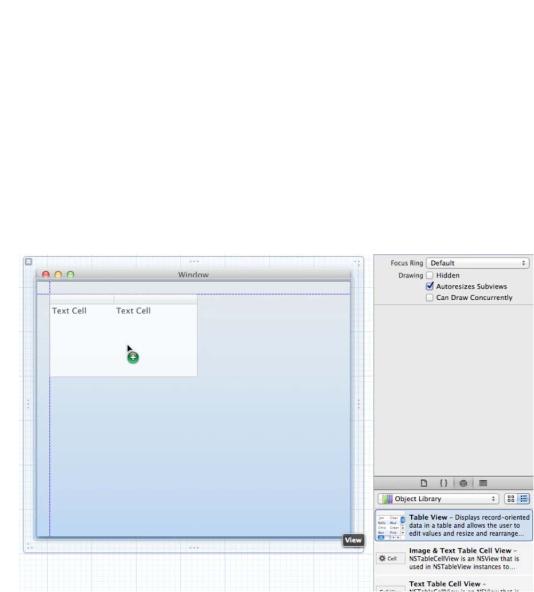
Drag an instance of NSTableView from the object library onto the window object. Resize the table to fill most of the window but leave room on the bottom for a button.
Figure 28.4 Adding an NSTableView
Notice that the object’s edges snap to guides when they approach the edges of the window or other objects. These guides align view objects in accordance with Apple’s Human Interface Guidelines, or HIG. These are the rules that any developer should follow when designing user interfaces for the Mac. There are also HIGs for the iPhone and iPad. You can find all of the HIGs in the developer documentation.
Now you’re going to set some of the table view’s attributes in the attributes inspector. Normally, you click on an object on the layout grid, and the inspector changes context to show you the attributes
of that object. Getting to the attributes of an instance of NSTableView is trickier. The table view object that you dragged onto the window is actually a collection of nested objects: an NSScrollView, an NSTableView, and one or more NSTableColumn instances. To get to a particular object in this
194
Edit BNRDocument.xib
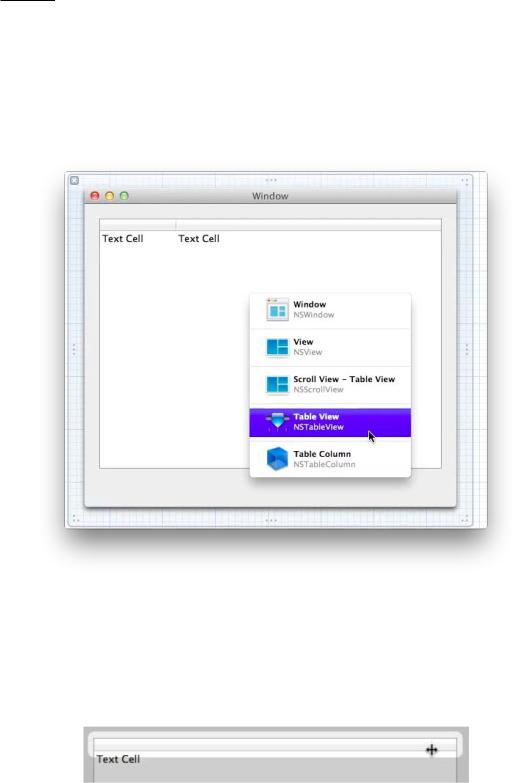
collection, hold down the Control and Shift keys while clicking on the table view. You will see a list of the objects under the cursor, and from there, you can select the object you’re really interested in. Select
the NSTableView.
Figure 28.5 Selecting a view from a stack
In the attributes inspector, set the table view to have one column. Then, back in the editor, select the table view’s header and resize the lone column to be the full width of the table view.
Figure 28.6 Resizing columns
195
Chapter 28 Your First Cocoa Application
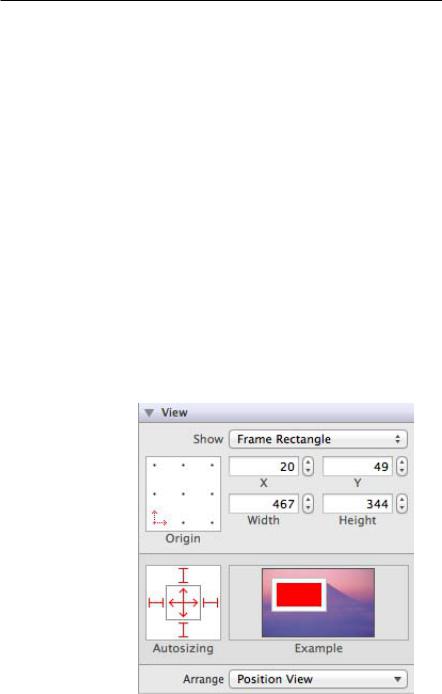
You’ve sized your views nicely, but what will happen when the user resizes the windows in your application? You can make the table view resize with the window. Actually, you are going to make the scroll view that contains the table view resize with the window. Control-Shift-click on the table view, and select the NSScrollView from the list. At the top of the inspector pane, click the  button to reveal the size inspector. Then find the section called Autosizing.
The autosizing section contains the autosizing mask – a control that lets you configure how the selected view object will react when its superview is resized. Views exist in a hierarchy much like classes
do. So views can have superviews and subviews. The NSScrollView’s superview is the instance of
NSWindow.
The autosizing mask contains four struts that look like I-beams and two springs shown as doubleheaded arrows. Enabling one of the springs allows the selected view object to expand in the indicated direction as its superview expands. Enabling a strut anchors the selected view object to the indicated edge of its superview. Fortunately, there is a handy animation right next to the autosizing mask that lets you preview the effect a combination of springs and struts will have on the selected view object.
Set all four struts and both springs in the autosizing mask. This will anchor all four sides of the scroll view to their respective edges of the window and allow the scroll view (and the table view within it) to expand horizontally and vertically as the window is resized.
Figure 28.7 Setting the autosizing mask
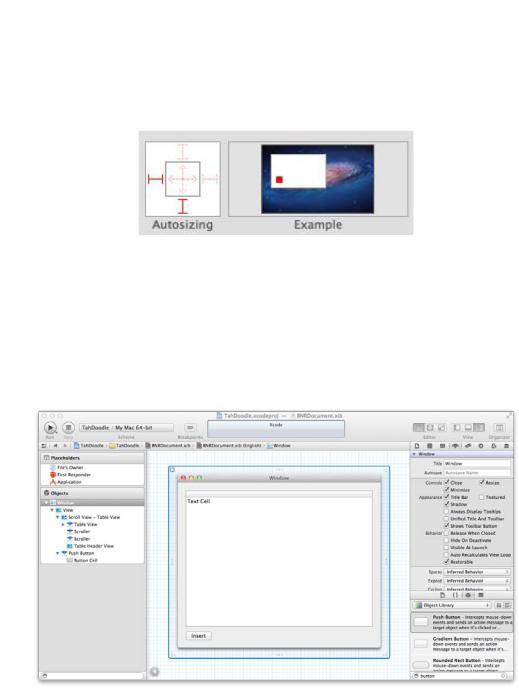
Now let’s move from the table view and turn to the button. Head back to the object library. Find and drag an instance of NSButton onto the window object. You can choose any of the button styles listed in the library; Rounded Rect Button is a classic. Once you’ve dragged the button onto the window, you can change its label by double-clicking on the button’s text and typing. Make it an Insert button.
196
Edit BNRDocument.xib
Finally, in the size inspector, use the autosizing mask to make the button stick to the lower left corner of the window and maintain its present size.
Figure 28.8 Autosize mask for Insert button
So what you’ve done is create the two view objects you need for TahDoodle: an NSTableView and an NSButton. You also configured these objects. You set the number of columns in the table view and set the button’s title. You also made sure they will resize and position themselves appropriately when the window is resized.
Figure 28.9 BNRDocument.xib with views configured
When you double-clicked on the NSButton and typed in a title, you were doing the same thing as in the last chapter when you added this line of code:
[insertButton setTitle:@"Insert" forState:UIControlStateNormal];
197