


Setting Up for the Internet
The biggest concern for the average user is applying Linux as a workstation. The workstation enables a person to
perform normal functions such as writing letters, sending e-mail, reading news, and browsing the Internet. This is true for both office environments as well as for home use.
Those workstations in an office environment are generally less concerned with a connection to the Internet . This chapter covers the process of connecting to the Internet through a dial-up connection. There are other means of connecting, which typically involve the use of a network connection through a cable modem, ISDN router, or DSL router.
Once a connection is made to the Internet, a whole new world of applications awaits. This chapter also explores those applications associated with Internet use, some of which are specific to intermittent connections with a server as found with dial-up use. You can use the other applications I describe whether you have a full-time connection or an intermittent dial-up connection to the Internet.
Connecting to an ISP
For those just getting started with Linux, establishing an Internet connection is the most important part of the setup. The thought of getting it to work may intimidate you, so take a deep breath and relax.
There are two types of connection protocols: Point-to-Point Protocol (PPP) and Serial Line IP (SLIP). SLIP is a much less efficient protocol and is rarely used. Conversely, PPP has become the standard protocol for modem communication. Both protocols allow the transmission of IP over a telephone line.
C 6H A P T E R
In This Chapter
Utilities for dial-up service
Clients used over the Internet
Receiving dial-up calls

114 Part I Getting Started
When connecting to the Internet, you need an Internet Service Provider (ISP) that also has modems into which you can dial. These modems have all the information necessary for dialing in.
Using wvdial to connect
The default, and probably the easiest dial-up client to use, is the wvdial utility. It lives up to its name as the intelligent PPP dial-up client by automatically negotiating the connection with the Internet whenever you issue the command.
When you install wvdial from the command, you are asked questions for configuring it. You need to know the phone number you dial to access the Internet Service Provider (ISP), the account name used for dialing in, and the password for the account. Follow these steps to configure wvdial:
1.When asked if you want to configure wvdial, answer Yes.
2.The next three questions ask for information about the dial-in account. The installation process assumes that you only have one account, and therefore asks the appropriate questions based on the one account.
Add the telephone number. Don’t include any special characters (such as parentheses, hyphens, or slashes) except those needed to dial the ISP. If you must add a pause to the number, use a comma for a 3-second pause. You can also add any number codes to disable features with the telephone as recommended by the ISP and/or the telephone company.
Then add the account login name. This is the name of the account that the ISP assigns you when you sign up. Some ISPs include a special character, such as a dollar sign, to help keep their systems secure. The ISP can help with this information.
Finally, enter the password that you were set up with for the account. As you type the password, notice that you cannot see what you are typing. However, you can clearly see this information if you look at the configuration file.
3.You are then asked to confirm that the information is correct. Answer Yes to this question to continue.
As the configuration finishes, the script polls the serial devices for a modem. The found modem is added to the configuration file. You should turn on any external modems before the script queries for a modem.
You can find all the information you enter in the configuration file at /etc/ wvdial.conf. Now that wvdial is configured, you just need to issue the command from a root shell. Then you should see something resembling the following dialog:
--> WvDial: Internet dialer version 1.41 --> Initializing modem.
--> Sending: ATZ ATZ

Chapter 6 Setting Up for the Internet 115
OK
--> Sending: ATQ0 V1 E1 S0=0 &C1 &D2 S11=55 +FCLASS=0 ATQ0 V1 E1 S0=0 &C1 &D2 S11=55 +FCLASS=0
OK
--> Modem initialized. --> Sending: ATDT 5551234 --> Waiting for carrier. ATDT 5551234
CONNECT 115200
--> Carrier detected. Waiting for prompt. Welcome to the ISP DIGITAL Network
You are connected to:
iq-ind-as007 on slot:11/mod:17 at 10:47pm ISP Login:
--> Looks like a login prompt. --> Sending: myname
myname Password:
--> Looks like a password prompt. --> Sending: (password)
PPP session from 209.43.51.117 to 198.70.144.213 beginning...
[7f][03]@![01][01][1f][01][04][05]\[02][06][7f][7f][7f][7f][05]
[06]^[19][7f]0[07][02][08][02][11][04][05]\[13][03]~[7f]}#@!}!} “}}?}!}$}%\}”}&[7f][7f][7f][7f]}%}&^}9[7f]0}’}”}(}”}1}$}%\}3}#} ;a~
--> PPP negotiation detected.
--> Starting pppd at Sun Oct 15 18:17:11 2000
If you press Ctrl+C, wvdial attempts to close the connection in a friendly fashion.
Using diald to connect
If you wish to connect to the Internet every time a request is made, then you want diald. Called dial on demand, diald functions in small offices and homes where a temporary dial-up connection is used without the need to manually connect.
diald monitors the traffic and determines if a connection needs to be made for requests going outside of the local network. Once the connection is established, diald monitors the connection to determine if it should shut down the link due to inactivity.
You need to change some settings for diald to work properly. The following script file, /etc/diald/connect, contains the settings that you need to change (specifically, the ones in boldface).
#!/bin/sh
#Copyright (c) 1996, Eric Schenk.
#Copyright (c) 1997, 1998 Philippe Troin <phil@fifi.org> for Debian GNU/Linux.
#$Id:$
#
116 Part I Getting Started
#This script is intended to give an example of a connection script that
#uses the “message” facility of diald to communicate progress through
#the dialing process to a diald monitoring program such as dctrl or diald-top.
#It also reports progress to the system logs. This can be useful if you
#are seeing failed attempts to connect and you want to know when and why
#they are failing.
#
#This script requires the use of chat-1.9 or greater for full
#functionality. It should work with older versions of chat,
#but it will not be able to report the reason for a connection failure.
#Configuration parameters
#When debugging a connection, set DEBUG to -v to increase chat’s
#verbosity and to report on this script’s progress.
#WARNING: THIS MIGHT CAUSE YOUR PASSWORD TO SHOW UP IN THE SYSTEM LOGS
#DEBUG=-v
#The initialization string for your modem
MODEM_INIT=”ATZ&C1&D2%C0”
#The phone number to dial PHONE_NUMBER=”5551212”
#If the remote system calls you back, set to 1; otherwise leave to 0. CALLBACK=0
#If you authentify using PAP or CHAP (that is let pppd handle the
#authentification, set this to 0.
AUTHENTIFY=1
#The chat sequence to recognize that the remote system
#is asking for your user name.
USER_CHAT_SEQ=”name:--name:--name:--name:--name:--name:--name:”
#The string to send in response to the request for your user name. USER_NAME=”USER”
#The chat sequence to recongnize that the remote system
#is asking for your password.
PASSWD_CHAT_SEQ=”word:”
#The string to send in response to the request for your password. PASSWORD=”PASSWORD”
#The prompt the remote system will give once you are logged in
#If you do not define this then the script will assume that
#there is no command to be issued to start up the remote protocol. PROMPT=”annex:”
#The command to issue to start up the remote protocol
PROTOCOL_START=”ppp”

Chapter 6 Setting Up for the Internet 117
#The string to wait for to see that the protocol on the remote
#end started OK. If this is empty then no check will be performed. START_ACK=”Switching to PPP.”
The first bolded text in the file refers to the command sequence used to initialize your modem. Every modem can use a different sequence, so you should refer to your modem’s manual for the specifics.
The next bolded text is the phone number. Here you type the phone number for your ISP. Only use numbers unless you need a pause — in which case, you use a comma for a 3-second pause.
The user chat sequence is the prompt you receive if a terminal is connected to the ISP. Often this is ogin:, but it may include other greeting information. The ISP should know this information.
Next is the account name — the name given when you sign up with the ISP. Note that some ISPs add a character, such as a dollar sign, to the account name to increase security.
The password chat sequence is like the user chat sequence. This appears at the prompt when ready for the password. Again, the ISP should know this information.
Next, you enter the password for the dial-in account. There are no special secrets with this one.
Finally, the prompt appears when you are logged in to the remote system. This confirms to diald that the attempt succeeded and there were no errors.
In addition to changing the etc/diald/connect file, you may need to look at and change other files including diald.conf and diald.options. You also need to perform the following steps to get diald up and working:
1.Make a symbolic link of /dev/modem to the /dev/ttySx that points to your modem. Here is an example of creating this link:
ln -s /dev/modem /dev/ttyS1
This creates a link to the modem on COM1 (represented by /dev/ttyS1) to the device called modem. diald uses this device name in its configuration files. Doing this also enables you to change modem devices without having to remember to make changes to other configuration files.
2.Remove lines mentioned in /etc/init.d/diald. When you edit this file, look for the following:
#Remove the following lines after configuration
echo Please read /usr/share/doc/diald/README.Debian for help setting up
exit 0

118 Part I Getting Started
Remove these lines for diald to work properly. As it is, the exit 0 entry in the file assumes that you have not made the configuration changes needed to let diald connect to your ISP.
3.You can then start the diald service manually by inputting /etc/init.d/ diald start from a command line. When first installed, diald is added to the default run level so that it runs normally the next time you restart your system. However, it did not run normally the last time you started because the lines mentioned in Step 2 were still in the initialization script.
From here on out, when someone wants to connect to a system, Web site, or machine outside of your local machine or network, diald makes those connections for you. This machine is now your gateway to the Internet.
Web Browsers
One of the most common reasons to dial into the Internet is to access the World Wide Web. To do this, you need a Web browser. There are several Web browsers available to you for Linux:
Lynx — A text-only Web page viewer. This works great on virtual terminals in which graphics is a problem. You can follow links by browsing page after page.
Netscape — This is a Linux port of the commonly known Windows version. The latest version includes Java, JavaScript, and other plug-in support.
Mozilla — An Open Source Web browser project using the code released by Netscape. It is now the basis for the next generation of Netscape version 6.
Opera — A commercial Web browser offering commonly available features
Konqueror — A Web browser built for the latest K Desktop environment
I cover these browsers in more detail in Chapter 7, although this should give you an idea of the types of browsers available.
E-Mail Clients
E-mail has become the most common form of written communication. Now, instead of sending out a paper memo to departments, a department head sends out the same memo in an electronic message. Likewise, pen-pals shoot notes back and forth at near light speed.

Chapter 6 Setting Up for the Internet 119
The tools people use range from crude command-line programs to completely graphical interfaces. This section lists some of these tools, which offer a broad range of flexibility.
Balsa
This mail client is included when you install the Gnome desktop environment. Balsa is Gnome’s mail tool. It has all the features required of a mail tool, such as the capability to create, send, and read mail. If for some reason Balsa is not installed with Gnome, you can add it through the Debian package manager.
When you launch Balsa for the first time, a graphical wizard guides you through the configuration. It asks you for the account name, e-mail address, server, and local mail directory. Make any changes to this information to ensure it is correct before proceeding. The next screen of the configuration process shows the paths for the mailboxes. Accept the defaults unless you are sure where to create them. You are then finished with the configuration of Balsa.
A ~/balsarc file for each account contains the configuration information, but you can change it through the interface under the Settings menu option. Figure 6-1 shows what the interface looks like when reading a message. To access the mailboxes, double-click the desired mailbox from the left-hand column. A tab appears on the right with the name of the mailbox. Clicking a message in that box makes it appear in the lower-right window where you can read it.
Figure 6-1: Reading a message with Balsa

120 Part I Getting Started
You can create additional mailboxes from the Mailboxes menu option. Choosing Add from the menu initiates a wizard to acquire the needed information to create a mailbox. Once a new mailbox exists, you can organize your e-mail by highlighting it and then right-clicking the message for a menu to appear. From this menu, you can reply, forward, delete, and even transfer e-mail to another mailbox.
When creating a message to send, you can pick a name from the address book, which is extracted from the GnomeCard address book. GnomeCard is listed as the Address Book in the Applications section of the Gnome mail menu. You can add e-mail addresses to this address book for later retrieval in Balsa.
Note Balsa is capable of using host names instead of domain names for sending mail. Most mail systems are connected to the Internet and therefore require fully qualified domain names. Private networks can send mail internally using a host name instead.
Netscape
Perhaps you first think of using Netscape as a browser. However, it also includes a fully functioning e-mail client. You have the advantage of using only one application for several functions. Another advantage is that when you browse a Web page and click a mailto link, a new message window appears for you to send an e-mail. Figure 6-2 shows the form used to create an e-mail message.
Figure 6-2: Creating a message using the e-mail form with Netscape Mail

Chapter 6 Setting Up for the Internet 121
You need to perform some customization for Netscape to work correctly. You can use the following instructions to set up Netscape for the first time or return to make changes at any time:
1.With the Netscape browser open, click the Edit menu item and select Preferences from the list of options.
2.From the left column of the dialog box, click the arrow next to Mail and Newsgroups. This expands a list of additional options.
3.Click the Identity item. From here, type the appropriate information about yourself in each field (name, e-mail address, and so on).
4.Click the Mail Servers. This displays the settings for the servers. The Add button enables you to add as many accounts as you need for picking up mail (as long as they are IMAP servers). You can have only one POP mail account. You can also set the outgoing mail server.
The details of the account — such as server names, type of server, and
passwords — come from the ISP. You can change this information at any time using the preceding instructions.
Once the Netscape Mail is set up, you can access the mail, respond, and file the mail as you do with other mail tools.
|
mutt |
|
You see a slightly different style of graphical interface with mutt. mutt is a text- |
|
based mail client that uses the full display. The top line shows available commands. |
|
The second-to-last line shows the status information, such as number of messages, |
|
number of old messages, and the total disk space used by the messages. The last |
|
line of the display shows any message from mutt-like commands, error messages, |
|
and other such messages. |
|
mutt does not take any special configuration, and you can install it from the Debian |
|
package manager. Once installed, you can execute mutt from a command line or |
|
through the Debian Net menu under one of the desktops. |
|
Once running, press the question mark (?) to receive help with the commands. |
|
Although the basic commands appear at the top of the screen, several more exist |
|
for simple, quick keystroke execution. |
Tip |
It is a good idea to become familiar with one of the text-based mail clients. When |
|
connecting to your systems remotely through a telnet session, you can still read |
|
your e-mail and respond to the messages. Some text-based clients may not work |
|
well under the virtual terminal session depending on the telnet client used on |
|
the remote system. |

122 Part I Getting Started
On the basic virtual terminal, graphics cannot be displayed so the old standby is the text-based mail. This lists out, in a numbered fashion, the messages you have in your mailbox. This program is installed along with the basic system, and you execute it from the command line.
mail’s basic commands are a little less intuitive than those of mutt because its commands aren’t displayed. Table 6-1 shows some of the more common commands you need to know.
|
Table 6-1 |
|
mail commands |
|
|
Command |
Description |
|
|
R |
Replies to the message |
|
|
d |
Deletes the message |
|
|
u |
Undeletes the message |
|
|
h |
Displays a one-line header of mailbox messages |
|
|
n |
Reads the n number message |
|
|
l |
Lists other commands |
|
|
Creates a new mail message |
|
|
|
q |
Quits the mail program |
|
|
To create a message from within mail, issue mail user in which user is the e-mail address for the person you want to send the message. Press Enter; you are now prompted for the subject of the message. Type the subject you want to send. The next line begins the body of the message. When you are finished composing your message, press Ctrl+D at the beginning of a new line for the carbon copy prompt to send a copy of this message to anyone else.
Mail utilities
Some utilities are not a necessity, but rather a convenience. Tools such as new mail notification or utilities that grab the mail to be reviewed later are just a few types of mail utilities covered next. These niceties add to the power and automation available to you.

Chapter 6 Setting Up for the Internet 123
fetchmail
The first of the two mail utilities grabs e-mail off a remote system and then forwards it to your local system where you can read it at any time. fetchmail’s intended use is with dial on demand access.
Once you install the fetchmail and fetchmailconf packages using the Debian package manager system, run the fetchmailconf file from within an X Windows environment to configure fetchmail. Figure 6-3 shows the configuration introduction. There are two ways to configure fetchmail: using a novice or expert approach.
Figure 6-3: From fetchmailconf, you can configure, test, and run fetchmail.
Taking the novice approach allows for fewer controls than the expert option. Type a name where you see New server and then press Enter. This brings up a configuration dialog box for the intended server to which you want to attach. You can then fill in the information on the screen as appropriate.
The expert option gives you many more choices to fully customize aspects of the mail as it is captured and then forwarded (for example, rewriting the To:/Cc:/ Bcc: fields).
You can use fetchmail to grab mail for as many accounts as you have access to on the remote system. Once you complete the configuration of fetchmail, a configuration file is created in your home directory called fetchmailrc. If this file does not exist, then fetchmail cannot run.

124 Part I Getting Started
To retrieve mail using fetchmail, run it from the command line or start it up as a daemon using the -d option. You can then set it to check your remote mail every n seconds. Here is a command that runs fetchmail in the background and checks for new mail every 15 minutes:
$ fetchmail -d 900 &
You can get more information from one of the many resources on the Internet, such as www.tuxedo.org/~esr/fetchmail.
Tip You can put the fetchmail background command in the .bashrc, .login, or
.profile files (depending on the preferred shell or .xsession file for X users) so that fetchmail starts as a daemon after you log in.
biff
A standard program that is loaded with Debian is biff. This little program notifies you with a message that you have mail, but only in the virtual terminal. You can turn it on or off any time using:
$ biff y
or
$ biff n
When biff is turned on and you get a new message, you should see something like the following:
You have new mail in /var/spool/mail/jo
For those who use an X environment to work, biff has an X counterpart called xbiff. This shows a small picture of a mailbox, as seen in Figure 6-4. When new mail arrives, the flag goes up and beeps a notification. Clicking the mailbox lowers the flag.
Figure 6-4: The xbiff mailbox indicates that no new mail has arrived.
Those who need to know when new mail arrives may find one or both of these applications useful.
Chapter 6 Setting Up for the Internet 125
News Clients
News clients enable people to post messages to a type of message board based on a specific topic. There are over 20,000 different newsgroups to pick from, ranging from technical topics like programming, to sports, to jobs in a certain area of the world.
To read one of these newsgroups, you need to have a news client (also called a newsreader). There are several news clients to choose from, and each has its own characteristics.
PAN
An easy-to-use newsreader for X, PAN offers a straightforward configuration wizard for setting itself up. The configuration takes you through identifying who you are, the name of the news server to use, and e-mail information. The data for PAN is saved in ~/.pan/.
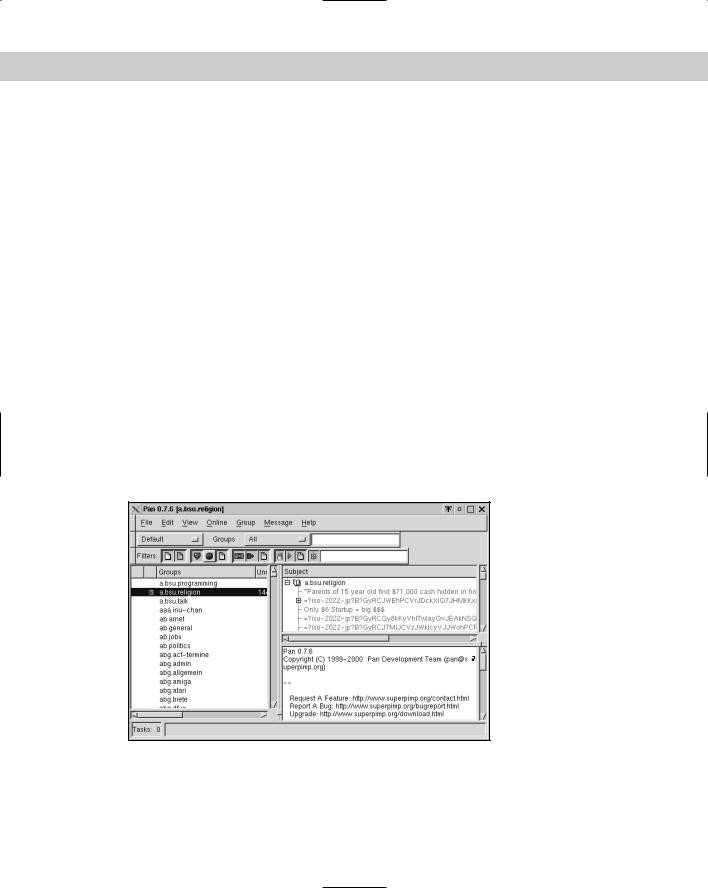
Once PAN starts, it downloads all the topics from the news server (which may take a while because of the large number of topics). You can then select a topic by double-clicking the left window. The list of current articles then appears in the upper-right window. Double-clicking one of those windows downloads the article so you can read it in the lower-right window (as seen in Figure 6-5).
Figure 6-5: Reading an article using PAN
126 Part I Getting Started
Threads, series of responses from a post, are viewed in a hierarchy. Click the plus sign to expand and the minus sign to contract. This helps to make sense of the seemingly endless messages.
PAN is a text reader with a graphical interface. Messages that include HTMLor MIME-encoded information show up in the raw form. With HTML messages, you see the code along with the message. With the encoded information, you also see the gibberish that makes up the file.
Netscape
With Netscape, the newsreader is mixed with the mail-reader portion. Netscape views messages containing HTMLand MIME-encoded files as they were originally meant to be viewed.
1.To configure the news portion of Netscape, click the Edit menu option and then Preferences. This brings up the Configuration dialog box.
2.Under the Mail and Newsgroups heading, click the arrow to expand the list of options. You should see an item labeled Newsgroup Servers. Click this item to display its configuration settings.
3.Click the Add button for the dialog box to enter the name of the news server. This information should be available through your ISP.
4.Click the appropriate buttons to accept the changes into place.
To subscribe to a newsgroup, right-click the server name you just configured. A dialog box appears to retrieve the list of topic names. You can either scroll through the list of names or type in the box to find a suitable newsgroup. Once you find a group to subscribe to, click the Subscribe button with the group highlighted.
All subscribed newsgroups appear under the server name. Click one of the topics. You should see the messages and the message contents on the right side. Unread messages appear in bold text; they appear in normal text after you read them.
tin newsreader
A text-based newsreader, tin gives you easy-to-use features that employ letters, numbers, and arrows to navigate and read messages. tin can read a message from either the local /var/spool/news directory or from a remote Network News Transport Protocol (NNTP) server. You can find the tin package among the non-free Debian packages.
When you first run the client, you can start it from the command line. If run as tin, the client looks locally for the news. Alternatively, if you use -g server, tin connects to the remote server for the news. The first time you run tin, it may take a few minutes as it downloads the topics. The subscribed newsgroups are saved in the

Chapter 6 Setting Up for the Internet 127
~/.newsrc file, and the server is specified in the ~/.tin/newsrctable file. Figure 6-6 shows what the interface looks like through the virtual terminal session.
Figure 6-6: Reading news using tin
FTP Clients
Next to corresponding with e-mail and browsing the Internet, users want the ability to transfer files from machine to machine. Here, a special protocol called File Transfer Protocol (FTP) is used. It requires a special server and client to allow the transfer of these files over a network.
Chapter 22 discusses servers and clients in more detail. However, here is a list of some of the clients available with Debian:
ftp — The standard command-line FTP client where you can retrieve and insert files on a remote computer
ncftp — Offers pseudo-graphics for a terminal interface using the full-screen and single-key commands. This client offers the use of bookmarks for easier access to remote sites.
xftp — Uses a graphical X window with buttons to click for transferring files
gftp — A full functioning FTP client that enables you to see both the remote and local filesystems

128 Part I Getting Started
In addition to the clients listed, you can also use Web browsers for transferring files using the File Transfer Protocol. However, browsers are limited in that they can only retrieve or download files. Browsers commonly function to retrieve files from anonymous FTP sites linked to Web pages.
Telnet
When working on a network with multiple computers, one essential tool stands out — Telnet. Telnet gives you command-line access to any computer on the network. You can do anything from checking e-mail to administering the server functions. Each computer you intend to connect to must have the telnetd daemon running. Easily installed from its Debian package, telnetd gets started through the inetd service.
The telnet daemon is activated whenever a request comes in to TCP port 23. A login prompt is sent to the requesting client. The client responds with an account name; then the server requests a password for the account. After the client replies with the password and the server verifies and authorizes the valid account, you can start using the session as you would if you were on the machine itself. As soon as you logoff, the session ends and the Telnet connection is terminated. The following shows a typical Telnet session:
$ telnet remotehost Trying 192.168.0.12...
Connected to remotehost. Escape character is ‘^]’.
Debian GNU/Linux 2.2 serv1.mydomain.com hoth login: jo
Password:
Last login: Tue Oct 17 05:23:48 2000 from :0 on 0
Linux serv1 2.2.17 #1 Sun Jun 25 09:24:41 EST 2000 i686 unknown
Most of the programs included with the Debian GNU/Linux system are freely redistributable; the exact distribution terms for each program are described in the individual files in /usr/doc/*/copyright
Debian GNU/Linux comes with ABSOLUTELY NO WARRANTY, to the extent permitted by applicable law.
You have mail. jo@hoth:~$
Notice from this session that no password is displayed when you type it in. This is to secure the password from anyone looking over your shoulder.
A problem with using Telnet on an insecure network such as the Internet is that the information, including the password, is sent in clear form. This means that a packet sniffer can pick up the information to crack the server. You should always avoid

Chapter 6 Setting Up for the Internet 129
using special accounts such as super user when connected via a mistrusted connection. This is not always possible, so just be aware of the potential danger to your system.
Dial-in PPP Server Setup
So far in this chapter, you have seen applications oriented for dialing out from your system. You can also accomplish the reverse — dialing in — by setting up a Linux system. This works for small offices in which few connections are needed. Larger environments and commercial dial-up services use modem pools, switching services, and routers.
As I’m sure you are aware, modems respond to incoming calls as well as outgoing calls. You need a program to capture the call when it comes in. Let’s use mgetty, the smart getty. The getty program opens a terminal-like session using a serial port connection. This is reminiscent of the old teletypewriters (commonly called a TTY) used to communicate via written messages over a telephone line. Additional features to enhance its faxing capability accompany the mgetty Debian package.
Several configuration files that reside in /etc/mgetty control the connection. These configuration files are:
dialin.config — Sets the rules for accepting calls. Using callerID, dialin.config compares the number coming in with each number in its file. Pound signs (#) are comments and are thereby ignored. Numbers starting with an exclamation mark (!) point out specific numbers to ignore when attempting to dial in.
login.config — Contains the specific commands for logging in, starting the pppd service, and authenticating the account. The file is initially set up to automatically receive calls.
mgetty.config — Sets the overall settings for mgetty, such as modem speed, ownership, tty settings, and more
Note Other configuration files involve faxing because mgetty accommodates receiving faxes. A separate program called sendfax helps you with faxing as well.
One of the first things to note is that you must set up your system to acknowledge an incoming call. You do this by setting mgetty to listen to the modem. Make sure that you modify the /etc/inittab file to include a line like the following:
S3:23:respawn:/sbin/mgetty -x0 -s 57600 ttyS3
When you install mgetty, the preceding line is added. This line specifies the short name for the modem device (S3), the run levels this service should make available (23), and whether to set the service active (respawn) or not (off). It also specifies

130 Part I Getting Started
the path and command to be used (/sbin/mgetty), followed by any options to employ with the command. In this case, the -x0 option indicates the debugging level to use. The higher the number (9), the more information is logged (a zero means no logging). The second option, -s 57600, indicates the speed to use with the modem. In this case, the speed is set for a 56K modem. Lastly, the line indicates where the modem is located (ttyS3 indicates COM4). Here is the general syntax for the inittab file:
<tt>:rlevel:<respawn|off>:/sbin/mgetty [options] <device>
The /etc/mgetty/login.config file should work as installed. However, you may need to make a few adjustments to it. All the files in /etc/mgetty include examples of the content. For more information on setting up the files, install the mgettydocs package and read the files located at /usr/doc/mgetty/. These files can help if you run into trouble; however, the Debian packages are preconfigured to offer the fewest problems when setting up dial-up service.
For documentation, install the mgetty-docs package, use info mgetty from a command line, or visit alpha.greenie.net/mgetty/ for information on the installation, configuration, and use of mgetty.
If you want to use a Windows 9x machine to dial in, you need to install the pppd package. You also need to modify the /etc/ppp/options file to include an entry for the DNS. This file already contains examples, so you only need to modify the IP address to match a valid DNS that you use. In addition, you need to modify the /etc/ppp/pap-secrets file to enable incoming connections to use the /etc/passwd file for login authentication.
Summary
This chapter covered a wide variety of applications and tools used with the Internet. Now you know how to connect using a modem, send and receive e-mail, browse Web sites, catch up on newsgroup postings, and connect to a remote computer.
This chapter also described several clients available with each service and covered an overview of the application. You may need to install and try out the clients you find most interesting to see how they meet your personal preferences.
Also covered were three dial-up options: wvdial, diald, and mgetty. Each has its own niche where it works best. For instance, wvdial can get you connected quickly and easily with a single machine. diald works best in an office or network environment in which a connection is made automatically when someone wants to access the Internet. For those cases in which someone needs to dial in to your machine, mgetty works great.

Working with Debian
P A R T
II
In This Part
Chapter 7
Applications
Chapter 8
Productivity
Applications
Chapter 9
Essential Tools
Chapter 10
Multimedia
Chapter 11
Games