

 Printing with Inkjet Printers using PictBridge
Printing
Easy Print
You can print images by pressing only one button after connecting the camera to the printer.
|
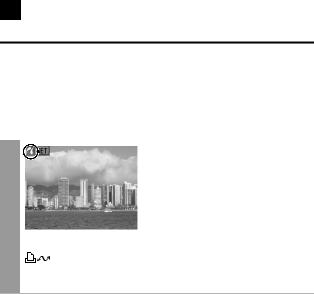
Make sure that |
|
displays in |
|
the upper left |
corner of the |
|
1 |
LCD monitor. |
||
|
|
|
|
|
|
|
|
2 |
Display the images you wish to print and press the |
||
button. |
|||
If you wish to change the print settings, see Print after |
|||
Changing the Print Settings (p. 33).
32
Print after Changing the Print Settings
You can change the print settings before printing.
1
Playback Screen
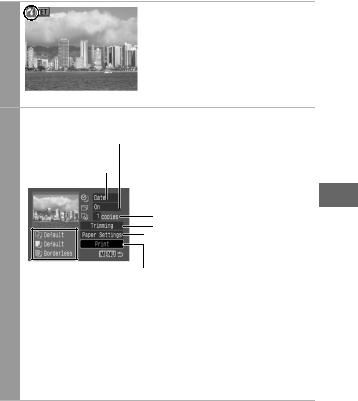
Make sure that  displays in the upper left corner of the LCD monitor.
If  displays on the LCD monitor, please refer to
  Printing with Inkjet Printers using Bubble Jet Direct (p. 71).
Sets the print effect (p. 36)
Sets the date and the file number for printing (p. 35)
2
 Print Order Screen
Display the images you wish to print and press the FUNC./ SET button.
The print order screen appears.
Sets the number of copies (p. 37) Sets the trimming portion (p. 38)

 Sets the paper size, type and layout (p. 42)
 Starts the printing process
|
The paper size, type, and layout information displays. |
|
|
3 |
Select print settings as needed. |
|
Select [Print] and press the FUNC./SET button. |
4 |
• The image will start to print and, when it is completely |
mode.finished, the display will revert to the standard playback |
• If you press the MENU button, the display will revert to the standard playback mode and printing will not take place.
33

•You cannot print RAW images.
•It may not be possible to play back or print images shot with a different camera.
•You may not be able to print if the memory card holds a large number of images (about 1000).
Cancel Printing
•To cancel printing between images, press the FUNC./SET button.
A confirmation dialog will display. Select [OK] and press the FUNC./SET button. The printer will stop printing the current image and eject the paper.
Printing Errors
•An error message appears if an error occurs for some reason during the printing process. When the error is resolved, printing will automatically resume. If printing does not resume, select [Continue] and press the FUNC./SET button. If [Continue] cannot be selected, select [Stop], press the FUNC./SET button and restart the print job. See List of Messages (p. 50) for details.
•On printers equipped with an operation panel, an error number or message displays on the panel. Please refer to the printer user guide for the remedies corresponding to the error numbers or messages.
34