

Visual CSharp .NET Programming (2002) [eng]
.pdf...
FileStream fs;
private void btnDeserial_Click(object sender, System.EventArgs e) { try{
XmlSerializer theSerial = new XmlSerializer (typeof(OurTeam)); fs = new FileStream("employee.xml",FileMode.Open);
OurTeam newteam = new OurTeam();
newteam = (OurTeam) theSerial.Deserialize(fs); foreach (Employee emp in newteam){
lstFname.Items.Add(emp.Fname);
lstLname.Items.Add(emp.Lname);
lstTitle.Items.Add(emp.Title);
}
}
catch (Exception excep){ MessageBox.Show (excep.Message);
}
finally{
fs.Close();
}
}
Finally, the Employee items in the collection class can be cycled through, and their XML elements accessed like instance members. The results of adding the XML elements, using instance member syntax, to ListBoxes, is shown in Figure 12.13.
Figure 12.13: Once the XML has been deserialized from the file back to class instances, it can be accessed normally.
Reading and Writing XML
You don’t need to serialize XML content to write (and read) XML documents to and from files. The XmlTextWriter class allows you to write whatever XML you care to generate, and XmlTextReader lets you read the contents of an XML document. Using the XMLTextWriter, an XML document is written from top to bottom. In other words, you get a single forward pass at creating the XML document.
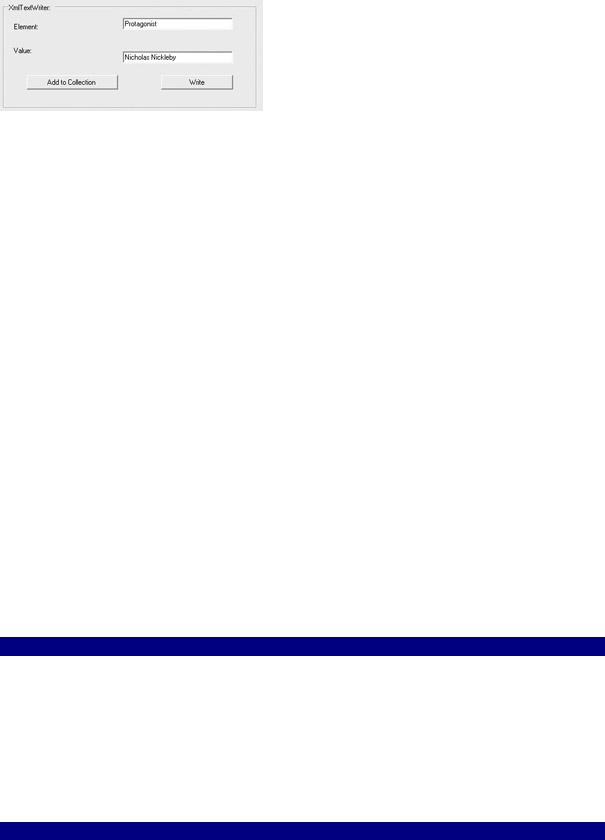
To see this in action, I’ve set up a simple interface, shown in Figure 12.14, which lets the user decide the name for XML nodes and the values that those nodes enclose. The text entered by the user in the Element text box will become the XML tag, and the text entered in the Value text box will become its value:
<element> value </element>
Figure 12.14: Users can enter as many element/value pairs as they want; when all the pairs have been entered, the XML document is created.
In the interests of simplicity, all the element/value pairs entered by the user will fall under one root XML node, <UserChoice>. So the structure of the XML document will look like this, with each element/value combination chosen by the user:
<UserChoice> <element> value </element> <element>
value </element>
...
</UserChoice>
Creating the Class and Collection Class
If the user can enter multiple element/value pairs before the XML document is generated, the application must have some way to store the information. Once again, we’ll use a class that is based on ArrayList to handle this (this time inheriting directly from ArrayList rather than using ArrayList functionality via encapsulation as in the example in the previous section).
Listing 12.9 shows the bare-bones class that will be used for each element/value pair and the collection class that will be used to store the user’s XML choices until the XML document is ready to be generated.
Listing 12.9: An Element/Value XML Class and a Collection Class Used to Store Element/Value Pairs
using System.Collections;
...
public class Xml |
{ |
public string |
element; |
public string |
@value; |
}
public class XmlCollection : ArrayList { public void Add (Xml aXml){
base.Add (aXml);
}
}
Note I really wanted to use the identifier value for the variable holding the value of an
element, but, of course, value is a reserved keyword in C#. So I marked the variable name with the @ literal identifier, @value, which can be used as a variable.
Using the Class and Collection
After you’ve set up the class and collection, create an interface with text boxes for the user input of elements and values, like that shown in Figure 12.14. The Add button will be used to add an element/value pair to the collection, and the Write button will be used to generate the relevant XML document.
At the top of the form module, import the System.Xml namespace (it contains the XmlTextReader and XmlTextWriter classes):
using System.Xml;
Next, declare at the form level and instantiate in Form1’s constructor a collection object based on the collection class defined in Listing 12.9:
XmlCollection theXml; // Declared at form level
...
theXml = new XmlCollection(); // in Form1 constructor
In the click event procedure of the Add button, instantiate an element/value object, assign the values of the text boxes to it, and add it to the collection:
private void btnAdd_Click(object sender, System.EventArgs e) { Xml aXml = new Xml();
aXml.element = txtElement.Text; aXml.@value = txtValue.Text; theXml.Add (aXml); txtElement.Text = String.Empty; txtValue.Text = String.Empty;
}
That takes care of adding element/value pairs to the collection. Now let’s write an XML document based on the contents of the collection!
In the click event procedure for the Write button, declare and instantiate a XmlTextWriter, specifying a file (including path) and the encoding to use:
XmlTextWriter myXmlTextWriter = new XmlTextWriter("doc.xml", null);
Setting the encoding to null causes it to be written out as UTF-8. If no path is provided, by default the file will be written to the executable, or bin, directory of the project.
Warning The XmlTextWriter will overwrite the specified file if it already exists. There’s nothing to stop you from using the common dialogs (or other mechanism) to allow the user to select a file.
Next, declare an element/value XML object based on the class defined in Listing 12.9.

Use the methods and properties of the XmlTextWriter object to tell the XmlTextWriter to format the XML with three spaces for indentation, place a comment at the start of the document, and create a root XML element called <UserChoice>:
myXmlTextWriter.Formatting = Formatting.Indented; myXmlTextWriter.Indentation = 3; myXmlTextWriter.IndentChar = ' '; myXmlTextWriter.WriteStartDocument();
myXmlTextWriter.WriteComment("This is a sample XML document" + " generated using an XmlTextWriter object.");
myXmlTextWriter.WriteStartElement("UserChoice");
Next, use the foreach syntax to cycle through the collection to write each item in the collection:
foreach (Xml aXml in theXml){ myXmlTextWriter.WriteElementString(aXml.element, aXml.@value);
}
Finally, close the root element and document:
myXmlTextWriter.WriteEndElement();
myXmlTextWriter.Close();
Note I just wrote “finally” close the root element and document. Well, as you may be thinking, the closure code in this example (and in some others in this chapter) should be placed in the finally block of a try...finally structure. I haven’t done this here to make the code more readable—but you should place this kind of closure code within finally blocks in all real-world applications.
The complete code for adding XML element/value pairs to the collection and writing an XML document based on the collection items that have been added is shown in Listing 12.10.
Listing 12.10: Creating a Collection of Element/Value Pairs and Writing Them to an XML Document
using System.Xml;
...
XmlCollection theXml; // Declared at form level
...
theXml = new XmlCollection(); // in Form1 constructor
...
private void btnAdd_Click(object sender, System.EventArgs e) { Xml aXml = new Xml();
aXml.element = txtElement.Text; aXml.@value = txtValue.Text; theXml.Add (aXml); txtElement.Text = String.Empty; txtValue.Text = String.Empty;
}
private void btnWrite_Click(object sender, System.EventArgs e) { XmlTextWriter myXmlTextWriter = new XmlTextWriter("doc.xml", null); myXmlTextWriter.Formatting = Formatting.Indented; myXmlTextWriter.Indentation = 3;
myXmlTextWriter.IndentChar = ' '; myXmlTextWriter.WriteStartDocument(); myXmlTextWriter.WriteComment("This is a sample XML document" +


You could then set up a loop reading the rest of the document, and exiting only when the end of the document or the </UserChoice> tag is reached:
while (myXmlTextReader.Read()){
if (myXmlTextReader.Name == "UserChoice") break;
...
}
Within the loop, you can use the ReadOuterXml method to read tags and values into a multiline text box:
while (myXmlTextReader.Read()){
if (myXmlTextReader.Name == "UserChoice") break;
txtReader.Text += myXmlTextReader.ReadOuterXml() + "\r\n";
}
Finally, the XmlTextReader should be closed:
myXMLTextReader.Close()
The code, placed in the Display button’s click event, is shown in Listing 12.11. Listing 12.11: Reading an XML File
private void btnDisplay_Click(object sender, System.EventArgs e) { txtReader.Text = String.Empty;
XmlTextReader myXmlTextReader = new XmlTextReader("doc.xml"); myXmlTextReader.ReadStartElement("UserChoice");
while (myXmlTextReader.Read()){
if (myXmlTextReader.Name == "UserChoice") break;
txtReader.Text += myXmlTextReader.ReadOuterXml() + "\r\n";
}
myXmlTextReader.Close();
}
If you run the project and click the Display button, the elements and values in the doc.xml file contained between the beginning <UserChoice> tag and the ending </UserChoice> tag will be shown in the text box (Figure 12.15).
I leave it, as they say, as an exercise for the reader to refine this project by adding exception handling and dealing with white space entered by the user for an element tag (as things stand, this will cause the program to throw an exception when XmlTextReader tries to retrieve the tag with white space)—and to customize the application for your particular needs.
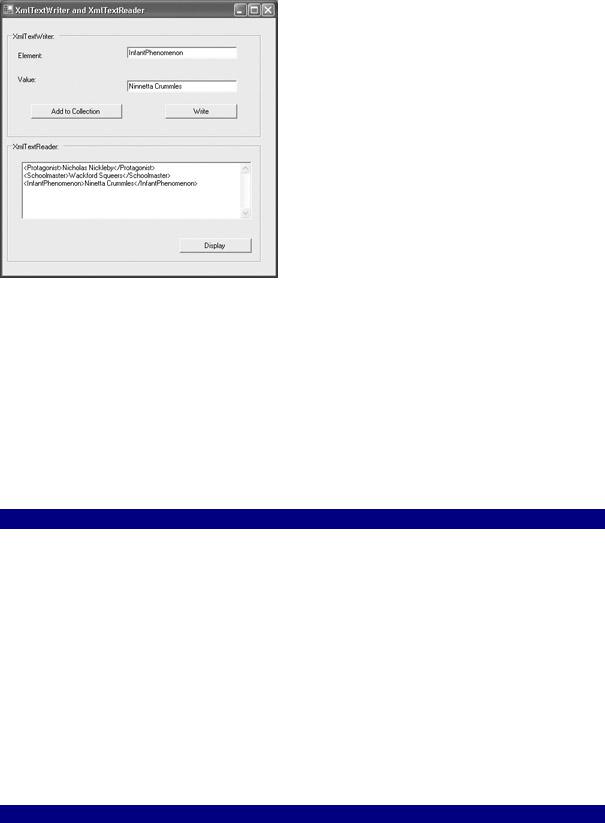
Figure 12.15: The XmlTextReader is programmed to retrieve the tags and values between the <UserChoice> and </UserChoice> tags.
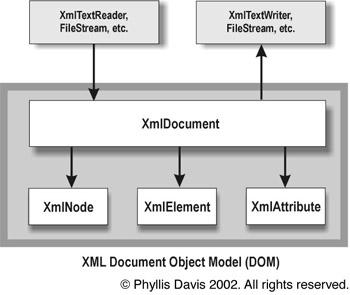
The Document Object Model (DOM)
The XmlTextWriter and XmlTextReader classes described in the last section are great if all you need to do is make a single pass through an XML document—and read or write it to a file. However, they don’t help you that much with adding, editing, and deleting members of an XML document. Other mechanisms exist that do a better job of this, including SAX (see sidebar) and the Document Object Model (DOM)—implemented by the XmlDocument class and related classes—which is discussed in this section.
Simple API for XML (SAX)
Simple API for XML (SAX) is an alternative to DOM that is not supported explicitly by any
.NET classes. (As a publicly developed interface, SAX could fairly easily be implemented in a class derived from XmlReader.)
The SAX interface reads an XML document using an events-based model. A SAX reader is fast, read-only, and only moves in one direction: forward.
SAX requires less overhead than DOM, so it might make sense to use it if resources are an issue and you have a large number of XML documents to parse (or a single, very large document). SAX can be configured to read only the information you need (unlike DOM, which reads the entire XML document into memory). In additionunlike DOMa SAX parse can be stopped when you find what you need.
Once an XML document has been loaded into an instance of the XmlDocument class, it is available in memory and can be traversed backwards and forwards. The parts of the XML document are represented by node classes, some of which are shown in Table 12.3. These
The top node of the TreeView is created and the WalkTheTree method invoked:
tn = new TreeNode("XML Document"); tView.Nodes.Add(tn);
xn = xDoc.DocumentElement; WalkTheTree (xn, tn);
Within WalkTheTree, a node is added to the topmost node, using the XML name and value of the node for display purposes:
XmlNode tmpXn; TreeNode tmpTn; TreeNode tmpTnAttr;
tmpTn = new TreeNode (xn.Name + " " + xn.Value); tn.Nodes.Add(tmpTn);
Attributes need special handling:
if (xn.NodeType == XmlNodeType.Element){ foreach (XmlNode xnAttr in xn.Attributes){
tmpTnAttr = new TreeNode(xnAttr.Name + " = " + xnAttr.Value); tmpTn.Nodes.Add(tmpTnAttr);
}
}
If the node has children, then process them, and their children and siblings, by recursively calling WalkTheTree:
if (xn.HasChildNodes){ tmpXn = xn.FirstChild; while (tmpXn != null){
WalkTheTree(tmpXn, tmpTn); tmpXn = tmpXn.NextSibling;
}
}
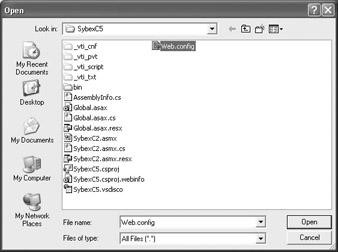
If you try this on an XML file, such as the Web.config file selected earlier, you’ll have to expand the nodes in the TreeView. With the nodes expanded, the element name, value, and attributes will be displayed (Figure 12.18).