

ASP Programming for the Absolute Beginner
.pdf186
ASP Programming for the Absolute Beginner
%>
<hr>
<form method="post" action="ASPWar_Play.asp"> <%
'Set values to pass CurrentRound=Request.Form("Round")+1 Player=Request.Form("Player")
%>
<input type="hidden" name="player" value="<%=Player%>">
<input type="hidden" name="TotalArmies" value="<%=TotalArmies%>">
|
|
|
|
Y |
<input type="hidden" name="round" value="<%=CurrentRound%>"> |
||||
<input type="hidden" name="CTotalArmies" value="<%=CTotalArmies%>"> |
||||
|
|
|
L |
|
<b>Enter number of armies for next battle: (Available: <%=TotalArmies%>) </b> |
||||
|
|
|
F |
|
<input type="text" size="10" name="Armies"> <center><input type="submit" |
||||
value="Proceed to next battle!"></center> |
|
|
|
|
</form> |
A |
|
||
<% |
|
|||
|
|
|
|
|
END IF |
E |
|
|
|
%> |
|
|
||
T |
M |
|
||
</body> |
|
|||
|
|
|||
</html>
How does all of this work? Let’s go through the code and see what’s happening within this page:
1.The opening lines of code request the total armies and number of armies that have been gambled for the particular round. The ArmyCheck variable is used to determine whether at least half the available armies have been gambled (remember, this is a central rule of the game).
2.The next section, focusing on the line IF Request.Form("Round")=11, checks whether the game is over (the round variable increases by 1 as each round is played). If this variable is equal to 11, this indicates that 10 rounds have been played and the game is over (so the IF...THEN statement evaluates to true in this case). The code then checks to see who won the war, by comparing the TotalArmies (player
armies) with the CTotalArmies (computer armies) variables. Whichever is highest wins the game, and the appropriate message is displayed (either YOU WIN THE WAR or
SORRY! THE COMPUTER HAS WON THE WAR!).
3.If the round variable is not equal to 1, this indicates that the game is still in progress. The first action that must occur is to determine whether the player has gambled at least half his armies and to check whether he has tried to gamble more armies than he possesses. The use of the ELSEIF statement facilitates this: If either of the preceding conditions are true, the appropriate code is displayed
(Sorry, but you don't have that many armies! or Sorry, but you need to gamble at least half of
your available armies). The code is stopped at this point, and a form is displayed, asking the user to gamble more or fewer of his armies.
Team-Fly®

TRICK |
Note that in both these sections, the form action is set to "ASPWar_Play.asp". In |
|
|
|
other words, the form submits back to the same page. This is a useful trick for |
|
keeping your ASP applications smaller in size by limiting the number of Web pages |
|
you need to build. |
4.Assuming that round 10 has not passed and the player has gambled at least half his armies (without trying to gamble more armies than he already has), the code proceeds. The first action to occur is that the four arrays are initially set
(PlayerCards, ComputerCards, ComputerScore, and PlayerScore). These arrays are used to dis-
play the cards on screen and to tally the total of these cards so that a winner for each round can be determined.
5.A typical HTML table is begun (to keep the card display neat, you place the cards into specific cells within the table). The round is displayed at the top of the table
(via the line BATTLE no. <%=Request.Form("Round")%>).
6.The specific cards for each round are randomly selected. Notice the use of the CheckVar variable to determine whether the card has already been selected. This works exactly the same as the Memory Game you developed in Chapter 6. A random number is generated (in this case, a number between 1 and 52 to correspond to the number of cards in the deck). This number is then used in a SQL query to the database. This query continues to be executed (via the DO UNTIL loop)
until a card is found that has not been selected. When such a card is found, its value within the database is set to selected, and the DO UNTIL loop ends. The card name is inserted into the PlayerCard array (by the line PlayerCards(a)=CardCheck("CardName")), and the card’s specific value is inserted into the
array PlayerScore (by the line PlayerCards(a)=CardCheck("CardValue")).
7.This process is repeated for the computer cards so that, for each round, all four ar-
rays (PlayerCards, ComputerCards, ComputerScore, and PlayerScore) are set with specific values.
8.The cards are displayed on the screen inside the table. Notice how the various card image files are referenced:
<img border="0" src="Cards/<%=PlayerCards(1)%>.gif"
The name of the card is dynamically generated by calling a specific element of either the PlayerCard or ComputerCard array and then adding the .gif extension to the end.
9.After all the cards are displayed, the code determines who won this particular round. The player score and computer score are computed (by adding together the respective elements of both the PlayerScore and ComputerScore arrays), with each of these values being set to two variables: PScore and CScore. Then, these two variables are compared. The highest score indicates the winner of this particular
round, and the appropriate message is displayed (PLAYER WINS THE BATTLE!, COMPUTER
WINS THE BATTLE!, or STALEMATE!).
10.Finally, the database is reset. Specifically, the Selected field for each record is set back to 0 (this is done so that, when the cards for the next round are determined, all the cards are initially unselected). A form is presented to the player, asking him to enter the number of armies he wants to gamble for the next round. Note that within this line of code, the TotalArmies variable value is displayed so that players know how many armies are available to them.
187
C h a p te r
8
E s s en t i a l
P r og r a m m i n g
L o g i P c, ar I t I
188
ASP Programming for the Absolute Beginner
The card images are freeware and were obtained from the Web. However, in an effort to give proper credit to the creator of these cards and to encourage the free and honest distribution of others’ work, please be sure to read the Card_Graphic_Agreement file included on the enclosed CD-ROM.
Summary
This chapter presents you with more useful VBScript functions and gives examples of how to integrate them within your ASP Web pages. Using arrays, manipulating and formatting time and dates, determining whether variables meet specific criteria (the Is functions) and working with trigonometric functions, you should take advantage of all the functions within VBScript to make your coding more powerful and, ultimately, easier to understand. Finally, by developing the ASP War! game, you again saw how various VBScript functions and statements can come together to produce nifty results (especially when combined with straightforward HTML). You will learn more about formatting your VBScript output with HTML in Chapter 9.
E X E R C I S E S
Try these exercises to further your understanding of how to work with VBScript functions:
1.Develop a form that asks for a user’s name, street address, city, state, and ZIP. When the form is processed, place all this information into a multidimensional array named UserInfo(), and then, reading from this array, display the information back on the screen. Do not use request.form to display the information. Instead, insert the form data into the UserInfo() array. Then display the information by reading from this array.
2.Develop a form that asks for information in a specific format (text, date, numbers, and the like). When the form is processed, use the Is functions to determine whether the information entered meets the specific format you set.
3.Develop an ASP Trigonometry Calculator. Format a typical HTML table, and within each cell, place a submit button that is titled Sin, Cos, Tan, and so on (list all the trigonometric functions discussed in this chapter). Also, in one of the cells, insert a text box so that the user can insert a number. Then, depending on the number entered and the specific button selected, the value will be displayed on screen.
4.Customize the ASP War! game so that, on the ASPWar_Home.asp page, it also asks users how many rounds they would like to play, instead of forcing them to play the default 10 rounds.
5.Customize the ASP War! game (and database) so that, after the game is over, the player has the option to save his scores (within the database) for future reference.
6.Troubleshoot (that is, add functionality to account for possible errors) the following possibilities: upon the first turn, user bets all his armies and loses (what screen/options should appear to him)? Also, add a feature into the code so that the system checks to make sure he entered a username.

C9H A P T E R
Formatting
Processed Output
In this chapter, you will
•Learn how to format tables, lists, and hyperlinks and to perform general page formatting as a result of your processed VBScript.
•Learn how to integrate query results dynamically from a database into your Web pages.
•Learn how to make the ASP MadLibs game presented in Chapter 3, “Working with ASP Objects,” more visually appealing and more functional.

190
ASP Programming for the Absolute Beginner
One look at the title of this chapter and you might think that it’s referring to one of those not-so-tasty food substitutes you find in a box of imitation macaroni and cheese. This is not the case, however. Formatting processed output refers to methods and mechanisms for making the VBScript you execute within your ASP Web pages come to life in the best way possible. Remember, one of the most appealing attributes of ASP is that your VBScript executes on the server, so only regular HTML is sent to the user’s Web browser for display. However, in comparison to static HTML, the dynamic Web pages you create with ASP can produce HTML that is a result of users’ providing information via a form, the integration of information stored in a database with the Web page, the actual processing of your VBScript code on the server, and so on. In short, your Web pages come alive with ASP. Learning how to format the executed code and its resulting output ensures that your pages—and the functionality contained within them—always look their best.
Think of this chapter as a workshop lesson on how to improve your existing skill set in working with VBScript, ASP, and database design.
HTML Formatting—Beyond the Basics
By using typical HTML formatting, you can neatly arrange your text and graphics on a Web page. Consider the typical HTML code for a table in Listing 9.1.
Listing 9.1 Table.asp
<html>
<head>
<title>Simple HTML Formatting</title> </head>
<body>
<table border="1" width="100%"> <tr>
<td width="100%" colspan="2">
<p align="center"><font color="#008000" size="6" face="Bookman Old Style"><b>Welcome
to Active Server Pages</b></font></td> </tr>
<tr>
<td width="50%"> </td> <td width="50%"> </td>
</tr>
<tr>
<td width="50%"> </td> <td width="50%"> </td>
</tr>
<tr>
<td width="50%"> </td> <td width="50%"> </td>
</tr>
<tr>
<td width="50%"> </td> <td width="50%"> </td>
</tr>
<tr>
<td width="50%"> </td> <td width="50%"> </td>
</tr>
<tr>
<td width="50%"> </td> <td width="50%"> </td>
</tr>
<tr>
<td width="50%"> </td> <td width="50%"> </td>
</tr>
<tr>
<td width="50%"> </td> <td width="50%"> </td>
</tr>
<tr>
<td width="50%"> </td> <td width="50%"> </td>
</tr>
</table>
</body>
</html>
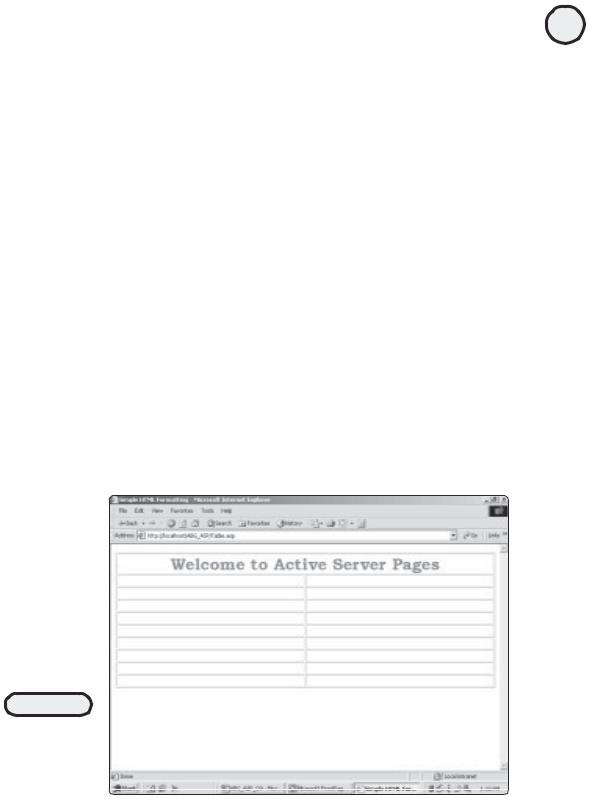
When this page is loaded within a Web browser, it looks like Figure 9.1.
FIGURE 9.1
A simple HTML table. Note the amount of code required to produce this simple page.
191
C h a p te r
9
F o r ma t t i n Pr g o c e s s O ed u t p ut

192
ASP Programming for the Absolute Beginner
If you didn’t know anything about VBScript or ASP, you would be relegated to typing in all the preceding code to produce the table in Figure 9.1. Fortunately, you decided to learn ASP and are becoming quite proficient at it, so you have other options available! Take a look at the code in Listing 9.2, which produces the same table shown in Figure 9.1 but uses VBScript to do the job.
Listing 9.2 Table2.asp
<html>
<head>
<title>Simple HTML Formatting</title> </head>
<body>
<table border="1" width="100%"> <tr>
<td width="100%" colspan="2">
<p align="center"><font color="#008000" size="6" face="Bookman Old Style"><b>Welcome
to Active Server Pages</b></font></td> </tr>
<%
For i=1 to 10 %>
<tr>
<td width="50%"> </td> <td width="50%"> </td>
</tr>
<% Next %>
</table>
</body>
</html>
Undoubtedly, you notice the difference in code length between Listings 9.1 and 9.2; the latter is considerably shorter. Also, note how much easier Listing 9.2 is to read and understand. After the opening <table> tag is displayed and the initial table cell is formatted with the Welcome to Active Server Pages text, a simple For...Next loop is inserted. This loop is programmed to run 10 times; each time through, a new row of the table is inserted. After the loop is complete, the closing </table> tag is inserted, and the page ends.
Because this example is simple, you should not underestimate the power of VBScript to reduce the size and complexity of your HTML formatting drastically. Tables are a good example, especially when used to read information from a database (as you learned to do in Chapter 5, “Database Access with ADO”).
To reinforce that point, here is another look at reading information into your Web pages via an Access database. Listing 9.3 draws on the Music database you worked with in Chapter 5.

Listing 9.3 Database.asp
<html>
<head>
<title>Formatting Database Information</title> </head>
<body>
<table border="1" width="100%"> <tr>
<td width="100%" colspan="2">
<p align="center"><font color="#008000" size="6" face="Bookman Old Style"><b>A sample of our music catalog</b></font></td>
</tr>
<%
Set Catalog=Server.CreateObject("ADODB.Recordset")
Catalog.open "SELECT * FROM Catalog", "DSN=Music"
Do WHILE NOT Catalog("ID")=11
%>
<tr>
<td width="50%"> <%=Catalog("Artist")%></td> <td width="50%"> <%=Catalog("Title")%></td>
</tr>
<%
Catalog.MoveNext
Loop
Catalog.Close
Set Catalog=Nothing %>
</table>
</body>
</html>
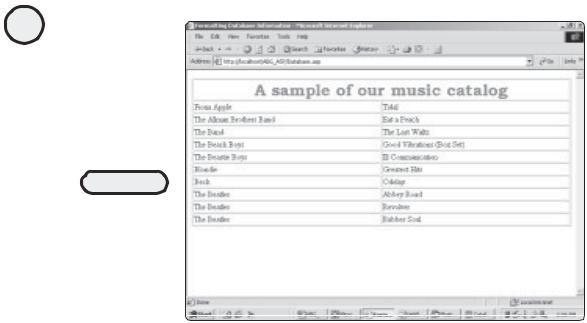
When this code is loaded into a Web browser, it looks like Figure 9.2.
Think for a moment about the drawbacks of not using a database to present this kind of information. You have to deal with the following issues:
•You have to enter each line of the table manually. Aside from the time involved, your code will be twice as long (like Listing 9.1).
•Whenever the information within your Web page changes, you have to update the Web page (and any related formatting) to display the information.
By keeping the information within a database, you only make the change there and let the SQL query in the Web page do all the work. You can take the information you retrieve from the SQL query and use it within other pages to which this page links (as you will soon see).
The point here is that you should always take advantage of the time-saving, code-mini- mizing capabilities of VBScript and ASP. Now you will see how VBScript and ASP bring spice to your HTML.
193
C h a p te r
9
F o r ma t t i n Pr g o c e s s O ed u t p ut
194
ASP Programming for the Absolute Beginner
FIGURE 9.2
By integrating information stored within a database into your Web pages, you add a whole new level of functionality and power.
Creating Dynamic Form Elements
In Chapter 6, “Using Forms,” you learned how to use ASP to gather and process information and, in conjunction with ADO, to integrate this information with a database. You can also use VBScript to create the form and its corresponding form elements dynamically.
To illustrate this, Listing 9.4 is a typical HTML form that uses a drop-down menu element.
Listing 9.4 Hard Coded Form Elements
<html>
<head>
<title>Dynamic Form Elements</title> </head>
<body>
<p>Please select one of the titles listed below, and then click the Submit button:</p>
<form method="POST" action="TitleChoice.asp"> <p><select size="1" name="Choice">
<option value="37">Dixie Chicken</option> <option value="38">Astral Weeks</option> <option value="39">In my Tribe</option> <option value="40">Scarecrow</option> <option value="41">Blue</option>
</select><input type="submit" value="Submit" name="B1"></p> </form>
</body>
</html>
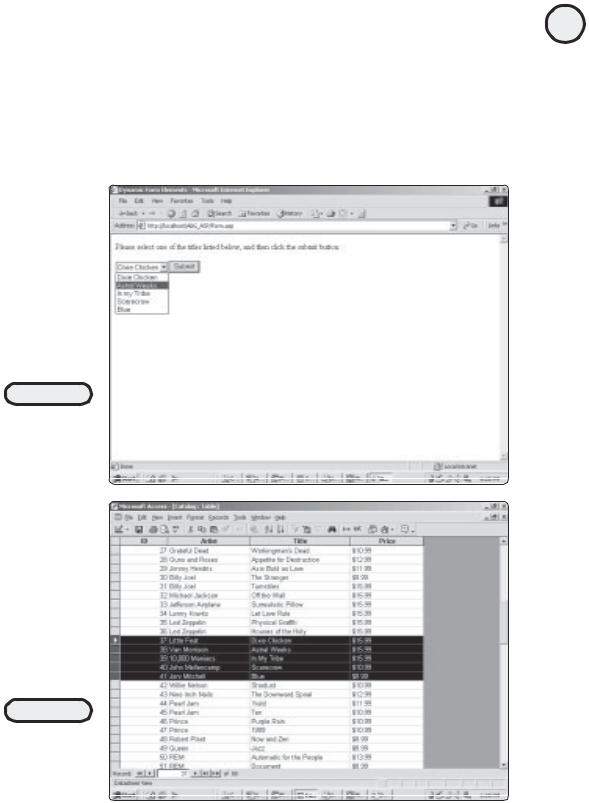
When loaded into a Web browser, this code produces the results shown in Figure 9.3.
In Listing 9.4, notice how all the items in the drop-down menu have a numeric value assigned to them (37–41). This number corresponds to each record’s specific ID, as contained in the Catalog table of the Music.mdb database. Figure 9.4 shows this table.
FIGURE 9.3
A typical drop-down menu form element populated with five titles, each assigned a specific value.
FIGURE 9.4
The Catalog table of
the Music.mdb
database. Note the
ID field for each
highlighted entry.
195
C h a p te r
9
F o r ma t t i n Pr g o c e s s O ed u t p ut