

Lesson04. Your Homework. Tutorial for IBS Students. 1st. Semester.
Homework for Lesson 04.
Starting Microsoft Word 2007
Introduction
To work comfortably with this tutorial, click Web Layout View button on the Status Bar.
![]()
Be familiar with what you should be able to do by completion of this tutorial.
By successful completion of the task you should be able to:
Start and exit Word.
Know parts of Microsoft Word 2007 environment.
Appreciate Ribbon, Tabs and Groups of menu commands.
Know how to customize Word environment.
Create, open, rename, save and close a document.
Scroll through a text.
Make selections.
Copy, Cut and Paste text.
Change text attributes.
And much more…
Assignments and explanations
1. Understanding the Word 2007 environment.
The Microsoft Word window looks similar to the one shown here.

1.1. The Title bar.
You can see there the name of the document that you work at. In our case, the name of the document should look like Document1, or Document2, etc.
1.2. The Microsoft Office Button.
In the upper-left corner of the Word 2007 window is the Microsoft Office button. When you click the button, a menu appears. You can use the menu to create a new file, open an existing file, save a file, and perform many other tasks.
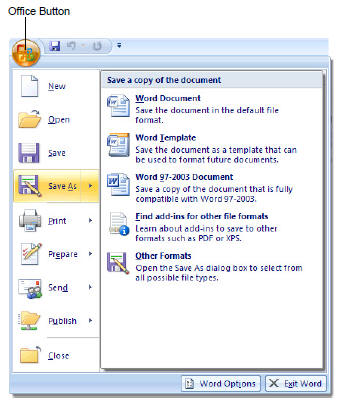
Click the Microsoft Office Button, click Save or Save As, and save this file in your “…/Lessons” folder with name “Your_name_homework_04.docx”, for example, “Kuragin_SV_homework_04.docx”.
You should do all further formatting and other changes immediately in THIS document!
1.2.1. How to Save Documents
To Use the Save As Command:
Click the Microsoft Office Button.
Select Save As - Word Document. The Save As dialog box appears.
Select the location you wish to save the document using the drop-down menu.
Enter a name for the document.
Click the Save button.
To Use the Save Command:
Click the Microsoft Office Button.
Select Save from the menu. …etc.
Using the Save command saves the document in its current location using the same file name. If you are saving for the first time and select Save, the Save As dialog box will appear. To Use the Save As Word 97 - 2003 Document:
Click the Microsoft Office Button.
Select Save As - Word 97-2003 Document.
Select the location you wish to save the document using the drop-down menu.
Enter a name for the document.
Click the Save button.
1.3. Customizing the Word Environment
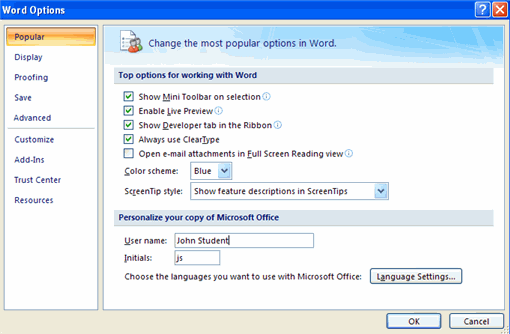
Click the Office Button.
Click Word Options.

Explore the Word Options menu.
Popular.
These features allow you to personalize your work environment with language, color schemes, user name and allow you to access the Live Preview feature. The Live Preview feature allows you to preview the results of applying design and formatting changes without actually applying it.
Display This feature allows you to modify how the document content is displayed on the screen and when printed. You can opt to show or hide certain page elements.

Proofing This feature allows you personalize how word corrects and formats your text. You can customize auto correction settings and have word ignore certain words or errors in a document.

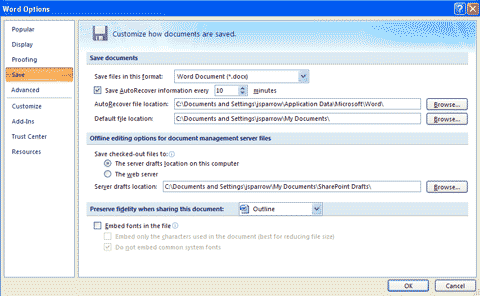
Save This feature allows you personalize how your document is saved. You can specify how often you want auto save to run and where you want the documents saved.
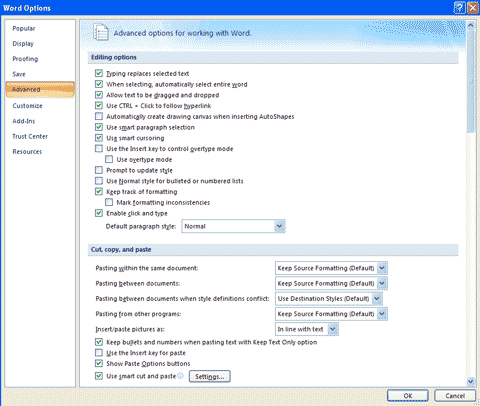
Advanced This feature allows you to specify options for editing, copying, pasting, displaying, printing and saving.
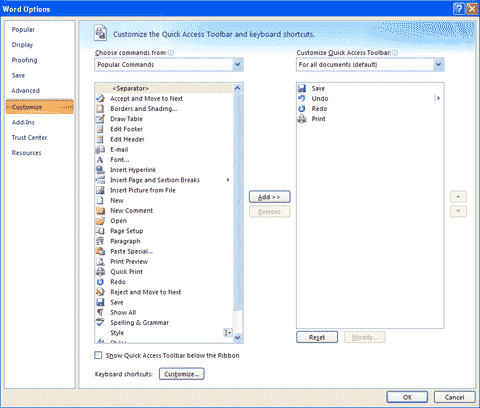
Customize Customize allows you to add features to the Quick Access Toolbar. If there are tools that you are utilizing frequently, you may want to add these to the Quick Access Toolbar.
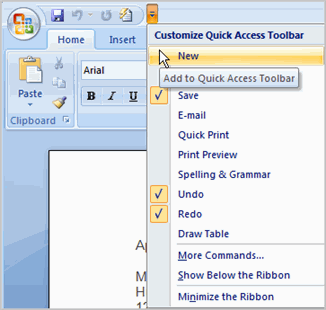
1.4. The Quick Access Toolbar
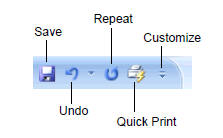
Next to the Microsoft Office button is the Quick Access toolbar. The Quick Access toolbar provides you with access to commands you frequently use. By default Save, Undo, and Redo appear on the Quick Access toolbar. You can use Save to save your file, Undo to rollback an action you have taken, and Redo to reapply an action you have rolled back. You may wish to add other commands to make using specific Word features more convenient for you.