

Beginning ASP.NET 2.0 With CSharp (2006) [eng]
.pdfChapter 1
Toolbox
VWD offers the set of ASP.NET server-side controls in a Toolbox for easy drag-and-drop onto the page. Chapter 3 discusses in detail the various server-side controls and how they are used; here you will just get a feel for how to use the Toolbox in general. The Toolbox can be displayed by choosing Menu View Toolbox or by pressing Ctrl+Alt+X. When the Toolbox is displayed, you can move it to a new location on the screen by dragging its title bar. As you drag the Toolbox to different areas, it will render a compass icon that enables you to drop the toolbar toward the top, bottom, left, or right, as well as on top of other windows. If you are trying to maximize the size of your design surface, you can stack your Solution Explorer and Toolbox on top of each other at one location on the screen.
The Toolbox is organized into several panels that group similar controls. The panels can be expanded to show their tools or collapsed to save space. There is some variation among installations, but a typical set of panels includes the following:
Standard for the majority of ASP.NET 2.0 server-side controls
Data for data source and data-bound controls
Validation for controls that reject user input that does not meet your range of acceptable values
Navigation for menus and breadcrumbs
Login for the authentication controls
WebParts for larger components in sites that the user can rearrange or hide
HTML for generic (non-ASP) tags
General for customization
Figure 1-7 depicts the Toolbox as it appears on your screen.
Figure 1-7
Clicking the plus icon expands a panel to show its list of available controls. Figure 1-8 shows the Data and Login panels expanded.
The General panel starts out empty. After you have created part of a page, you can select that page and drag it into the General panel to create your own reusable tool. This is useful if you want to duplicate a set of a couple controls with formatting onto several pages.
18

An Introduction to ASP.NET 2.0 and the Wrox United Application
Figure 1-8
On the right side of the Toolbox title bar there is a pushpin icon, shown in Figure 1-9. When clicked, the pushpin turns horizontal, meaning that the Toolbox will automatically hide when not in use, leaving only its title bar exposed.
Figure 1-9
The appearance of the Toolbox changes as it is used. For example, the titles of each panel will change as they are selected.
When your mouse moves over the Toolbox title bar, the Toolbox expands for your employment, as shown in Figure 1-10.
Figure 1-10
19

Chapter 1
In this Try It Out, you practice using the Design and Source Views and Toolbox features of VWD.
Try It Out |
Using the Views and Toolbox |
1.Continue working in VWD with your Mishaps page.
2.Switch to Design View. In the Toolbox, expand the HTML panel and scroll down to the bottom of the panel. Drag a Horizontal Rule from the Toolbox onto the page (anywhere between paragraphs).
3.Your next objective is to add a calendar to the bottom of the History page. Open the Standard panel of the Toolbox and find the ASP.NET calendar control. Drag it to the page. (Doubleclicking performs the same operation.) Select the calendar with a single click and notice the small right-facing arrow in the top-right corner. Click it to expose the smart task panel. Click Autoformat, select a format, and click Apply. Observe how easy it is to modify many rendering criteria simultaneously using VWD’s dialog interface.
4.Open your History page in VWD. View it in Design View. Move your insertion bar up to the first line to the tag that begins with <%@ Page...>. Note that the navigation guide (at the bottom of the design panel) shows that you are in the <Page> tag. Click the <Page> tag. You will see that the entire tag is selected in the design panel.
How It Works
As you saw, by adding a simple HTML Horizontal Rule, the Toolbox offers the ability to drag and drop elements to the page rather than typing out their tags. Even complex constructs like a calendar are added with just a drag-and-drop. When you are on the page, you can modify an element by using the smart task panel.
Properties Window
An object, such as a web page, a ListBox server-side control, or a connection to a data source, has properties. Properties are settings that determine how the object appears and behaves. In earlier versions of ASP, many goals were achieved by writing lengthy and complex code. In ASP.NET 2.0, however, most of that code has been pre-written by Microsoft and encapsulated within the server-side controls. Properties determine how that behavior will be exercised. Properties can be very simple, such as BackgroundColor, or very complex, such as EnablePaging. Likewise, the values assigned to a property can be as simple as BLUE or as complex as a multiple-line SQL statement. Property values can be set by typing them directly into the Code View or by using the Properties window, which is shown in Figure 1-11.
Display the Properties window by pressing F4 or by choosing Menu View Properties. The properties are organized into panels that can be collapsed or expanded (similar to the Toolbox). For example, in Figure 1-11 the top three panels are collapsed. At the top of the Properties window is a drop-down list containing the names of all controls on the page currently open. Below that are icons to arrange the list of properties categorically or alphabetically. The lightning icon changes the Properties window so that it displays events (a topic covered in Chapter 6) rather than properties. The body of the window displays property names on the left and their current values on the right. At the bottom sits a box that gives some help on the currently selected property.
20

An Introduction to ASP.NET 2.0 and the Wrox United Application
Figure 1-11
The fundamental technique used to change properties is to select an object, usually a control, and then find the property of interest and set it. You can select the object with a single click on the object in Design View or by locating the insertion bar in the object in Source View. Alternatively, you can select an object from a drop-down list at the top of the Properties window. One common mistake arises when you attempt to change the properties but have not first actually selected the object you want to change. You end up changing an object that was still selected from earlier work.
You have several options for setting the value of a property. If the property has a limited number of allowed values (such as true and false), you can double-click the property name to toggle through the values. If there are more than a few options, but still a finite amount, the values will be in a drop-down list. Some properties have many options, and their value box offers an ellipses button that takes you to a dialog box. Some properties can accept strings, so their values are set in text boxes. It is always better to select or to toggle a value rather than type it. After a value has been changed, you must press Enter or Tab or click another property in order to set the value. At that time, the Design View will render the change.
You can also set property values by typing into the Source View. Locate the insertion bar within a tag and press the space bar to display an IntelliSense list of all the properties that can be inserted at the location of the insertion bar. Type the first letter or two and then type an equals sign. IntelliSense displays all of the legal values (if the list is finite), and again type the first letter or two of the value you desire. Finish by typing a space. Note that there will be no value list if the range of possible property values is not finite. For example, if the value is a SQL statement, you will have to type the statement without IntelliSense.
21

Chapter 1
Error List Window
When problems arise you have two major paths for obtaining clues about the problem. First is an error report on the page delivered to the browser, and second is the Error List window within VWD.
ASP.NET 2.0 displays an error report (shown in Figure 1-12) on the page sent to the browser if the following shaded line is in your Web.config file:
<system.web>
<compilation debug=”true”> </compilation>
Figure 1-12
Note that the first time you run (F5) a page, you get a default of <compilation debug=”true” strict=”false” explicit=”true”/>.
Because the default is true, you will have debug turned on if there is no specific attribute. So debug=true for the following case as well where there are no changes to the default. Of course, having the default literally set to true helps other programmers on your team that may be looking through your settings:
<system.web>
<compilation></compilation>
22
An Introduction to ASP.NET 2.0 and the Wrox United Application
A fatal error on the page produces a characteristic white-and-yellow page on your browser with an error message. Just below the yellow block is the name of the offending file and the line containing the failure. As with all errors, the error may actually be related to the line number displayed, but this should give you a good clue. Note that when you deploy a site, the debug command in Web.config should be set to false to improve performance and to reduce information given to hackers. Error handling is covered in greater depth in Chapter 15.
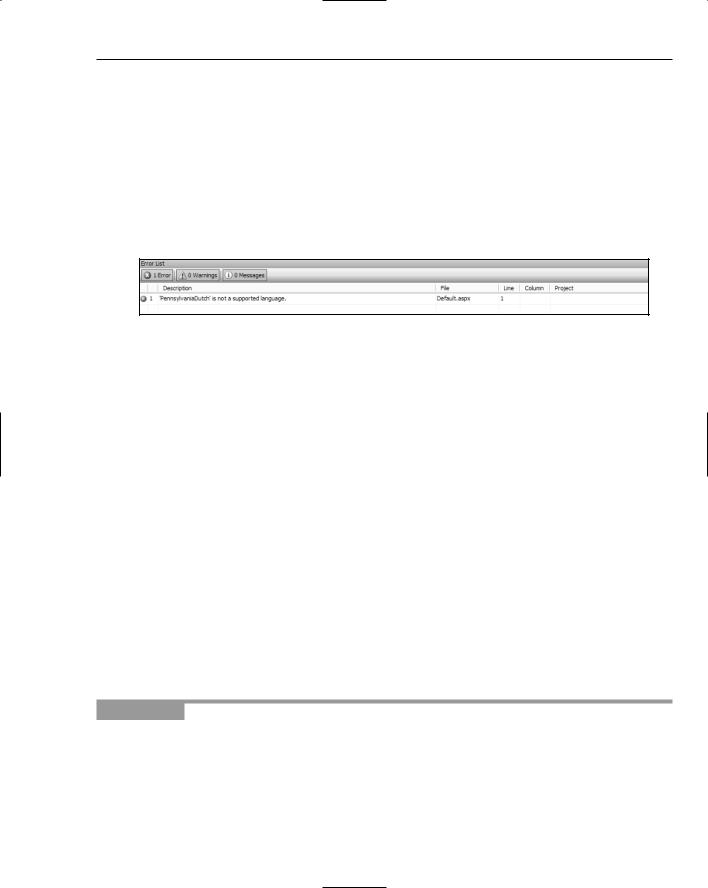
The second way to identify errors comes from within VWD itself via the Error List window, depicted in Figure 1-13. By default, the window is hidden until you run a page. You can force it to be displayed by choosing Menu View Error List. The window displays all of the errors encountered during the conversion of the page into the MSIL.
Figure 1-13
Note that the top of the Error List window has three clickable icons: Errors, Warnings, and Messages, which display different lists of items created when the page was built. Hiding a type of item does not remove it from the list; rather, doing so only hides the item so the list is shorter. The second column from the left identifies the order in which the errors occurred.
Errors cause the page as a whole, or some portion of it, to fail. This includes, for example, references to objects that do not exist.
Warnings are problems that could be solved by VWD while building the page (for example, the lack of a closing tag).
Messages are sets of texts that the programmer can include in the code to appear when IIS is building the page.
When viewing the list of items, you can sort by clicking a column heading. If you hold Shift you can click a second column for tiebreakers (to determine the order for records with the same value in the primary column). You can also resize the columns by dragging their dividers, or re-order them by dragging the column name left or right. Double-clicking an item allows you to open the offending file and jump the cursor to the offending line.
In this Try It Out, you practice changing properties of an image control on the History page. Then you create some errors and observe the results.
Try It Out |
Using the Properties and Error Lists Windows |
1.Open the History page in Design View. In the Solutions window, open the Images folder and drag the JPEG named “logo-yellow” to the top of the History page. VWD automatically creates an image with its source set to the JPEG.
2.Click the image once to select it, and then switch to the Properties window (or open it with F4). Change the height from 447 to 100 and press Enter to set the value. As you can see, changes are immediately visible in the design panel.
23

Chapter 1
3.Now modify properties from Source View. Find the <img> control and within it the property (attribute) for height. Change it from 100 to 300. Click the green arrow (or press F5) to run the page and see the result.
4.Close your browser and return to Source View. Locate your insertion bar in the <img> tag immediately after the closing quote of height=”300” and press the space bar. This opens the IntelliSense list with all of the properties that are suitable at this point in your page. Press the t key and then the i key to move down the list to the Title property. Press the equal (=) key to close the IntelliSense and type in “Wrox Logo In Yellow” including the start and end quotes. Run the page, and in your browser note that when you mouse over the image you see the title you created. Close the browser.
5.Next, introduce a non-fatal error. Open the History page in Source View and find the <h1> tag near the top of the page. Change the <h1> tag to <H1xx> and run the page. The browser opens and you can see that the text “Wrox United — a potted history” fails to render in the headingone style. Close the browser and switch back to VWD to observe the Errors List window. If not the Errors List window is not already visible, choose Menu View Error List to view it. Note that two errors were entered in the list. First was a note that “h1xx” on line 3 is not supported. Second, the closing tag of </h1> on line 4 no longer matches an opening tag.
6.Your last experiment is to introduce a fatal error. In Source View, go to the top of the page and change the first line from Language=”C#” to Language=”Esperanto” and run the page.
7.You will deal with solving many kinds of errors in each chapter of this book. For now, return your page to its original form by deleting the <img> tag, restoring the goofy <h1xx> to the proper <h1>, and changing the language back to C#.
8.Save the page.
How It Works
You experimented with three ways to change a property. First you worked in Design View and changed a property by typing its new value into the Properties window. Next you made a change by typing a new value into the source code. Last, you used IntelliSense to guide you through adding a property to an existing control.
You observed the results of two types of errors: fatal and non-fatal. In the first case, ASP.NET 2.0 could still render the page even though the faulty tag of <h1xx> left your text as default, not heading one. Although the page rendered, back in VWD an error message was logged on to the Error List window. You introduced a more serious error when you changed the language value to a non-supported language. ASP.NET 2.0 could not overcome this error and so you see two results. In the browser you got the error page with troubleshooting information, and back in VWD you got entries to the error list.
VWD’s Database Explorer
When you begin to work with data (in Chapter 7) you can use tools in VWD to gain knowledge about your data sources. This information includes the exact names of tables and columns. In fact, as you will see later in this book, you can drag columns to the designer and VWD does all the work of setting up the proper controls to display data from those columns. For now, understand that in the Solution Explorer you can double-click the name of an Access MDB to open that file in Access (assuming Access is installed). For SQL Server databases (as used in this book), you can use a tool named the Database Explorer to do even more exploration of a database and change its data and properties. These features are discussed in detail in Appendix D.
24

An Introduction to ASP.NET 2.0 and the Wrox United Application
Summar y
Microsoft has revised large parts of ASP.NET in version 2.0. The overall biggest benefit is that tasks, which formerly required custom coding, can now be implemented by dragging pre-built controls to the page. These pre-built controls include tools for logging on users, navigation, connecting to stores of data, displaying data, creating a consistent look to the site, and offering customization options to the user. The result is both faster and more robust development of dynamic web pages. On top of this, Microsoft has made version 2.0 easier to deploy and faster in performance. As with earlier versions of ASP, the execution of code (that is, the building of dynamic pages) occurs on the server and only standard HTML is sent to the browser. Thus, ASP.NET 2.0 is compatible with all browsers.
Three tools are available from Microsoft for creating ASP.NET 2.0 pages. The one used in this book, Visual Web Developer Express (VWD), is a free download as of 2005. VWD displays the organization of pages on your site, and helps you build new pages or modify existing pages. VWD also comes with a lightweight web server named ASP.NET Development Server for testing your pages. After building a page, you can click Run to have VWD start ASP.NET Development Server, start your browser, build the page, and serve it to the browser. This chapter also covered the following topics:
VWD offers many options for the way that you view and work with pages during their development. Tabs enable switching between Design View (which displays a good facsimile of how the browser will render the page) and Source View (which shows the tags and code that generate the page).
When you create a new site or add pages, VWD offers wizards and templates that walk you through the most common setups. In this chapter, you looked at how to create a new page based on one of several dozen templates, followed by working with the Toolbox. This source of prebuilt objects is a focus of building pages in all the exercises of this book. To organize the large Toolbox, the tools are divided into groups.
Another window displays properties of whichever object is currently selected. You can, for example, select a text box and see its size, background color, and dozens of other properties. The remainder of this book goes into the details of many properties of objects that ASP.NET 2.0 supports on a page.
When a page is built as a result of the VWD Run command, you get some feedback on how the process fared. Fatal errors are listed, as well as warnings about potential problems with the page. Double-clicking any of those errors leads you to the offending line in the site.
This first chapter focused on an introduction to ASP.NET 2.0 and how to build your first pages using VWD. Chapter 2 moves on to some of the ASP.NET 2.0 features that govern the look and feel of all the pages on a site.
Exercises
1.Explain the differences among the .NET 2.0 Framework, ASP.NET 2.0, VWD, and IIS.
2.List some differences between ASP.NET Development Server and IIS.
3.When you drag the title bar of the toolbar it will only go to certain locations and certain sizes. How can you put the title bar where you want it?
25

Chapter 1
4.How can you copy a .jpg file in C:\MyPhotos into your site for display on a page?
5.You want to add a subfolder to your site, but Folder is not one of the items listed in Add Items. Why?
6.Microsoft has written extensive code to make it easier for programmers to create web pages. How does a programmer actually use that code?
7.Why are there no tools in the General panel of the Toolbox?
26

2
Site Design
When you start to develop a web site, you’ll often have a good idea of what the site needs to be able to do. For example, a blog site needs the ability to store blog entries by categories, for adding comments to blog entries, and an administration section, at the very least. Alternatively, consider a simple retail store that wants to enter the realm of e-business by having a web site that enables customers to browse and buy their products. Each and every site needs to be carefully thought about and designed before you can start work, and only then can you start putting code together to implement a site.
Before jumping into the discussion and implementation of specific techniques, you should understand the development of good site design with an eye toward the features supported by the ASP.NET 2.0 server-side controls. After all, a well-designed site is easier to create, easier to use, and easier (and cheaper) to maintain.
In this chapter, you’ll learn about the following concepts:
How to start the design process for a site, and consider all the requirements for the site before you start coding
Using Master and Content pages to implement a consistent look and feel to a site using this great new ASP.NET 2.0 feature
Constructing a site map that defines which pages exist on a site, and how these pages relate to each other hierarchically
Storing central configuration data and code that is used by all pages on a site using the
Web.config and Global.asax files
At the end of the chapter are some exercises to help you gain a bit more familiarity with the concepts learned.