

ASP.NET 2.0 Instant Results
.pdfWrox Photo Album
The following tables depict the specific fields of each of the database tables in use:
The Photo Table
Field Name |
Data Type |
Description |
|
|
|
photoID |
Int |
The unique identifier for this record. |
collectionID |
Int |
The foreign key collection ID within the system. |
filepath |
Varchar |
The file path of the photo file in the web server’s folder path. |
name |
Varchar |
The name of the photo. |
description |
Varchar |
The detailed description of the photo. |
The Collection Table
Field Name |
Data Type |
Description |
|
|
|
collectionID |
Int |
The unique identifier for this record. |
name |
Varchar |
The name of the collection. |
description |
Varchar |
A description of the collection. |
|
|
|
The next section walks you through the security model and its implied mechanisms within the application.
Security Model
You need some level of security to protect your precious photos from the untrusted user out in cyberspace. The Wrox Photo Album provides a basic security model using Forms Authentication and a SQL Server Express Data Provider. This SQL Server Express provider generates a new security database when implemented, which is included in the project and used to house all of the user account information and security settings. This security model implements Forms Authentication intrinsically within the various security controls, such as those used to login, display login status, recover your password, change your password, and create a new user.
Two accounts are created for use within the photo album, and two different roles that those accounts are assigned to, respectively. These are outlined in the following table:
Username |
Password |
Account Description |
|
|
|
Admin |
password# |
This user is assigned to the Administrator role. |
SuperAdmin |
password# |
This user is assigned to the Super Administrator role. |
|
|
|
In successive fashion, the following table details the list of roles created in the system, and what permissions those roles have:
217
Chapter 7
Role |
Role Description |
|
|
Administrator |
This role has the ability to add photos and photo collections to the |
|
system, but does not have any edit or delete permissions. |
Super Administrator |
This role has the ability to add, edit, and delete both photos and |
|
collections. |
Aside from these design considerations, the Wrox Photo Album has been designed in accordance with the ASP.NET 2.0 features that you’d expect. Nothing is earth-shattering or groundbreaking in nature, just typical, and the new .NET 2.0 tools, including the navigation controls, master pages, GridView control, file upload control, and others.
Classes Involved
The following sections outline the classes involved in the system from a design perspective.
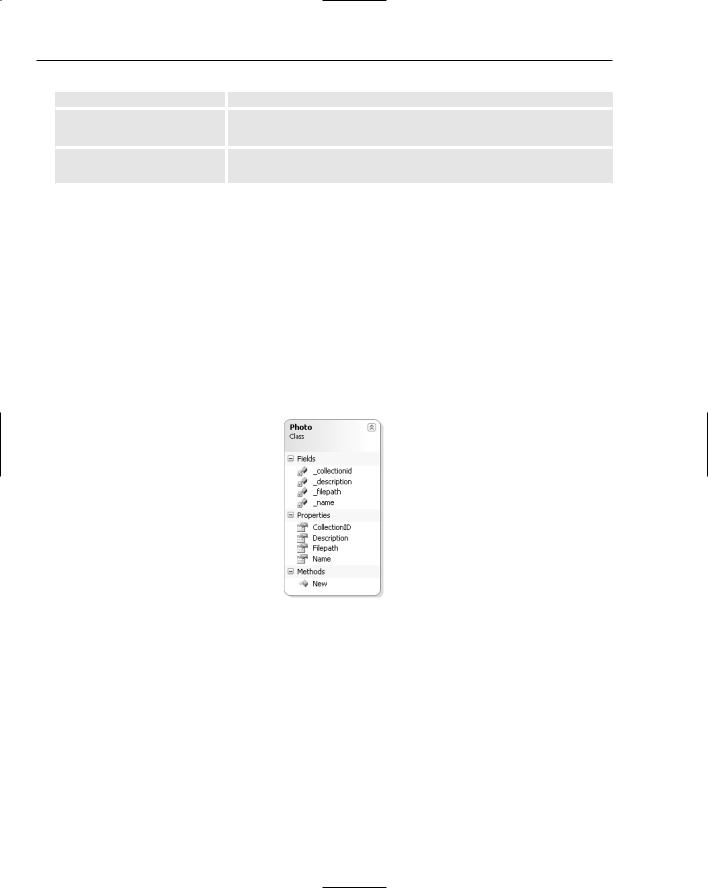
The Photo Class
The Photo class is used to represent an instance of the photo in the application logic. Figure 7-11 is a graphical representation of the Photo class in the system, showing its fields, properties, and methods separately.
Figure 7-11
The Photo class is used to represent a Photo object as it is passed into the business object layer for entry into the system. The following table lists the properties of the Photo class:
Property |
Return Type |
Description |
|
|
|
CollectionID |
Integer |
The specific parent collection to which the photo belongs. |
Description |
String |
The description entered for the photo. |
FilePath |
String |
The image’s filename as it exists in the filesystem of the server |
|
|
for storage. |
Name |
String |
The name of the photo. |
|
|
|
218
Wrox Photo Album
The next class is where the photo items are managed and contained within.
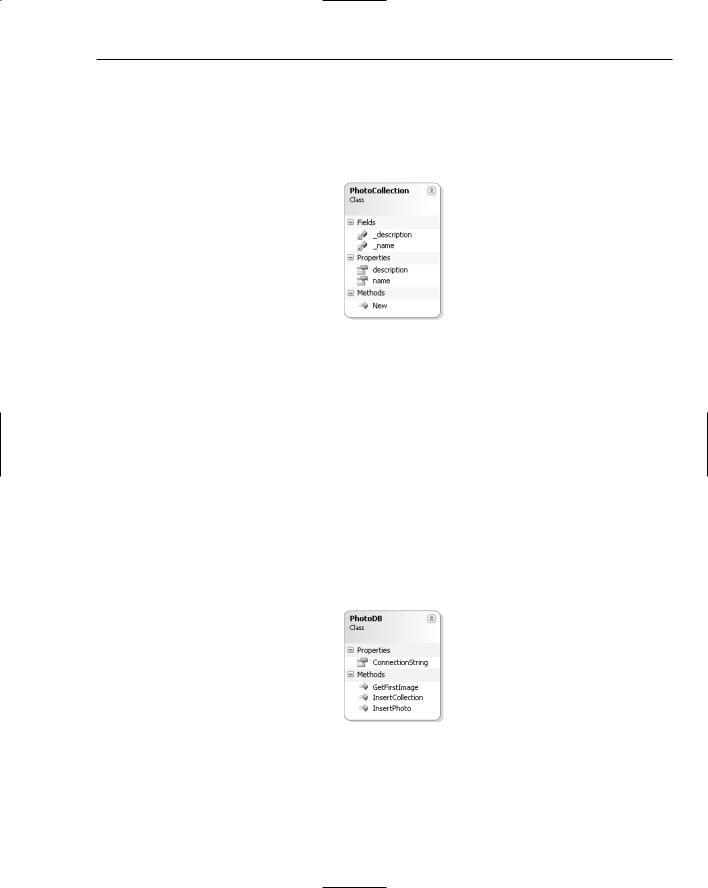
The PhotoCollection Class
The PhotoCollection class, shown in Figure 7-12, outlines the basic composition of the class, with its fields, properties, and events.
Figure 7-12
The PhotoCollection class is used to represent a PhotoCollection object as it is passed into the business object layer for entry into the system. The following table lists the properties of the PhotoCollection class:
Property |
Return Type |
Description |
|
|
|
Description |
String |
The text description provided for the collection. |
Name |
String |
The name entered for the collection. |
|
|
|
The next class ties in how the business classes you have already studied will interact with the database.
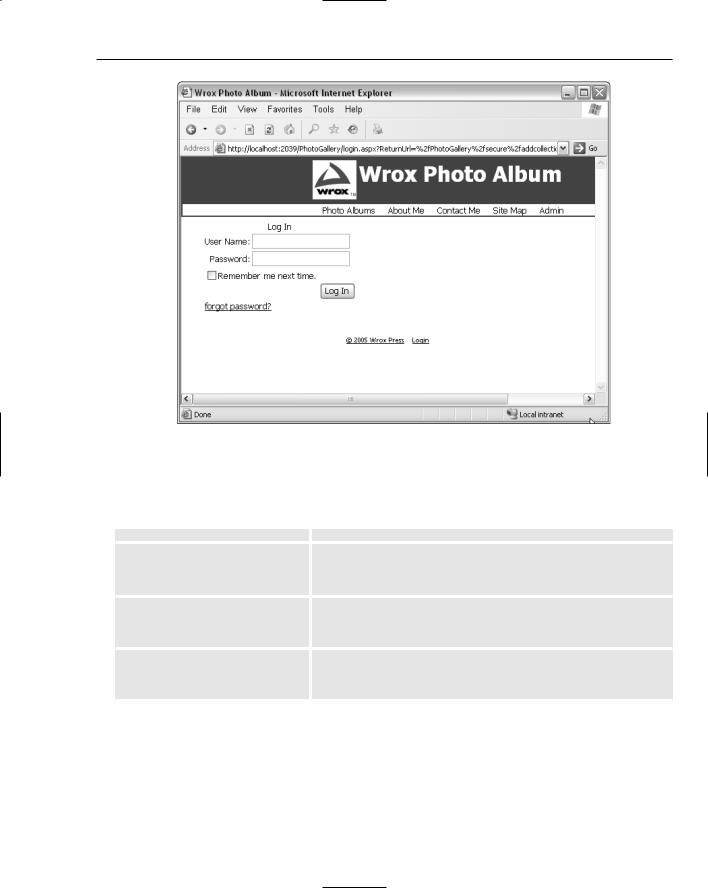
The PhotoDB Class
The data access layer is managed and provided via this PhotoDB class (see Figure 7-13), because it provides a window to the data and data objects.
Figure 7-13
The data access strategy is to maintain a lightweight set of database command logic that provides data management capabilities to the presentation layer. The DataAccessLayer class is primarily used to insert new photos and collections into the database. The basis of this class is essentially to separate the implementation of the data access activities from the presentation layer of the application as much as
219

Chapter 7
possible. By using class object references as parameters to method calls within this business layer, you can potentially save time in customizations, because you need only to manage the class definition and class references in a few places to provide additional fields or functionality.
The data access layer contains the following properties and methods:
Property or Method |
Return Type |
Description |
|
|
|
|
|
|
ConnectionString |
String |
This property is the textual connection string from |
|
|
the Web.config file’s connection string entry. |
GetFirstImage |
String |
This function accepts a collectionID as a |
|
|
parameter, and returns a string image path for the |
|
|
single photo that was selected from the database to |
|
|
represent that collection. |
InsertCollection |
Boolean |
This function accepts a photocollection object |
|
|
as its only parameter, and adds it as a collection |
|
|
into the database. |
InsertPhoto |
Boolean |
This function accepts a photo object as its only |
|
|
parameter, and adds the photo to the database. |
|
|
|
The InsertPhoto function is possibly the most important area of the class, and is listed here:
Public Shared Function InsertPhoto(ByVal p As Photo) As Boolean Try
‘Declare the objects for data access Dim conn As New SqlConnection()
Dim cmd As New SqlCommand() ‘set the connection string
conn.ConnectionString = DataAccessLayer.ConnectionString cmd.Connection = conn
conn.Open()
cmd.CommandType = CommandType.StoredProcedure cmd.CommandText = “add_photo”
‘ Create a SqlParameter for each parameter in the stored proc. Dim idParam As New SqlParameter(“@path”, p.Filepath)
Dim cParam As New SqlParameter(“@collectionID”, p.CollectionID) Dim nameParam As New SqlParameter(“@name”, p.Name)
Dim descParam As New SqlParameter(“@desc”, p.Description) ‘add each parameter to the command object cmd.Parameters.Add(cParam)
cmd.Parameters.Add(idParam)
cmd.Parameters.Add(nameParam)
cmd.Parameters.Add(descParam)
cmd.ExecuteNonQuery()
Return True
Catch ex As Exception
Throw (ex)
End Try
End Function
220

Wrox Photo Album
This excerpt provides insight to the basic data insertion operation that the DataAccessLayer class provides. Dim conn As New SqlConnection() provides a reference to a new connection. This connection will be set to be the SQL Server Express 2005 PhotoDB.mdf database as per the Web.config setting, with the following line of code:
conn.ConnectionString = DataAccessLayer.ConnectionString
Next, the function opens the connection and begins to set the properties of the SqlCommand object. The command is stated to be a stored procedure with the name of add_photo. This stored procedure accepts four parameters, and is shown here:
ALTER PROCEDURE dbo.add_photo
(
@collectionID int, @path varchar(300), @name varchar(300), @desc varchar(300)
)
AS
insert into photo (collectionID, filepath, [name], description) values (@collectionID, @path, @name, @desc)
RETURN
In order to call the stored procedure from the ADO.NET SqlCommand object, you need to add SqlParameter objects to it. The following code creates the four parameter object variables, assigns values to them, and adds them into the command parameters collection:
‘ Create a SqlParameter for each parameter in the stored proc. Dim idParam As New SqlParameter(“@path”, p.Filepath)
Dim cParam As New SqlParameter(“@collectionID”, p.CollectionID) Dim nameParam As New SqlParameter(“@name”, p.Name)
Dim descParam As New SqlParameter(“@desc”, p.Description)
‘add each parameter to the command object cmd.Parameters.Add(cParam) cmd.Parameters.Add(idParam) cmd.Parameters.Add(nameParam) cmd.Parameters.Add(descParam)
Now you just need to execute the stored procedure, which inserts a record into the photo database table. The cmd.ExecuteNonQuery() statement provides just that.
The next section walks you through each code file with a detailed explanation on the background and/or purpose of the modules.
Code and Code Explanation
This section explains each of the essential code files in the Wrox Photo Album project. You look in detail at the files in each of the different folders and learn how they interact and are used across the project.
221

Chapter 7
Root Files
The root of the Wrox Photo Album contains several important files, including the main ASPX shellpages, and the configuration and formatting pages. Most of the business logic is hidden from these pages and contained in the reusable web user controls held in the Usercontrols folder.
Web.config
The Web.config stores vital configuration entries used within the application. One entry, named the SqlServerConnectionString, controls the connection to the database, as shown here:
<connectionStrings>
<add name=”SqlServerConnectionString” connectionString=”server=(local)\SqlExpress;AttachDbFileName=|DataDirectory|PhotoDB
.mdf;Integrated Security=true;User Instance=true” providerName=”System.Data.SqlClient” />
</connectionStrings>
It also contains information managing the SMTP e-mail settings for sending out e-mails:
<appSettings>
<add key=”EmailFrom” value=”admin@myphotoalbum.com” />
<add key=”EmailTo” value=”admin@myphotoalbum.Com” /> </appSettings>
In order to access these entries, such as in the DataAccessLayer class, use the following code:
Public Class DataAccessLayer
Public Shared ReadOnly Property ConnectionString() As String
Get
Return
ConfigurationManager.ConnectionStrings(“SqlServerConnectionString”).ConnectionString
End Get
End Property
This is simply referencing the Web.config file to extract the values from the textual data and place them into the class variable references.
In the next section you get a look at the use of the various master pages in use.
Masterpage.master and Admin.master
The master pages are used to maintain a consistent view of the pages with different formats for each. The Masterpage.master is the master page for the public pages on the site, which all users see when viewing the web site. The master page contains several important controls that are used across the public pages of the site. These include a SiteMapDataSource, Menu, SiteMapPath, and a
ContentPlaceHolder control.
The Admin.master is a different master page that is used only for the pages contained within the Secure folder. These are considered to be the administrative pages, and are accessible only once the user logs in to the system.
222

Wrox Photo Album
Web.sitemap
This XML file is simply a hierarchical list of siteMapNode elements that allow a web site to abstract its links of pages into a separate area for shared consumption. The contents of the file are as follows:
<?xml version=”1.0” encoding=”utf-8” ?>
<siteMap xmlns=”http://schemas.microsoft.com/AspNet/SiteMap-File-1.0” > <siteMapNode url=”#” title=”” description=”Welcome to PhotoShare!”>
<siteMapNode url=”default.aspx” title=”Photo Albums” /> <siteMapNode url=”about.aspx” title=”About Me” />
<siteMapNode url=”contact.aspx” title=”Contact Me” /> <siteMapNode url=”sitemap.aspx” title=”Site Map” /> <siteMapNode url=”secure/admin.aspx” title=”Admin” />
</siteMapNode>
</siteMap>
The Web.sitemap file is used as a data source for the menu of the web site, which is contained within the master page. It’s also used to feed the TreeView control in the sitemap.aspx page. In this way, if you need to add a page to the web site, it can be instantly positioned within all of the navigation controls by simply adding the entry to this file.
WebForms
The root of the Wrox Photo Album contains several important files, including the main ASPX pages, and the configuration and formatting pages. The following pages comprise the pages used when a general user visits the site.
Photos.aspx
This WebForm displays the photos from the web server in the form and appearance of a grid. This implements an ASP.NET 2.0 DataList control that renders an HTML image control across the page from left to right and from top to bottom. The DataList control has been called a big brother to the Repeater control. They are both essentially the same, except that the DataList control has a bit more value in having built-in templates and a more flexible layout.
The following code represents the data-bound DataList control:
<asp:DataList ID=”DataList1” runat=”Server” dataSourceID=”SqlDataSource1” repeatColumns=”6” repeatdirection=”Horizontal” borderwidth=”0px”
cellpadding=”3”>
<ItemStyle cssClass=”item” /> <ItemTemplate>
<table align=left border=”0” cellpadding=”0” cellspacing=”0” class=”collection”>
<tr>
<td></td>
<td nowrap width=”100” valign=”top”>
<a class=”photoname” href=”viewphoto.aspx?photoID=<%# Eval(“photoID”)
%>”>
<%#GetName(Server.HtmlEncode(Eval(“Name”).ToString()))%> </a>
</td>
223

Chapter 7
<td></td>
</tr>
<tr>
<td></td>
<td>
<a href=’viewphoto.aspx?photoID=<%# Eval(“photoID”) %>’ >
<img class=”viewphoto” src=”upload/<%# Eval(“filepath”) %>” height=”100” width=”100” alt=’<%# Eval(“description”) %>’ />
</a>
</td>
<td></td>
</tr>
</table>
</ItemTemplate>
</asp:DataList>
The data-binding settings of the preceding HTML markup, dataSourceID=”SqlDataSource1”, point to the SqlDataSource control also contained within the page, and are listed here:
<asp:SqlDataSource ID=”SqlDataSource1” runat=”server” ConnectionString=”<%$ ConnectionStrings:SqlServerConnectionString %>”
SelectCommand=”SELECT [photoID], [collectionID], [filepath], [name], [description] FROM [photo] WHERE ([collectionID] = @collectionID)”>
<SelectParameters>
<asp:QueryStringParameter Name=”collectionID” QueryStringField=”collectionID” Type=”Int32” />
</SelectParameters>
</asp:SqlDataSource>
The SqlDataSource control accepts a querystring parameter, collectionID, which is passed in from the clicking of a collection image on the default.aspx page. From Design View, you can click the smart tag of a DataSource control and view the wizard for configuration and parameterization of the control at run time. This wizard provides the capability to view and select querystrings, cookies, posted forms, or session parameters to feed the dynamic SQL queries of the control.
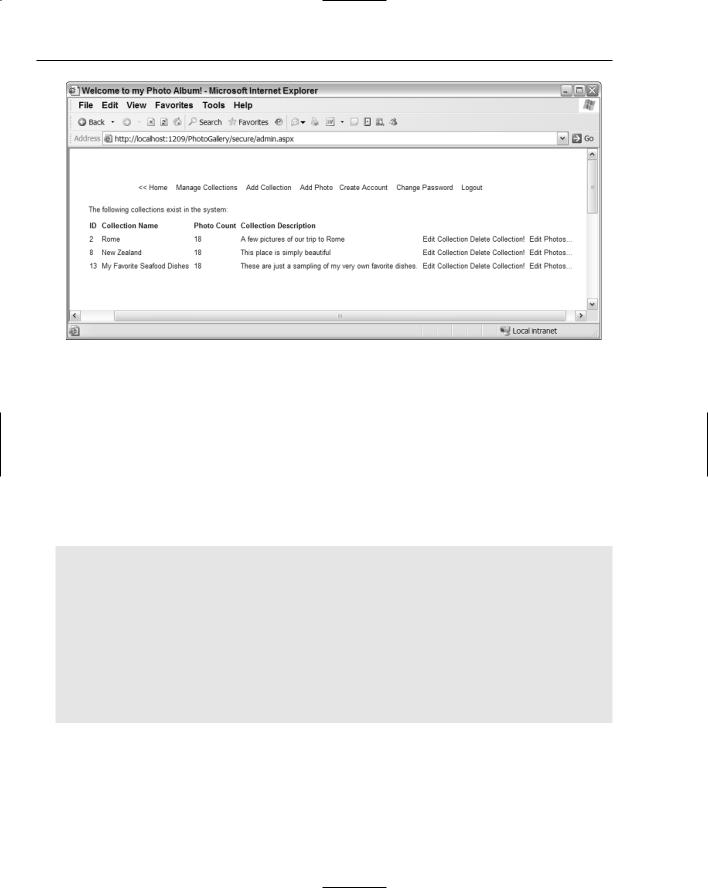
Login.aspx
Figure 7-14 shows the Login control, new in ASP.NET 2.0.
The Login WebForm contains an ASP.NET Login control, which intrinsically accesses the SQL Server Express ASPNET database for authentication calls. As shown in the following code, there is very little HTML markup needed to implement this login functionality in the site:
<asp:Login ID=”Login1” runat=”server” PasswordRecoveryText=”forgot password?” PasswordRecoveryUrl=”~/passwordrecovery.aspx”
DestinationPageUrl=”~/secure/admin.aspx”>
</asp:Login>
224
Wrox Photo Album
Figure 7-14
As you can see within the HTML markup of the page, just a few properties are set for the Login control that change the behavior of the control in the site. These are listed and explained in the following table:
Property |
Description |
|
|
PasswordRecoveryText |
This is the text you see where the link exists for a user to |
|
recover his or her password by a potential secret question |
|
used when creating the account. |
PasswordRecoveryUrl |
This is the URL used for the password recovery URL, which |
|
points to a page with the password recovery control some- |
|
where in it. |
DestinationPageUrl |
This is the URL to send the user to when the user successfully |
|
answers the secret question and is allowed to recover the |
|
password via an e-mail sent to him or her by the system. |
This is just one example of how ASP.NET 2.0 provides robust functionality built into the security controls and usable right out of the box.
Admin.aspx
The Admin.aspx WebForm is essentially the landing page for the secure section of the site, seen immediately after logging in. This Admin page contains a GridView control, which is data-bound to the site’s collection data, as displayed in Figure 7-15.
225
Chapter 7
Figure 7-15
The GridView of collections allows a Super Administrator to edit or delete a collection by clicking the appropriate hyperlinks in the row of the collection grid view.
From the Page_Load event of this page, the user is authenticated to ensure he or she is a member of either an Administrator or a Super Administrator role within the security configuration. Either of these roles allows for access to the secure folder of the site. The Super Administrator role, however, is the only role that provides edit and delete functionality to the images and collections of the site. Thus, the GridView control is hidden for Administrator users, but visible for Super Administrator users.
This authentication logic is depicted in the following excerpt:
<%@ Control Language=”VB” ClassName=”admin” %>
<script runat=”server”>
Protected Sub Page_Load(ByVal sender As Object, ByVal e As System.EventArgs) ‘we check for a super admin or admin...
If Context.User.IsInRole(“Administrator”) Then grdCollectionManagement.Visible = False
End If
If Context.User.IsInRole(“Super Administrator”) Then grdCollectionManagement.Visible = True
End If End Sub
</script>
The GridView is bound to the SqlDataSource control on the page, and the database actions that the grid provides are configured within the HTML markup of the SqlDataSource. The following code displays the SelectCommand, UpdateCommand, and DeleteCommand queries, as well as the parameters for each database command:
226