

ASP.NET 2.0 Instant Results
.pdfWrox Chat Server
1.Create a brand new web site in Visual Web Developer or Visual Studio 2005.
2.Open the folder Chapter 03 – Wrox Chat Server from the CD-ROM that came with this book and extract the contents of the file ChatServerSource.zip to a folder on your hard drive.
3.Open a Windows Explorer and browse to the folder that contains the unpacked files. Next, arrange Visual Web Developer and the Windows Explorer in such a way that both are visible at the same time.
4.In the Windows Explorer, select all of the folders and files within the codebase and drag them from the explorer window into the Solution Explorer in Visual Web Developer. If you’re prompted to overwrite files, select Yes. You should end up with a Solution Explorer that contains all of the necessary files for the project to run properly.
5.Press F5 to run the application in the development environment.
For some insight on how you can modify your project in order to take advantage of some of the possible uses of the Wrox Chat Server, find this book’s download page at www.wrox.com.
Summar y
This chapter reviewed some of new controls within the ASP.NET 2.0 Framework, such as the Callback method, SiteMap control, the SiteMapDataSource, the use of Master Pages, and the databound Menu control. The flow of the chapter was centered around a standard approach to application design, using business layer classes, data layer classes, and a basic database structure. You learned how each of these new controls can save development time and effort in great proportions.
The “Wrox Chat Server Design” section provided a glimpse at the technology behind the Callback feature, because it shines in version 2.0 of the .NET Framework as one of the much-needed features for developers to use. The section also touched on class files in use, their properties, their methods, and the general purposes of each. It also gave visibility to the database tables, their relationships, and general entities displayed as classes.
The chapter finished with the necessary additions to provide a basic enhancement to the system, allowing for the chat system to automatically respond to user messages during off-hours.
97


4
Wrox Sur vey Engine
If you have ever taken an online survey before, you might have found that it is often very interesting to see the results and nod your head in agreement. Surveys can produce a sense of intrigue to the viewer, because they are aimed at gathering and compiling information about public opinion. The political scene is constantly speculating based on the polls and surveys conducted for a given set of people. Company changes and truckloads of monetary investments are made at the helm of an informative survey. You also may have noticed that surveys are often intentionally aimed and phrased to make sense to the average user. In fact, surveys are one of the proven best ways of extracting information from web users of the general public. Online surveys are found all over the Internet and have been a source of valuable data for companies of various sizes. The user is prompted with very simple and easy-to-understand questions that offer enticing answers from a list of multiple choices. Results from the survey questions are compiled immediately and available to management personnel for many times what proves to be important decisions for the company or department. It makes perfect sense, then, to implement surveys in order to ascertain the true state of a group or market sector.
The Survey Engine is an interesting application. It is easily reproducible in various environments with any number of multiple-choice questions. Once a survey has been conducted, the information gathered should be available to view in an organized and legible format. Reports can be run on survey results to demonstrate the responses of the majority.
The Wrox Survey Engine is a great example project that you can learn from in your valiant effort of tackling ASP.NET 2.0. This survey management web site provides the ability for an admin user to create surveys and monitor their results through the use of a user-friendly interface.

Chapter 4
The Wrox Survey Engine provides a list of useful features, including the following:
Create a survey on the fly.
View survey responses with percentages.
Embed surveys into an existing web site.
These features comprise the core functionality of the web site, with room for plenty of enhancements and modifications.
This chapter demonstrates how easy it is to implement some of the newer controls and techniques available in ASP.NET 2.0. Some of these new areas include the ObjectDataSource control, enhanced SQL Server DataSource control, ASP.NET Web Security Interface, the application of themes at the Web
.config file level, the new navigation controls, the login and password retrieval controls, and the use of master pages within a solution.
In the section “Wrox Survey Engine Design” you explore the design of the application in great detail. This includes the database file structures, class designs, a basic inheritance model, and the loosely coupled application architecture.
The section titled “Code and Code Explanation” performs a methodical examination of the code, breaking down the important modules and functions and explaining their role from the GUI to the database and back. In addition, it reviews the logic within the classes involved, and some possible modifications you can make to the project with specific instructions.
The final section, “Setting up the Project,” reviews how to extract and customize the Survey Engine in a development environment and how to install it to production.
But first things first: a review of the basics of using the Survey Engine.
Using the Wrox Sur vey Engine
Using the Wrox Survey Engine is a remarkably simple task. It is essentially a web site that has been developed to be the starting point for a company or an individual to easily and quickly create online surveys. Only a few pages are needed for an individual to complete a survey, because it is simply a list of multiple-choice questions with no right or wrong answers. This lends itself well to implementing a reusable component or module to generate a survey because every survey has questions and exactly four possible choices.
If the Wrox Survey Engine web site has been successfully installed (refer to the section “Setting up the Project” later in this chapter), you can browse to view the site by going to http://localhost/ surveyengine. You’ll see the screen shown in Figure 4-1.
100
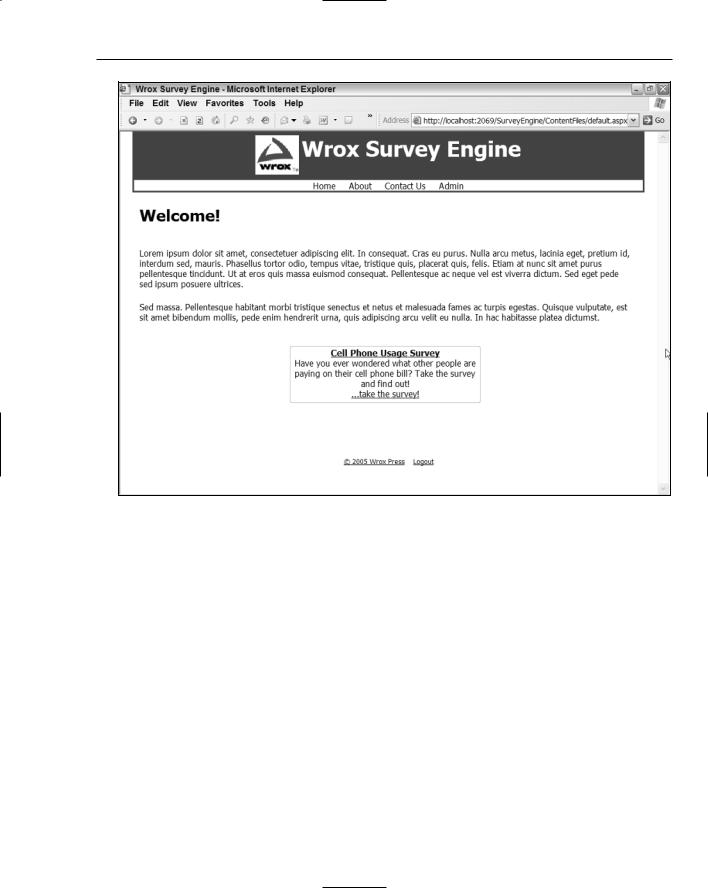
Wrox Survey Engine
Figure 4-1
At the top of the homepage are several links to choose from:
Home
About
Contact Us
Admin
On the homepage, you will see a rounded box area toward the bottom of the page. This is essentially the hyperlink the user can click in order to take a survey. As you click the link, you are brought to the page used to present all of the survey questions at one time (see Figure 4-2).
101
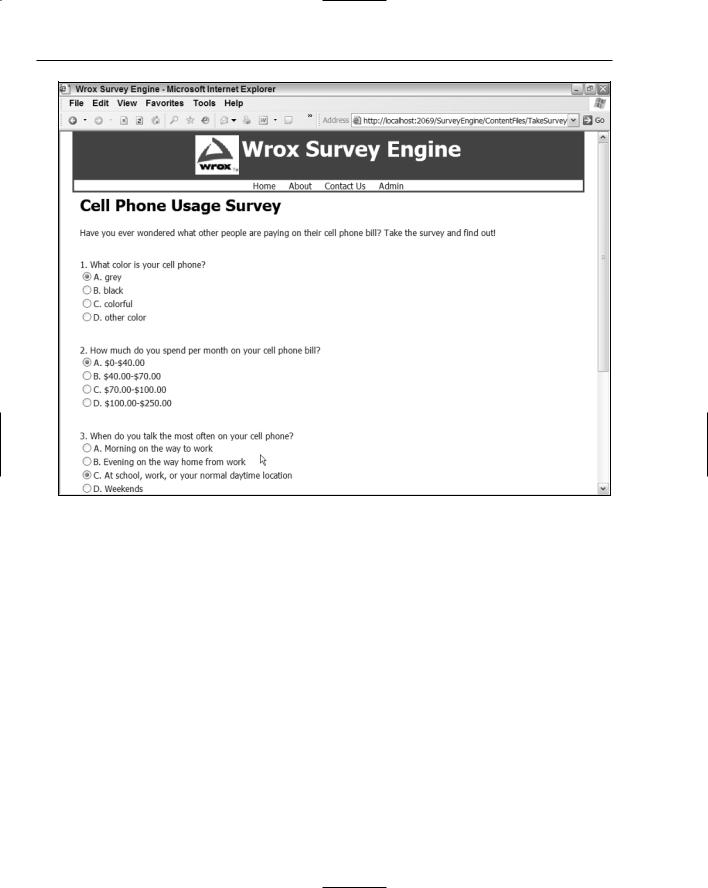
Chapter 4
Figure 4-2
Multiple choices are given (A, B, C, D), from which users can pick to answer the survey questions. Once you select an answer for every question, you can click the View Results button to submit the form, at which point you’ll see the screen depicted in Figure 4-3.
Now that the survey has been submitted, you will see the results for the survey so far. As more people complete surveys on the web site, the statistics will obviously change.
102

Wrox Survey Engine
Figure 4-3
That actually concludes the main portion of content that the typical user would be exposed to. Behind the scenes, however, an administration section provides you with a great way to quickly and easily create surveys and view their responses.
When you click the Admin link in the main menu, you are brought to the login screen if you have not already logged into the web site and created a session. Figure 4-4 shows the login interface.
This page has a login feature and a password retrieval feature for you to use. Enter Admin for the username and password# for the password and click the Log In button.
103
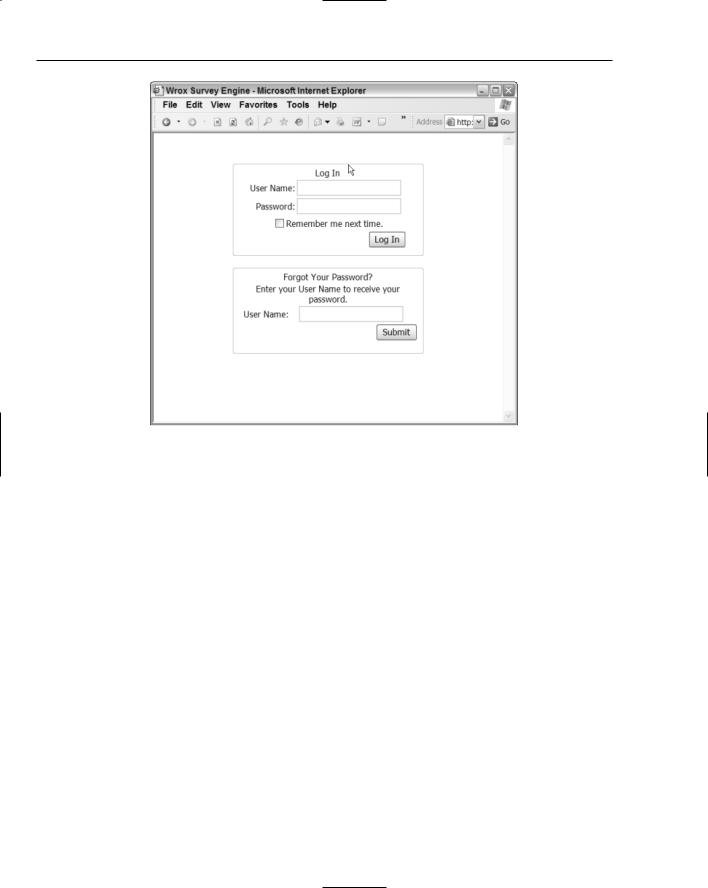
Chapter 4
Figure 4-4
Once you log in to the site, you are brought to the Administrator landing page, displayed in Figure 4-5.
This Administrator page provides a grid of all of the surveys that exist in the system. Each survey in the grid has several features you can choose from in order to perform administrative functions, including the following:
Create a new survey.
Edit the questions or name of an existing survey.
Add additional questions to an existing survey.
View responses of a survey.
Designate a specific survey to be the one that is displayed to the user.
By clicking any one of the hyperlinks in the grid, you navigate to the appropriate pages to complete the activity selected. These pages are described in the sections that follow.
104
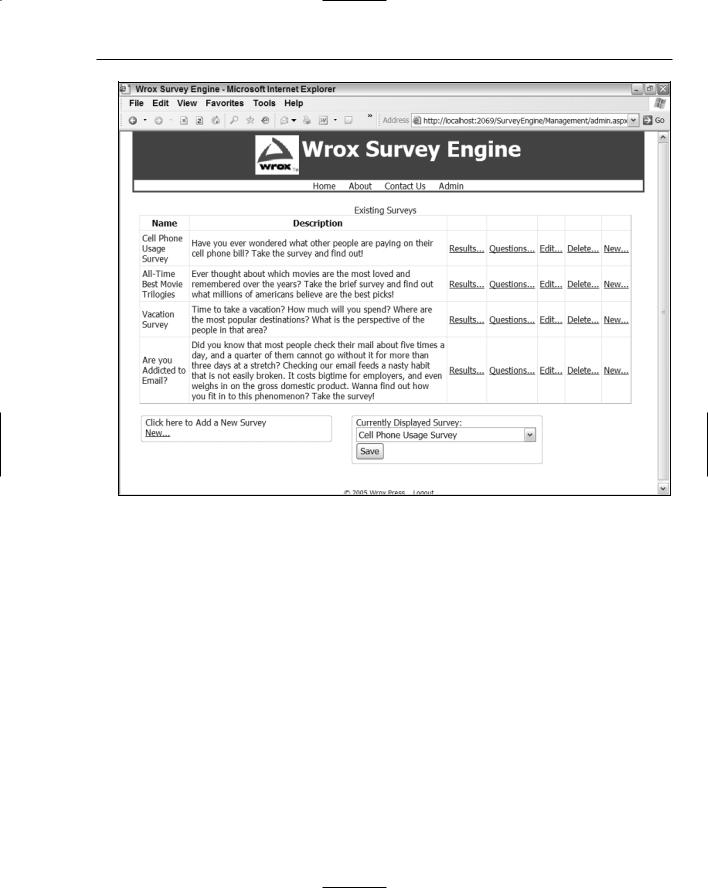
Wrox Survey Engine
Figure 4-5
Adding a New Survey
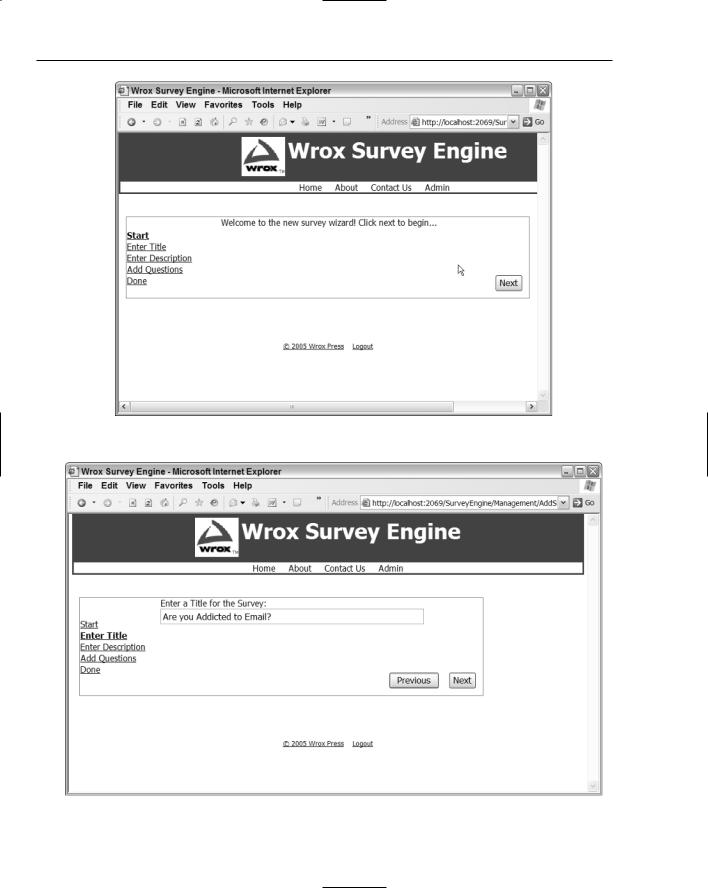
One of the very first selections you may want to invoke could be the Add Survey Wizard, via the link that exists on the bottom-left of the page, or the New link in any of the rows of the data grid. Once clicked, the Add Survey Wizard appears and prompts you for specific information on the survey you are trying to add. Figure 4-6 depicts this process.
This figure illustrates the beginning of the wizard, with a Next button on the bottom right. This is a brand-new control to ASP.NET 2.0, and the next section, “Wrox Survey Engine Design,” dives into its usage scenarios and details.
By clicking Next, you can enter a name for the new survey, as shown in Figure 4-7.
105
Chapter 4
Figure 4-6
Figure 4-7
106