

ASP.NET 2.0 Instant Results
.pdfWrox Survey Engine
<asp:ObjectDataSource ID=”odsSurveyQuestions” runat=”server” SelectMethod=”GetQuestions” TypeName=”Survey”>
<SelectParameters>
<asp:QueryStringParameter Name=”id” QueryStringField=”surveyID” Type=”Int32” /> </SelectParameters>
</asp:ObjectDataSource>
Just below this section in the form is the DataList control that this ObjectDataSource control binds to. The fields and settings of this control exist solely within the HTML markup, as displayed here:
<asp:DataList ID=”DataList1” runat=”server” DataSourceID=”odsSurveyQuestions”> <ItemTemplate>
<%=GetQuestionNum()%>. <%#Server.HtmlEncode(Eval(“Text”).ToString())%> <br />
<input name=”Q<%#Eval(“ID”)%>” type=”radio” value=”A”>A. <%#Server.HtmlEncode(Eval(“OptionA”).ToString())%></option><br />
<input name=”Q<%#Eval(“ID”)%>” type=”radio” value=”B”>B. <%#Server.HtmlEncode(Eval(“OptionB”).ToString())%></option><br />
<input name=”Q<%#Eval(“ID”)%>” type=”radio” value=”C”>C. <%#Server.HtmlEncode(Eval(“OptionC”).ToString())%></option><br />
<input name=”Q<%#Eval(“ID”)%>” type=”radio” value=”D”>D. <%#Server.HtmlEncode(Eval(“OptionD”).ToString())%></option><br />
<br /><br /> </ItemTemplate>
</asp:DataList>
This code specifies the object properties that the DataList binds to by the use of the <%#Eval(“ID”)%> tags. This provides the connectivity and bindings to the object properties for the repeating data values in the DataList control.
User Controls
Some specific user controls in the site assist with the navigation and content display for multiple pages. Because web user controls promote a practice of creating and using reusable code, they were made to be applicable within multiple pages of the site, depending on the nature of the controls.
header.ascx
The header user control is used to provide the top area of each page with meaningful content. If anything needs to reside at or near the top of a web page, you would add it to the header control so it would be visible through all of the pages.
The following code represents entire header.ascx source:
<%@ Control Language=”VB” AutoEventWireup=”false” CodeFile=”header.ascx.vb” Inherits=”Controls_header” %>
<div style=”text-align: center”> <table><tr>
<td><img src=”../Images/headerlogo.gif” /></td> <td><h1><% Response.Write(Page.Title) %></h1> </td>
</tr></table>
</div>
127

Chapter 4
Notice that the <%Response.Write(Page.Title)%> tags are used to write back to the response stream a title of the web site on the top of each page, which originated from the Web.config file.
footer.ascx
The footer user control is used as the bottom section of the site, for each page that uses the master page. That is, the footer control, among others, is a referenced control within the master page. In this way, it is propagated to all pages in the same exact manner.
The content of the footer control is displayed here:
<%@ Control Language=”VB” AutoEventWireup=”false” CodeFile=”footer.ascx.vb” Inherits=”Controls_footer” %>
<a href=”http://wrox.com” target=”_blank”>© 2005 Wrox Press</a>
<asp:LoginStatus ID=”LoginStatus1” runat=”server” LogoutAction=”RedirectToLoginPage”
LogoutPageUrl=”~/Login.aspx” />
This excerpt includes a reference to a LoginStatus control, brand new in the ASP.NET 2.0 control set. The new control displays a changing link-button for providing login and logout functionality. When the user is logged in to the site, the LoginStatus control displays a Logout link-button. Clicking the Logout link-button logs users out of the site, and directs them to the Login page. When the user is logged out of the site, the LoginStatus control displays a Login link-button. Clicking the Login link-button directs users to the Login page, where they are able to log in.
navigation.ascx
The navigation user control is used to provide the reusable menu that each page includes within itself in structure of the site. The menu itself is a brand new ASP.NET 2.0 control that binds to a SiteMapDataSource control, also new in version 2.0 of the .NET Framework. The SiteMapDataSource control is used to bind to an XML file, wherein the site files are listed as entries in the XML file.
The following excerpt is the HTML markup of the navigation control:
<%@ Control Language=”VB” AutoEventWireup=”false” CodeFile=”navigation.ascx.vb” Inherits=”Controls_Navigation” %>
<asp:Menu ID=”Menu1” runat=”server” DataSourceID=”SiteMapDataSource1”
Orientation=”Horizontal”
StaticDisplayLevels=”2”></asp:Menu>
<asp:SiteMapDataSource ID=”SiteMapDataSource1” runat=”server” />
The XML file of the SiteMapDataSource control is displayed here:
<?xml version=”1.0” encoding=”utf-8” ?>
<siteMap xmlns=”http://schemas.microsoft.com/AspNet/SiteMap-File-1.0” > <siteMapNode url=”ContentFiles/default.aspx” title=”Home” description=””>
<siteMapNode url=”ContentFiles/about.aspx” title=”About” description=”” /> <siteMapNode url=”ContentFiles/contact.aspx” title=”Contact Us”
description=”” />
<siteMapNode url=”Management/admin.aspx” title=”Admin” description=”” /> </siteMapNode>
</siteMap>
128

Wrox Survey Engine
To add a page to the menu of the web site, you must simply copy and paste (with the necessary modifications) an entry of the preceding XML file. In this way, the master page (which contains the only reference to the navigation control) provides visibility to the menu of the site on each page.
surveyresults.ascx
The SurveyResults control displays the results of the survey that is specified via the surveyed QueryString value. It is referenced within the SurveyResults.aspx WebForm page in the ContentFiles folder, and the MgtSurveyResults.aspx page in the Management folder. The SurveyResults control provides visibility to the percentage results of each of the survey questions of the specified survey.
The following HTML markup is from the SurveyResults.aspx page, displaying a SqlDataSource control. Note the use of the QueryString surveyID as an entry in the <SelectParameters> section of the file:
<asp:SqlDataSource ID=”SqlSurveyResults” runat=”server” ConnectionString= ”<%$ ConnectionStrings:ConnectionString %>” SelectCommand=”SELECT * FROM [viewAnswerPercentByQuestion] WHERE ([SurveyID] = @SurveyID)”>
<SelectParameters>
<asp:QueryStringParameter Name=”SurveyID” QueryStringField=”surveyID” Type=”Int32” />
</SelectParameters>
</asp:SqlDataSource>
The next section of the file contains the data-bound DataList control, with all the applicable databound fields listed within server-side tags, as shown here:
<asp:DataList ID=”DataList1” runat=”server” DataSourceID=”SqlSurveyResults”> <ItemTemplate>
<%=GetQuestionNum()%>. <%#Server.HtmlEncode(Eval(“Text”).ToString())%> <table border=”0” cellpadding=”1” cellspacing=”0”>
<tr><td>
<span class=”Pct”><%#Server.HtmlEncode(Eval(“PctA”).ToString())%>%
</span>
</td><td> <%#Server.HtmlEncode(Eval(“OptionA”).ToString())%>
</td></tr><tr><td>
<span class=”Pct”><%#Server.HtmlEncode(Eval(“PctB”).ToString())%>%
</span>
</td><td> <%#Server.HtmlEncode(Eval(“OptionB”).ToString())%>
</td></tr><tr><td>
<span class=”Pct”><%#Server.HtmlEncode(Eval(“PctC”).ToString())%>%
</span>
</td><td> <%#Server.HtmlEncode(Eval(“OptionC”).ToString())%>
</td></tr><tr><td>
<span class=”Pct”><%#Server.HtmlEncode(Eval(“PctD”).ToString())%>%
</span>
</td><td> <%#Server.HtmlEncode(Eval(“OptionD”).ToString())%>
</td></tr></table> <br />
</ItemTemplate>
</asp:DataList>
129

Chapter 4
The preceding HTML markup provides data-bound controls that show you which fields are being displayed to the browser, all within a set of HTML tables and fields.
currentsurvey.ascx
The CurrentSurvey web user control is used to provide the name and description of the survey listed in the Survey table with the field IsCurrentSurvey field set to 1, rather than 0. The 1 value indicates that this record represents the current or selected survey to be displayed to the user at run time. That is, in a typical web site, only one survey could be exposed to the users of the site at a time. In such a case, the administrator may want to select one at a time by allowing one of the surveys to have a current value.
The top portion of the CurrentSurvey control is as follows:
<%@ Control Language=”VB” AutoEventWireup=”false” CodeFile=”currentsurvey
.ascx.vb” Inherits=”Controls_currentsurvey” %>
<asp:ObjectDataSource ID=”odsCurrentSurvey” runat=”server” SelectMethod=”GetCurrentSurvey” TypeName=”Survey”></asp:ObjectDataSource>
Notice in this excerpt the use of ObjectDataSource control with a SelectMethod of GetCurrentSurvey for the retrieval of the one record in the Survey table with an IsCurrentSurvey value of 1. The next section of the currentsurvey control, shown in the following code, displays the use of the DataList control as it binds to the ObjectDataSource control’s properties, providing the name and description of the current survey in the database:
<asp:DataList ID=”DataList1” runat=”server” DataSourceID=”odsCurrentSurvey”> <ItemTemplate>
<fieldset class=”CurrentSurveySection”>
<b><a href=”TakeSurvey.aspx?surveyID=<%# Eval(“ID”) %>”> <%#Server.HtmlEncode(Eval(“Name”).ToString())%></a></b><br /> <%#Server.HtmlEncode(Eval(“Description”).ToString())%> <br /> <a href=”TakeSurvey.aspx?surveyID=<%# Eval(“ID”) %>”>...take the
survey!</a>
</fieldset>
</ItemTemplate>
</asp:DataList>
As mentioned earlier in this chapter, there are other ways of displaying surveys, but this provides an easy means by which to present one survey at a time to the user through a small area of HTML real estate. A web site could squeeze this user control into just about any section of a site, so it lends itself well to the design.
The next section explains in detail how to install and configure the source files of the web site and how to deploy the site to a server in a production environment.
Setting up the Project
The time has come to learn how to install this Wrox Survey Engine and see for yourself how quickly you can be up and running with a working survey application. The two ways you can install the web site are as a hosted web site application and as a source codebase for editing in Visual Studio 2005 or VWD.
130

Wrox Survey Engine
Hosted Web Site Installation
If you want to install the Wrox Survey Engine as a hosted web site on a computer or server, without customizations or enhancements at all, follow these steps (which assume you have already installed the
.NET Framework 2.0):
1.Open the folder Chapter 04 – Wrox Survey Engine\Installation Files\ from the CD-ROM that came with this book and double-click the setup.exe file.
2.This process installs the files properly for hosting the web site locally to C:\wwwRoot\ SurveyEngine as a file-based web site application. Click Next to install the application, and close the installation program when it completes.
3.Then, browse to your local web site (for example, http://localhost/SurveyEngine). The Wrox Survey Engine application should appear. To test the administration section, click the Admin link and log in with a username of SuperAdmin and a password of password#.
4.Finally, if you need to expose the site to the outside world, be sure to configure the public IP address to the IIS web site application. The details of this IIS configuration and its implications are outside the scope of this book, but the Wrox Survey Engine is easily configurable as a public web site with a brief tutorial on web site hosting.
Local Developer Installation
If you would like to open the project in Visual Studio or VWD, perform the following steps (assuming the .NET Framework 2.0 is installed, along with either Visual Studio or VWD):
1.Create a new web site in Visual Web Developer or Visual Studio 2005.
2.Open the folder Chapter 04 – Wrox Survey Engine Installer\ from the CD-ROM that came with this book and extract the contents of the file PhotoAlbumSource.zip to a folder on your hard drive.
3.Open a Windows Explorer and browse to the folder that contains the unpacked files. Next, arrange both Visual Web Developer and the Windows Explorer in such a way that both are visible at the same time.
4.In the Windows Explorer, select all of the folders and files within the codebase and drag the selected folders and files from the explorer window into the Solution Explorer in Visual Web Developer. If you’re prompted if to overwrite files, click Yes. You should end up with a Solution Explorer that contains all of the necessary files for the project to run properly.
5.In the Web.config file, modify the EmailTo and EmailFrom values in the appSettings section (see the following code) to reflect the administration e-mail accounts to be used for sending and receiving e-mail, should you decide to use this feature. Also, the PageTitle property is changeable here, which applies to the window title bar of each page in the site.
<appSettings>
<add key=”EmailFrom” value=”admin@mysurveyengine.com” />
<add key=”EmailTo” value=”admin@mysurveyengine.Com” /> <add key=”PageTitle” value=”Wrox Survey Engine” />
6.Also in the Web.config file, you can modify the smtp value in the mailSettings section (see following code) to reflect the e-mail SMTP outbound mail server name to be used for sending and receiving e-mail, should you decide to use this feature.
131

Chapter 4
<system.net>
<mailSettings>
<smtp deliveryMethod=”Network”>
<network host=”smtp.YourMailServerName.com” port=”25” />
</smtp>
</mailSettings>
</system.net>
<system.web>
7.Right-click the Default.aspx WebForm in the ContentFiles folder and select the Set as Start Page option. Press F5 to run the application in the development environment.
Now that you’ve set up the project, head to www.wrox.com, find this book’s download page, and check out some possible modifications to the Wrox Survey Engine.
Summar y
In this chapter you learned about some of the more exciting controls and tools in the ASP.NET 2.0 framework, such as the Login, LoginStatus, PasswordRetrieval, SiteMap, master pages, SqlDataSource, ObjectDataSource, SiteMapDataSource, GridView, DataList, and Menu controls. The flow of the chapter was visually rich, providing plenty of examples for you to absorb the logical flow of the application. You learned how each of these new and exciting features provides the rapid development everyone has been waiting for in Visual Studio.
The focus of the chapter was the understanding of how surveys are completed and retrieved, with some emphasis on the layered application approach. Some expanded and informative areas of the reading were related to the ObjectDataSource control versus the SqlDataSource control. The benefits and risks were outlined for both, and an argument was formed in favor of the ObjectDataSource control.
132

5
Wrox CMS
Many of today’s web sites are database-driven, which means they get their content from a database and not from static HTML files alone. Although this gives you great possibilities in the content you can present, it also brings a problem in updating that content. With static HTML sites you can design and create your files offline, and when you’re ready you simply use FTP or other network communication tools to get your files to the production server. However, with a site based on a database, this won’t work. Because the site must remain up and running, you often cannot simply overwrite the old database with new information. Also, because the site may be collecting run-time information (such as page views, user logins, and so forth) you could lose that information when you upload a new database with fresh content.
The most common way to solve this problem is to use an online Content Management System (CMS). Such a system allows you to log in to your site, and then manage the content right on the location where it’s stored and used: the web server.
In this chapter you learn how to build a generic CMS that allows you to manage content and the categories that this content is stored in. You can use the web site and CMS to publish information for a wide variety of scenarios. You can use it to publish information about your local soccer club, your company’s press releases, or any other topic you want to share with the world. The demo web site presented in this chapter uses the CMS to manage information about programmingrelated topics, including ASP.NET 2.0 and Visual Web Developer. The chapter begins with a quick tour of the web site and the CMS section. You see how to create new categories that will appear as menu items in the web site and how to enter the actual content in the database.
The section “Design of the Wrox CMS” explains how the CMS is designed, and what pages and classes are involved, and the section “Code and Code Explanation” takes a thorough look at the files and code in the site and explains how it all works.
Using the Wrox CMS
The site demonstrated in this chapter has two important sections: the public front end and the (protected) content management system. The public front end displays what are called content items in this chapter; a collection of news, articles, and frequently asked questions. These content

Chapter 5
items can be managed with the content management system that is part of the web site. This chapter focuses mainly on the latter section, but it also shows you how the information from the CMS is displayed on the public side.
Viewing Content on the Site
If the Wrox CMS web site has been installed successfully (refer to the section “Setting up the Wrox CMS” later in this chapter for more details) you can view the site by browsing to http://localhost/Cms. You’ll see the screen shown in Figure 5-1.
Figure 5-1
The main menu, with the big tabs at the top of the screen, contains both static and dynamic menu items. The Home, Admin, and Login items are fixed elements. The Home button always brings you back to the homepage and the Login button allows you to log in. The Admin button provides access to the Content Management System, referred to as the Management section in this chapter. The other three, referred to as content types, come from the database. Once you click a content type, such as Articles, you see a submenu appear, as depicted in Figure 5-2.
Figure 5-2
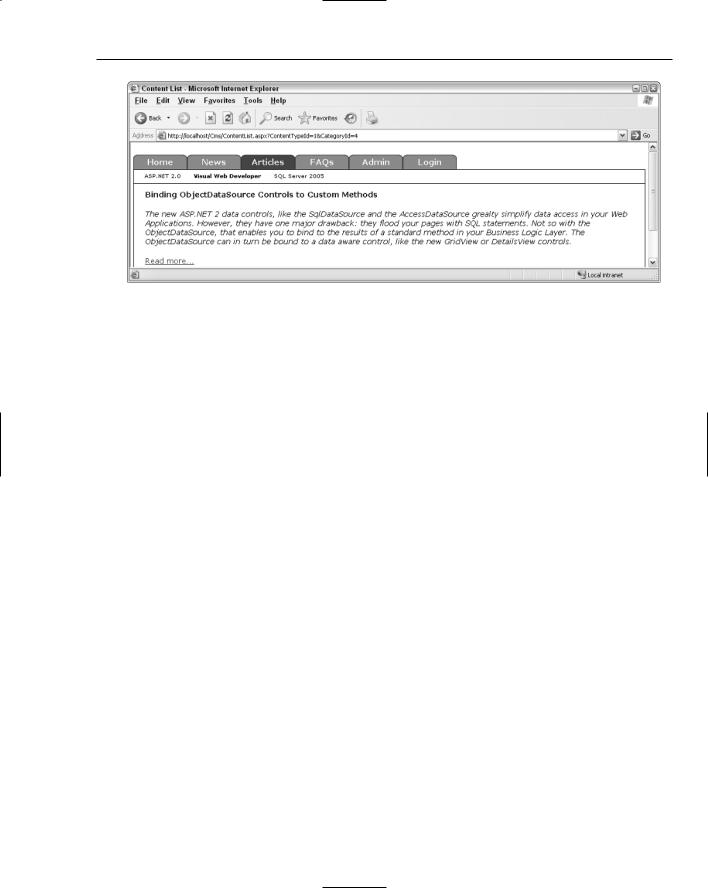
The sub-menu displays the categories that are available within the chosen content type. When you click a sub-menu, such as Visual Web Developer, you see a list with content items (see Figure 5-3) that are assigned to that category.
134
Wrox CMS
Figure 5-3
When you click the “Read more” link below one of the content items, a detail page appears that shows you the full version of the content item.
Managing Content with the CMS
To manage the content in the system and the various content types and categories, you need to log in first. If you installed the application using the supplied installer or through the manual process — as described in the section “Setting up the Wrox CMS” later in the chapter — you can log in with a username of Administrator and the password Admin123# (note that the password is case-sensitive).
Once you’re logged in, you see the CMS main menu appear with links to manage content types, categories, and content. Managing content types and categories is pretty straightforward. You can create new and update existing items. You can also reassign a category to a different content type by editing the category and choosing a new content type from the drop-down.
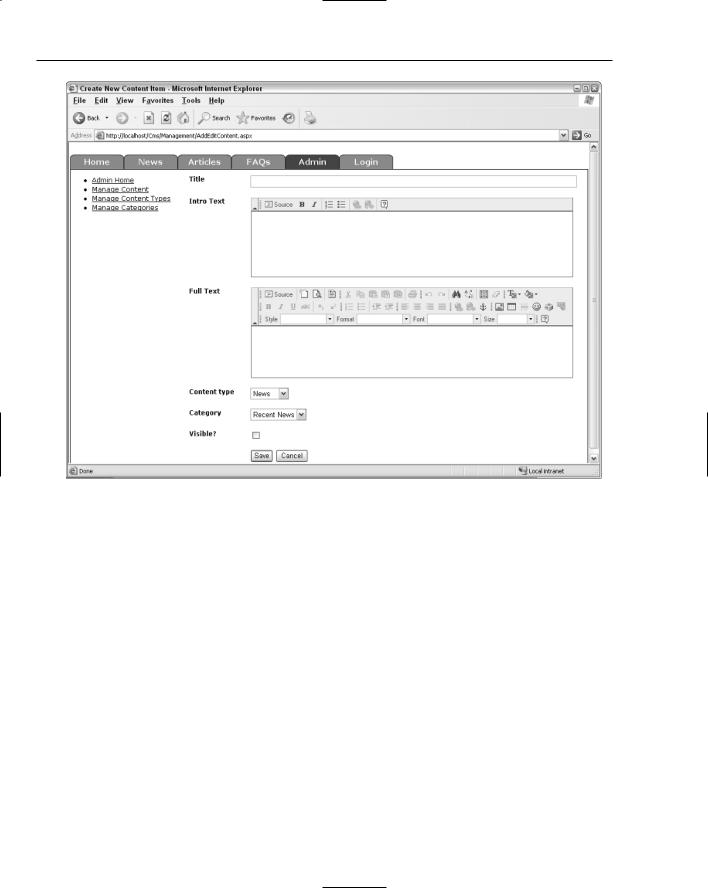
You can manage the content of the site by clicking the Manage Content item on the left menu that you can see in Figure 5-4. You then get a list with all the available content, filtered by the content type. To choose a different type, select the item from the drop-down list. To change a content item, click the Edit button in the list. If you click the Create New button you’re taken to the AddEditContent.aspx page (shown in Figure 5-4) that is used to add new and change existing content items.
In addition to the Title, Intro Text, and Full Text of the content item, you can also specify the content type and the category. As soon as you choose a new content type, the page refreshes and the category dropdown is updated to display the categories that belong to the chosen content type. An HTML editor called the FCKeditor was used for the Intro Text and Full Text fields. Use of this editor is explained later in the chapter.
If you leave the Visible checkbox unchecked, the item will no longer show up on the web site. It won’t be deleted from the database, however, so you can always reactivate the item later.
135
Chapter 5
Figure 5-4
Managing the content and various categories in this web-based CMS is pretty easy to do. Fortunately, the design and implementation of the CMS are pretty straightforward as well. In the next section you learn about the design of the application. The section describes the business layer and data access classes and shows you the design of the database and the stored procedures used to get data in and out of the database.
Design of the Wrox CMS
Most of the pages in the Wrox CMS rely on SqlDataSource controls to get the data in and out of the database. These new data source controls, in combination with the GridView and FormView, allow you to create database-driven pages in no time, with very little to no code at all. However, these controls suffer from a few problems. First of all, they are best suited for rather simple scenarios. For example, the page in the Management section that allows you to create or change categories is well suited for the SqlDataSource in combination with a GridView (for the list of categories) and a FormView (to insert new items) because the underlying data structure is quite simple. However, with more complex pages, like the AddEditContent.aspx page that has two drop-downs that are bound to each other, things become a bit more difficult. To make the SqlDataSource and FormView controls work in these scenarios you
136