

Beginning Microsoft Word Business Documents - From Novice To Professional (2006)
.pdf76 |
C H A P T E R 4 ■ C R E A T I N G F O R M S F O R P R I N T I N G O R D I S T R I B U T I N G E L E C T R O N I C A L L Y |
Figure 4-1. Selecting the Forms toolbar
Figure 4-2. The Tables and Borders toolbar
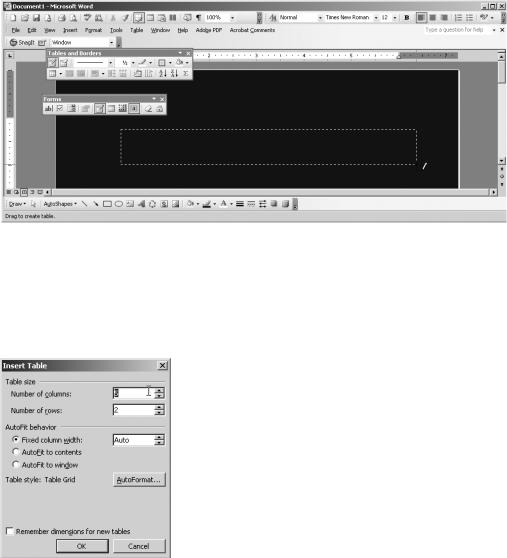
Before you begin drawing, use the drop-down boxes to select the table’s line style and line weight. You can also use the Border Color button to select a different color for the table lines. Then create your layout table by clicking where you want the top-left corner to begin. Drag your mouse and release the button where you want the bottom-right corner of the first cell to end, as Figure 4-3 demonstrates.
Repeat the steps for each cell of the table. Cells can vary in width and height. If you make a mistake while you’re drawing the table, you can use the Eraser button to erase cells from the table by drawing a box around the cells to be deleted. Then click the Draw Table button to continue adding cells.
C H A P T E R 4 ■ C R E A T I N G F O R M S F O R P R I N T I N G O R D I S T R I B U T I N G E L E C T R O N I C A L L Y |
77 |
Figure 4-3. Drawing a table cell
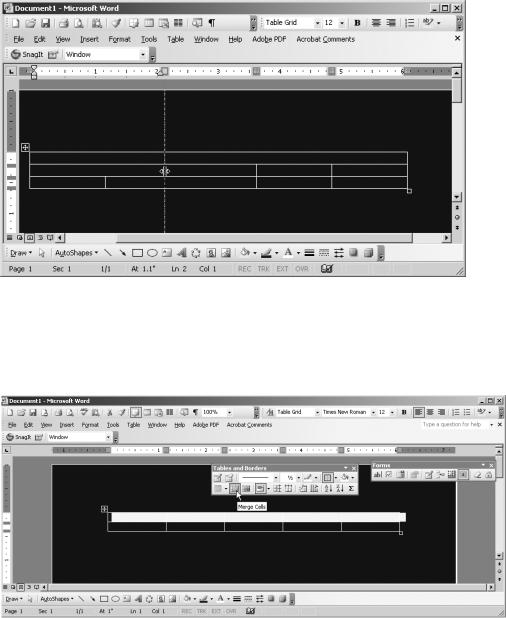
If you don’t want to draw the individual rows and columns of a table, you can use the Insert Table button. This will open a dialog box that allows you to specify the number of rows and columns for the table, as shown in Figure 4-4. They will be uniform in size.
Figure 4-4. Using the Insert Table button
Additionally, you can split the cells in a table row. Click the Split Cells button on the toolbar. Then specify the desired number of rows and columns, and click OK. As Figure 4-5 illustrates, you can click and drag the cell borders to resize the cells.
78 |
C H A P T E R 4 ■ C R E A T I N G F O R M S F O R P R I N T I N G O R D I S T R I B U T I N G E L E C T R O N I C A L L Y |
Figure 4-5. Using the split cells feature
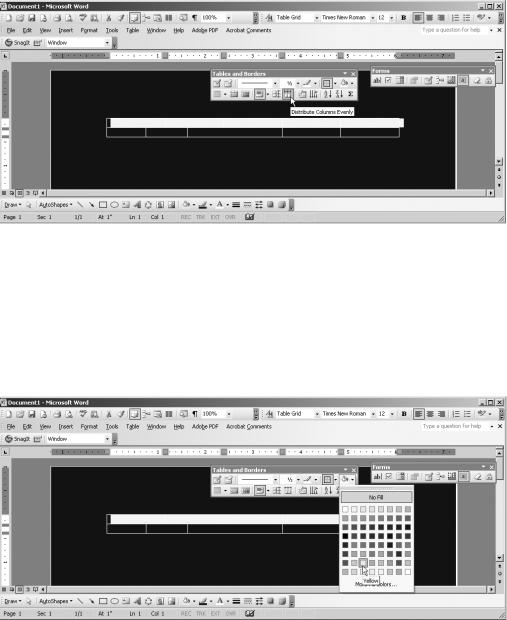
If you need, you can also merge cells. Highlight the cells you would like to merge and click the Merge Cells button, as you see in Figure 4-6.
Figure 4-6. Using the Merge Cells feature
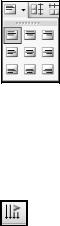
There are also buttons that will distribute the columns and rows evenly. Highlight the multiple columns or rows and then click the appropriate button, as shown in Figure 4-7. Word will resize them all to the same size.
C H A P T E R 4 ■ C R E A T I N G F O R M S F O R P R I N T I N G O R D I S T R I B U T I N G E L E C T R O N I C A L L Y |
79 |
Figure 4-7. The Distribute Columns Evenly button
You can use the Fill button to apply shading to different cells in the table. This is handy for highlighting sections that are designed for office use only, for example. Just click the button to apply color to the cell where the mouse is currently positioned. Or select multiple cells and click the Fill button. You can use the arrow beside the button and select a different color from the pop-up color chart, if you desire (see Figure 4-8).
Figure 4-8. Choosing fill options
80 |
C H A P T E R 4 ■ C R E A T I N G F O R M S F O R P R I N T I N G O R D I S T R I B U T I N G E L E C T R O N I C A L L Y |
Entering Form Text and Form Fields
Next, you are ready to begin entering text and the form fields. Just click inside the cells and begin typing to enter the text. You can also insert pictures in the table cells. When you’re ready to insert a form field, just select it from the Forms toolbar. It will appear inline with text.
To align the text in a table cell, click the Alignment button. The arrow to the right of it will give you a pop-up menu of options, as Figure 4-9 shows. Select the one you want for the cell contents.
Figure 4-9. Text alignment options
If needed, you can change the direction of text within a cell. Simply click the Change Text Direction button, as shown in Figure 4-10.
Figure 4-10. The Change Text Direction button
With printed forms, there are only two important form fields to enter. The first is a text form field, which is a box where text can be entered. You can join several in succession if you need to resize the box, as shown in Figure 4-11.
The second form field is the check box form field, which is a box that users can simply check (see Figure 4-12).

C H A P T E R 4 ■ C R E A T I N G F O R M S F O R P R I N T I N G O R D I S T R I B U T I N G E L E C T R O N I C A L L Y |
81 |
Figure 4-11. The text form field
Figure 4-12. The check box form field
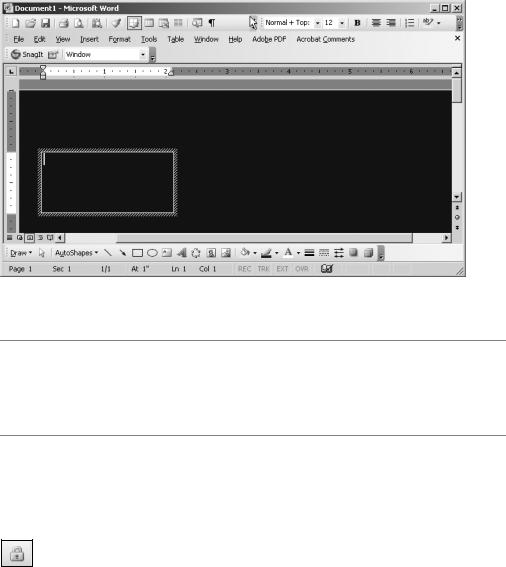
Additionally, the toolbar allows you to insert a frame in the document. This is handy if you want to include a small form in only a portion of your document, as shown in Figure 4-13.
82 |
C H A P T E R 4 ■ C R E A T I N G F O R M S F O R P R I N T I N G O R D I S T R I B U T I N G E L E C T R O N I C A L L Y |
Figure 4-13. The floating frame
■Tip While working with form fields, it is helpful to turn on form field shading. Certain form fields are not visible with the shading turned off. The shading does not appear when you print the form. Additionally, you probably don’t want to see field codes in your document; your fields will appear as a string of characters. To disable field codes, click Tools Options. On the View tab, uncheck Field Codes.
Once you have completed your form, you may wish to lock it. Simply click the Protect Form button on the Forms toolbar, shown in Figure 4-14, to prevent changes to the form layout and the text labels in the form.
Figure 4-14. The Protect Form button
Creating Forms for Electronic Distribution
Word also allows you to create forms that can be completed in Word. Such forms are similar to forms that are printed and then completed. However, you have more options.
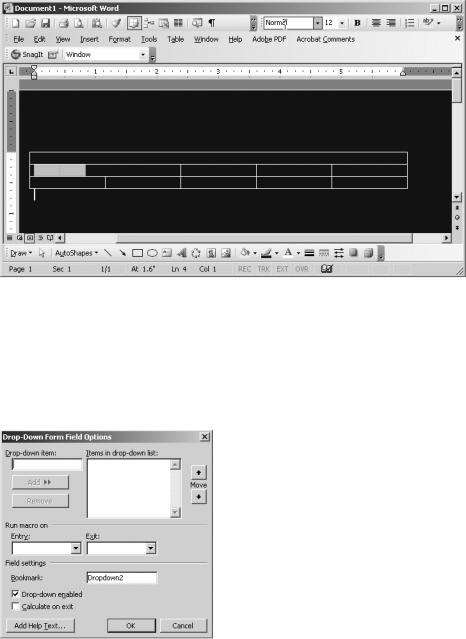
First, you can insert a drop-down form field. This is similar to a form field that a user completes. However, the options are limited. The user clicks an arrow in the form field box and selects from a number of options.
C H A P T E R 4 ■ C R E A T I N G F O R M S F O R P R I N T I N G O R D I S T R I B U T I N G E L E C T R O N I C A L L Y |
83 |
To insert a drop-down form field, position the cursor where you would like the field to appear. Then click the Drop-Down Form Field button. The field will look similar to a regular form field, as you can see in Figure 4-15.
Figure 4-15. The drop-down form field
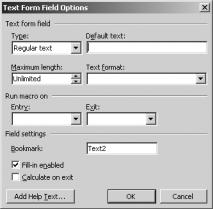
To specify options for the drop-down form field, right-click it and select Properties. The Drop-Down Form Field Options dialog box, shown in Figure 4-16, will open. Begin by entering items in the box labeled Drop-down item. After you have entered an item, click the Add button. It will appear in the box labeled Items in drop-down list.
Figure 4-16. The Drop-Down Form Field Options dialog box
84 |
C H A P T E R 4 ■ C R E A T I N G F O R M S F O R P R I N T I N G O R D I S T R I B U T I N G E L E C T R O N I C A L L Y |
To remove an item from the drop-down list, highlight it in the box labeled Items in drop-down list. Then click the Remove button. You can reorder items in the drop-down list by highlighting them in the box labeled Items in drop-down list. Then click the arrows labeled Move to move the item up or down in the list.
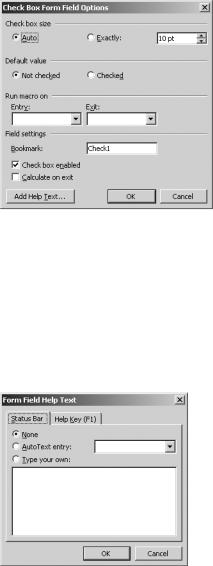
Once you have made your choices, click OK. On text form fields, you have a number of options. Double-click the text form field to open its properties box, as shown in Figure 4-17.
Figure 4-17. The Text Form Field Options dialog box
Under Type, you can specify a format, such as a date for the type of text that can be entered in the field. You can also use the Default text box to specify a default entry for the box. Furthermore, you can specify a maximum length for the entry and a format for the text. The format can be used to capitalize the first letter of words or to capitalize the entire entry. Once you have set your options, click OK.
With check boxes, you can change the size of the box in comparison with the size of the surrounding text. Double-click the check box so the Check Box Form Field Options dialog box appears, as shown in Figure 4-18.
You can size the box automatically or specify the size of the box in points. Furthermore, you can change the default value for the box—checked or unchecked.
Finally, click OK. A series of check boxes is not mutually exclusive; users can check as many as are appropriate.
C H A P T E R 4 ■ C R E A T I N G F O R M S F O R P R I N T I N G O R D I S T R I B U T I N G E L E C T R O N I C A L L Y |
85 |
Figure 4-18. The Check Box Form Field Options dialog box
Providing Help to Readers
If you anticipate that readers will need help answering questions on the form, you can add help text. Bring up the properties for the form field by clicking the Form Field Options button on the Forms toolbar. Click the Add Help Text button. The Form Field Help Text dialog box, shown in Figure 4-19, will open.
Figure 4-19. The Form Field Help Text dialog box
Select either the Status Bar tab or the Help Key (F1) tab. Select Type your own, enter the help text in the box below, then click OK. Status bar help text appears in the status bar when a user clicks a form field. To access other help text, the user must press the F1 key.