

Beginning Microsoft Word Business Documents - From Novice To Professional (2006)
.pdf106 |
C H A P T E R 6 ■ C R E A T I N G D A T A S H E E T S |
Creating Bulleted Lists
There is a good chance that you will want to use bulleted lists in your data sheet. Although they are a handy way to list product features and specifications, these types of lists are notoriously difficult to work with in Word. However, recently Word has significantly improved the way it handles lists.
Word generally tries to create a list if you begin a paragraph with a number or a symbol. When you end the paragraph by pressing Return or Enter, it will AutoFormat the paragraph in a list style.
This AutoFormatting is frustrating for many users, particularly if a list is not desirable. And, if you have multiple paragraphs within a list item, it can be difficult to have Word format the list correctly.
I generally recommend that people disable lists in Word’s AutoFormat section, which will alleviate much of the frustration. To do this, click Tools AutoCorrect Options. On the AutoFormat As You Type tab, shown in Figure 6-7, deselect Automatic bulleted lists and Automatic numbered lists.
Figure 6-7. The AutoFormat As You Type tab of the AutoCorrect dialog box
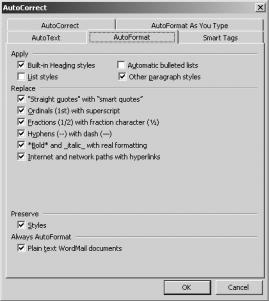
On the AutoFormat tab, shown in Figure 6-8, deselect Automatic bulleted lists and List styles. Click OK.
C H A P T E R 6 ■ C R E A T I N G D A T A S H E E T S |
107 |
Figure 6-8. The AutoFormat tab of the AutoCorrect dialog box
Now you can create the lists as you would like by inserting symbols for list items. Then you can adjust the indents as you would like. For some, creating lists manually is preferable to messing around with Word’s lists feature. However, keep in mind that such lists won’t automatically update when individual list items are moved or deleted.
But, for short lists, it is much easier to let Word create the list for you. To begin a list, simply click the Bullets button on the Formatting toolbar.
When you create a list using the toolbar buttons, it is best to allow Word to format the list automatically. Then if you want to make changes to the format, you can do so in one fell swoop when the list is complete.
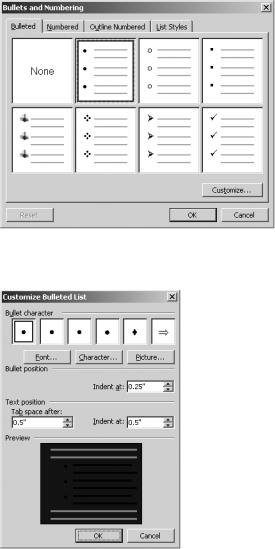
To change the format of a bulleted list, double-click one of the bullet points. The Bullets and Numbering dialog box opens (see Figure 6-9). There are a number of predefined list formats from which you can choose. Simply highlight one of the styles and click OK.
Or, you can customize a list style by clicking the Customize button. In the Customize Bulleted List dialog box, shown in Figure 6-10, you have a number of options. You can choose from one of the existing bullet characters by selecting it, or you can choose a different symbol by clicking the Character button. The Font button allows you to change the bullet symbol’s font.
108 |
C H A P T E R 6 ■ C R E A T I N G D A T A S H E E T S |
Figure 6-9. The Bullets and Numbering dialog box
Figure 6-10. The Customize Bulleted List dialog box
In the Bullet position section, use the control box to select the indentation for the character. The Text position section changes the position of the text relative to the left margin. Tab space after sets the position of the first line of text. Indent at changes the position of all subsequent lines.
Once you have made your changes, click OK in each of the open dialog boxes.
If you want to remove a bullet point or number from a paragraph, simply position the cursor before the first character in the paragraph text, then press the Backspace key. The bullet will be removed; the rest of the list updates automatically.
C H A P T E R 6 ■ C R E A T I N G D A T A S H E E T S |
109 |
At the end of a list, press Enter or Return twice to turn off bullets and to return to a normal paragraph style.
Inserting Pictures
Images are an important part of data sheets. You can insert diagrams and other images into a Word document in a few simple steps. And Word provides you with a number of options for formatting them perfectly.
■Note The steps for inserting images are the same no matter where in your document you are placing them. For example, with data sheets you may want to insert a company logo in the document header. Also, you can insert pictures in a table, if you want to align the images neatly.
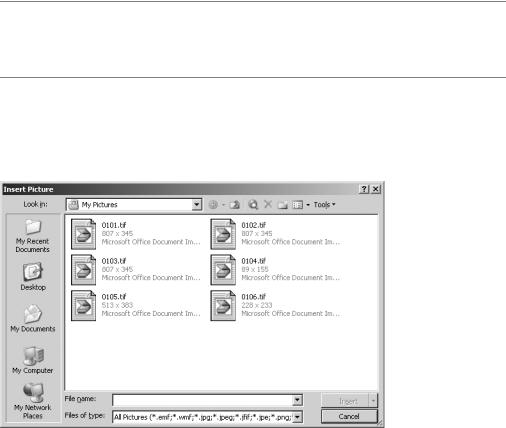
To insert an image, click Insert Picture From File. Navigate through the Insert Picture dialog box, shown in Figure 6-11, to find the correct image. As you can see in the Files of type box, Word accepts a wide variety of image types.
Figure 6-11. The Insert Picture dialog box
When you find your image, select it and click Insert. The image will appear at the current cursor position.
110 |
C H A P T E R 6 ■ C R E A T I N G D A T A S H E E T S |
It is also possible to insert a picture by copying it from a different program, such as a photo editing program. Then select the place in your document where you want to insert the image and use the Ctrl+V shortcut key to paste the picture into the document.
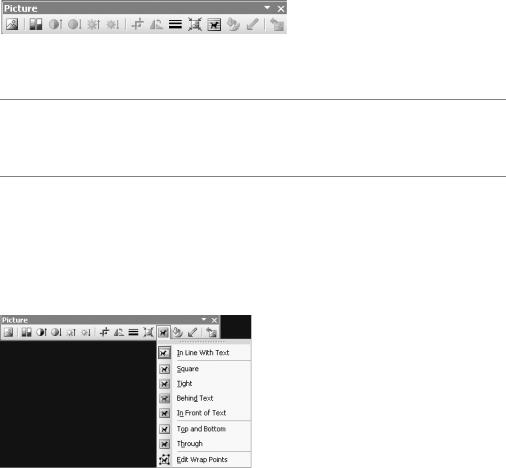
When you click an image in Word, the Picture toolbar appears (see Figure 6-12). It provides a number of options for editing your picture, such as adjusting brightness, contrast, and color. You can also crop images or rotate them.
Figure 6-12. The Picture toolbar
■Caution Word provides you with a number of options for editing pictures you insert in your document. I strongly advise that you avoid editing your images in Word. Rather, use a program that is designed specifically for editing images and edit the images before inserting them in the document.
To crop a picture, click the Crop button. A black bar appears on each side of the picture, plus on each corner. Click and drag the bars to move the edge of the picture. When you’ve made your adjustments, click outside of the picture.
The Text Wrapping button helps you position the picture in relation to the text. Click the button and select an option from the drop-down menu, as shown in Figure 6-13.
Figure 6-13. Text wrapping options
To align your picture in relation to the document margins, select it and then click one of the alignment buttons on the Formatting toolbar.
You can resize the picture by clicking and dragging the black boxes on the edges or in the corners of the picture.
C H A P T E R 6 ■ C R E A T I N G D A T A S H E E T S |
111 |
For more advanced formatting options, right-click your picture and select Format Picture to open the Format Picture dialog box.
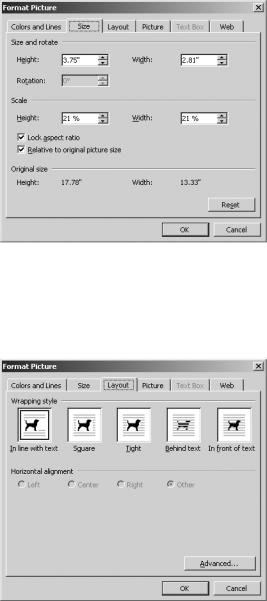
The Size tab, shown in Figure 6-14, lets you manually set the size of your picture. You can also scale your picture by percentage. To keep the picture proportions, select Lock aspect ratio.
Figure 6-14. The Size tab of the Format Picture dialog box
On the Layout tab, shown in Figure 6-15, you can specify text wrapping and horizontal alignment.
Figure 6-15. The Layout tab of the Format Picture dialog box
112 |
C H A P T E R 6 ■ C R E A T I N G D A T A S H E E T S |
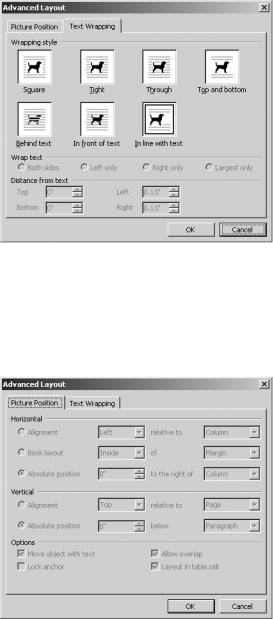
The Advanced button opens the Advanced Layout dialog box. On the Text Wrapping tab, shown in Figure 6-16, you can specify the distance between the picture and text. You can also specify text wrapping for specific sides of the picture.
Figure 6-16. The Text Wrapping tab of the Advanced Layout dialog box
On the Picture Position tab, select both vertical and horizontal alignment options. You can also set the alignment in relation to specific elements of the document (see Figure 6-17). Once you’ve made your changes, click OK to return to the Format Picture dialog box.
Figure 6-17. The Picture Position tab of the Advanced Layout dialog box
C H A P T E R 6 ■ C R E A T I N G D A T A S H E E T S |
113 |
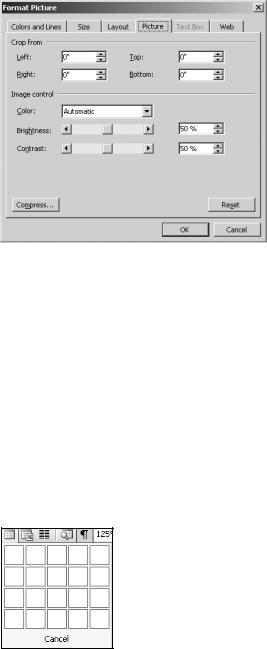
On the Picture tab, shown in Figure 6-18, you can specify picture cropping in inches. You can also make changes to the image brightness and contrast.
Figure 6-18. The Picture tab of the Format Picture dialog box
Inserting a Table
You may not find it necessary to insert a table in your data sheet. However, you might find tables are a handy way to organize diagrams. They can also be used to list technical specifications.
The easiest way for you to create a table in Word is to use the Insert Table button on the Standard toolbar.
Position the cursor where you would like the table placed. Then click the Insert Table button. Use the drop-down grid, shown in Figure 6-19, to select the number of rows and columns for the table. When you release the mouse, Word inserts the table at the appropriate location in your document.
Figure 6-19. Using the Insert Table button to create a table
114 |
C H A P T E R 6 ■ C R E A T I N G D A T A S H E E T S |
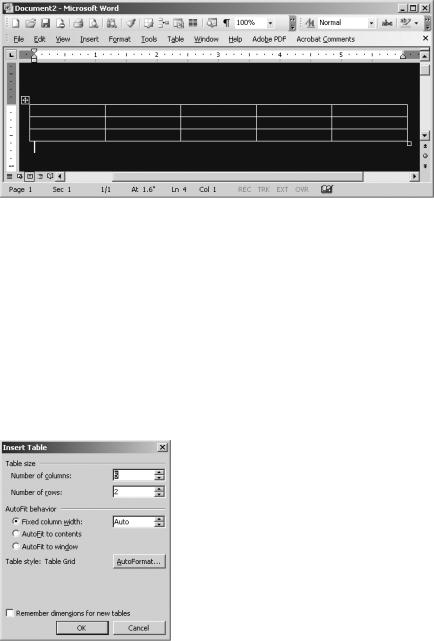
You will notice that tables you create with this method span the entire width of the document, no matter how many columns they contain (see Figure 6-20).
Figure 6-20. A table created with the Insert Table button
For more control over your columns, use the Insert Table dialog box, which allows you to specify a number of different formatting options for your table.
To access the Insert Table dialog box, place the cursor where you would like to position the table. Then click Table Insert Table. In the Insert Table dialog box, shown in Figure 6-21, specify the number of columns and rows you would like the table to contain. You can also set options for the column width. By default, Word automatically sets the width of the columns. However, you can use the Fixed column width box to specify the width of the columns in inches. Or, you can have Word AutoFit the table to the window or table contents.
Figure 6-21. The Insert Table dialog box
C H A P T E R 6 ■ C R E A T I N G D A T A S H E E T S |
115 |
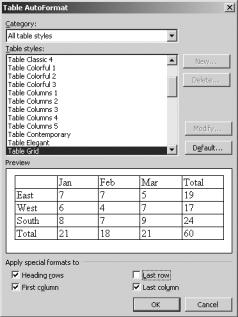
You will notice the AutoFormat button on the Insert Table dialog box. This opens a dialog box that allows you to specify predetermined formats to the table. In the Table AutoFormat dialog box, shown in Figure 6-22, you first select a table style. Word displays the table formatting in the Preview box. At the bottom of the dialog box, you can use the selections to add or remove formatting from specific rows and columns. When you’re done, click OK. Then click OK in the Insert Table dialog box.
Figure 6-22. The Table AutoFormat dialog box
To enter data in the table, simply click in a cell and begin typing. Or, follow the steps for inserting diagrams.
If you decide you want to add more rows or columns to your table, you can do so quite easily. To add a row, click to the left of the row below which you would like to add a new row. Once the row is selected, the Insert Table button on the Standard toolbar changes to the Insert Rows button, as you can see in Figure 6-23.
To add a column, click the border above the column beside which you would like to insert an additional column. The Insert Table button on the Standard toolbar changes to the Insert Columns button. Word inserts the column to the left of the selected column, as Figure 6-24 demonstrates.