

Beginning Microsoft Word Business Documents - From Novice To Professional (2006)
.pdf86 |
C H A P T E R 4 ■ C R E A T I N G F O R M S F O R P R I N T I N G O R D I S T R I B U T I N G E L E C T R O N I C A L L Y |
Additional Form Options
The property boxes for forms also give you the option of specifying macros to run when a selection is made. This can be used to expand the form, for example, or to make other selections on the form. But for this option to work, you must first create a macro and attach it to the form document. Then you can select the macro in the form field options dialog box. It can be activated when a user accesses or exits a form field. Use the Entry and Exit drop-down boxes in the form field options dialog box to select your macro.
You can also add ActiveX controls to a form for greater control. To access the Control Toolbox, shown in Figure 4-20, right-click in the toolbar area and select Control Toolbox.
Figure 4-20. The Control Toolbox
You will find a number of options such as radio and toggle buttons, list buttons, and scroll bars. While many of these can be handy for advanced forms, they require a knowledge of Visual Basic for Applications in order to function correctly.
Protecting and Distributing Your Form
As with printed forms, you should lock your form once you have completed creating it. This will prevent changes to the layout, while users can still complete fields.
If the form is to be distributed electronically, don’t forget to save it as a template first. Then each user can open a document and complete the form without saving their changes with the original document.
When one is filling out a form, it is possible to reset all form fields to their default. Simply click the Reset Form Fields button on the Forms toolbar.

C H A P T E R 5
■ ■ ■
Creating Legal Documents
The formatting for legal filings may vary depending on the type of filing, but most will use similar elements. You can alter the formatting to suit your unique needs.
A sample legal document is available with the downloads for this book at the Apress web site (http://www.apress.com).
Specifying Page Setup
Before you enter the body text, you should specify the page setup for the entire document. You may later need to alter the page setup in specific parts of your legal filing. Or you may already know that the page setup will differ in certain areas. This is okay. For now, you are setting the predominant page layout for your document.
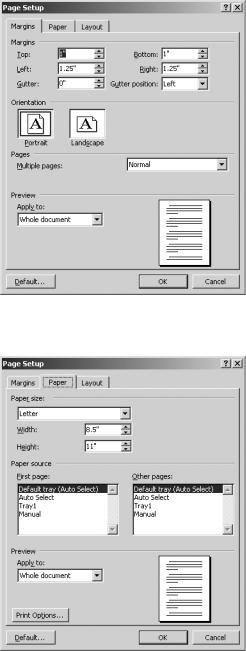
Access the Page Setup dialog box by clicking File Page Setup. Click the Margins tab to open the settings for the margins, as shown in Figure 5-1.
The default settings for the Normal.dot template are 1 inch at the top and bottom of the page and 1.25 inches at either side of the page, which is appropriate for most legal documents. However, you can enter new margin sizes if you wish.
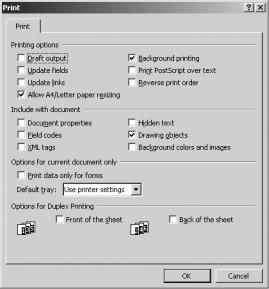
Next, click the Paper tab in the Page Setup dialog box (see Figure 5-2). In the Paper size section, use the drop-down box to specify the paper size.
87
88 |
C H A P T E R 5 ■ C R E A T I N G L E G A L D O C U M E N T S |
Figure 5-1. The Margins tab of the Page Setup dialog box
Figure 5-2. The Paper tab of the Page Setup dialog box
C H A P T E R 5 ■ C R E A T I N G L E G A L D O C U M E N T S |
89 |
Use the boxes in the Paper source section to specify the printer’s paper tray(s) for the first page of the legal filing and for the subsequent pages. In the Preview section, opt to apply the changes to the whole document.
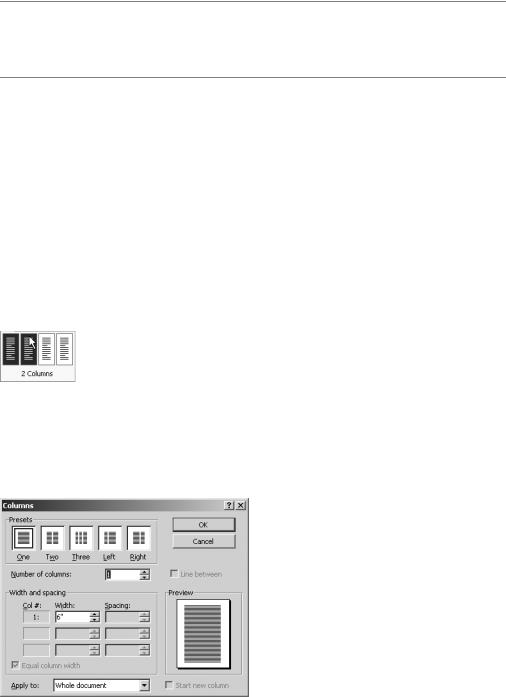
Click the Print Options button to review the settings, as you see in Figure 5-3. Deselect Draft output if it has been selected. You should select Drawing objects.
Figure 5-3. Print options
Once you have made your selections, click OK.
Entering the Body Text
With legal filings, you need to begin by entering information on the court, the court case, and the parties involved.
First, enter the court information. Then highlight it and click the Bold button on the Formatting toolbar. You will also want to align the information horizontally by clicking the Center button on the Formatting toolbar.
Next, you will need to enter the case number. Highlight the number and then click the Right button on the Formatting toolbar to right align it.
90 |
C H A P T E R 5 ■ C R E A T I N G L E G A L D O C U M E N T S |
If you don’t see the alignment buttons on the Formatting toolbar, you can display them by clicking the arrow on the right side of the toolbar. Then on the pop-up menu, select Add or Remove Buttons Formatting, and select the alignment buttons you want.
When you enter information on the parties involved, you may need to have it appear in two columns. There are two ways to do this. First, you can use Word’s columns feature.
Using Word’s Columns Feature
The easiest way to apply columns to a portion of your document is to use the Columns button on the Standard toolbar. Select a portion of your document and click the button. A drop-down menu allows you to divide the section into a maximum of four columns, as you see in Figure 5-4 (note, however, that if you hold the left mouse button and drag to the right, you are given the option of adding six columns). Highlight two columns to create the two columns in your document.
Figure 5-4. Inserting columns using the Columns toolbar button
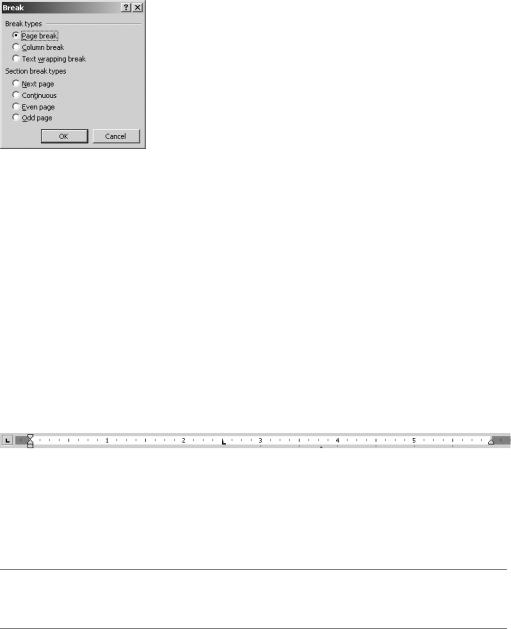
This doesn’t give you many choices. For more advanced options, click Format Columns. The Columns dialog box opens, as shown in Figure 5-5.
Figure 5-5. The Columns dialog box
C H A P T E R 5 ■ C R E A T I N G L E G A L D O C U M E N T S |
91 |
By default, Word makes each column identical in width. But you can set the width for each column independently. Deselect Equal column width. Then use the controls to specify width, in inches, for each column. The Spacing boxes let you set the distance between the columns.
At the bottom of the first column, insert a column break by clicking Insert Break to bring up the Break dialog box shown in Figure 5-6. Select Column break and then click OK.
Figure 5-6. The Break dialog box
At the bottom of the second column, insert a section break by clicking Insert Break. Select Continuous and then click OK. Text following the break will remain on the same page. You can work on the rest of the document.
Formatting Columns Using Indents
For legal filings, Word’s columns feature can be cumbersome. You can opt to use tabs to create the columns instead.
On the first line, enter the information you would like to appear in the first column. Then set a tab stop by clicking the Ruler. This will be the location where the second column begins. A small black L will appear on the Ruler, indicating the tab stop, as shown in Figure 5-7.
Figure 5-7. Word’s Ruler showing a tab stop
If you need, you can move a tab stop by clicking it and sliding it on the Ruler. To remove a tab stop, click it and drag it off the Ruler.
■Tip If you can’t see the Ruler, click View Ruler. The Ruler will appear at the top of the Word window,
below the toolbars.
92 |
C H A P T E R 5 ■ C R E A T I N G L E G A L D O C U M E N T S |
To enter information in the second column, simply press the Tab key once. The cursor will move to the second column, and you can enter text.
■Note Tab stops will persist from line to line unless you change them. So I recommend removing or changing the tab stops after you enter the information on the parties involved in the legal case. Otherwise, you may run into problems in later portions of the document.
Setting Line Spacing
For the body of the legal filing, you will likely want the line spacing set to double spacing. This will make the document easier to read.
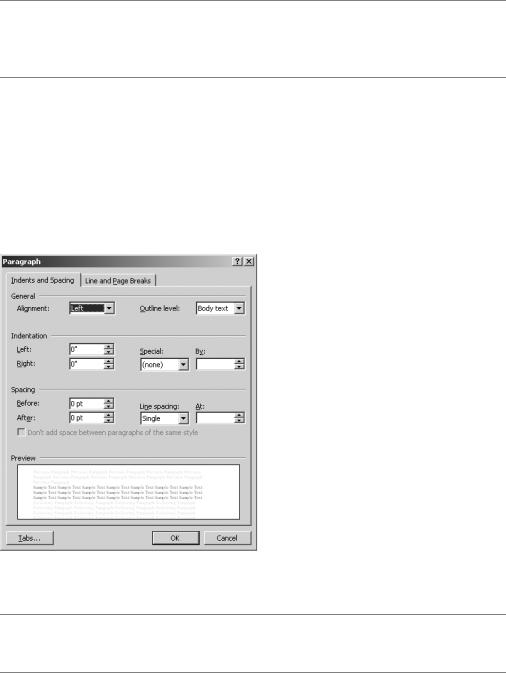
To set line spacing, right-click where you would like the double line spacing to begin. On the pop-up menu, select Paragraph. Open the Indents and Spacing tab, as shown in Figure 5-8. In the drop-down box labeled Line spacing, select Double. Click OK.
Figure 5-8. The Indents and Spacing tab of the Paragraph dialog box
■Note Formatting you apply at the paragraph level will continue from paragraph to paragraph—that is, unless you change the paragraph formatting.
C H A P T E R 5 ■ C R E A T I N G L E G A L D O C U M E N T S |
93 |
Line Numbering
Line numbering will help you refer to specific portions of the document. Word will number each line of text in the left margin of the document. You have a great deal of flexibility when working with line numbering. But your needs will probably be fairly simple in comparison to your options.
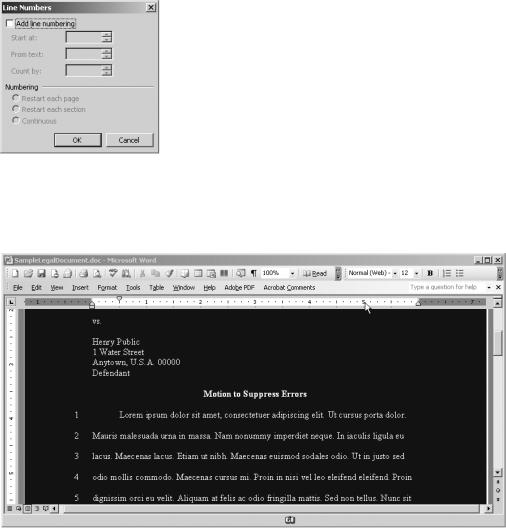
To activate line numbering, click File Page Setup. Open the Layout tab and click Line Numbers to bring up the Line Numbers dialog box, as shown in Figure 5-9. Select Add line numbering. Click OK twice to close the dialog boxes and apply the line numbering.
Figure 5-9. The Line Numbers dialog box
Figure 5-10 shows how line numbers might look in a legal document.
Figure 5-10. Line numbering in a legal document
94 |
C H A P T E R 5 ■ C R E A T I N G L E G A L D O C U M E N T S |
Line numbers will appear only in Print Layout view. If you can’t see line numbers, switch to Print Layout view by clicking View Print Layout. Or, you can use the View buttons in the lower left of the Word window.
Since line numbering is applied at the page level, it can be tricky to work with the line numbers. If you followed the preceding steps, you will notice that the parties’ information also contains line numbers. You will want to change this.
The process can be a bit tedious, but you can solve the problem. First, insert a section break before the body of the document by clicking Insert Break. Select Continuous and click OK.
Next, follow the preceding directions for adding line numbering. In the Line Numbers dialog box, select Restart each section. Now, you will notice that the numbering begins at 1 where you created the section break. However, the numbering remains next to the information on the parties.
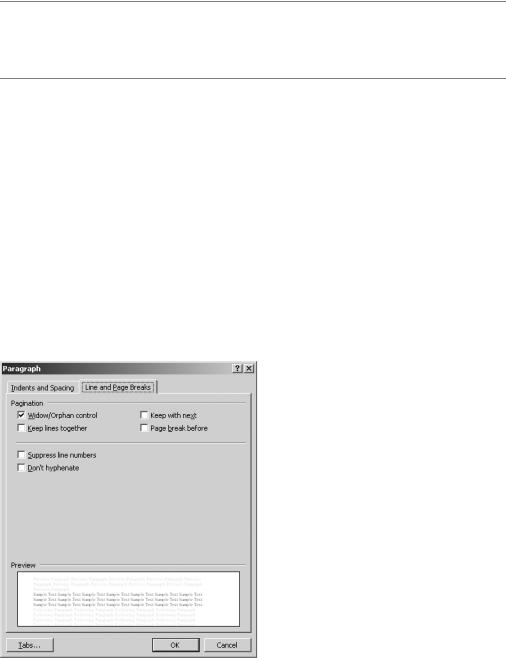
To remove the line numbers, highlight the lines. Right-click and select Paragraph. Open the Line and Page Breaks tab, as shown in Figure 5-11. Select Suppress line numbers and click OK.
Figure 5-11. The Line and Page Breaks tab of the Paragraph dialog box
C H A P T E R 5 ■ C R E A T I N G L E G A L D O C U M E N T S |
95 |
You will probably want to suppress line numbers in other portions of your document as well. Simply follow the same steps.
Inserting Block Quotes
It is likely you will need to include quotes in your filing. And chances are you would want them to appear in block format.
It is more efficient to enter the quotes with the rest of your document and then format them later. That way, you maintain consistent formatting throughout the document without having to make changes to the paragraph formatting several times.
With block quotes, you need to indent both the left and right margins of the text. Additionally, you should change the line spacing back to single spacing.
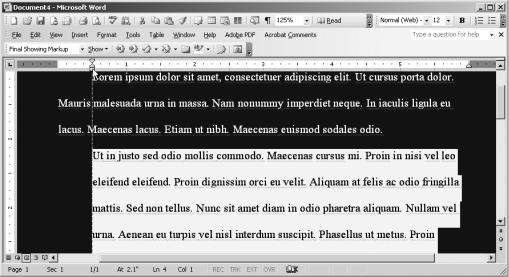
First, highlight the quote. Then use the Indent sliders on the Ruler to change the margins. Simply click the square below the pointers on the left side of the Ruler and slide it to the desired position, as shown in Figure 5-12. Half an inch from the current indent is good, although you may wish to increase or decrease the amount of space.
Figure 5-12. Using the Indent sliders on Word’s Ruler
To increase the right indent, click the pointer on the right side of the Ruler and slide it to the desired position.
Next, change the line spacing by right-clicking the highlighted block of text. Select Paragraph and open the Indents and Spacing tab. Under Line spacing, select Single and click OK.