

Beginning Microsoft Word Business Documents - From Novice To Professional (2006)
.pdf66 |
C H A P T E R 3 ■ C R E A T I N G M A R K E T I N G B R O C H U R E S A N D N E W S L E T T E R S |
Working with Text Boxes
If you want greater control over the position of a block of text in your document, consider using text boxes. You can place these boxes anywhere in the document and format them with shading and borders.
Additionally, you can link text boxes so that the contents flow between the boxes automatically. This is convenient if you want to insert a story that begins on one page of a newsletter and continues on a different page.
To insert a text box, click Insert Text Box. Click and drag your mouse where you would like to position the box in your document. It will appear with a border that you can use to resize or reposition the text box, as Figure 3-25 demonstrates.
Figure 3-25. Inserting a text box
■Note By default, Word places text boxes in a drawing canvas. You may find this inconvenient. You can drag the text box off the canvas. Then you can delete the canvas by selecting it and pressing Delete. You can also disable the drawing canvas by clicking Tools Options and opening the General tab. Deselect Automatically Create Drawing Canvas When Inserting AutoShapes and click OK.
C H A P T E R 3 ■ C R E A T I N G M A R K E T I N G B R O C H U R E S A N D N E W S L E T T E R S |
67 |
You can enter text in the box simply by clicking and typing in the box. You can format the text in the box as you would other text in your document. This includes character and paragraph formatting, as well as the use of styles. You can’t use some formatting, such as columns, page breaks, and drop caps. Additionally, text boxes cannot contain tables of contents, comments, or footnotes.
■Tip If the text you want to insert in a text box requires heavy formatting, enter it in a separate document. Format the text as you would like it to appear in the newsletter or brochure. Then cut and paste it into the text box. This is often easier than working directly in the text box.
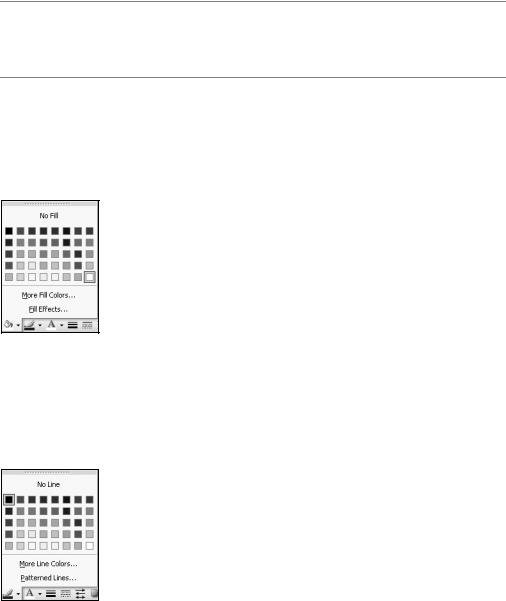
By default, text boxes are white with a thin black border. To change the background color, click the Fill button on the Drawing toolbar. Select a color from the color chart, shown in Figure 3-26, or use the More Fill Colors button at the bottom for more choices, including custom colors. You can use the Fill Effects button to specify background patterns.
Figure 3-26. Using the Fill button on the Drawing toolbar
To change the border, click the Line button on the Drawing toolbar. Select a color from the chart, shown in Figure 3-27, or click More Line Colors for more choices, including custom colors. The Patterned Lines button lets you change the border style.
Figure 3-27. Using the Line button on the Drawing toolbar
68 |
C H A P T E R 3 ■ C R E A T I N G M A R K E T I N G B R O C H U R E S A N D N E W S L E T T E R S |
■Note The default background color for text boxes is white. It is not transparent. To remove the background color altogether, click the Fill button on the Drawing toolbar. Then select No Fill from the pop-up menu.
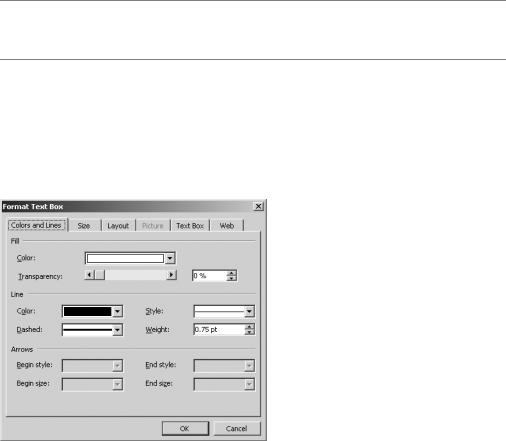
For more advanced formatting options, right-click the border of a text box and select Format Text Box.
On the Colors and Lines tab of this dialog box, shown in Figure 3-28, you can change the background color and adjust the transparency. You can also specify border style, color, and weight.
Figure 3-28. The Colors and Lines tab of the Format Text Box dialog box
The Size tab lets you specify dimensions in inches or scale the text box size by entering percentages, as you can see in Figure 3-29.
The Text Box tab, shown in Figure 3-30, lets you specify internal margins. You can also turn word wrapping on or off and specify that the box automatically resize to fit the text.

C H A P T E R 3 ■ C R E A T I N G M A R K E T I N G B R O C H U R E S A N D N E W S L E T T E R S |
69 |
Figure 3-29. The Size tab of the Format Text Box dialog box
Figure 3-30. The Text Box tab of the Format Text Box dialog box
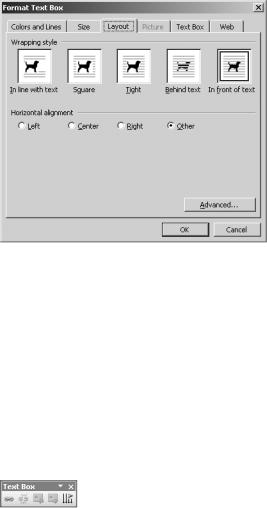
As you can see in Figure 3-31, the Layout tab of the Format Text Box dialog box offers the same options as the Layout tab in the Format Picture dialog box.
Once you’ve specified your options, click OK.
70 |
C H A P T E R 3 ■ C R E A T I N G M A R K E T I N G B R O C H U R E S A N D N E W S L E T T E R S |
Figure 3-31. The Layout tab of the Format Text Box dialog box
Linking Text Boxes
You can link text boxes so that text flows automatically from one box to the next. This is handy for portions of your document that start on one page and continue on one or more subsequent pages.
First, create your text boxes in Print Layout view (click View Print Layout). Do not enter any text until you’ve linked the boxes. Click the first box; the Text Box toolbar opens, as shown in Figure 3-32. Click the Create Text Box Link button and then click the second text box.
Figure 3-32. The Text Box toolbar
If you wish to link additional boxes, you can do so by clicking the Create Text Box Link button. The links function as a chain. This means each box must be linked to the box before it, not to the first text box.
Once you’ve created your links, enter the text in the first box. Word automatically flows the text between the boxes. As you edit it, the text automatically reflows.
You can use the Next Text Box and Previous Text Box buttons to move between the linked boxes.
It can prove tricky to remove a box from the middle of a linked chain of boxes. To remove a box without breaking the flow, right-click its border and select Cut. The box is removed, and the text reflows.
C H A P T E R 3 ■ C R E A T I N G M A R K E T I N G B R O C H U R E S A N D N E W S L E T T E R S |
71 |
If you wish to break the link between a box and the one that follows, click the box. Then click the Break Forward Link button on the Text Box toolbar. This essentially creates two series of linked text boxes. The first series contains the text; the second series will be empty.
Adding Captions to Tables, Charts, and Pictures
You may want to add a caption to your table, picture, or chart. The caption helps you identify these objects when you refer to them in your document.
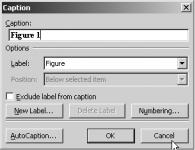
To insert a caption, select your table. Click Insert Reference Caption. In the Label box, select the type of label. Then specify the position of the label. Enter the caption text in the box labeled Caption, as shown in Figure 3-33. Finally, click OK.
Figure 3-33. The Caption dialog box
Word inserts the caption as a field. The numbering updates automatically if you add more captions or rearrange captioned objects.
Specifying Print Options
When you’re working on brochures and newsletters, you may want to print on both sides of the paper. Word provides features that will help you with duplex printing.
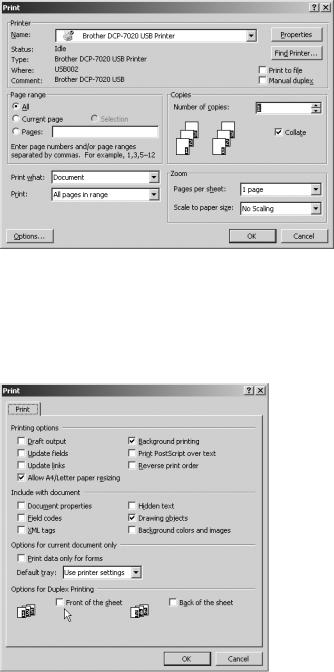
If your printer does not have an automatic duplex feature, you can do it manually. Open the Print dialog box, shown in Figure 3-34, by clicking File Print. In the Print drop-down box, select Odd pages and then click OK to start printing.
Once the odd pages have printed, put the pages back in your printer. Open the Print dialog box again and select Even pages in the Print drop-down box. You may have to experiment with your printer to get it right.
72 |
C H A P T E R 3 ■ C R E A T I N G M A R K E T I N G B R O C H U R E S A N D N E W S L E T T E R S |
Figure 3-34. The Print dialog box
If you have a printer that does automatic duplex printing, open the Print dialog box. Click the Options button. In the Options for Duplex Printing section, shown in Figure 3-35, specify your printing options. Click OK. Then click OK in the Print dialog box to begin printing.
Figure 3-35. Specifying duplex printing options
C H A P T E R 3 ■ C R E A T I N G M A R K E T I N G B R O C H U R E S A N D N E W S L E T T E R S |
73 |
Scaling Your Brochure or Document to a Different Paper Size
When you create a document, you create it for a specific paper size. Changing the document’s paper size after the document has been created will wreak havoc on the formatting.
Word does, however, provide an easy way for you to print your document on a different paper size without changing the formatting. The Scaling option allows you to preserve the formatting of the original document. It simply resizes everything to a new paper size.
To scale your document, click File Print. In the Print dialog box, select your new paper size in the box labeled Scale to paper size. It is in the Zoom section. Click OK to begin printing.

C H A P T E R 4
■ ■ ■
Creating Forms for Printing or Distributing Electronically
With Word, you can create forms that are printed and completed by hand. Or, you can create forms that can be completed electronically. While their preparation is relatively similar, they serve differing purposes. Electronic forms are easier to manage and give the creator greater control over their contents.
For a sample form, visit the downloads section for this book at the Apress web site (http://www.apress.com).
Designing a Form
When you create a form, Word’s Outline view probably isn’t the best way to plan the document. Rather, it makes more sense to draw the layout of the form on a piece of paper. This will help you decide what form elements to use and where to position them on the page.
A printed form that you create in Word can have several different elements. You can add text form fields, check box form fields, and floating frames. Additionally, you may want to use a table to arrange the various form sections on the page.
If you decide to use a table to organize your form, creating the table should be your first step.
Open the Forms toolbar by right-clicking in the toolbar area. Select Forms from the pop-up list, as shown in Figure 4-1.
The easiest way to create a table for forms is to draw it using your mouse. Click the Draw Table button to begin drawing your table. The Tables and Borders toolbar opens (see Figure 4-2).
75