

Beginning Perl Web Development - From Novice To Professional (2006)
.pdf70 C H A P T E R 3 ■ D ATA B A S E S A N D P E R L
Troubleshooting Database Interaction
Many a Perl DBI developer has been perplexed by database connectivity. Troubleshooting a database connection is no different from troubleshooting another bit of code. Well, it may be a little different, because troubleshooting a database connection is easier! Most servers will have a command-line interface (CLI) into the database or another means for you to test your connection apart from the program itself.
Here are some troubleshooting tips for working with database connectivity issues in a Perl program:
•If a connection to a database isn’t working, the first thing you should do is examine the amount of error reporting that you have coming from the database. Be sure that PrintError and RaiseError are enabled, and use the or die() construct as much as possible.
•One of the most helpful debugging and troubleshooting techniques is the frequent use of simple print statements to help determine where the problem might lie. In the context of a SQL statement, it’s very helpful to print out the statement exactly as it’s about to be run on the database. Doing so can help you to see that a parameter isn’t being filled in correctly or might help you spot another error.
•On some systems, you can enable logging of all queries for certain database servers such as MySQL. Be careful in doing so, however, as this can lead to a massive amount of logging and can also log potentially sensitive information, depending on what’s stored in your database.
•Databases that have a CLI are especially helpful. Connect to the CLI as the same user that you’re using for the program, and attempt to execute the same SQL statement to see if it works. You would be surprised how many issues can be solved by connecting to the CLI to imitate the program’s behavior in an interactive way. Refer to the documentation for your database server to determine the syntax for connecting to the CLI.
Security Considerations with Data Access
Accessing a database from a Perl program, especially one that’s on the Web, presents its own set of security risks and challenges. You most definitely don’t want to allow unauthorized access to the database and the data it contains. This section looks at some of the risks involved and gives suggestions for mitigating those risks.
Stored Credentials
One of the most obvious risks in connecting to a database from a program is that the credentials (username and password) are stored in the program itself or within a file that the program can read for those values. Unfortunately, there’s no truly effective method for mitigating this risk. If you’re running the program on a shared server, such as some web hosting provider’s server, you need to ensure that other users cannot read the program’s code to see the password. This is usually easier said than done. However, many web hosting providers now have users running in

C H A P T E R 3 ■ D ATA B A S E S A N D P E R L |
71 |
their own chroot’ed shell, which means that the risk of another user reading your files is greatly reduced. (For more information about chroot, see http://www.braingia.org/projects/.)
Unnecessary Privileges
There’s always a chance that someone might get access to the credentials stored in your program. For this reason, it’s important that the user credentials stored in that file allow only the minimum amount of privileges necessary to perform the task for that program. For example, if you have one program that performs SELECT statements for a catalog and another that updates a shopping cart database, it’s much better to use two separate users for these programs, each with separate privileges, than to have one “super-user” with all privileges.
■Tip Grant only the exact privileges necessary to perform the task at hand on only the databases (and even tables) necessary to perform that task from only the necessary host.
Having performed a number of security audits, I can’t count the number of times that I’ve seen developers grant their users full privileges (with grant option in MySQL, for example). By doing so, they’ve effectively made a super-user who even has the power to add other users! I can’t think of a worse scenario than having attackers get that username and password and be able to not only control the database, but also to add hidden users for themselves to get back in later! Again, it’s important to keep privileges at a minimum and separate privileges whenever possible.
Unsanitized Statements and Input
Another common mistake is to execute statements on a database that haven’t been properly sanitized. The DBI includes the quote() method to make sanitization easy. Employ the quote() method whenever you’ll be using a variable within a SQL statement.
Putting data on the Web through a database magnifies the problem of unsanitized input. Improperly checking (or not checking at all) the input that arrives from a web form or elsewhere is only asking for trouble when the input can lead to database interaction. Be sure to untaint the data, as discussed Chapter 1, and be sure to use the quote() method to clean the input and prevent users from executing more than they should on a database.
Summary
This chapter looked at database access through Perl. Much of the chapter was devoted to the DBI, which provides the interface into databases in Perl. The DBI uses database-dependent code, or DBDs, to connect to various database server implementations. Much of the chapter’s material was not specific to web programming per se, but rather covered how to work with databases.

72 C H A P T E R 3 ■ D ATA B A S E S A N D P E R L
The chapter included examples of connecting to databases, running queries, and retrieving query results. You also saw some examples of how to create HTML pages using data retrieved from SQL with the DBI.
The final section discussed security considerations with data access. It’s very important to ensure that any data you use—whether in a SELECT statement or any other SQL statement—is sanitized.
In the next chapter, you’ll learn about system interaction through Perl programs, with specific focus on the interaction from web programs. This will include a discussion of working with files through a CGI program.

C H A P T E R 4
■ ■ ■
System Interaction
Interacting with the system means many things to a Perl script. Naturally, by the simple act of executing, a Perl script is interacting with the system on many levels. Exactly how the interaction at that low level occurs isn’t of much concern to most Perl programmers. The system interactions of interest to Perl programmers are those that involve files and system processes. These types of interactions with the system are the focus of this chapter.
Perl Scripts and the Operating System
When a Perl script interacts with the system, it normally does so with the rights and privileges of the user executing the script. If the user is root, then the script usually executes with the rights of root. If the script runs as a normal user, then it has the rights of that user. However, Perl scripts can change their userid (uid), real or effective, within the program by using mechanisms such as suidperl and Apache’s suEXEC feature.
When a CGI program interacts with the system, it usually does so with the permissions of the web server. On modern Linux systems, Apache runs as a nonprivileged user such as httpd, www-data, or the like, rather than the root user. This means that any CGI script executed as part of a web application will be run as this nonprivileged user, so it likely won’t be able to write to files on the system, to kill processes, and so on.
The Apache suEXEC feature is an option to enable CGI scripts to be run as a user other than the httpd web server user. Using suEXEC, the CGI scripts might be owned and therefore run as a normal user account, and thus be able to read and write to that user’s directories and files. The Apache suEXEC mechanism makes administrators and most web developers happy, if that’s possible. Administrators are happy because CGI scripts aren’t run as a system account (such as httpd). Web developers are happy because they can read from and write to their own set of files without worrying about another developer on the computer overwriting their files.
Working with Filehandles
File input and output (I/O) is accomplished in Perl through the use of filehandles. Three filehandles are provided by default: STDIN, STDOUT, and STDERR (standard input, standard output, and standard error, respectively).
73

74 C H A P T E R 4 ■ S YS T E M I N T E R A C T I O N
■Note Having these three default filehandles available means that you can use shell redirect characters such as greater-than and less-than (> and <) to receive output from and send input to a Perl program. For the most part, with CGI scripts, these redirection features aren’t used.
When working with a CGI program written in Perl (or any Perl program, for that matter), you can also open, or create, additional filehandles other than STDIN, STDOUT, STDERR. These filehandles are logical connections between the filesystem and the Perl program. You can open filehandles for reading, writing (create and write), or appending. This section examines the basics of using filehandles to work with files from within your Perl program.
Opening Filehandles
The call to open a filehandle consists of three main elements: the name of the filehandle, the mode for opening, and the name of the file to open. This is most easily shown with a timely example:
open MYFILE, '<', 'thefilename';
This example makes the call to open a filehandle named MYFILE. This name, MYFILE, will be used internally by your program when referencing the filehandle. The name MYFILE resides in its own namespace. The file as it exists on the filesystem is called thefilename, and the mode in which this file will be opened is for reading.
You can also open a file for writing by using a single greater-than sign (>), using a slightly different syntax:
open (MYFILE, ">thefilename");
Most Perl programs written over the past several years will use this format for the open() statement. The previous example uses a newer syntax for opening a filehandle. If thefilename file already exists on the system, it will be overwritten because of the single greater-than sign.
■Caution It's important to use extra care when writing to files. It’s quite possible to overwrite important system files (such as /etc/passwd) by including only one greater-than sign (overwriting) instead of two (appending).
Using a double greater-than sign (>>) indicates that the file will be opened for appending. Building on the previous example, opening a file called thefilename for appending using a filehandle named MYFILE looks like this:
open (MYFILE, ">>myfilename");
All of the examples assume that the file myfilename is located in the same directory as the Perl script. As often as not, the file is located in a different directory. In that case, you need to tell the Perl program where to find the file, whether using a location relative to the
’s best to fully qualify the location

C H A P T E R 4 ■ S YS T E M I N T E R A C T I O N |
75 |
with an absolute path. Doing so ensures that the program will always be able to find the file (assuming that it actually exists).
Opening a file for reading located in the /tmp directory looks like this:
open (FILE, "/tmp/thefile");
File-open operations return true if they are successful and false if they are not, but Perl programs will silently continue and even let you use filehandles that haven’t been created successfully. This can wreak havoc on Perl programs, unless the status of the file-open operation is checked for errors. As the programmer, it’s your job to check the result, which is where the die() function comes in.
Using die() to Trap Errors
File-open operations can fail for any number of reasons, including because the file or a component of its path does not exist or because the user does not have sufficient privileges. What happens if the file that you’re opening within a Perl program doesn’t exist? For create and append file operations, the file will automatically be created if it doesn’t exist. Remember that for create operations (the single greater-than sign), the file will be created or re-created, even if it already exists. If the path to a file being opened doesn’t exist, Perl will silently continue as if the file had been created successfully. The same applies for files that are opened for reading: Perl will continue executing, regardless of whether the file or path actually exists. Therefore, it’s important that you trap errors when working with files and directories.
Using the die() function, you can effectively stop the program from executing if an error is encountered while opening a file. The die() function prints to STDERR when called. Since the open() function returns true on success and false on failure, you can use the die() function when the open() function returns false, as would be the case when a file-open operation fails.
The easiest way to use the die() function is with a logical OR when opening a file, as in this example:
open (MYFILE, ">thefilename") or die "Cannot open file 'thefilename': $!";
The logical OR can also be written as ||.
Reading from Filehandles
To read from a filehandle, you essentially read each line individually, in much the same way you read from STDIN. Consider this example:
open (FILE, "/tmp/file") or die("Cannot open file: $!"); while (<FILE>) {
chomp;
print "The line just read was: $_\n";
}
This example uses the chomp() function, which takes a scalar argument and removes the newline character from the end, assuming that there is indeed a newline character present. In the context of this example, chomp() acts on the $_ built-in variable, which holds the contents of the line just read in from the filehandle.
The chomp() function is used frequently when reading from a file to remove the newline ailable, but it isn’t as useful in

76 C H A P T E R 4 ■ S YS T E M I N T E R A C T I O N
this context, because it removes the last character from the line, regardless of whether that character is a newline or another character.
Writing to Filehandles
To write to a filehandle, place the filehandle after the print function call, like so:
open (NEWFILE, ">/tmp/thenewfile");
print NEWFILE "Printing to the new file like this.\n";
Closing Filehandles
None of the examples so far have shown how to close a filehandle. That is because Perl automatically closes the filehandle when the program exits or if the file is opened again. However, I almost always explicitly close any open filehandles. I do so simply to be thorough in coding. I recommend that you do the same. It’s a simple method:
close (FILEHANDLE);
Here’s a better example:
open (NEWFILE, ">/tmp/thenewfile") or die (Cannot open file: $!"); print NEWFILE "Printing to the new file like this.\n";
close (NEWFILE);
Using File Tests
One final area of basic file usage that I’ll touch on are the file tests, known within the perlfunc documentation (where you can find more information about them) as the “-X” tests. These functions test the given argument, a filename or filehandle, for something. That doesn’t sound like much fun, but it is really. Using a -X file test, you can quickly determine whether a file exists, if it’s a directory or a symbolic link, whether it’s a text file or a binary file, it’s age, and other such useful bits of information that you might find necessary in a given Perl program. Table 4-1 is a partial list of the -X file tests.
Table 4-1. Some -X File Tests
-e |
File or directory exists. |
-z |
File is empty (zero size). |
-s |
File is not empty; function returns size in bytes. |
-f |
Argument is a plain file. |
-d |
Argument is a directory. |
-l |
Argument is a symbolic link. |
-p |
Argument is a named pipe. |
-S |
Argument is a socket. |
-b |
File is a block special file. |
-c |
File is a character special file. |
-t |
Filehandle is an open tty (isatty()). |
-f |
Argument is readable by effective uid/gid. |

C H A P T E R 4 ■ S YS T E M I N T E R A C T I O N |
77 |
Some -X File Tests
-w |
Argument is writable by effective uid/gid. |
-x |
Argument is executable by effective uid/gid. |
-o |
Argument is owned by effective uid. |
-R |
Argument is readable by real uid/gid. |
-W |
File is writable by real uid/gid. |
-X |
File is executable by real uid/gid. |
-O |
File is owned by real uid. |
-T |
File is an ASCII text file. |
-B |
File is a binary file. |
-u |
Argument has setuid bit set. |
-g |
Argument has setgid bit set. |
-k |
Argument has sticky bit set. |
-M |
Time in days from argument modification time to Perl program start time. |
-A |
Time in days from argument access time to Perl program start time. |
-C |
Time in days from argument change time to Perl program start time. |
|
|
A Slight Aside: Directory Listings
I know that I said I was done with basic filesystem usage in Perl, but before I conclude the section, I want to address a common task that you might encounter in your Perl program: obtaining a directory listing or a listing of files in a directory.
Using readdir, you can obtain a listing of files in a given directory by using its directory handle. Directory handles are much like filehandles, insofar as how you create them within your Perl program. You create a directory handle with the opendir() function:
opendir (TMP, "/tmp") or die "Cannot open /tmp";
Then you can read from the directory handle in a manner similar to reading from a file:
while ($file = readdir(TMP)) {
print "The file $file is in /tmp\n";
}
closedir(TMP);
You can also close the directory handle by using the closedir() function, as shown in this example.
Uploading Files with CGI.pm
So far, this chapter has laid some groundwork for dealing with files from within Perl programs, both CGI and non-CGI. Now, it’s time to look at filesystem interaction specifically from a CGI program.
Uploading files through a web browser is a multifaceted task that confronts many web developers. Not only must developers code the basic framework for the upload, but they must
eb server. If those files
78C H A P T E R 4 ■ S YS T E M I N T E R A C T I O N
contain malicious code that a user can then execute, the user might very well be able to compromise the entire web server. If a size limitation isn’t put on the file, a user might upload a file big enough to fill the disk of the web server.
As with seemingly everything in Perl, there are multiple ways to upload files through a CGI program. It’s quite possible to build your own handlers for file uploads. However, the CGI module includes functions to assist with file uploads. Here, I’ll describe using the CGI module functions.
■Note The Apache::Request module, which works with mod_perl, offers another method for working with uploaded files. It provides greater control over the file-upload process than the CGI module functions. For example, the Apache::Request module can help limit the maximum size for the file, thus making the entire process of allowing uploads just that much safer. Chapter 11 provides more information about the
Apache:Request module.
Creating a File-Upload Field
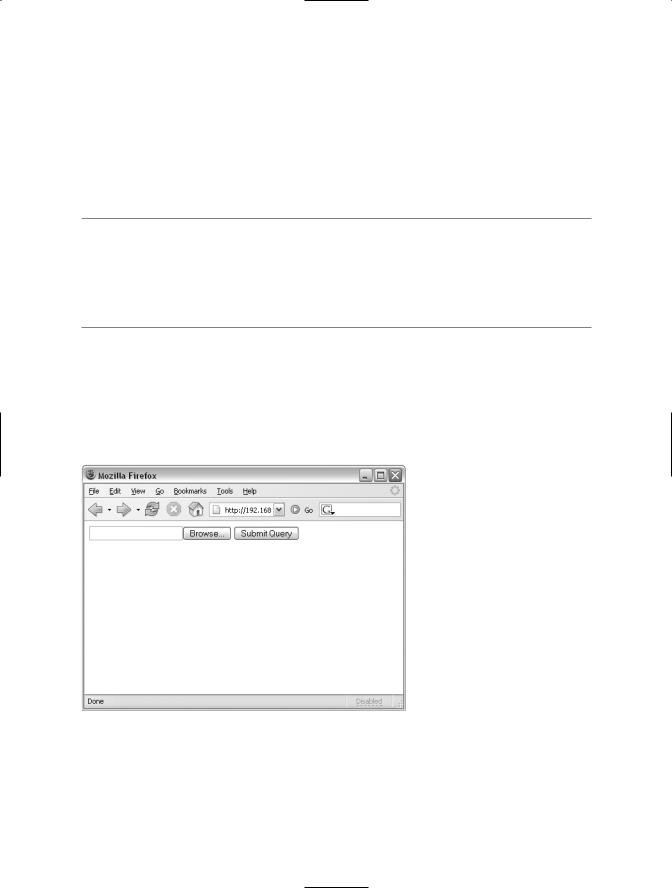
CGI.pm includes a function to create a file-upload field within a web form, much like the one shown in Figure 4-1. The upload field created must then be processed within your program.
Figure 4-1. A form with a file-upload field
In order to use the file-upload field function, called upload(), you must use the special multipart encoding scheme, which is accessed by calling start_multipart_form(), rather than

C H A P T E R 4 ■ S YS T E M I N T E R A C T I O N |
79 |
the normal start_form() function that you’re accustomed to using. Timely code snippets always seem to help. Here’s an example of the upload() function in action:
start_multipart_form();
$handle = $q->upload(-name=>'filename', -default=>'the_initial_text', -size=>75,
-maxlength=>150);
The upload() function accepts four parameters:
•-name: This is the name for the field itself. It will be the name that you use to access the field within your code. It has no significance outside the web page and your program. In other words, users never see this name unless they view the HTML source of the web page. The -name parameter creates a filehandle within your Perl program, which means that you can work with the file just as you would work with any other filehandle in Perl. Now you know why all that material about filehandles in the previous section was so important.
•-default: This parameter specifies the default text to appear in the field. This text isn’t necessarily honored by all browsers, so you should be wary of its use or test extensively using different versions of different browsers (which you should do anyway).
•-size: This parameter indicates the physical size of the field as it will appear on the web page. Note that this size doesn’t have any correlation to the size of the file to be uploaded; rather, it’s akin to the size parameter for an everyday, run-of-the-mill form field. Like the -default parameter, the -size parameter is optional.
•-maxlength: This parameter specifies the maximum length in characters that the field will accept on the web page. Like -size, -maxlength has nothing to do with the actual size of the file to be uploaded. And like the -size parameter, the -maxlength parameter is optional within the call to upload().
So, of the four parameters, only the first, -name, is required. The remaining three parameters are not required. In fact, many browsers ignore the -default option. Since three of the four parameters are optional, the code example shown previously can be written more tersely, as follows:
$handle = $q->upload('filename');
As mentioned, the upload() function creates a filehandle that you then need to deal with in your code. Since it’s a filehandle, you can do a few things with the uploaded file. Most commonly, the filehandle will be used to simply print (or output) to a file on the filesystem. Expanding on the code example just given and what you’ve learned about writing to files already, here’s an example that takes the filehandle and writes to standard output:
$handle = $q->upload('filename'); while (<$handle>) {
print;
}