

Beginning Perl Web Development - From Novice To Professional (2006)
.pdf10 C H A P T E R 1 ■ T H E C G I M O D U L E
Figure 1-2. The object-oriented Hello World example viewed in a web browser
Reviewing the Code
If you think that the code for hello-oo.cgi looks eerily similar to the hello.cgi code, you’re right. The key differences are in how the functions within the CGI module are called in this version.
Recall that in the function-oriented example, the program calls a method grouping, :standard, on the use CGI line. With the object-oriented model, that call is not necessary. Thus, the line is simply written like this:
use CGI;
The next line is new to the object-oriented approach and is responsible for instantiating the CGI object so that you can call methods within it later. This line of code creates a CGI object called $cgi:
my $cgi = new CGI;
Note that the script could have used any scalar variable name instead of $cgi. Many examples use $q as a variable name for this CGI object.
The four CGI functions are called next. Notice that these calls look different from the ones in the function-oriented version.
print $cgi->header;
print $cgi->start_html('Hello World'); print $cgi->h1('Hello World');
print $cgi->end_html();

C H A P T E R 1 ■ T H E C G I M O D U L E |
11 |
Each instance of a function call must be called through the CGI object ($cgi) created earlier. Attempting to call one of these functions without qualifying it through the $cgi object will result in an Internal Server Error message.
As with the example in Listing 1-1, the code in the example uses the semicolon format, but the comma format is acceptable and common. In that format, the code looks like this:
#!/usr/bin/perl -T
use strict; use CGI;
my $cgi = new CGI;
print $cgi->header, $cgi->start_html('Hello World'), $cgi->h1('Hello World'), $cgi->end_html();
exit;
A Closer Look at the CGI.pm Functions
The CGI module has a large number of functions to make the life of the programmer easier. These functions range from those that create HTML tags, HTTP headers, and cookies to those for working with web forms. This section looks at some of the most commonly used functions.
HTML Shortcuts
The HTML functions within the CGI module save time and make the code look cleaner. Without the HTML functions, a CGI program would be forced to include bits of HTML interspersed with Perl, read in external files with HTML, or (more commonly) use a combination of these techniques. This makes the code much more difficult to troubleshoot and debug.
Most of the HTML version 3 and 4 tags are available through a function in the CGI module. Simply calling the HTML function with a print statement will cause it to be sent to the outputted page. Recall the Hello World examples in Listings 1-1 and 1-2. These examples use the h1() function to create an <h1></h1> HTML tag around the phrase “Hello World.” Viewing the source from the resulting page shows this HTML:
<?xml version="1.0" encoding="utf-8"?> <!DOCTYPE html
PUBLIC "-//W3C//DTD XHTML Basic 1.0//EN" "http://www.w3.org/TR/xhtml-basic/xhtml-basic10.dtd">
<html xmlns="http://www.w3.org/1999/xhtml" lang="en-US"> <head><title>Hello World</title>
</head><body><h1>Hello World</h1></body></html>

12 C H A P T E R 1 ■ T H E C G I M O D U L E
The CGI module functions will usually create both the starting and ending HTML tags. However, should you wish to manually create these tags, you can do so by calling the function with start_ or end_ prepended, as in this example:
print start_h1;
print "This is some text"; print end_h1;
This code produces an opening <h1> tag followed by some text and then a closing </h1> tag. See the CGI module documentation (type perldoc CGI from a terminal window) for more information about HTML element generation.
You can also define your own functions for HTML tags. This allows you to define and call HTML tags that aren’t already provided for within the CGI module. For example, suppose that a new HTML tag called <snow> is available in a certain browser, and you want to use it within your CGI program. You only need to define the function, like so:
use CGI qw/:standard snow/
Then you can call it in the same way that you would call any other HTML function:
print snow('Fall');
The resulting HTML looks like this:
<snow>Fall</snow>
Dynamic Pages and Forms
Just as standard HTML elements are available through functions in the CGI module, so are form elements. For example, tags to start and end forms, code for text fields and other input fields, and code for buttons are available as CGI module functions. The syntax for these functions is the same as the syntax for calling HTML tag functions. Consider the code shown in Listing 1-3.
Listing 1-3. Code to Accept Input with the CGI Module
#!/usr/bin/perl -T
use strict;
use CGI qw/:standard/;
print header, start_html('Hello'), start_form,
"Enter your name: ",textfield('name'), submit,
end_form, hr, end_html;
exit;
C H A P T E R 1 ■ T H E C G I M O D U L E |
13 |
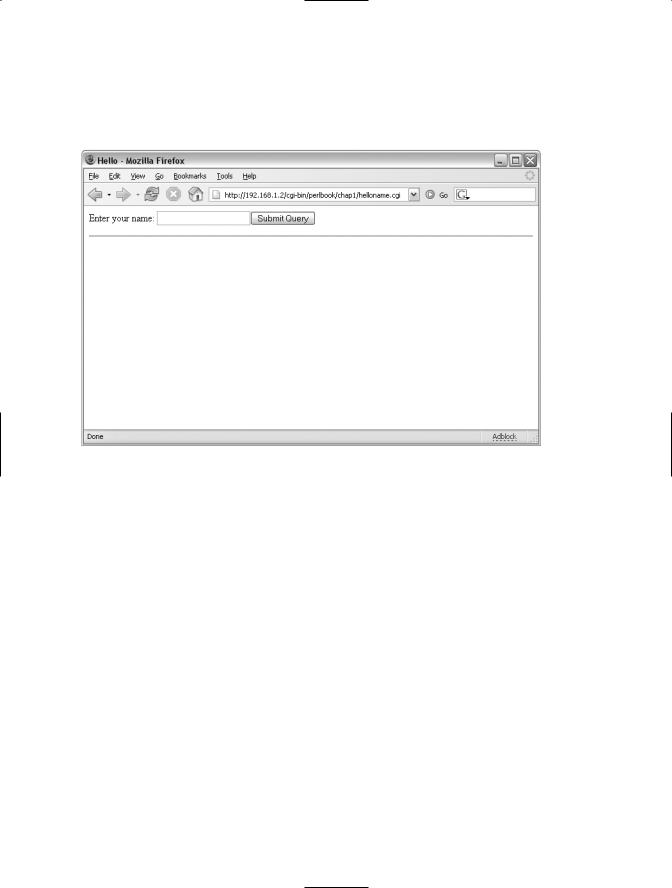
When the code is saved to a web server and viewed through a browser, it should look like Figure 1-3. It looks like a regular form, but don’t bother filling in the name and clicking on submit yet. There’s no code to handle it!
Figure 1-3. A form created with CGI module functions
Viewing the source code for the resulting HTML page reveals what this bit of Perl code did in the background:
<?xml version="1.0" encoding="utf-8"?> <!DOCTYPE html
PUBLIC "-//W3C//DTD XHTML Basic 1.0//EN" "http://www.w3.org/TR/xhtml-basic/xhtml-basic10.dtd">
<html xmlns="http://www.w3.org/1999/xhtml" lang="en-US"><head><title>Hello</title> </head><body><form method="post" action="/cgi-bin/name.cgi" enctype="application/x-www-form-urlencoded">
Enter your name: <input type="text" name="name" />
<input type="submit" name=".submit" /></form></body></html>
As you can see, the start_form() function inserted a <form> tag into the page. It automatically made the method a POST and set the action to itself—"/cgi-bin/name.cgi", in this case. You could change both of these parameters by providing them within the call to the start_form() function, as in this example:
start_form(-method=>'GET',-action=>"/cgi-bin/someothercgi.cgi")
The code would then produce a form tag like this:
14 C H A P T E R 1 ■ T H E C G I M O D U L E
<form method="get" action="/cgi-bin/someothercgi" enctype="application/x-www-form-urlencoded">
However, for this example, leave the form method and action at their defaults (POST and
/cgi-bin/name.cgi).
Making the form actually perform some action means that you need to handle parameters within the program. To do so, you can simply check whether the param() function returns true.
if (param()) { #do something
}
Listing 1-4 shows a more complete function added to the code shown in Listing 1-3.
Listing 1-4. Printing the Name Input Using the CGI Module
#!/usr/bin/perl -T
use strict;
use CGI qw/:standard/;
print header, start_html('Hello'), start_form,
"Enter your name: ",textfield('name'), submit,
end_form, hr;
if (param()) { print "Hello ", param('name'), p;
}
print end_html;
exit;
■Tip The basic if (param()) type of check is commonly used to determine whether to serve the default page or whether to process the CGI parameters. For example, if there are parameters within param(), then the CGI will output “Hello,” along with the value that was filled in for the text field that is contained in param('name').
C H A P T E R 1 ■ T H E C G I M O D U L E |
15 |
Update your code on the web server with this new code. Don’t forget to click the refresh button in your web browser to ensure that you have the new code within your version of the page. If you fail to reload the page after saving the new code, you won’t get the same results as the rest of us.
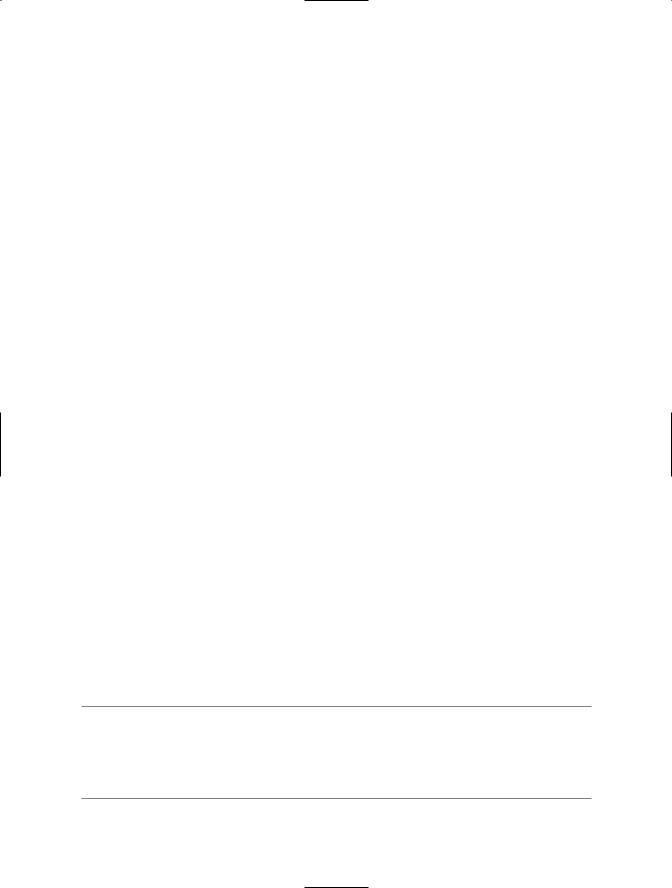
Now you can fill in your name and click the Submit Query button. If your name is Steve, you’ll see the output shown in Figure 1-4.
Figure 1-4. Printing the name based on what was submitted
Cookies
Cookies are tokens or data sent in the HTTP header. Cookies sometimes reside in volatile memory for the duration of the browser setting and can also be saved as persistent text files on the user’s computer. You can use cookies for many reasons, including carrying information about users to enhance their browsing experience. Cookies offer a very useful way to maintain state between visits or during a session.
■Caution Cookies are often overused and relied upon unnecessarily. Additionally, some users overestimate the risks of allowing cookies and misunderstand the privacy concerns related to their use. For these reasons, some users will disable cookies in their browsers. Therefore, you shouldn’t design an application that relies on cookies for session state or other client-side settings.
The CGI module includes powerful functions to assist in creating and managing browser cookies. Here, I’ll show you some examples. But first, let’s see what goes into a cookie. (I find it difficult to resist clever but overdone metaphors when writing about cookies; therefore, I’ll
thcoming sections.)

16 C H A P T E R 1 ■ T H E C G I M O D U L E
Cookie Ingredients
Cookies consist of up to the following six parameters:
•Name: This is the name of the cookie itself and is the only required parameter for a cookie.
•Value: The value of a cookie is an optional item that contains the object or subject of the cookie. In other words, if you have a cookie with a name of sessionid, the value for that sessionid might be 515093028943.
•Domain: The domain parameter refers to the Internet domain within which the cookie is valid. Cookies are valid only within the domain in which they are set. For example, as an operator of example.com, you cannot read cookies that are tied to the domain example.net.
•Secure: The secure parameter refers to whether or not the cookie will be transmitted over an unsecure connection; that is, a connection that doesn’t use SSL. The default for this parameter is off, meaning that cookies can be transmitted over SSL and non-SSL connections alike.
•Path: The path parameter further refines the area of the domain in which the cookie is valid. For example, a cookie with a path of /shoppingcart will be sent only to pages below /shoppingcart within the domain. That cookie would be sent to http://www.example.com/shoppingcart/checkout.cgi, but would not be sent to http://www.example.com/index.html, since index.html is not hierarchically below the /shoppingcart path in the URL.
•Expiration date: The expiration date is the time at which the cookie will no longer be valid. If no expiration date is set, or—and this is important—if the expiration date is set incorrectly, the cookie will expire at the close of the browser session. Some browsers won’t accept the cookie at all if the expiration date is not set correctly. The format for the expiration date is specific and is as follows: Weekday, DD-MM-YYYY HH:MM:SS GMT.
■Tip To clear a cookie, it's usually sufficient to set the value to null, or "".
Cookie Limitations
The following are some inherent limitations set by the cookie standard itself:
•A 4KB total size for any single cookie
•A total of 300 cookies stored by a browser
•A total of 20 cookies for any given server or domain
While some of these limitations are merely recommendations, it’s a good idea to keep these in mind when working with cookies. In addition, although not required, it is recommended that elements within a cookie be properly encoded. Usually, this means escaping
C H A P T E R 1 ■ T H E C G I M O D U L E |
17 |
reserved characters into their hex equivalents. For instance, a single space in the cookie would be represented as %20.
Sampling the Cookies
Setting up your computer to test cookies means configuring your web browser to prompt when a cookie is received. You set up prompting on cookie receipt through the options or preferences within your browser of choice. Doing so will cause a dialog box to be displayed when a cookie is received. This is quite an annoyance for general browsing, but it is very helpful when working with cookies to ensure that the cookies are being set with the correct parameters.
Baking Cookies by Hand
Cookies get set as part of the header. You can set cookies without the use of the CGI module, just as you can accomplish any of the tasks of writing a Perl-based CGI application without the CGI module. To send a cookie to the browser, you need to create a program to output the necessary elements. This is as simple as the code shown in Listing 1-5.
Listing 1-5. A Simple Cookie Example
#!/usr/bin/perl -T
use strict;
print "Content-type: text/html\n";
print "Set-Cookie: testcookie=testvalue;"; print "\n\n";
print "You've received a cookie<p>\n";
exit;
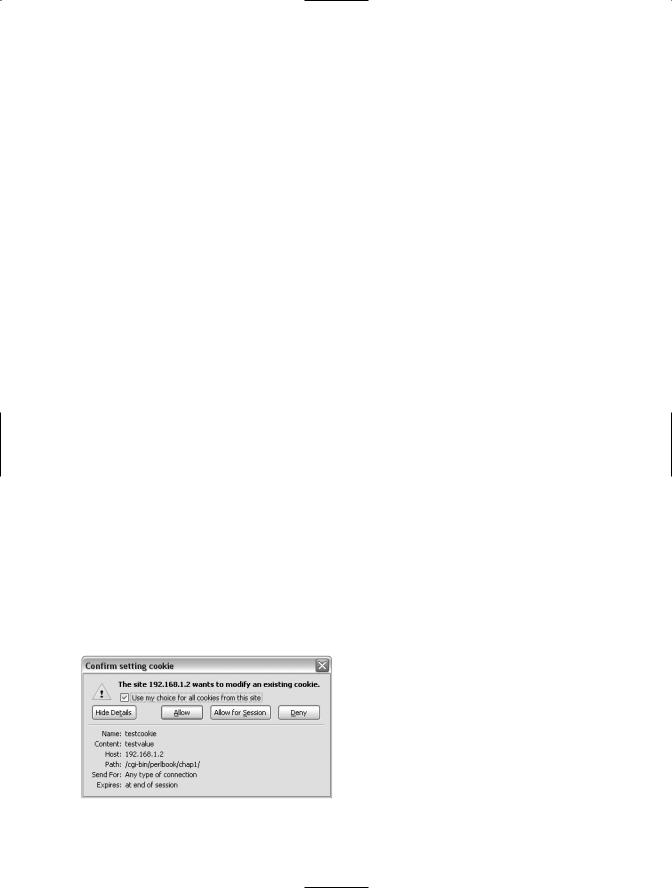
If you have prompting for cookies enabled in your browser (as recommended in the previous section), pointing the browser to this code on the server results in a dialog box similar to that in Figure 1-5. You can see the cookie is being set with a name of testcookie and a value of testvalue. The cookie will expire at the end of the session, since no expiration date parameter was included in the cookie.
Figure 1-5. The cookie being set

18 C H A P T E R 1 ■ T H E C G I M O D U L E
Baking Cookies with CGI.pm
As you’ve seen, setting cookies by hand isn’t the most difficult thing to do, yet the CGI module makes it even easier, especially in the area of setting the expiration date. Cookie functions are included within the :standard method group of the CGI module.
Just as with the manual method for sending cookies to the browser, you need to output the necessary elements when using the CGI module. Listing 1-6 shows how to re-create the simple cookie set in Listing 1-5 using the CGI module.
Listing 1-6. A Simple Cookie Example Using the CGI Module
#!/usr/bin/perl -T
use strict;
use CGI qw/:standard/;
my $cookie = cookie(-name=>'testcookie',-value=>'testvalue'); print header (-cookie=>$cookie);
print "You've received a cookie<p>\n";
exit;
Notice that in Listing 1-5, the path for the cookie was set to /cgi-bin/, or the directory from which the program was run. However, in Listing 1-6, the path is set to /, or the root of the site from which the program is run. Since the path is not set explicitly, the default for the module will be used, with the result being the root directory set for the path.
As with the manual example, you can view this code from the server through a browser with cookie prompting enabled to see the cookie contents as the cookie is being set.
Consuming Cookies
You’ve now seen how to set simple cookies in browsers both by hand and by using the CGI module. It might be nice to find out how to actually read those cookies back into your program.
Cookies are sent as part of the request header and can be accessed as an environment variable. As you’ve probably come to expect, the CGI module also includes a built-in function for cookie retrieval. You just call the cookie() function with the name of the cookie as an argument. Listing 1-7 shows the code to retrieve the cookie named testcookie (created in Listing 1-6).
Listing 1-7. Retrieving Cookies
#!/usr/bin/perl -T
use strict;
use CGI qw/:standard/;
my $retrievedcookie = cookie('testcookie');
C H A P T E R 1 ■ T H E C G I M O D U L E |
19 |
print header, start_html,
p("You sent a cookie and its value was $retrievedcookie\n"), end_html;
exit;
But note that since the cookie set in Listing 1-6 didn’t have an expiration date set, if you've closed your browser, the cookie will be gone, and this example won’t work!
Setting Cookie Expiration
As I just noted, because the cookie created in Listing 1-6 contained only a name and a value parameter, it expired when the browser session closed. When you set an expiration date for a cookie, the cookie will be available on the user’s computer until the expiration date, which means that it will be available when she visits your application until that date, regardless of whether or not she closed the browser. However, the format for the expiration date is very specific, and if formatted incorrectly may cause the cookie to expire at the end of the session or not be set at all!
Assume that you want to set an expiration date seven days in the future. Without the help of the CGI module, you would first have to figure out the current date, then add seven days to it, and then format the string in the correct format for the cookie’s expiration date parameter. The code might look something like Listing 1-8.
Listing 1-8. Setting Cookie Expiration Without Using the CGI Module
#!/usr/bin/perl -T
use strict;
my @monthnames = qw/Jan Feb Mar Apr May Jun Jul Aug Sep Oct Nov Dec/;
my @weekdays = qw/Sunday Monday Tuesday Wednesday Thursday Friday Saturday/;
my $nextweek = time+604800;
my ($sec,$min,$hour,$mday,$mon,$year,$dayname,$dayofyear) = gmtime($nextweek); $year += 1900;
print "Content-type: text/html\n";
print "Set-Cookie: testcookie=testcookievalue;";
printf ("expires=%s, %02d-%s-%d %02d:%02d:%02d GMT",$weekdays[$dayname],$mday, $monthnames[$mon],$year,$hour,$min,$sec);
print "\n\n";
print "You've received a cookie<p>\n";
exit;