

Beginning Visual Basic 2005 (2006)
.pdfChapter 4
Finally, once you have the favorite color, you display a message box as usual.
You could have done the opposite of this and converted all the names to uppercase and used strName.ToUpper instead of strName.ToLower.
Multiple Selections
You’re not limited to matching one value inside a Select Case . . . End Select block. You can also match multiple items. In the next Try It Out, you’ll change the application so that you report the sex of whoever you click on.
Try It Out |
Multiple Selections |
1.Open the Code Editor for Form1 and change the code in the SelectedIndexChanged handler as highlighted here:
Private Sub lstData_SelectedIndexChanged(ByVal sender As System.Object, _ ByVal e As System.EventArgs) Handles lstData.SelectedIndexChanged
‘Declare variables Dim strName As String
Dim strFavoriteColor As String
‘Get the selected name
strName = lstData.Items(lstData.SelectedIndex)
‘Use a Select Case to display a person’s gender Select Case strName.ToLower
Case “bryan”, “edward” MessageBox.Show(“Male”, “Select Demo”)
Case “stephanie”, “cathy”, “betty” MessageBox.Show(“Female”, “Select Demo”)
End Select End Sub
2.Run the project and click one of the female names. You will see results as shown in Figure 4-15.
Figure 4-15
106

Controlling the Flow
How It Works
The code you use to get back the name and initialize the Select Case block remains the same. However, in each Case statement you can provide a list of possible values separated with commas. In the first one, you look for bryan or edward. If either of these matches, you run the code under the Case statement:
Case “bryan”, “edward”
MessageBox.Show(“Male”, “Select Demo”)
In the second one, you look for stephanie or cathy or betty. If any of these three matches, you again run the code under the Case statement:
Case “stephanie”, “cathy”, “betty”
MessageBox.Show(“Female”, “Select Demo”)
It’s important to realize that these are all or matches. You’re saying “one or the other,” not “one and the other.”
The Case Else Statement
So what happens if none of the Case statements that you’ve included is matched? You saw this before when demonstrating the case-sensitive nature of Select Case. In the next Try It Out, you see it with the Case Else statement.
Try It Out |
Using Case Else |
1.Open the Form Designer for Form1. Locate the Items property for the list box and open the String Collection Editor again. Add another name to the collection and then click the OK button.
2.In the lstData_SelectedIndexChanged event handler, add the highlighted code:
‘Use a Select Case to display a person’s gender Select Case strName.ToLower
Case “bryan”, “edward” MessageBox.Show(“Male”, “Select Demo”)
Case “stephanie”, “cathy”, “betty” MessageBox.Show(“Female”, “Select Demo”)
Case Else
MessageBox.Show(“I don’t know this person’s gender.”, _
“Select Demo”)
End Select
3.Run the project and click the last name that you just added, and you will see results similar to those shown in Figure 4-16.
107

Chapter 4
Figure 4-16
How It Works
The Case Else statement is used if none of the other supplied Case statements match what you’re looking for. There isn’t a Case “sydney” defined within the block, so you default to using whatever is underneath the Case Else statement. In this instance, you display a message box indicating that you do not know the gender of the person who’s been selected.
Different Data Types with Select Case
In this chapter, you used Select Case with variables of type String. However, you can use Select Case with all basic data types in Visual Basic 2005, such as Integer, Double, and Boolean.
In day-to-day work, the most common types of Select Case are based on String and Integer data types. However, as a general rule, if a data type can be used in an If statement with the Equals (=) operator, it will work with Select Case.
Loops
When writing computer software, you often need to perform the same task several times to get the effect you want. For example, you might need to create a telephone bill for all customers, or read in 10 files from your computer’s disk.
To accomplish this, you use a loop, and in this section, you’ll take a look at the two main types of loops available in Visual Basic 2005:
For loops — These loops occur a certain number of times (for example, exactly 10 times).
Do loops — These loops keep running until a certain condition is reached (for example, until all of the data is processed).
108

Controlling the Flow
The For . . . Next Loop
The simplest loop to understand is the For . . . Next loop, which you learn to build in the next Try It Out.
Try It Out |
Building a For . . . |
Next Loop |
1.Create a new Windows Application project called Loops.
2.Add a ListBox and a Button control to the form that appears.
3.Change the Name property of the list box to lstData and its IntegralHeight property to False.
4.Change the Name property of the button to btnForNextLoop. Also, set its Text property to For Next Loop. Your form should now look similar to the one shown in Figure 4-17.
Figure 4-17
5.Double-click the button to create its Click event handler and add the highlighted code:
Private Sub btnForNextLoop_Click(ByVal sender As System.Object, _
ByVal e As System.EventArgs) Handles btnForNextLoop.Click
‘Declare variable
Dim intCount As Integer
‘Perform a loop
For intCount = 1 To 5
‘Add the item to the list
lstData.Items.Add(“I’m item “ & intCount & “ in the list!”)
Next End Sub
6.Run the project and click the button. You should see results like those in Figure 4-18.
109

Chapter 4
Figure 4-18
How It Works
First, inside the Click event handler, you define a variable:
‘Declare variable
Dim intCount As Integer
Then you start the loop by using the For keyword. This tells Visual Basic 2005 that you want to create a loop. Everything that follows the For keyword is used to define how the loop should act. In this case, you’re giving it the variable you just created and then telling it to count from 1 to 5:
‘Perform a loop
For intCount = 1 To 5
The variable that you give the loop (in this case, intCount) is known as the control variable. When you first enter the loop, Visual Basic 2005 sets the control variable to the initial count value — in this case, 1. After the loop starts, Visual Basic 2005 moves to the first line within the For loop — in this case, the line that adds a string to the list box:
‘Add the item to the list
lstData.Items.Add(“I’m item “ & intCount & “ in the list!”)
This time, this line of code adds I’m item 1 in the list! to the list box. Visual Basic 2005 then hits the Next statement, and that’s where things start to get interesting:
Next
When the Next statement is executed, Visual Basic 2005 increments the control variable by one. The first time Next is executed, 1 changes to 2. Providing that the value of the control variable is less than or equal to the “stop” value (in this case, 5), Visual Basic 2005 moves back to the first line after the For statement, in this case:
‘Add the item to the list
lstData.Items.Add(“I’m item “ & intCount & “ in the list!”)
110

Controlling the Flow
This time, this line of code adds I’m item 2 in the list! to the list box. Again, after this line is executed, you run the Next statement. The value of intCount is now incremented from 2 to 3 and, because 3 is less than or equal to 5, you move back to the line that adds the item to the list. This happens until intCount is incremented from 5 to 6. As 6 is greater than the stop value for the loop, the loop stops.
When you’re talking about loops, you tend to use the term iteration. One iteration includes one movement from the For statement to the Next statement. Your loop has five iterations.
Step
You don’t have to start your loop at 1 — you can pick any value you like. You also don’t have to increment the control value by 1 on each iteration — again, you can increment by any value you like. In the next Try It Out, you learn about the flexibility of Step.
Try It Out |
Using Step |
1.Stop your project if it is still running. Add another Button control to your form and set its Name property to btnForNextLoopWithStep and its Text property to For Next Loop w/Step.
2.Double-click the button and add the following highlighted code in the Click event handler:
Private Sub btnForNextLoopWithStep_Click(ByVal sender As System.Object, _ ByVal e As System.EventArgs) Handles btnForNextLoopWithStep.Click
‘Perform a loop
For intCount As Integer = 4 To 62 Step 7 ‘Add the item to the list lstData.Items.Add(intCount)
Next End Sub
3.Run the project and click the button. You will see results like those in Figure 4-19.
Figure 4-19
111

Chapter 4
How It Works
The magic in this example all happens with this statement:
‘Perform a loop
For intCount As Integer = 4 To 62 Step 7
First, notice that you didn’t declare the intCount variable using a Dim statement. This has been done as part of the For statement and makes this variable local to this loop. Using the As keyword and the data type for the variable (in this case Integer), you have effectively declared an inline variable. Next, instead of using 1 as the start value, you’re using 4. This means that on the first iteration of the loop, intCount is set to 4, and you can see this by the fact that the first item added to the list is indeed 4. Also, you’ve used the Step keyword to tell the loop to increment the control value by 7 on each iteration rather than by the default of 1. This is why, by the time you start running the second iteration of the loop, intCount is set to 11 and not 5.
Although you gave For a stop value of 62, the loop has actually stopped at 60 because the stop value is a maximum. After the ninth iteration, intCount is actually 67, which is more than 62, and so the loop stops.
Looping Backwards
By using a Step value that’s less than 0 (or a negative number), you can make the loop go backwards rather than forward, as you see in the next Try It Out.
Try It Out |
Looping Backwards |
1.Stop your project if it is still running. Add another Button control to your form and set its Name property to btnBackwardsForNextLoop and its Text property to Backwards For Next Loop.
2.Double-click the button and add the following highlighted code in the Click event handler:
Private Sub btnBackwardsForNextLoop_Click(ByVal sender As System.Object, _ ByVal e As System.EventArgs) Handles btnBackwardsForNextLoop.Click
‘Perform a loop
For intCount As Integer = 10 To 1 Step -1 ‘Add the item to the list lstData.Items.Add(intCount)
Next End Sub
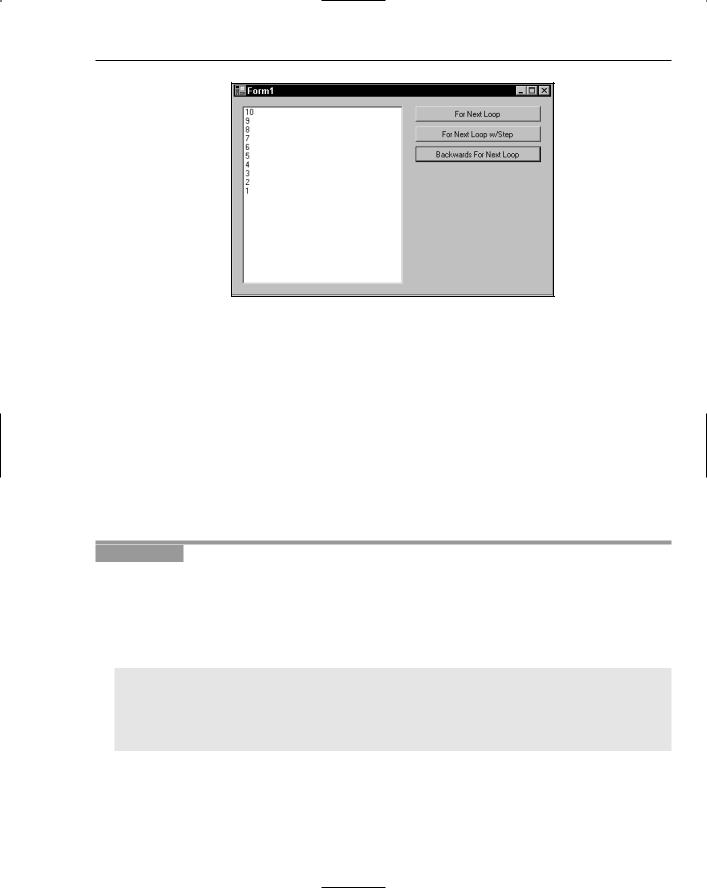
3.Run the project and click the button. You should see results like those shown in Figure 4-20.
How It Works
If you use a negative number, like -1, For tries to add -1 to the current control value. Adding a negative number has the effect of subtracting the number, so intCount goes from its start value of 10 to its new value of 9 and so on until the stop value is reached.
112
Controlling the Flow
Figure 4-20
The For Each . . . Next Loop
In practical, day-to-day work, it’s unlikely that you’ll use For . . . Next loops as illustrated here. Because of way the .NET Framework typically works, you’ll usually use a derivative of the For . . . Next loop called the For Each . . . Next loop.
In the algorithms you design, whenever a loop is necessary, you’ll have a set of things to work through, and usually this set is expressed as an array. For example, you might want to look through all of the files in a folder, looking for ones that are over a particular size. When you ask the .NET Framework for a list of files, you are returned an array of objects, each object in that array describing a single file. In the next Try It Out, you’ll modify your Loops application so that it returns a list of folders contained at the root of your C drive.
Try It Out |
For Each Loop |
1.Add another Button control to your form and set its Name property to btnForEachLoop and its Text property to For Each Loop.
2.Double-click the button and add the following highlighted code to the Click event handler:
Private Sub btnForEachLoop_Click(ByVal sender As System.Object, _
ByVal e As System.EventArgs) Handles btnForEachLoop.Click
‘List each folder at the root of your C drive For Each strFolder As String In _
My.Computer.FileSystem.GetDirectories(“C:\”)
‘Add the item to the list lstData.Items.Add(strFolder)
Next End Sub
3.Run the project and click the button. You should see a list of folders that are at the root of your C drive.
113

Chapter 4
How It Works
The My namespace in the .NET Framework exposes several classes that make it easy for you to find the information that you’ll use on a daily basis. In particular, the Computer class provides several other classes related to the computer that your program is running on. Since you want to find out about files and folders, you use the FileSystem class, which provides methods and properties for working with files and folders.
The GetDirectories method returns a collection of strings representing names of directories (or folders) on your computer. In this case, you use it to return a collection of names of folders in the root of the computer’s C drive.
The principle with a For Each . . . Next loop is that for each iteration you’ll be given the “thing” that you’re supposed to be working with. You need to provide a source of things (in this case, a collection of strings representing folder names) and a control variable into which the current thing can be put. The GetDirectories method provides the collection, and the inline variable strFolder provides the control variable:
‘List each folder at the root of your C drive For Each strFolder As String In _
My.Computer.FileSystem.GetDirectories(“C:\”)
Next
What this means is that on the first iteration, strFolder is equal to the first item in the string collection (in my case, “C:\Documents and Settings”). You then add that item to the list box:
‘Add the item to the list lstData.Items.Add(strFolder)
As with normal For . . . Next loops, for every iteration of the loop you’re given a string containing a folder name, and you add that string to the list.
The Do . . . Loop Loops
The other kind of loop you can use is one that keeps happening until a certain condition is met. These are known as Do . . . Loop loops, and there are a number of variations.
The first one I’ll introduce is the Do Until . . . Loop. This kind of loop keeps going until something happens. For this Try It Out, you’re going to use the random number generator that’s built into the .NET Framework and create a loop that will keep generating random numbers until it produces the number 10. When you get the number 10, you’ll stop the loop.
Try It Out |
Using the Do Until . . . |
Loop |
1.In the Form Designer, add another Button control to your form and set its Name property to btnDoUntilLoop and its Text property to Do Until Loop.
2.Double-click the button and add the following highlighted code to its Click event handler:
Private Sub btnDoUntilLoop_Click(ByVal sender As System.Object, _
ByVal e As System.EventArgs) Handles btnDoUntilLoop.Click
114

Controlling the Flow
‘Declare variables
Dim objRandom As New Random()
Dim intRandomNumber As Integer = 0
‘Clear the list lstData.Items.Clear()
‘Process the loop until intRandomNumber = 10 Do Until intRandomNumber = 10
‘Get a random number between 0 and 24 intRandomNumber = objRandom.Next(25) ‘Add the number to the list lstData.Items.Add(intRandomNumber)
Loop End Sub
3.Run the project and click the button. You’ll see results similar to the results shown in Figure 4-21. Keep clicking the button. You’ll see that the number of elements in the list is different each time.
Figure 4-21
How It Works
A Do Until . . . Loop keeps running the loop until the given condition is met. When you use this type of loop, there isn’t a control variable per se; rather, you have to keep track of the current position of the loop yourself — let’s see how you do this. You begin by declaring a variable (also known as an object) for the Random class, which provides methods for generating random numbers. This object has been prefixed with obj to specify that this is an object derived from a class. The next variable that you declare is the intRandomNumber, and this variable will be used to receive the random number generated by your objRandom object:
‘Declare variables
Dim objRandom As New Random()
Dim intRandomNumber As Integer = 0
115