

Beginning Visual Basic 2005 (2006)
.pdfChapter 1
Figure 1-3
It is a good idea to select Service Releases to check for updates. Microsoft has done a good job of making software updates available through the Internet. These updates can include anything from additional documentation to bug fixes. You will be given the choice to install any updates via a Service Pack CD or the Internet. Obviously, the Internet option requires an active connection. Since updates can be quite large, a fast connection is highly recommended.
Once you have performed the update process, Visual Studio 2005 is ready to use. Now the real fun can begin! So get comfortable, relax, and let us enter the world of Visual Basic 2005.
The Visual Basic 2005 IDE
You don’t actually need the Visual Basic 2005 product to write applications in the Visual Basic 2005 language. The actual ability to run Visual Basic 2005 code is included with the .NET Framework. You could actually just write all of your Visual Basic 2005 using a text editor such as Notepad. You could also hammer nails using your shoe as a hammer, but that slick pneumatic nailer sitting there is probably a lot more efficient. In the same way, by far the easiest way to write in Visual Basic 2005 is by using the Visual Studio 2005 Integrated Development Environment, also known as the IDE. This is what you actually see when working with Visual Basic 2005 — the windows, boxes, and so on. The IDE provides a wealth of features unavailable in ordinary text editors — such as code checking, visual representations of the finished application, and an explorer that displays all of the files that make up your project.
6
Welcome to Visual Basic 2005
The Profile Setup Page
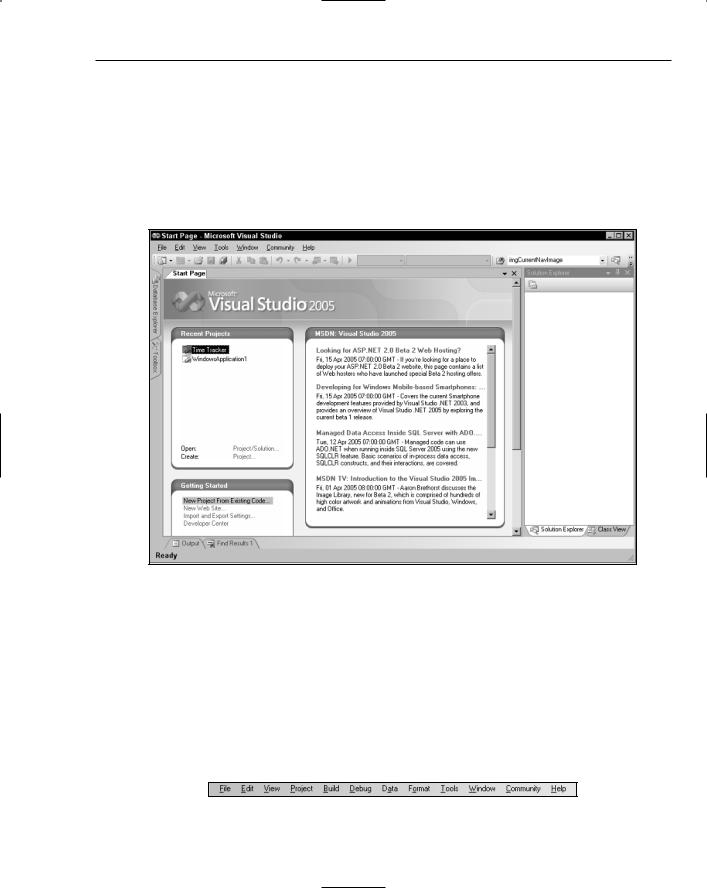
An IDE is a way of bringing together a suite of tools that makes developing software a lot easier. Fire up Visual Studio 2005 and see what you’ve got. If you used the default installation, go to your Windows Start menu and then Programs (All Programs on Windows XP and Windows Server 2003) Microsoft Visual Studio 2005 Microsoft Visual Studio 2005. A splash screen will briefly appear, and then you should find yourself presented with the Choose Default Environment Settings dialog box. Select the Visual Basic Development Settings option and then click Start Visual Studio. The Microsoft Development Environment will appear, as shown in Figure 1-4.
Figure 1-4
The Menu
By now, you may be a bit eager to start writing some code. But first, begin your exploration of the IDE by looking at the toolbar and menu, which, as you will learn are not really all that different from the toolbars and menus you have seen in other Microsoft software such as Word, Excel, and PowerPoint.
Visual Studio 2005’s menu is dynamic, meaning that items will be added or removed depending on what you are trying to do. While you are looking at the blank IDE, the menu bar will consist only of the File, Edit, View, Data, Tools, Window, Community, and Help menus. When you start working on a project, however, the full Visual Studio 2005 menu appears as shown in Figure 1-5.
Figure 1-5
7

Chapter 1
At this point, there is no need to cover each menu topic in great detail. You will become familiar with each of them as you progress through the book. Here is a quick rundown of what activities each menu item pertains to:
File: It seems every Windows program has a File menu. It has become the standard where you should find, if nothing else, a way to exit the application. In this case, you can also find ways of opening and closing single files and whole projects.
Edit: The Edit menu provides access to the items you would expect: Undo, Redo, Cut, Copy, Paste, and Delete.
View: The View menu provides quick access to the windows that exist in the IDE, such as the Solution Explorer, Properties window, Output window, Toolbox, and so on.
Project: The Project menu allows you to add various files to your application such as forms and classes.
Build: The Build menu becomes important when you have completed your application and want to run it without the use of the Visual Basic 2005 environment (perhaps running it directly from your Windows Start menu, as you would any other application such as Word or Access).
Debug: The Debug menu allows you to start and stop running your application within the Visual Basic 2005 IDE. It also gives you access to the Visual Studio 2005 debugger. The debugger allows you to step through your code while it is running to see how it is behaving.
Data: The Data menu helps you to use information that comes from a database. It appears only when you are working with the visual part of your application (the [Design] tab will be the active one in the main window), not when you are writing code. Chapters 15 and 16 will introduce you to working with databases.
Format: The Format menu also appears only when you are working with the visual part of your application. Items on the Format menu allow you to manipulate how the controls you create will appear on your forms.
Tools: The Tools menu has commands to configure the Visual Studio 2005 IDE, as well as links to other external tools that may have been installed.
Window: The Window menu has become standard for any application that allows more than one window to be open at a time, such as Word or Excel. The commands on this menu allow you to switch between the windows in the IDE.
Community: The Community menu provides access to developer resources, where you can ask questions, search for code snippets, and send product feedback.
Help: The Help menu provides access to the Visual Studio 2005 documentation. There are many different ways to access this information (for example, via the help contents, an index, or a search). The Help menu also has options that connect to the Microsoft Web site to obtain updates or report problems.
The Toolbars
Many toolbars are available within the IDE, including Formatting, Image Editor, and Text Editor, which you can add to and remove from the IDE via the View Toolbars menu option. Each one provides quick access to often-used commands, preventing you from having to navigate through a series of menu
8

Welcome to Visual Basic 2005
options. For example, the leftmost icon (New Project) on the default toolbar (called the Standard toolbar), shown in Figure 1-6, is available from the menu by navigating to File New Project.
|
|
|
|
|
|
|
|
|
|
|
Navigate Forward |
|
|
|
|
|
|
|
Toolbox |
|||||||||
|
|
|
Save |
|
|
Paste |
|
|
Solution |
|
|
|
Properties |
|
Other |
|||||||||||||
Add Item |
|
|
Cut |
|
|
|
Redo |
|
|
Find in Files |
|
|||||||||||||||||
|
|
|
|
|
|
Configurations |
Window |
Windows |
||||||||||||||||||||
|
|
|
|
|
|
|
|
|
|
|
|
|
|
|
|
|
|
|
|
|
|
|
|
|
|
|
|
|
|
|
|
|
|
|
|
|
|
|
|
|
|
|
|
|
|
|
|
|
|||||||||
|
|
|
|
|
|
|
|
|
|
|
|
|
|
|
|
|
|
|
|
|
||||||||
New |
Save All |
|
|
Undo |
|
Start |
|
|
|
Find |
Solution |
|
Start |
|||||||||||||||
Project |
|
|
|
|
|
|
|
|
|
|
Debugging |
|
|
|
|
|
Explorer |
|
Page |
|||||||||
|
|
|
|
Copy |
|
|
|
|
|
|||||||||||||||||||
|
|
|
|
|
|
|
|
|
|
|
|
|
|
|
|
|
|
|
|
|
|
|
||||||
|
Open File |
|
|
|
|
Navigate Backward |
Solution Platform |
Object Browser |
||||||||||||||||||||
Figure 1-6
The toolbar is segmented into groups of related options, which are separated by a vertical bar. The first five icons provide access to the commonly used project and file manipulation options available through the File and Project menus, such as opening and saving files.
The next group of icons is for editing (Cut, Copy, and Paste). The third group of icons is for undoing and redoing edits and for navigating through your code.
The fourth group of icons provides the ability to start your application running (via the green triangle). You can also choose a configuration for your solution and target specific platforms.
The next section allows you to find text in your code throughout the entire document, project, or solution.
The final group of icons provides quick links back to the Solution Explorer, Properties window, Toolbox, Object Browser, Start Page, and other windows. If any of these windows is closed, clicking the appropriate icon will bring it back into view.
If you forget what a particular icon does, you can hover your mouse pointer over it so that a ToolTip appears displaying the name of the toolbar option.
You could continue to look at each of the windows by clicking on the View menu and choosing the appropriate window. But, as you can see, they are all empty at this stage and therefore not too revealing. The best way to look at the capabilities of the IDE is to use it while writing some code.
Creating a Simple Application
To finish your exploration of the IDE, you need to create a project, so that the windows shown earlier in Figure 1-4 actually have some interesting content for you to look at. In the following Try It Out, you are going to create a very simple application called HelloUser that will allow you to enter a person’s name and display a greeting to that person in a message box.
9

Chapter 1
Try It Out |
Creating a HelloUser Project |
1.Click the New Project button on the toolbar.
2.The New Project dialog box will open. Make sure you have Visual Basic selected in the Project Types tree-view box to the left. Next, select Windows Application in the Templates box on the right. Finally, type Hello User in the Name text box and click OK. Your New Project dialog box should look like Figure 1-7.
Figure 1-7
3.The IDE will then create an empty Windows application for you. So far, your Hello User program consists of one blank window, called a Windows Form (or sometimes just a form), with the default name of Form1.vb, as shown in Figure 1-8.
Whenever Visual Studio 2005 creates a new file, either as part of the project creation process or when you create a new file, it will use a name that describes what it is (in this case, a form) followed by a number.
Windows in the Visual Studio 2005 IDE
At this point, you can see that the various windows in the IDE are beginning to show their purposes, and you should take a brief look at them now before you come back to the Try It Out. Note that if any of these windows are not visible on your screen, you can use the View menu to select and show them. Also, if you do not like the location of any particular window, you can move it by clicking on its title bar (the blue bar at the top) and dragging it to a new location. The windows in the IDE can float (stand out on their own) or be docked (as they appear in Figure 1-8). The following list introduces the most common windows:
Database Explorer: The Database Explorer provides access to your defined database connections. Here you can create new database connections and view existing database connections. In Figure 1-8, the Database Explorer is a tab at the bottom of the Toolbox window.
10

Welcome to Visual Basic 2005
Figure 1-8
Toolbox: The Toolbox contains reusable controls and components that can be added to your application. These can range from buttons to data connectors to customized controls that you have either purchased or developed.
Design window: The Design window is where a lot of the action takes place. This is where you will draw your user interface on your forms. This window is sometimes referred to as the Designer.
Solution Explorer: The Solution Explorer window contains a hierarchical view of your solution. A solution can contain many projects, whereas a project contains forms, classes, modules, and components that solve a particular problem.
Properties: The Properties window shows what properties the selected object makes available. Although you can set these properties in your code, sometimes it is much easier to set them while you are designing your application (for example, drawing the controls on your form). You will notice that the File Name property has the value Form1.vb. This is the physical file name for the form’s code and layout information.
Try It Out |
Creating a HelloUser Project (cont.) |
1.Change the name of your form to something more indicative of what your application is. Click on Form1.vb in the Solution Explorer window. Then, in the Properties window, change the File Name property from Form1.vb to HelloUser.vb and press Enter, as shown in Figure 1-9. When changing properties you must either press Enter or click off the property for it to take effect.
11

Chapter 1
Figure 1-9
2.Notice that the form’s filename has also been updated in the Solution Explorer to read
HelloUser.vb.
3.Now click the form displayed in the Design window. The Properties window will change to display the form’s Form properties (instead of the File properties, which you have just been looking at). You will notice that the Properties window is dramatically different. The difference is the result of two different views of the same file. When the form name is highlighted in the Solution Explorer window, the physical file properties of the form are displayed. When the form in the Design window is highlighted, the visual properties and logical properties of the form are displayed.
The Properties window allows you to set a control’s properties easily. Properties are a particular object’s set of internal data; they usually describe appearance or behavior. In Figure 1-10 you can see that properties are grouped together in categories — Accessibility (not shown), Appearance (header is not shown), Behavior, Data, Design, Focus (not shown), Layout (not shown), Misc (not shown), and Window Style (not shown).
You can see that under the Appearance category (header not shown), even though we changed the file name of the form to HelloUser.vb, the text or caption of the form is still Form1.
4.Right now, the title (Text property) of your form (displayed in the bar at the top) is Form1. This is not very descriptive, so change it to reflect the purpose of this application. Locate the Text property in the Appearance section of the Properties window. Change the Text property’s value to Hello from Visual Basic 2005 and press Enter. Notice that the form’s title has been updated to reflect the change.
If you have trouble finding properties, click the little AZ button on the toolbar toward the top of the Properties window. This changes the property listing from being ordered by category to being ordered by name.
5.You are now finished with the procedure. Click the Start button on the Visual Studio 2005 toolbar (the green triangle) to run the application. As you work through the book, whenever we say “run the project” or “start the project,” just click the Start button. An empty window with the title Hello from Visual Basic 2005 is displayed.
12

Welcome to Visual Basic 2005
Figure 1-10
That was simple, but your little application isn’t doing much at the moment. Let us make it a little more interactive. To do this, you are going to add some controls — a label, a text box, and two buttons to the form. This will let you see how the Toolbox makes adding functionality quite simple. You may be wondering at this point when you will actually look at some code. Soon! The great thing about Visual Basic 2005 is that you can develop a fair amount of your application without writing any code. Sure, the code is still there, behind the scenes, but, as you will see, Visual Basic 2005 writes a lot of it for you.
The Toolbox
The Toolbox is accessed via the View Toolbox menu option, the Toolbox icon on the Standard menu bar, or by pressing Ctrl+Alt+X. Alternatively, the Toolbox tab is displayed on the left of the IDE; hovering your mouse over this tab will cause the Toolbox window to fly out, partially covering your form.
The Toolbox contains a Node type view of the various controls and components that can be placed onto your form. Controls such as text boxes, buttons, radio buttons, and combo boxes can be selected and then drawn onto your form. For the HelloUser application, you will be using only the controls in the Common Controls node. In Figure 1-11, you can see a listing of common controls for Windows Forms.
Controls can be added to your forms in any order, so it does not matter if you add the label control after the text box or the buttons before the label. In the next Try It Out, you start adding controls.
13

Chapter 1
Figure 1-11
Try It Out |
Adding Controls to the HelloUser Application |
1.Stop the project if it is still running, because you now want to add some controls to your form. The simplest way to stop your project is to click the _ button in the top-right corner of the form. Alternatively, you can click the blue square in the IDE (which displays a ToolTip that says “Stop Debugging” if you hover over it with your mouse pointer).
2.Add a Label control to the form. Click Label in the Toolbox and drag it over the form’s Designer and drop it in the desired location. (You can also place controls on your form by double-clicking on the required control in the Toolbox or clicking on the control in the Toolbox and then drawing it on the form.)
3.If the Label control you have just drawn is not in the desired location, it really isn’t a problem. Once the control is on the form, you can resize it or move it around. Figure 1-12 shows what the control looks like after you place it on the form. To move it, click the dotted border and drag it to the desired location. The label will automatically resize itself to fit the text that you enter in the Text property.
4.After drawing a control on the form, you should at least configure its name and the text that it will display. You will see that the Properties window to the right of the Designer has changed to Label1, telling you that you are currently examining the properties for it. In the Properties
14

Welcome to Visual Basic 2005
window, set your new label’s Text property to Enter Your Name. Notice that, once you press enter or click off of the property, the label on the form has automatically resized itself to fit the Text property. Now set the Name property to lblName.
Figure 1-12
5.Now, directly beneath the label, you want to add a text box, so that you can enter a name. You are going to repeat the procedure you followed for adding the label, but this time make sure you select the TextBox control from the toolbar. After you have dragged-and-dropped (or double-clicked) the control into the appropriate position as shown in Figure 1-13, use the Properties window to set its Name property to txtName.
Notice the sizing handles on the left and right side of the control. You can use these handles to resize the text box horizontally.
Figure 1-13
6.In the bottom left corner of the form, add a Button control in exactly the same manner as you added the label and text box. Set its Name property to btnOK and its Text property to &OK. Your form should now look similar to the one shown in Figure 1-14.
15