

Beginning Visual Basic 2005 (2006)
.pdfChapter 1
The ampersand (&) is used in the Text property of buttons is to create a keyboard shortcut (known as a hot key). The letter with the & sign placed in front of it will become underlined (as shown in Figure 1-14) to signal users that they can select that button by pressing the Alt+letter key combination, instead of using the mouse (on some configurations the underline doesn’t appear until the user presses Alt). In this particular instance, pressing Alt+O would be the same as clicking directly on the OK button. There is no need to write code to accomplish this.
Figure 1-14
7.Now add a second Button control to the bottom right corner of the form by dragging the Button control from the Toolbox onto your form. You’ll notice that, as you get close to the bottom right of the form, a blue snap line will appear, as shown in Figure 1-15. This snap line will allow you to align this new Button control with the existing Button control on the form. The snap lines assist you in aligning controls to the left, right, top, or bottom of each other, depending on where you are trying to position the new control. The light blue line provides you with a consistent margin between the edge of your control and the edge of the form. Set the Name property to btnExit and the Text property to E&xit. Your form should look similar to Figure 1-16.
Figure 1-15
16

Welcome to Visual Basic 2005
Figure 1-16
Now before you finish your sample application, let us briefly discuss some coding practices that you should be using.
Modified Hungarian Notation
You may have noticed that the names given to the controls look a little funny. Each name is prefixed with a shorthand identifier describing the type of control it is. This makes it much easier to understand what type of control you are working with when you are looking through the code. For example, say you had a control called simply Name, without a prefix of lbl or txt. You would not know whether you were working with a text box that accepted a name or with a label that displayed a name. Imagine if, in the previous Try It Out, you had named your label Name1 and your text box Name2 — you would very quickly become confused. What if you left your application for a month or two and then came back to it to make some changes?
When working with other developers, it is very important to keep the coding style consistent. One of the most commonly used styles for control names within application development in many languages was brought forth by Dr. Charles Simonyi, who worked for the Xerox Palo Alto Research Center (XPARC) before joining Microsoft. He came up with short prefix mnemonics that allowed programmers to easily identify the type of information a variable might contain. Since Simonyi is from Hungary, and the prefixes make the names look a little foreign, the name “Hungarian Notation” came into use for this system. Because the original notation was used in C/C++ development, the notation for Visual Basic 2005 is termed Modified. The following table shows some of the commonly used prefixes that you shall be using in this book.
Hungarian Notation can be a real time-saver when you are looking at code someone else wrote or at code that you wrote months earlier. However, by far the most important thing is to be consistent in your naming. When you start coding, pick a convention for your naming. It is recommended that you use the de facto standard Modified-Hungarian for Visual Basic 2005, but it is not required. Once you pick a convention, stick to it. When modifying others’ code, use theirs. A standard naming convention followed throughout a project will save countless hours when the application is maintained. Now let’s get back to the application. It’s now time to write some actual code.
17

Chapter 1
Control |
Prefix |
|
|
Button |
btn |
ComboBox |
cbo |
CheckBox |
chk |
Label |
lbl |
ListBox |
lst |
MainMenu |
mnu |
RadioButton |
rdb |
PictureBox |
pic |
TextBox |
txt |
The Code Editor
Now that you have the HelloUser form defined, you have to add some code to make it actually do something interesting. You have already seen how easy it is to add controls to a form. Providing the functionality behind those on-screen elements is no more difficult. To add the code for a control, you just double-click the control in question. This will open the code editor in the main window, shown in Figure 1-17.
Figure 1-17
Notice that an additional tab has been created in the main window. Now you have the Design tab and the Code tab. You draw the controls on your form in the Design tab, and you write code for your form in the Code tab. One thing to note here is that Visual Studio 2005 has created a separate file for the code. The visual definition and the code behind exist in separate files: HelloUser.Designer.vb and Hello User.vb. This is actually the reason why building applications with Visual Basic 2005 is so slick and easy. Using the Design view you can visually lay out your application, and then, using Code view, you add just the bits of code to implement your desired functionality.
You will also notice that there are two combo boxes at the top of the window. These provide shortcuts to the various parts of your code. Hover your mouse on the combo box on the left, and you’ll see a ToolTip appear, telling you that it is the Class Name combo box. If you expand this combo box, you will see a list
18

Welcome to Visual Basic 2005
of all the objects within your application. If you hover your mouse on the combo box on the right, you’ll see a ToolTip telling you that this is the Method Name combo box. If you expand this combo box, you will see a list of all defined functions and subroutines for the object selected in the Class Name combo box. If this particular form had a lot of code behind it, these combo boxes would make navigating to the desired area very quick — jumping to the selected area in your code. However, since all of the code fits in the window, there are not a lot of places to get lost.
Try It Out |
Adding Code to the HelloUser Project |
1.To begin adding the necessary code, click the Design tab to show the form again. Then doubleclick the OK button. The code window will open with the following code. This is the shell of the button’s Click event and is the place where you enter the code that you want to run when you click the button. This code is known as an event handler and sometimes is also referred to as an event procedure:
Private Sub btnOK_Click(ByVal sender As System.Object, _
ByVal e As System.EventArgs) Handles btnOK.Click
End Sub
As a result of the typographic constraints in publishing, it is not possible to put the Sub declaration on one line. Visual Basic 2005 allows you to break up lines of code by using the underscore character (_) to signify a line continuation. The space before the underscore is required. Any whitespace preceding the code on the following line is ignored.
Sub is an example of a keyword. In programming terms, a keyword is a special word that is used to tell Visual Basic 2005 to do something special. In this case, it tells Visual Basic 2005 that this is a subroutine, a procedure that does not return a value. Anything that you type between the lines Private Sub and End Sub will make up the event procedure for the OK button.
2.Now add the highlighted code into the procedure:
Private Sub btnOK_Click(ByVal sender As System.Object, _
ByVal e As System.EventArgs) Handles btnOK.Click
‘Display a message box greeting the user MessageBox.Show(“Hello,” & txtName.Text & _
“! Welcome to Visual Basic 2005.”, _ “Hello User Message”)
End Sub
Throughout this book, you will be presented with code that you should enter into your program if you are following along. Usually, we will make it pretty obvious where you put the code, but as we go, we will explain anything that looks out of the ordinary. The code with the gray background is code that you should enter.
3.After you have added the preceding code, go back to the Design tab, and double-click the Exit button. Add the highlighted code to the btnExit_Click event procedure.
Private Sub btnExit_Click(ByVal sender As System.Object, _
ByVal e As System.EventArgs) Handles btnExit.Click
‘End the program and close the form
Me.Close() |
|
End Sub |
19 |
|
Chapter 1
You may be wondering what Me is. Me is a keyword that refers to the form. Just like the pronoun me, it is just shorthand for referring to one’s self.
4.Now that the code is finished, the moment of truth has arrived and you can see your creation. First though, save your work by using File Save HelloUser.vb from the menu or by clicking the Save button on the toolbar.
5.Now click the Start button on the toolbar. You will notice a lot of activity in the Output window at the bottom of your screen. Provided you have not made any mistakes in entering the code, this information just lets you know which files are being loaded to run your application.
It is at this point that Visual Studio 2005 will compile the code. Compiling is the activity of taking the Visual Basic 2005 source code that you have written and translating it into a form that the computer understands. After the compilation is complete, Visual Studio 2005 runs (also known as executes) the program, and you’ll be able to see the results.
If Visual Basic 2005 encounters any errors, they will be displayed as tasks in the Task List window. Double-clicking a task transports you to the offending line of code. We will learn more about how to debug the errors in our code in Chapter 9.
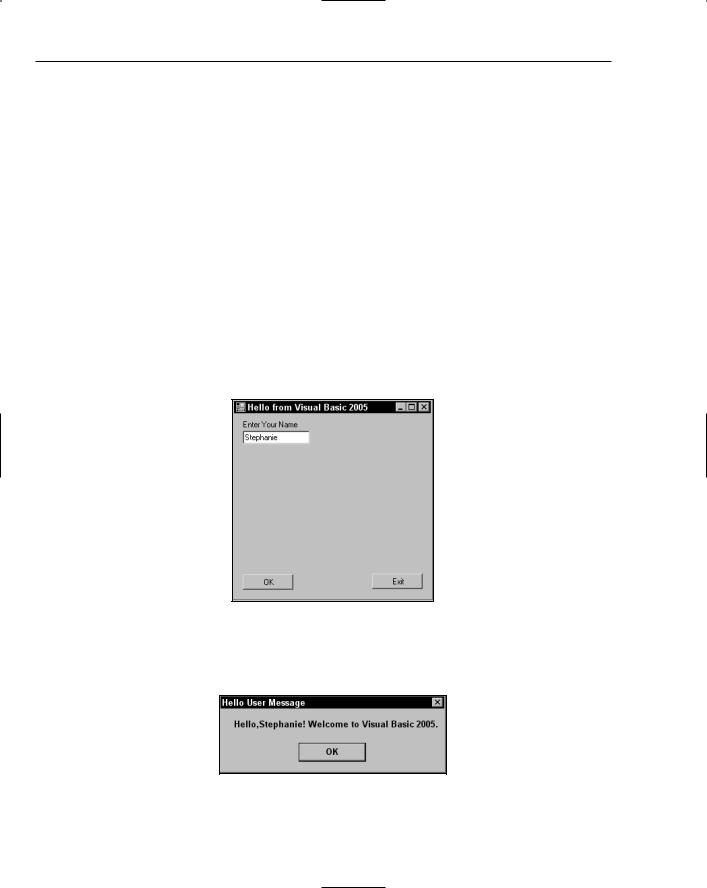
6.When the application loads, you see the main form. Enter a name and click OK (or press the Alt+O key combination) (see Figure 1-18).
Figure 1-18
7.A window known as a message box appears, welcoming the person whose name was entered in the text box on the form — in this case Stephanie (see Figure 1-19).
Figure 1-19
20

Welcome to Visual Basic 2005
8.After you close the message box by clicking the OK button, click the Exit button on your form. The application closes and you will be returned to the Visual Basic 2005 IDE.
How It Works
The code that you added to the Click event for the OK button will take the name that was entered in the text box and use it as part of the message that was displayed in Figure 1-19.
The first line of text entered in this procedure is actually a comment, text that is meant to be read by the human programmer who is writing or maintaining the code, not by the computer. Comments in Visual Basic 2005 begin with a single quote (‘), and everything following on that line is considered a comment and ignored by the compiler. Comments will be discussed in detail in Chapter 3.
The MessageBox.Show method displays a message box that accepts various parameters. As used in your code, you have passed the string text to be displayed in the message box. This is accomplished through the concatenation of string constants defined by text enclosed in quotes. Concatenation of strings into one long string is performed through the use of the ampersand (&) character.
The code that follows concatenates a string constant of “Hello,” followed by the value contained in the Text property of the txtName text box control followed by a string constant of “! Welcome to Visual Basic 2005.” The second parameter being passed to the MessageBox.Show method is the caption to be used in the title bar of the Message Box dialog box.
Finally, the underscore (_) character used at the end of the lines in the following code enables you to split your code onto separate lines. This tells the compiler that the rest of the code for the parameter is continued on the next line. This is really useful when building long strings, because it allows you to view the entire code fragment in the Code Editor without having to scroll the Code Editor window to the right to view the entire line of code.
Private Sub btnOK_Click(ByVal sender As System.Object, _
ByVal e As System.EventArgs) Handles btnOK.Click
‘Display a message box greeting the user MessageBox.Show(“Hello,” & txtName.Text & _
“! Welcome to Visual Basic 2005.”, _ “Hello User Message”)
End Sub
The next procedure that you added code for was the Exit button’s Click event. Here you simply enter the code: Me.Close(). As explained earlier, the Me keyword refers to the form itself. The Close method of the form closes the form and releases all resources associated with it, thus ending the program.
Private Sub btnExit_Click(ByVal sender As System.Object, _
ByVal e As System.EventArgs) Handles btnExit.Click
‘End the program and close the form Me.Close()
End Sub
21

Chapter 1
Using the Help System
The Help system included in Visual Basic 2005 is an improvement over Help systems in previous versions. As you begin to learn Visual Basic 2005, you will probably become very familiar with the Help system. However, it is worthwhile to give you an overview, just to help speed your searches for information.
The Help menu contains the menu items shown in Figure 1-20:
Figure 1-20
As you can see, this menu contains a few more entries than the typical Windows application. The main reason for this is the vastness of the documentation. Few people could keep it all in their heads — but luckily, that is not a problem, because you can always quickly and easily refer to the Help system. Think of it as a safety net for your brain.
One really fantastic feature is Dynamic Help. When you select the Dynamic Help menu item from the Help menu, the Dynamic Help window is displayed with a list of relevant topics for whatever you may be working on. The Dynamic Help window can be displayed by clicking Help Dynamic Help on the menu bar. The Dynamic Help window is then displayed as a tab behind the Properties window.
Let us say, for example, that you are working with a text box (perhaps the text box in the HelloUser application) and want to find out some information; you just select the text box on our form or in the code window and you can see all the help topics that pertain to text boxes, as shown in Figure 1-21
The other help commands in the Help menu (Search, Contents, and Index), function just as they would in any other Windows application. The How Do I menu item displays the Visual Studio Help collection with a list of common tasks that are categorized. This makes finding help on common tasks fast and efficient.
22

Welcome to Visual Basic 2005
Figure 1-21
Summar y
Hopefully, you are beginning to see that developing basic applications with Visual Basic 2005 is not that difficult. You have taken a look at the IDE and saw how it can help you put together software very quickly. The Toolbox enables you to add controls to your form and design a user interface very quickly and easily. The Properties window makes configuring those controls a snap, while the Solution Explorer gives you a bird’s eye view of the files that make up your project. You even wrote a little code.
In the coming chapters, you will go into even more detail and get comfortable writing code. Before you go too far into Visual Basic 2005 itself, the next chapter will give you an introduction to the Microsoft
.NET Framework. This Framework is what gives all of the .NET languages their ease of use, ease of interoperability, and simplicity in learning.
To summarize, you should now be familiar with:
The Integrated Development Environment (IDE)
Adding controls to your form in the Designer
Setting the properties of your controls
Adding code to your form in the code window
Exercise
Create a Windows Application with a Textbox and Button control that will display whatever is typed in the text box when the user clicks on the button.
The answers for this exercise and those at the end of all the other chapters can be found in Appendix D.
23


2
The Microsoft .NET
Framework
The .NET Framework provides an unprecedented platform for building Windows, Web, and mobile applications with one or more languages. It is a definitive guide, encompassing and encapsulating where we have come from as a development community and, of course, where we are going.
Today, .NET has been a real success in many respects. Within the .NET Framework, new languages (C# and J#) have been born, and the well-established Visual Basic language has been reborn. The
.NET Framework even supports legacy languages such as C++.
The .NET Framework provides the base for all development with Visual Studio 2005. It provides base classes, available to all Visual Studio 2005 languages. for such functions as accessing databases, parsing XML, displaying and processing Windows and Web forms, and providing security for your applications. All languages in Visual Studio 2005 share and use the same base classes, making your choice of a programming language in Visual Studio 2005 a matter of personal preference and syntax style.
In this chapter, you will examine the following topics:
What the .NET Framework is
The .NET vision
Why Microsoft dared to spend $2 billion on a single development project
Microsoft’s Reliance on Windows
In terms of the great corporations of the world, Microsoft is still a new kid on the block. It is a fabulously rich and successful one. Nonetheless, the company has grown from nothing to a corporate superpower in a very short time.