

105
 Changing Colors
Available Shooting Modes |
|
|
p. 220 |
|
|
|
|
You can shoot images with the original colors transformed. This can be performed on movies as well as still images, allowing you to enjoy photographing with image or movie effects. However, depending on the shooting conditions, the images may appear rough or you may not get the expected color. Before you try to photograph important subjects, we highly recommend that you shoot trial images and check the results. If you set [Save Original] (p. 109) to [On] when shooting a still image, you can record the original image as well the transformed one.
Use this option to have only the color specified in Color Accent the LCD monitor remain and to transform all
others to black and white.
Use this option to transform a color specified in
Color Swap the LCD monitor into another. The specified color can only be swapped into one other color,
and multiple colors cannot be chosen.
The ISO speed will rise depending on the shooting conditions, which may increase the noise in the image.
Shooting in the Color Accent Mode
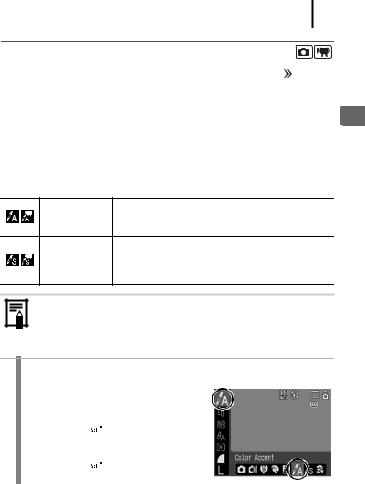
1 Select the Color Accent mode.
When shooting still images:
1.Set the mode switch to  .
.
2.Press the  button.
3.Use the  or
or  button to select
  .
.
4. Press the  button.
Methods Shooting Various

106
When shooting movies:
1.Set the mode switch to 
 .
.
2.Press the  button.
3.Use the  or
or  button to select
  .
.
4. Press the  button.
|
|
|
2 Press the |
|
button. |
|
||
|
||
• The camera will switch to Color Input |
||
mode and the display will alternate |
||
between the original image and the |
||
color accent image (using the |
||
previously set color). |
||
3 Aim the camera so that the color you wish to retain appears at the center of the LCD monitor and press the  button.
•Only one color can be specified.
•You can use the  or
or  button to specify the range of colors that are retained.
–5: Only takes the color that you want to retain
+5: Also takes colors close to the one that you want to retain
4 Press the 

 button to complete the setting, then shoot.
z The default color accent is green.
z You may not obtain the expected results if you use the flash. z The specified color accent and color range is retained even if
the camera’s power is turned off.

Shooting in the Color Swap Mode
|
|
|
|
|
|
|
|
|
|
|
|
|
|
|
|
|
|
|
|
|
|
|
|
|
|
|
|
|
|
|
|
|
|
|
|
|
|
|
|
|
|
|
|
|
|
|
|
|
|
|
|
|
|
|
|
|
|
|
|
|
|
|
|
|
|
|
|
|
|
|
|
|
|
|
|
|
|
|
|
|
|
|
|
|
|
|
|
|
|
|
|
|
|
|
|
|
|
|
|
|
|
|
|
|
|
|
|
|
|
|
|
|
|
|
|
|
|
|
|
|
|
|
|
|
|
|
|
|
|
|
|
|
|
|
|
|
|
|
|
|
|
|
|
|
|
|
|
|
|
|
|
|
|
|
|
|
|
|
|
|
|
|
|
|
|
|
|
|
|
|
|
|
|
|
|
|
|
|
|
|
|
|
|
|
|
|
|
|
|
|
|
|
|
|
Original Color |
|
|
|
|
Desired Color |
|
|
|
|
|||||
(Before Swapping) |
|
|
|
|
(After Swapping) |
|
|
|
|
|||||
1 Select the Color Swap mode.
When shooting still images:
1.Set the mode switch to  .
.
2.Press the  button.
3.Use the  or
or  button to select
  .
.
4.Press the  button.
When shooting movies:
1.Set the mode switch to 

 .
.
2.Press the  button.
3.Use the  or
or  button to select
  .
.
4.Press the  button.
107
Methods Shooting Various

108
|
|
|
2 Press the |
|
button. |
|
||
|
||
• The camera will switch to Color Input |
||
mode and the display will alternate |
||
between the original image and the |
||
color swap image (using the |
||
previously set color). |
||
3 Aim the camera so that the original color appears at the center of the LCD monitor and press the  button.
•Only one color can be specified.
•You can use the  or
or  button to specify the range of colors that are swapped.
–5: Only takes the color that you want to swap
+5: Also takes colors close to the one that you want to swap
4 Aim the camera so that the desired color appears at the center of the LCD monitor and press the  button.
• Only one color can be specified.
5 Press the 

 button to complete the setting, then shoot.
z The default setting for Color Swap mode changes green into white.
z You may not obtain the expected results if you use the flash.
zThe colors specified in the Color Swap mode and the color range are retained even if the camera’s power is turned off.
109
Changing the Save Method for the Original Image
When shooting still images in the Color Accent or Color Swap mode, you can set whether or not to save the original image as well as the transformed one.
1 Select [Save Original].
1.Press the  button.
2.In the  menu, use the
  or
or  button to select [Save Original].
2 Accept the setting.
1.Use the  or
or  button to select [On] or [Off].
2.Press the  button.
When [Save Original] is Set to [On]
-Only the transformed image displays in the LCD monitor while shooting in the Color Accent or Color Swap mode.
-The transformed image is reviewed in the LCD monitor after shooting in the Color Accent or Color Swap mode. If you erase the image at this point, the original image is erased along with the transformed image. Exercise adequate caution before deleting a file.
-The images are numbered consecutively. The original images are assigned the lower number and the transformed color accent or color swap images the next number.
-Since two images are recorded with each shot, the number of shots remaining is approximately half the number displayed when this function is set to [Off].
Methods Shooting Various