

ASP.NET 2.0 Everyday Apps For Dummies (2006)
.pdfPart V
Building
Community
Applications
In this part . . .
Among the most popular types of Web applications today are those used to build online communities.
This part presents three such applications. Chapter 9 presents a basic content-management system that makes it easy to create a Web site whose content changes on a regular basis. Then Chapter 10 presents a discussionforum application, which gives users a way to post messages and reply to messages from other users. And finally, Chapter 11 presents a simple blog application that lets users create their own online journal (weblog) pages.

Chapter 9
Building a Content
Management System
In This Chapter
Designing the Content Management System
Creating the database for the Content Management System
Building the Content Management System’s pages
AContent Management System is a Web site that lets users manage the content displayed by the site without requiring a detailed knowledge of
HTML. In short, the Content Management System provides an administrative interface that lets the user add, delete, or edit content items that are displayed on the Web site. Of course, you can limit access to the administrative pages so only those users who are authorized to administer the Web site can add, edit, or delete content items.
In this chapter, I present a simple Content Management System written in ASP.NET. The content displayed by this system is stored in a SQL database, and the system provides an easy way for authorized users to add, edit, and delete content.
Making Some Basic Decisions
Before we get into the specifics of how the Content Management System in this chapter works, consider some basic decisions that you should make early on when you create a Content Management System:
Will the content itself be stored in a database or as separate HTML files? There are two basic options for how you can store the actual content that’s managed by the Content Management System. One approach is to build a database that contains the text content that’s managed by the system. Then, the Content Management System’s main job is extracting information from this database to display. Building this type of
290 Part V: Building Community Applications
Content Management System is the easiest, but it also limits the type of content that can be managed by the system to text with simple formatting.
The alternative is to let users create the actual HTML files that provide the content for the system. Then, the Content Management System’s job is to manage these files. You’ll usually use a database to track the files, and you’ll need to provide a way for users to upload files to the server.
The Content Management System presented in this chapter stores all of the content data in a database. To keep things simple, the content is limited to simple text.
How will the content be organized? The Content Management System in this chapter provides two levels of organization for its content items: by department and by type. Both the departments and the types are stored in SQL tables, so users can easily add or remove departments or types. Depending on your organization’s needs, you may need to provide a different way to organize or categorize content items.
Will users be required to log in? You’ll almost certainly require that users log in before you let them modify the Web site’s content. That way, you can grant administration privileges to just certain users. However, you may also want to allow all users to log in. Then, you can restrict access to some or all of the content based on the user’s identity.
In addition, you’ll need to decide how you’ll handle the registration of new users. For tight control over the user list, you’ll want to allow only certain users to create new user accounts. For a more open Web site, you can let users register themselves.
For more information about adding login capabilities to a Web site, see Chapter 4. The Content Management System presented in this chapter requires the user to log in. To do that, it borrows the login.aspx page from the User Authentication application that was presented in Chapter 4.
The application shown in this chapter doesn’t provide for user registration, password changes, or password recovery — but those features should be easy enough to add if you use the application presented in Chapter 4 as a guide.
The Content Management System uses the ASP.NET roles feature to assign each registered user to one or more departments. Any user can view content from any department, but only users assigned to a department can add, update, or delete content for the department.
How will you handle expired content? For simplicity, the application in this chapter displays all of the content in the database. Users can add, modify, or delete content items any time they wish, but the system doesn’t provide an automatic way to limit how long an item should be displayed or to automatically remove items that are expired. (You shouldn’t have much trouble adding such a feature on your own, though.)
Chapter 9: Building a Content Management System 291
The Content Management
System’s User Interface
The Content Management System is designed to create an intranet Web site for a company so that each department within the company can provide its own content items. For example, the Human Resources department might want to provide information about company policies, while the Information Technology department may be interested in providing information about the computer network. The department names are stored in a database table so the company can create any department it wishes for the Content Management System.
Besides organizing its content by department, the Content Management System also categorizes content by type. As with departments, the Content Management System stores the type names in a database table. That way you can create as many different content types as you want.
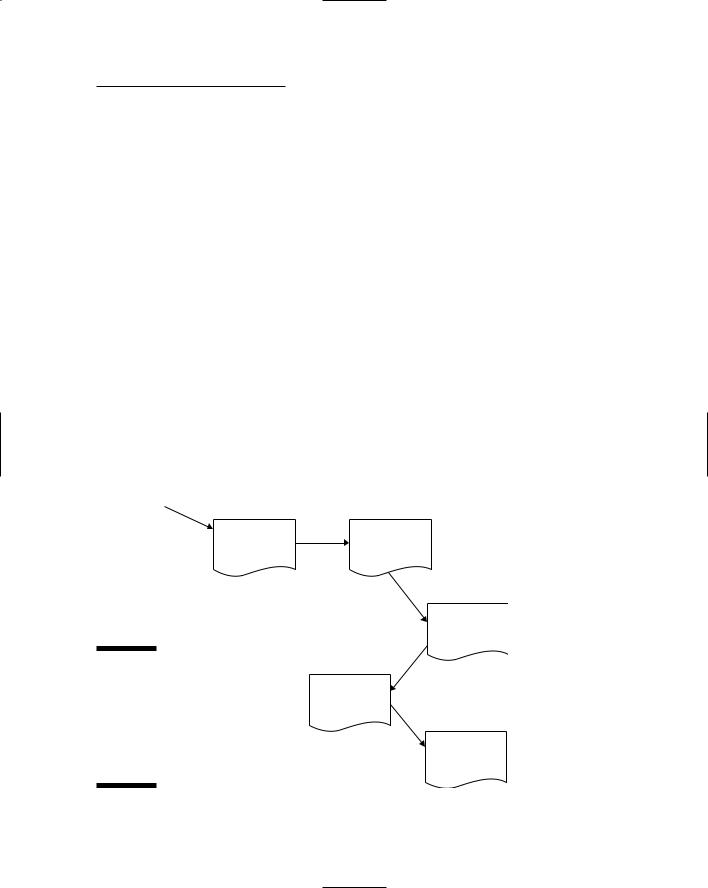
One of the interesting things about the Content Management System is that it lets you create the illusion of a Web site with many different pages, while in reality getting by with only five distinct pages. Figure 9-1 shows how these pages work together to create the Content Management System, and the following sections describe each page in greater detail.
Login.aspx |
Default.aspx |
Login page |
Home page |
|
DeptHome.aspx |
|
|
Department |
|
|
Home page |
|
Figure 9-1: |
List.aspx |
|
The Content |
Content List |
|
Manage- |
||
page |
||
ment |
||
Detail.aspx |
||
System |
||
requires |
Content Detail |
|
these five |
page |
|
pages. |
|
292 Part V: Building Community Applications
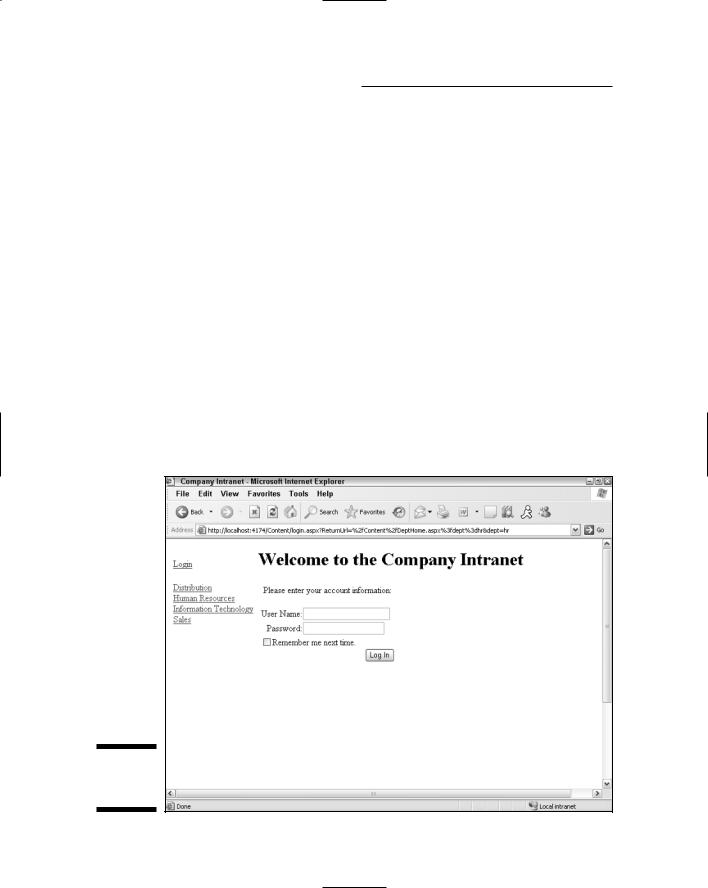
The Login page
The Login page (shown in Figure 9-2) appears whenever the user tries to access any page of the Content Management System without first logging in. As you can see, this page simply prompts the user to enter his or her user name and password. A checkbox lets the user store the name and password in a cookie — which then allows the user to automatically log in whenever he or she returns to the site.
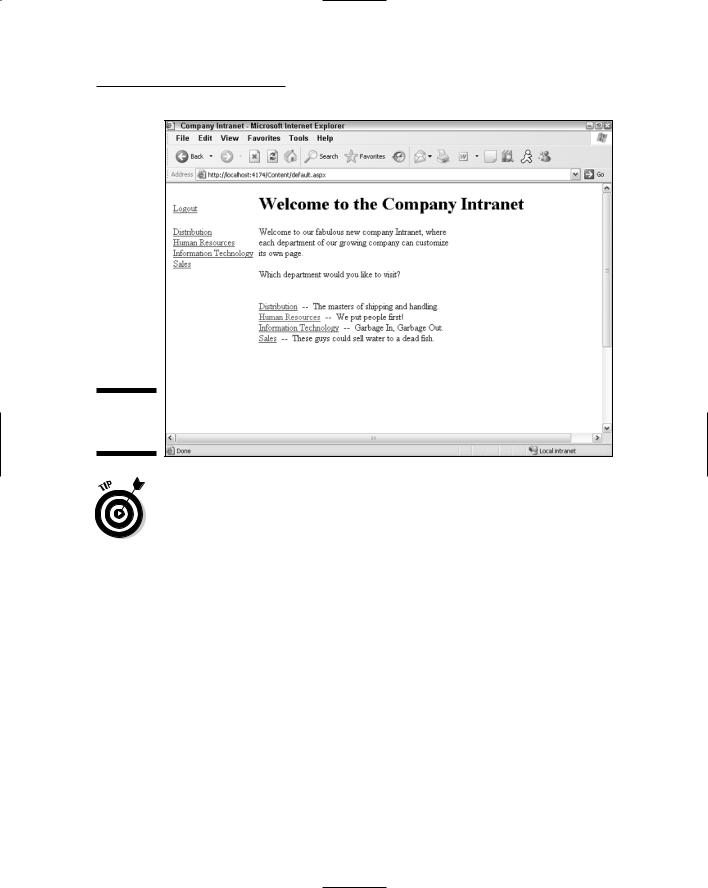
The Home page
The Home page is shown in Figure 9-3. Note that the user must get through the Login page to reach this or any other page in the Content Management System. The Home page displays a brief text introduction, followed by a list of links to the various departments of the company.
Notice that the departments also appear in a list at the left side of the page. This sidebar list is actually a part of the Master Page used throughout the application. As a result, the user can quickly jump to the Home page for any department by clicking the department in the sidebar list.
Figure 9-2:
The Login
page.
Chapter 9: Building a Content Management System 293
Figure 9-3:
The Home
page.
An enhancement you may want to make to the Content Management System is to store the text displayed on the Home page in a database table. (I’ll leave you to your own devices to figure out how to do that. It shouldn’t be too hard.)
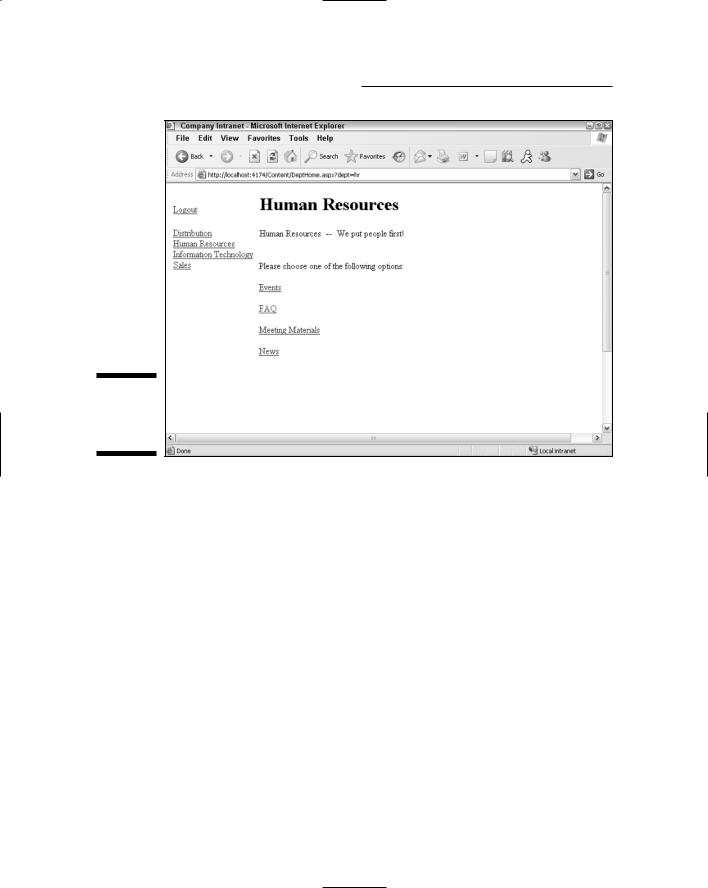
The Department Home page
When the user clicks one of the department names in the Home page (or in the sidebar menu that appears at the left side of each page), the Home page for that department appears, as shown in Figure 9-4. As you can see, this page displays the name of the department, followed by a catchy description that’s retrieved from the database. Then it displays links for each type of content managed by the system. (For example, the user can click the FAQ link to display a list of all the FAQ items for the selected department.)
Note that there is only one Department Home page for the entire Web site; each department doesn’t have its own home page. Instead, the content for the selected department is retrieved from the database and displayed on the Department Home page.
294 Part V: Building Community Applications
Figure 9-4:
The
Department
Home page.
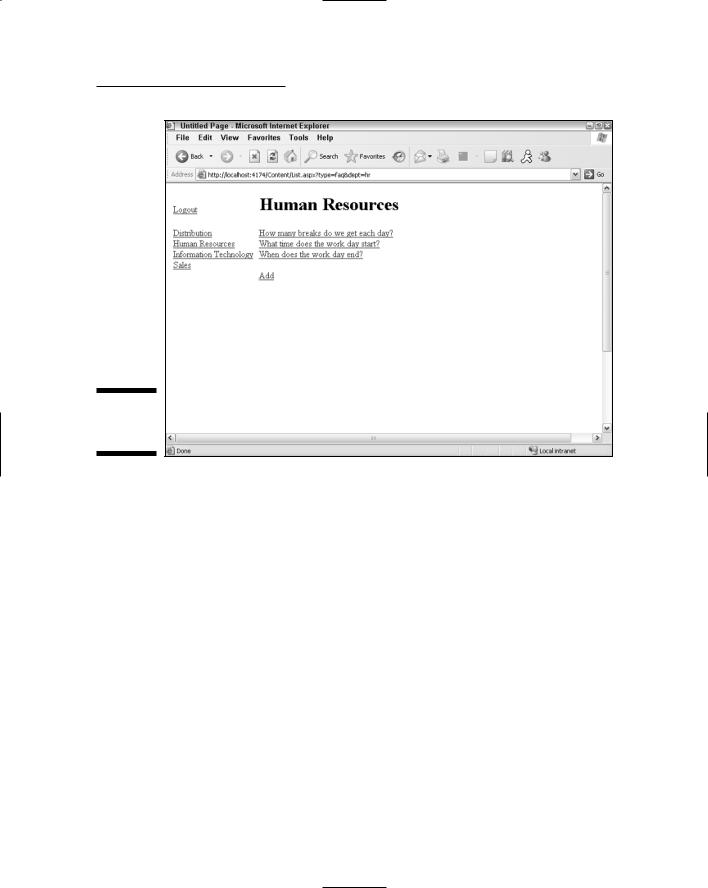
The Content List page
The Content List page is shown in Figure 9-5. This page lists all content items for the department and type selected by the user. For example, if the user clicks Human Resources on the Home page, and then clicks FAQ on the Department Home Page, what shows up on-screen is a list of all FAQ items for the Human Resources department.
Notice the Add link beneath the list of content items. This link allows the user to add a new content item to the database. The Add link appears only if the user is assigned to the administrative role for the department. The Content List page includes code that checks whether the user is a member of the department’s administrative role. If not, the Add link is hidden.
Chapter 9: Building a Content Management System 295
Figure 9-5:
The Content
List page.
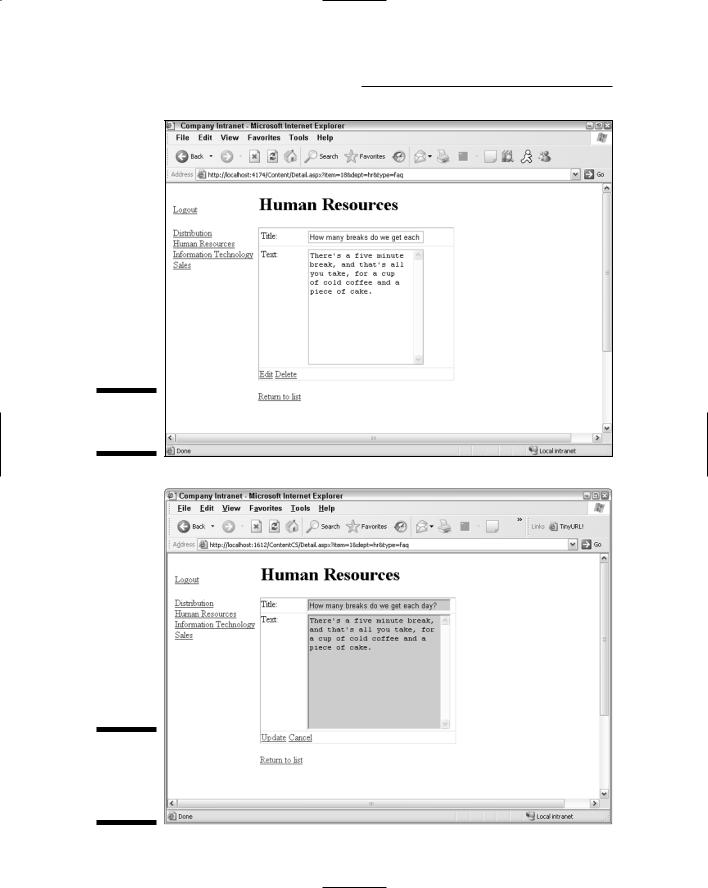
The Content Detail page
Figure 9-6 shows the Content Detail page, which is displayed when the user selects one of the content items from the Content List page. As you can see, each content item has just two elements: a title and text. The Content Detail page simply displays the title and text for the item selected by the user.
Beneath the text are Edit and Delete links that let the user edit or delete the content item. Like the Add link on the Content List page, these links are displayed only if the user has been assigned to the administrative role for the department. The code-behind file for this page includes code that checks the user’s role(s) — and hides these links if the user is in a role that shouldn’t see them.
If the user clicks the Delete link, the content item is summarily deleted and the Content List page is redisplayed. But if the user clicks the Edit link, the page goes into Edit mode, as shown in Figure 9-7. Then the user can change the title or text to match the content item.
296 Part V: Building Community Applications
Figure 9-6:
The Content
Detail page.
Figure 9-7:
The Content Detail page in Edit mode.