


66 |
CHAPTER 2. A TOY APP |
microposts
ID integer
CONTENT text
USER_ID integer
Figure 2.3: The data model for microposts.
type text).2 There’s an additional complication, though: we want to associate each micropost with a particular user. We’ll accomplish this by recording the user_id of the owner of the post. The results are shown in Figure 2.3.
We’ll see in Section 2.3.3 (and more fully in Chapter 11) how this user_id attribute allows us to succinctly express the notion that a user potentially has many associated microposts.
2.2 The Users resource
In this section, we’ll implement the users data model in Section 2.1.1, along with a web interface to that model. The combination will constitute a Users resource, which will allow us to think of users as objects that can be created, read, updated, and deleted through the web via the HTTP protocol. As promised in the introduction, our Users resource will be created by a scaffold generator program, which comes standard with each Rails project. I urge you not to look too closely at the generated code; at this stage, it will only serve to confuse you.
Rails scaffolding is generated by passing the scaffold command to the rails generate script. The argument of the scaffold command is the singular version of the resource name (in this case, User), together with op-
2Because microposts are short by design, the string type is actually big enough to contain them, but using text better expresses our intent, while also giving us greater flexibility should we ever wish to relax the length constraint.

2.2. THE USERS RESOURCE |
67 |
tional parameters for the data model’s attributes:3
$ rails generate scaffold User name:string email:string
invoke |
active_record |
create |
db/migrate/20140821011110_create_users.rb |
create |
app/models/user.rb |
invoke |
test_unit |
create |
test/models/user_test.rb |
create |
test/fixtures/users.yml |
invoke |
resource_route |
route |
resources :users |
invoke |
scaffold_controller |
create |
app/controllers/users_controller.rb |
invoke |
erb |
create |
app/views/users |
create |
app/views/users/index.html.erb |
create |
app/views/users/edit.html.erb |
create |
app/views/users/show.html.erb |
create |
app/views/users/new.html.erb |
create |
app/views/users/_form.html.erb |
invoke |
test_unit |
create |
test/controllers/users_controller_test.rb |
invoke |
helper |
create |
app/helpers/users_helper.rb |
invoke |
test_unit |
create |
test/helpers/users_helper_test.rb |
invoke |
jbuilder |
create |
app/views/users/index.json.jbuilder |
create |
app/views/users/show.json.jbuilder |
invoke |
assets |
invoke |
coffee |
create |
app/assets/javascripts/users.js.coffee |
invoke |
scss |
create |
app/assets/stylesheets/users.css.scss |
invoke |
scss |
create |
app/assets/stylesheets/scaffolds.css.scss |
By including name:string and email:string, we have arranged for the User model to have the form shown in Figure 2.2. (Note that there is no need to include a parameter for id; it is created automatically by Rails for use as the primary key in the database.)
To proceed with the toy application, we first need to migrate the database using Rake (Box 2.1):
3The name of the scaffold follows the convention of models, which are singular, rather than resources and controllers, which are plural. Thus, we have User instead of Users.
68 |
CHAPTER 2. A TOY APP |
$ bundle exec rake db:migrate
==CreateUsers: migrating ====================================================
-- create_table(:users) -> 0.0017s
==CreateUsers: migrated (0.0018s) ===========================================
This simply updates the database with our new users data model. (We’ll learn more about database migrations starting in Section 6.1.1.) Note that, in order to ensure that the command uses the version of Rake corresponding to our Gemfile, we need to run rake using bundle exec. On many systems, including the cloud IDE, you can omit bundle exec, but it is necessary on some systems, so I’ll include it for completeness.
With that, we can run the local web server in a separate tab (Figure 1.7) as follows:4
$ rails server -b $IP -p $PORT # Use only `rails server` if running locally
Now the toy application should be available on the local server as described in Section 1.3.2. (If you’re using the cloud IDE, be sure to open the resulting development server in a new browser tab, not inside the IDE itself.)
Box 2.1. Rake
In the Unix tradition, the make utility has played an important role in building executable programs from source code; many a computer hacker has committed to muscle memory the line
$ ./configure && make && sudo make install
commonly used to compile code on Unix systems (including Linux and Mac OS X).
4The rails script is designed so that you don’t need to use bundle exec.
2.2. THE USERS RESOURCE |
69 |
Rake is Ruby make, a make-like language written in Ruby. Rails uses Rake extensively, especially for the innumerable little administrative tasks necessary when developing database-backed web applications. The
command is probably the most common, but there are many others; you can see a list of database tasks using -T db:
$ bundle exec rake -T db
To see all the Rake tasks available, run
$ bundle exec rake -T
The list is likely to be overwhelming, but don’t worry, you don’t have to know all (or even most) of these commands. By the end of the Rails Tutorial, you’ll know all the most important ones.
2.2.1 A user tour
If we visit the root URL at / (read “slash”, as noted in Section 1.3.4), we get the same default Rails page shown in Figure 1.9, but in generating the Users resource scaffolding we have also created a large number of pages for manipulating users. For example, the page for listing all users is at /users, and the page for making a new user is at /users/new. The rest of this section is dedicated to taking a whirlwind tour through these user pages. As we proceed, it may help to refer to Table 2.1, which shows the correspondence between pages and URLs.
We start with the page to show all the users in our application, called index; as you might expect, initially there are no users at all (Figure 2.4).
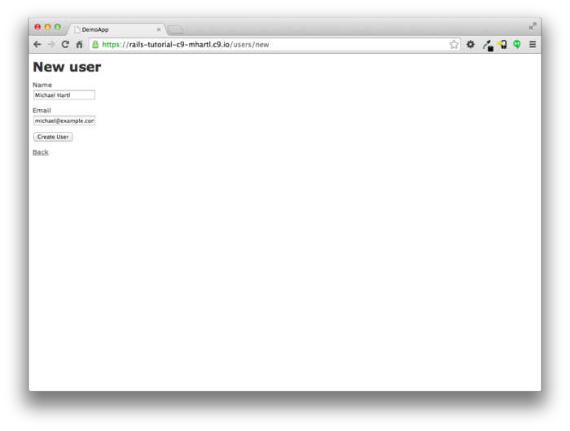
To make a new user, we visit the new page, as shown in Figure 2.5. (Since the http://0.0.0.0:3000 or cloud IDE part of the address is implicit whenever we are developing locally, I’ll omit it from now on.) In Chapter 7, this will become the user signup page.

70 |
CHAPTER 2. A TOY APP |
URL |
Action |
Purpose |
|
|
|
/users |
index |
page to list all users |
/users/1 |
show |
page to show user with id 1 |
/users/new |
new |
page to make a new user |
/users/1/edit |
edit |
page to edit user with id 1 |
Table 2.1: The correspondence between pages and URLs for the Users resource.
Figure 2.4: The initial index page for the Users resource (/users).
2.2. THE USERS RESOURCE |
71 |
Figure 2.5: The new user page (/users/new).
72 |
CHAPTER 2. A TOY APP |
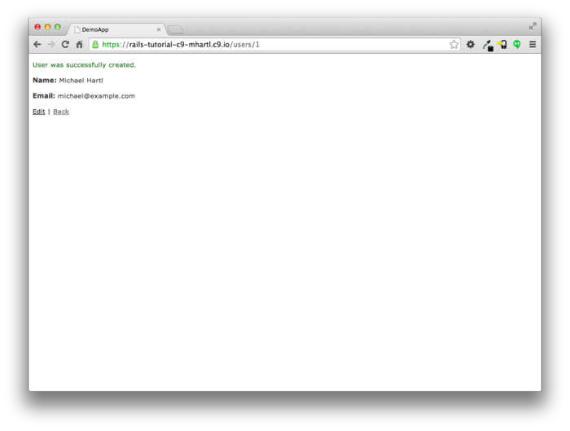
Figure 2.6: The page to show a user (/users/1).
We can create a user by entering name and email values in the text fields and then clicking the Create User button. The result is the user show page, as seen in Figure 2.6. (The green welcome message is accomplished using the flash, which we’ll learn about in Section 7.4.2.) Note that the URL is /users/1; as you might suspect, the number 1 is simply the user’s id attribute from Figure 2.2. In Section 7.1, this page will become the user’s profile.
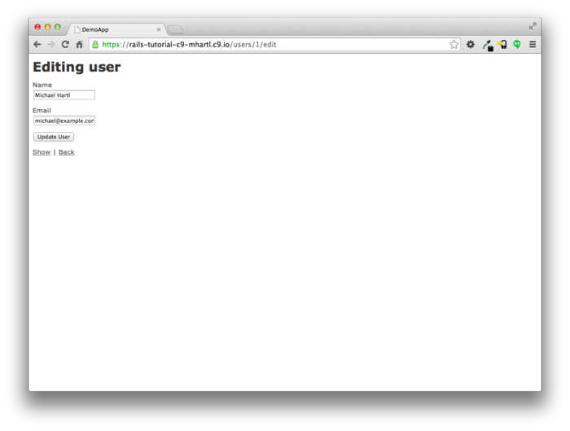
To change a user’s information, we visit the edit page (Figure 2.7). By modifying the user information and clicking the Update User button, we arrange to change the information for the user in the toy application (Figure 2.8). (As we’ll see in detail starting in Chapter 6, this user data is stored in a database back-end.) We’ll add user edit/update functionality to the sample application
2.2. THE USERS RESOURCE |
73 |
Figure 2.7: The user edit page (/users/1/edit).
in Section 9.1.
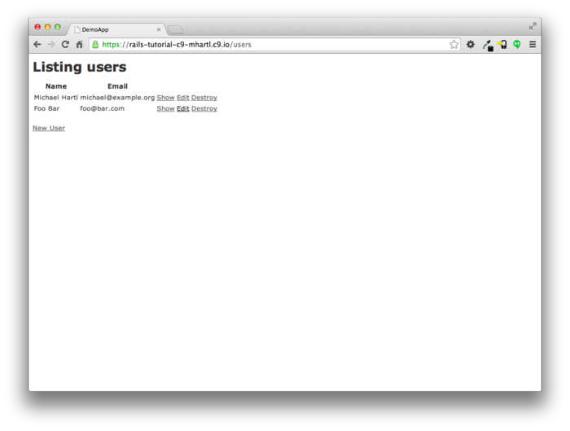
Now we’ll create a second user by revisiting the new page and submitting a second set of user information; the resulting user index is shown in Figure 2.9. Section 7.1 will develop the user index into a more polished page for showing all users.
Having shown how to create, show, and edit users, we come finally to destroying them (Figure 2.10). You should verify that clicking on the link in Figure 2.10 destroys the second user, yielding an index page with only one user. (If it doesn’t work, be sure that JavaScript is enabled in your browser; Rails uses JavaScript to issue the request needed to destroy a user.) Section 9.4 adds user deletion to the sample app, taking care to restrict its use to a special

74 |
CHAPTER 2. A TOY APP |
Figure 2.8: A user with updated information.
2.2. THE USERS RESOURCE |
75 |
Figure 2.9: The user index page (/users) with a second user.