

24 |
CHAPTER 1. FROM ZERO TO DEPLOY |
Listing 1.5: A Gemfile with an explicit version for each Ruby gem.
source 'https://rubygems.org'
gem 'rails', |
'4.2.2' |
gem 'sass-rails', |
'5.0.2' |
gem 'uglifier', |
'2.5.3' |
gem 'coffee-rails', |
'4.1.0' |
gem 'jquery-rails', |
'4.0.3' |
gem 'turbolinks', |
'2.3.0' |
gem 'jbuilder', |
'2.2.3' |
gem 'sdoc', |
'0.4.0', group: :doc |
group |
:development, :test do |
|
gem |
'sqlite3', |
'1.3.9' |
gem |
'byebug', |
'3.4.0' |
gem |
'web-console', '2.0.0.beta3' |
|
gem |
'spring', |
'1.1.3' |
end |
|
|
Once you’ve placed the contents of Listing 1.5 into the application’s Gemfile, install the gems using bundle install:9
$ cd hello_app/
$ bundle install
Fetching source index for https://rubygems.org/
.
.
.
The bundle install command might take a few moments, but when it’s done our application will be ready to run.
1.3.2rails server
Thanks to running rails new in Section 1.3 and bundle install in Section 1.3.1, we already have an application we can run—but how? Happily, Rails comes with a command-line program, or script, that runs a local web server to assist us in developing our application. The exact command depends on the
9As noted in Table 3.1, you can even leave off install, as the bundle command by itself is an alias for bundle install.
1.3. THE FIRST APPLICATION |
25 |
environment you’re using: on a local system, you just run rails server (Listing 1.6), whereas on Cloud9 you need to supply an additional IP binding address and port number to tell the Rails server the address it can use to make the application visible to the outside world (Listing 1.7).10 (Cloud9 uses the special environment variables $IP and $PORT to assign the IP address and port number dynamically. If you want to see the values of these variables, type echo $IP or echo $PORT at the command line.) If your system complains about the lack of a JavaScript runtime, visit the execjs page at GitHub for a list of possibilities. I particularly recommend installing Node.js.
Listing 1.6: Running the Rails server on a local machine.
$ cd ~/workspace/hello_app/ $ rails server
=> Booting WEBrick
=> Rails application starting on http://localhost:3000 => Run `rails server -h` for more startup options
=> Ctrl-C to shutdown server
Listing 1.7: Running the Rails server on the cloud IDE.
$ cd ~/workspace/hello_app/
$ rails server -b $IP -p $PORT => Booting WEBrick
=> Rails application starting on http://0.0.0.0:8080 => Run `rails server -h` for more startup options
=> Ctrl-C to shutdown server
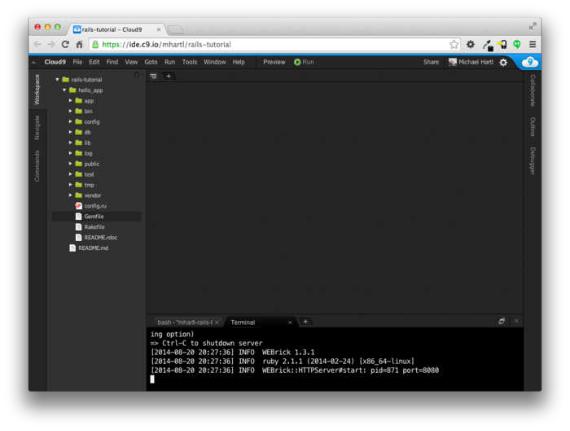
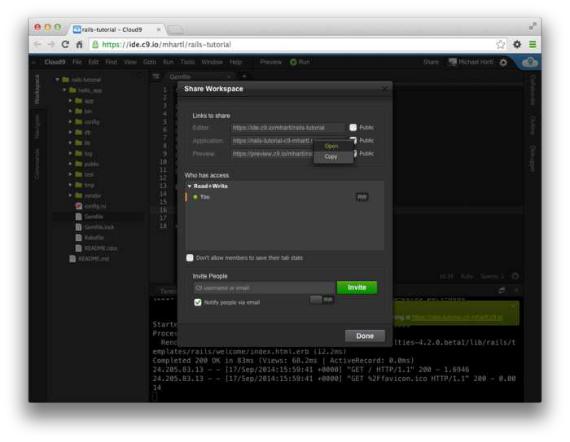
Whichever option you choose, I recommend running the rails server command in a second terminal tab so that you can still issue commands in the first tab, as shown in Figure 1.6 and Figure 1.7. (If you already started a server in your first tab, press Ctrl-C to shut it down.)11 On a local server, point your browser at the address http://localhost:3000/; on the cloud IDE, go to Share and click on the Application address to open it (Figure 1.8). In either case, the result should look something like Figure 1.9.
10Normally, websites run on port 80, but this usually requires special privileges, so it’s conventional to use a less restricted higher-numbered port for the development server.
11Here “C” refers to the character on the keyboard, not the capital letter, so there’s no need to hold down the

26 |
CHAPTER 1. FROM ZERO TO DEPLOY |
Figure 1.6: Opening a new terminal tab.
1.3. THE FIRST APPLICATION |
27 |
Figure 1.7: Running the Rails server in a separate tab.
28 |
CHAPTER 1. FROM ZERO TO DEPLOY |
Figure 1.8: Sharing the local server running on the cloud workspace.
1.3. THE FIRST APPLICATION |
29 |
Figure 1.9: The default Rails page served by rails server.
30 |
CHAPTER 1. FROM ZERO TO DEPLOY |
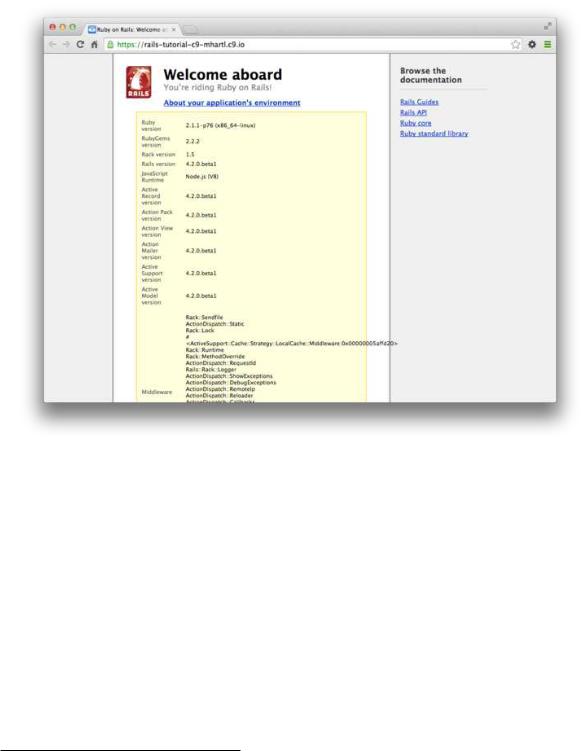
Figure 1.10: The default page with the application’s environment.
To see information about the first application, click on the link “About your application’s environment”. Although exact version numbers may differ, the result should look something like Figure 1.10. Of course, we don’t need the default Rails page in the long run, but it’s nice to see it working for now. We’ll remove the default page (and replace it with a custom home page) in Section 1.3.4.
Shift key to get a capital “C”.