

Visual Web Developer™ 2005 Express Edition For Dummies - Alan Simpson
.pdfIn this part . . .
If you want users to return to your site regularly, you have to give them a sense of belonging to a community.
One way to accomplish that is to give them the option of personalizing their use of your site to their liking. In this part, you get a handle on using the Personalization and Themes features of VWD to give users what they want.
If you plan to offer courses, products, or other things that users might purchase or sign up for, your site will need some custom database tables to store data about your offerings and record transactions. This part unravels the mysteries about how to create these features.

Chapter 9
Using Personalization
In This Chapter
Creating user profiles
Storing information about users as profile properties
Retrieving, changing, and saving profile properties
Using validation controls
Using the Forms Designer
When you configure your Web site to support membership, VWD automatically creates database tables to store information about
user accounts. However, it creates only the bare-minimum number of fields needed, such as User Name, E-mail Address, and Password. If you want to store more information than that about each user, such as name, address, and phone number, you must define profile properties.
The basic idea in VWD is this: Every authenticated user has a profile that contains information about that user. In code, you can use the simple syntax Profile.propertyname to get, or store, information about each user. The keyword Profile (with an uppercase P) always means “whichever user happens to be viewing this page.”
The first step is to decide what properties you want to store for each user — and then configure your site to support those profiles.
Creating a User Profile
A user profile consists of a set of property names, where each property name represents the unit of information you want to store. The names you give your properties are entirely up to you. Just keep the name short, no blank spaces, and make sure it starts with a letter (A–Z). Some common examples include names like FirstName, LastName, Address, City, State, and ZIPCode.

172 Part III: Personalization and Databases
Why strings for phone numbers and ZIP codes?
It may seem that phone numbers and ZIP codes should be numbers rather than strings. After all, aren’t (215) 555-1234 and 00123-1343 numbers? Actually, they’re not numbers. At least, they’re not scalar values that represent some quantity. With scalar values, you can do math (addition, subtraction, multiplication, and division) to come up with some new meaningful result. Try doing math with ZIP codes or phone numbers, and even if you can come up with some sort of result, that result has no real meaning.
Also, numbers must start with a numeric digit (0–9) or a leading minus sign. A number cannot contain parentheses or embedded hyphens. Hence, you couldn’t type a phone number like (215) 555-1234 or a ZIP code like 00123-1343 into a numeric field even if you wanted to. You only want to use the Number data types for true scalar values such as 10, 98.6, –32, 9.99, and so forth.
You can also choose a data type for each field — that is, a description of the type of information being stored, whether it’s text (string), a number, a date, whatever.
If you don’t know a data type from a turtledove, suffice it to say that the String data type can store just about anything. So if in doubt, use the String data type.
For the sake of example, in this chapter we create eight profile properties to store the following information about each person who creates an account on your Web site:
FirstName: This stores the person’s first name (such as Joe or Mary).
LastName: This stores the person’s surname (such as Smith or Jones).
Address1: First line of street address.
Address2: Optional second line of street address.
City: Town or city in which the person lives.
StateProvince: State or province in which the person lives.
ZIPPostalCode: ZIP code or postal code in which the person lives.
Country: Country where the person lives.
You can assign default values to properties. For example, you can set the default value of the Country field to USA if you think most site members will be American. The default value is simply the value that’s stored in the property unless the user specifies another.

Chapter 9: Using Personalization 173
Setting up user profiles
To define user profiles, you need to manually edit the Web.config file in the root of your Web site. Here’s how:
1.Open Web.config for editing by just double-clicking its icon.
Typically you’ll see that filename located near the bottom of Solution Explorer.
2.Just above the closing </system.Web> tag, type
<profile>
and press Enter. A closing </profile> tag is added automatically. So you end up with:
<profile>
</profile>
3.With the cursor placed between the <profile> and </profile> tags, type:
<properties>
and press Enter. Once again, the closing </properties> tag is entered automatically. So you end up with
<profile>
<properties>
</properties>
</profile>
4.Between the <properties> and </properties> tags you need to type a tag for each property you want to define using the following syntax:
<add propertyName />
where propertyName is the name of the profile property.
If you’re using the string data type, as all the sample fields described earlier were, then you don’t need to specify a data type. So in this example all you’d really need in your Web.config file is the following:
<profile>
<properties>
<add name=”FirstName”/> <add name=”LastName”/> <add name=”Address1”/>
<add name=”Address2”/> <add name=”City”/>
<add name=”StateProvince”/> <add name=”ZIPPostalCode”/> <add name=”Country”/>
174 Part III: Personalization and Databases
</properties>
</profile>
When you’re typing code, like here, there is no margin for error. You must type every character and blank space correctly, or you’ll get error messages when you try to view a Web page in your browser.
If you want to put in a default value for a property, include a defaultValue= ”value” in the tag (where value is the text you want inserted into the property automatically). For example, to make USA the default value for the Country property, add defaultValue=”USA” to the tag that defines the Country property, as shown below:
<profile>
<properties>
<add name=”FirstName”/> <add name=”LastName”/> <add name=”Address1”/> <add name=”Address2”/>
<add name=”City”/>
<add name=”StateProvince”/> <add name=”ZIPPostalCode”/>
<add name=”Country” defaultValue=”USA”/> </properties>
</profile>
I should mention that even though you can omit the data type when defining string value, that doesn’t mean you must omit them. When you look at other examples of profile properties, you might see the string data type defined explicitly, like this:
<profile>
<properties>
<add name=”FirstName” type=”System.String”/> <add name=”LastName” type=”System.String”/> <add name=”Address1” type=”System.String”/> <add name=”Address2” type=”System.String”/> <add name=”City” type=”System.String”/>
<add name=”StateProvince” type=”System.String”/> <add name=”ZIPPostalCode” type=”System.String”/> <add name=”Country” defaultValue=”USA”
type=”System.String”/>
</properties>
</profile>
Try not to let this confuse you. Including the type=”System.String” attribute really has no effect — even if you omit the attribute, the data type will be System.String (called a string for short).
So, just to make sure we’re all on the same page here, let’s recap. Assuming you added the same properties described in this chapter,your entire Web.config file should look something like the example in Figure 9-1.

Chapter 9: Using Personalization 175
Figure 9-1:
Profile properties in a sample
Web.
config file.
If you happened to add the tags for relaxing password rules as described in
Chapter 7, your Web.config file might look more like the one in Figure 9-2.
When you’re sure you have it right, just close and save the Web.config file.
Figure 9-2:
Another
sample
Web. config file with profile properties defined.
176 Part III: Personalization and Databases
Letting Users Enter Properties
The whole purpose of creating profile properties is to store information about users (site members). You wouldn’t want to type in all that information about each user yourself. Rather, you want each user to type in his or her own profile properties. To do so, you need to provide users with a fill-in-the- blanks form.
A form is basically a Web page with controls for entering and editing data (information). To create a Web form for entering profile properties, just create a new, empty .aspx page. In the following steps, I create a page named CreateProfile.aspx to let users enter profile information in their own accounts:
1.In Solution Explorer, right-click the folder in which you want to store the new page and choose Add New Item.
In my example, I right-clicked my MemberPages folder.
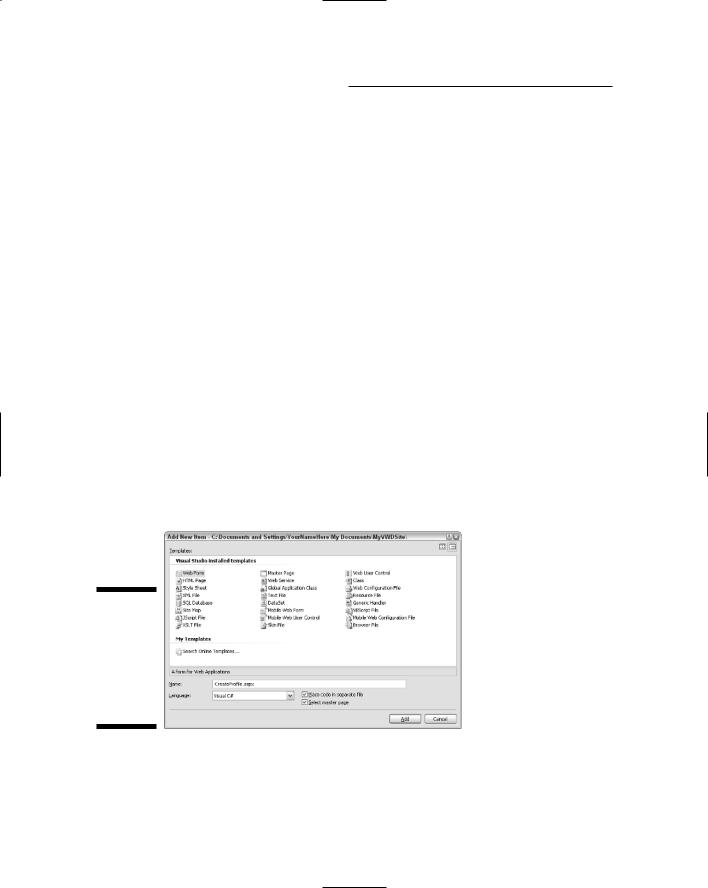
2.In the Add New Item dialog box, click Web Form.
3.Enter a filename for your page.
I entered CreateProfile.aspx for my page.
4.Choose other options to taste.
I chose the options shown in Figure 9-3.
Figure 9-3:
About to create a Web Form named
Create
Profile.
aspx.
5.Click the Add button.
6.If you opted to use a Master Page, choose your master, and then click OK.
Chapter 9: Using Personalization 177
A new, blank page (or content placeholder) opens ready for you to design your form. If it opens in Source view, click the Design button at the bottom of the Design surface to switch to Design view. Then you can add text, pictures, links, and controls to the page using all the standard methods described in earlier chapters.
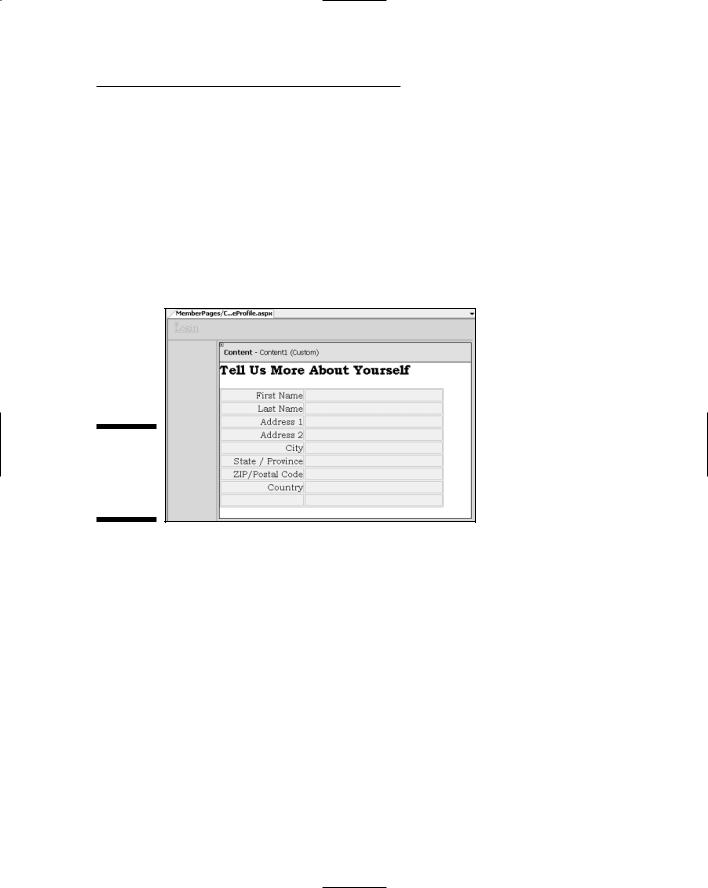
Here, some Textbox controls will allow users to enter profile information on this new page. Probably your best bet would be to add a table to the page first, to make it easy to organize the text boxes. The left column of the table would be used for plain-English descriptions of what you expect the user to type in the text boxes in the right column, as shown in the example in Figure 9-4.
Figure 9-4:
Table and some text added to a page.
To make the table act as a form, you’ll need to add some Textbox controls so users can type in their own information. You’ll also need to assign a programmatic name to each control, via the control’s ID property. You’ll use the programmatic name to refer to the text box from code. The programmatic name can be just about anything you want, but must start with a letter and cannot contain spaces or punctuation marks.
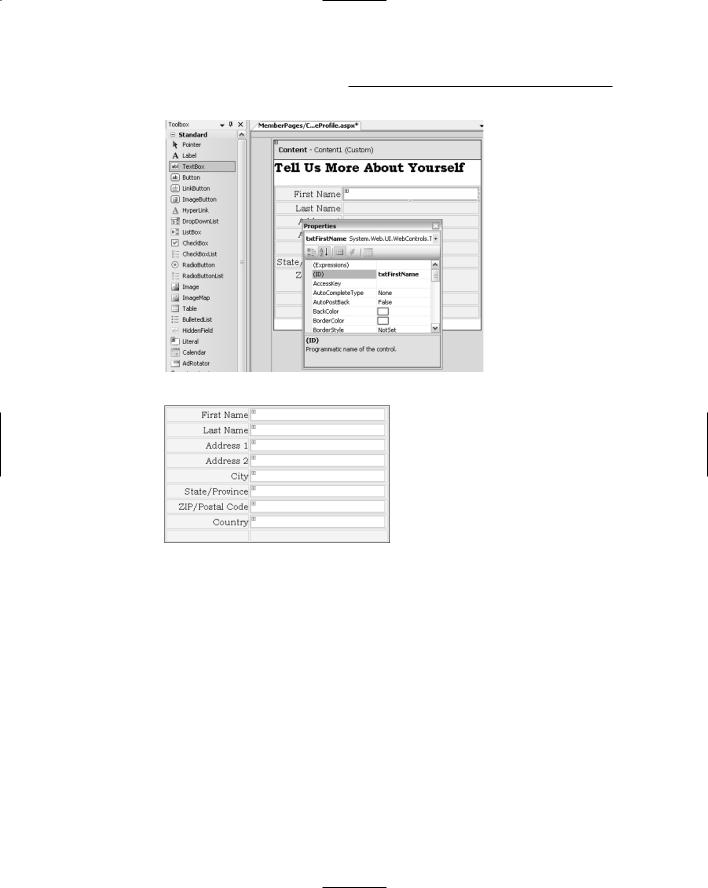
For example, in Figure 9-5 I dragged a Textbox control from the Standard tools (visible in the Toolbox at the left side of the figure) into a table cell. The text box is the white rectangle. That control is currently selected so you can see its Properties sheet. As you can see in the figure, I’ve named the text box txtFirstName by typing that name as the control’s ID property in its Properties sheet.
You’ll need to add (and name) a Textbox control for each profile property that you want users to see or edit. For my example, I created eight Textbox controls and named them as shown in Figure 9-6. Adding “txt” to the front of each name isn’t a technical requirement. I just stuck that on there to remind myself later that the name refers to a Textbox control.
178 Part III: Personalization and Databases
|
|
|
|
|
|
|
|
|
|
|
|
Figure 9-5: |
|
|
|
|
|
A Textbox |
|
|
|
|
|
control |
|
|
|
|
|
named |
|
|
|
|
|
txtFirst |
|
|
|
|
|
Name added |
|
|
|
|
|
to the page. |
|
|
|
|
|
|
|
|
|
|
|
|
|
|
|
|
|
|
|
|
|
txtFirstName |
|
|
|
|
|
||
|
|
|
|
txtLastName |
|
|
|
|
|
||
|
|
|
|
txtAddress1 |
|
|
|
|
|
||
Figure 9-6: |
|
txtAddress2 |
|||
|
|||||
|
txtCity |
||||
Sample |
|
||||
|
|||||
named |
|
txtStateProvince |
|||
|
|||||
Textbox |
|
txtZIPPostalCode |
|||
|
|||||
controls. |
|
txtCountry |
|||
|
|||||
|
|
|
|
|
|
|
|
|
|
|
|
Adding a button
In addition to having some blanks to fill in, users need a button to indicate when they’re done typing and ready to submit their information. To add a button to the form, just drag a Button control from the Standard tools onto the form. VWD automatically names the button Button1. You can keep that name or change it by changing the button’s ID property. For my example, I’ll keep the default name.
To change the text that appears on the button, change the button’s Text property. Figure 9-7 shows an example where I’ve added a button to my sample form, and set its Text property to Submit. So the button shows Submit as its label. (You could use OK or anything else you want for the button’s Text property.)

Chapter 9: Using Personalization 179
Figure 9-7:
A button added to my sample form.
So now you have a page that shows some empty text boxes, and a button that does nothing when you click it. But it has no connection whatsoever to profile properties. Before this page is of any real value, I need to come up with a way to copy whatever the user types into the Textbox controls into that user’s profile properties. That requires some programming. And programming means writing code in the page’s code-behind file.
Writing some code
Programming is all about writing code — which is slang for “computer instructions written in a programming language like C# or Visual Basic” (and not for “hieroglyphics,” no matter what you’ve heard). Learning to write code fluently is an enormous undertaking and usually requires several months, if not years, of study and experience to master. I can’t get into all of that here; there’s simply not enough room in this book. But I can tell you exactly what’s needed in terms of using profile properties.
In code, if you want to refer to the contents of a Textbox, you use the syntax
ctrlName.Text
where ctrlName is the programmatic name (ID) of the control. For example, in code, txtFirstName.Text refers to the contents of the txtFirstName text box.
To refer to a specific profile for the current user, the syntax is:
Profile.propertyName