

Visual Web Developer™ 2005 Express Edition For Dummies - Alan Simpson
.pdf100 Part II: Building Your Web Site
Rules don’t have to be defined across a single line like the above example. In fact, VWD automatically arranges rules so each rule’s property/value pair appears on a separate line. This makes it easier to see what’s in the rule.
For example, here’s yet another rule for the body style that defines the font type, font size, and background color for the page:
body
{
font-size: 12pt;
font-family: ‘Bookman Old Style’; color: navy
}
In the above example, the selector is on one line. The declaration is broken into five lines so you can clearly see the braces and the property: value pairs.
In VWD, you can create style sheets without knowing all the selectors, properties, and values, because you don’t have to type anything. You can create your styles using the Style Builder instead. (Thank goodness.) First, you have to create a style sheet in which to put your CSS rules. The next section tells you how.
Creating a CSS Style Sheet
Creating a style sheet in VWD is fairly easy. If you want to keep your style sheets in a specific folder, you can start by right-clicking the project folder and the top of Solution Explorer and choosing New Folder. Name the folder whatever you like (I’ll name mine, oh, what the heck, StyleSheets) and press Enter. Then, to create a new style sheet, follow these steps:
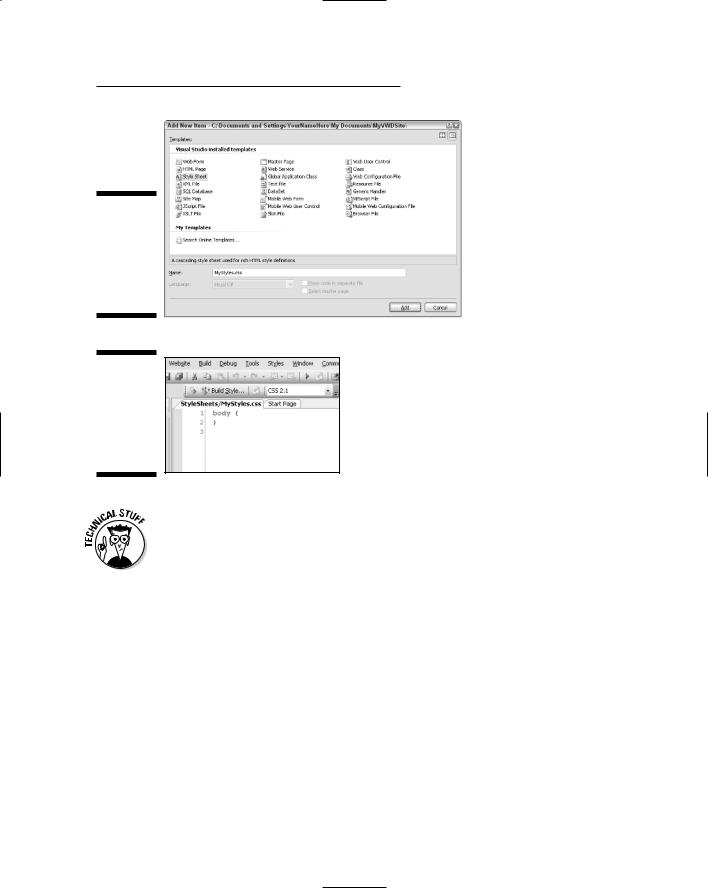
1.In Solution Explorer, right-click the folder in which you want to place the style sheet and choose Add New Item.
2.In the Add New Item dialog box, click Style Sheet.
3.In the Name box, type a name for your style sheet.
In Figure 6-2 I’ve named mine MyStyles.css.
4.Click Add.
A new style sheet opens in the CSS Editor, at first just showing an empty rule for defining the style of the HTML body tag. The Style Sheet toolbar also opens, as shown at the top of Figure 6-3.
If your CSS toolbar doesn’t open somewhere, choose View Toolbars
Style Sheet from the menu bar.
Chapter 6: Designing with Styles 101
Figure 6-2:
Creating a new CSS style sheet named
MyStyles
.css.
Figure 6-3:
The Style Sheet toolbar and part of
MyStyles
.css.
If you’re already into CSS and have a preference, you can use the drop-down list on the Style Sheet toolbar to choose with which version of CSS you want your sheet to comply. If you don’t have a preference and just want to go with the latest version, choose CSS 2.1 (as in Figure 6-3).
Creating Style Rules
A style sheet can contain any number of rules — of several different types. The sections that follow look at the different types of rules and how to create them.
Creating CSS element styles
A CSS element style is a rule that defines the style of a built-in HTML tag like <p> or <body> or <h1>. These rules are the easiest to create and the easiest to use (in most cases). The predefined elements cover most of the design elements needed for a Web page. So rather than reinvent the wheel, you can set a style for those elements and just use the elements as you would normally.

102 Part II: Building Your Web Site
In a CSS style sheet, you follow these steps to create an element-rule selector:
1.Click the Add Style Rule button in the CSS toolbar, or right-click in the CSS style sheet and choose Add Style Rule.
The Add Style Rule dialog box opens.
2.Choose Element, and then choose the HTML element for which you want to design a style.
In Figure 6-4, I chose the H1 element, allowing me to define the style of all text marked with <h1>...</h1> tags in my pages.
3.Click OK.
A rule selector appears with empty curly braces, as in the example given here:
H1
{
}
Figure 6-4:
Defining a style rule for the H1 element.
With the selector and curly braces in place, you can use the Style Builder described later in this chapter to define the style of the element.
If you already have a style sheet from a previous Web site, you can just copy and paste that sheet’s contents into the new sheet you’ve created in VWD.
Creating CSS class selectors
You don’t have to apply a style to all instances of an HTML element. You can create “special circumstance” rules that are applied only as needed. For example, you might have to create two types of tags for table cells: one for regular table cells, and one for the column headings across the top row of the table.

Chapter 6: Designing with Styles 103
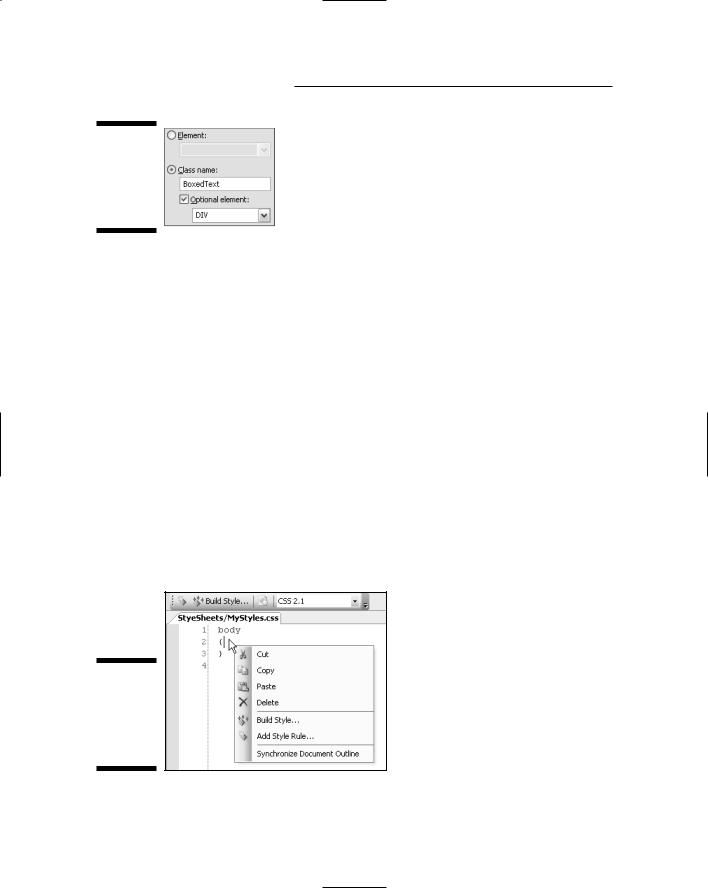
To create “special circumstance” rules, you define CSS class selectors. Unlike an element selector, a class selector doesn’t have to match an HTML tag. You can give the class selector any name you want — just avoid using spaces and punctuation in the name. Keep it short and simple.
You create a class selector as you would an element selector. Click the Add Style Rule button or right-click the page and choose Add Style Rule. In the Add Style Rule dialog box, choose Class Name. Then type the name of the class in the text box, as in the example shown in Figure 6-5.
Figure 6-5:
Creating a
CSS class
selector.
Click OK, and the class appears in the style sheet looking like this:
.Mono
{
}
The leading dot that VWD adds to your name isn’t actually part of the name. It’s just a signal to the Web browser, indicating that the name that follows the dot is a class name rather than an HTML element.
You can also assign a style class to a particular HTML element, and use that style class with only certain instances of the element. For example, you might create a DIV (division) class that creates sidebar text, similar to the sidebars you see in this book. In a style sheet, you create such a selector by joining the HTML element name (the same name you use inside an HTML tag) followed by a dot and whatever name you decide to give your class.
Again, you use the Add Style Rule dialog box to create the rule. Choose Class Name and type in a name of your own choosing for the class. Then select the Optional Element check box, and choose an HTML element from the dropdown list. For example, in Figure 6-6, I’m about to create a new CSS class named DIV.BoxedText.
Click OK, and the result is as follows:
DIV.BoxedText
{
}
104 Part II: Building Your Web Site
Figure 6-6:
Defining a CSS element class selector.
Now all that’s left to do is make sure the cursor is between the curly braces, and use the Style Builder to define the style of the rule. The next section tells you how.
Defining Rules with Style Builder
Manually typing the declaration for a rule isn’t easy. The syntax rules are strict, and there are a lot of property names to remember. The Style Builder offers a much better alternative. The first step, or course, is to create the selector (you know — the name and curly braces). The next step is actually two:
1.Position the cursor just to the right of the opening curly brace of the selector you want to style.
2.Click the Build Style button in the Style Sheet toolbar, or right-click near the cursor and choose Build Style.
In Figure 6-7, for example, I’m about to build a style for the body{} selector in MyStyles.css.
Figure 6-7:
Preparing to build a style for the body{} selector.
After you’ve chosen Build Style, the Style Builder dialog box opens. Figure 6-8 shows the top half of the Style Builder. Here you can add all the styles you like.

Chapter 6: Designing with Styles 105
Setting to <not set>
Many of the drop-down lists you encounter in the Style Builder will have a <not set> option, like the Italics drop-down list in Figure 6-8. It may seem odd that you have the choice to set an option to “not set,” but there is a reason for it: If you previously set the option to a specific setting, choosing <not set> ensures that the old setting is removed.
In the rule that the Style Builder creates, you won’t see <not set> anywhere because choosing <not set> removes the property: value pair from the rule. That means the element you’re styling will inherit the style from its parent element.
Figure 6-8:
Here’s what part of the Style Builder looks like.
The sections that follow discuss the most commonly used options in the Style Builder. As with HTML, CSS is a book-length topic in its own; an exhaustive discussion of styles would surpass my page count (and probably your patience). But a quick tour of the most common style options can give you a sense of how you might use them in your own Web sites. Stay tuned.
For more information about the options in the Style Builder category you’re viewing, press Help (F1).
Styling fonts
The Font category of the Style Builder lets you define the font of the selector (the item you’re styling). It’s important to know that fonts come from the client computer, not from your computer. In the person doesn’t have the font specified in your CSS rule, their Web browser will automatically substitute another font.
To gain some control over how the client PC chooses substitute fonts, specify multiple fonts in order of preference. Generic fonts are good for this purpose, because they allow the client PC to choose a font that at least resembles your preferred font. To specify fonts in the Style Builder, choose Family under Font Name in the Style Builder. Then click the Build button.

106 Part II: Building Your Web Site
A generic font is just a general font style without a specific typeface. For example, Arial and Helvetica are both sans-serif fonts used for headlines. If you specify Arial as the preferred font, and sans-serif as the Generic font, Arial will be used wherever possible. Otherwise, Helvetica (or some other sans-serif font) will be used instead.
In the Font Picker, first choose the font you most prefer, and then click the >> button to move that font name to the Selected Fonts list. Any additional fonts you choose after the first will be used only if your preferred font isn’t available on the client PC. Figure 6-9 shows an example in which I’ve chosen Bookman Old Style as the preferred font, and a generic Serif font as the alternate. Click OK after making your selections.
Figure 6-9:
The Font Picker dialog box.
To choose a color for your font, pick a color name from the Color drop-down list. Or click the Build button to the right of the color option. In the Color Picker dialog box that opens, click any tab, and then choose your color and click OK.
There are several ways to size a font:
Set a specific size, in points (or some other unit of measure): You might want to do this when defining the default font for body text (in the body{} selector in the style sheet). To set a specific size, choose Specific. Then type in a size and choose your unit of measure.
Set an absolute size: This option defines the size as a value, ranging from XX-small to XX-large. The exact size of the text, in points, is defined by settings in the visitor’s Web browser.
Absolute sizes are defined by the visitor’s Web browser, with Medium being equal to body text size. The exact size varies. For example, in Microsoft Internet Explorer you can choose View Text Size to set a general size for all text on the page. Text you define using an Absolute size will be sized according to which Text Size a visitor chooses from that menu.
Chapter 6: Designing with Styles 107
To get a sense of how the absolute sizes vary relative to one another, choose Choose a Size from the Absolute drop-down list. The sample text at the bottom of Style Builder shows you an example of your choice.
Set a relative size: This defines the size of the text relative to neighboring inline text, either smaller or larger.
Relative size refers to the size of the parent element’s size. The parent element is usually text in the same sentence of a paragraph. This setting makes the text a little smaller, or a little larger, than whatever size that neighboring text happens to be.
The option for boldface reflects XHTML’s preference for using the CSS font-weight property rather than <b>...</b> tags for boldface. You can choose how bold you want boldface to be using that property. If you want the standard boldface, choose Bold from the Absolute drop-down list. Otherwise choose Relative and then choose either Lighter or Bolder.
By and large, the other items in the Fonts category are self-explanatory. If they still seem a little obscure, just choose one and have a look at its preview sample at the bottom of the Style Builder.
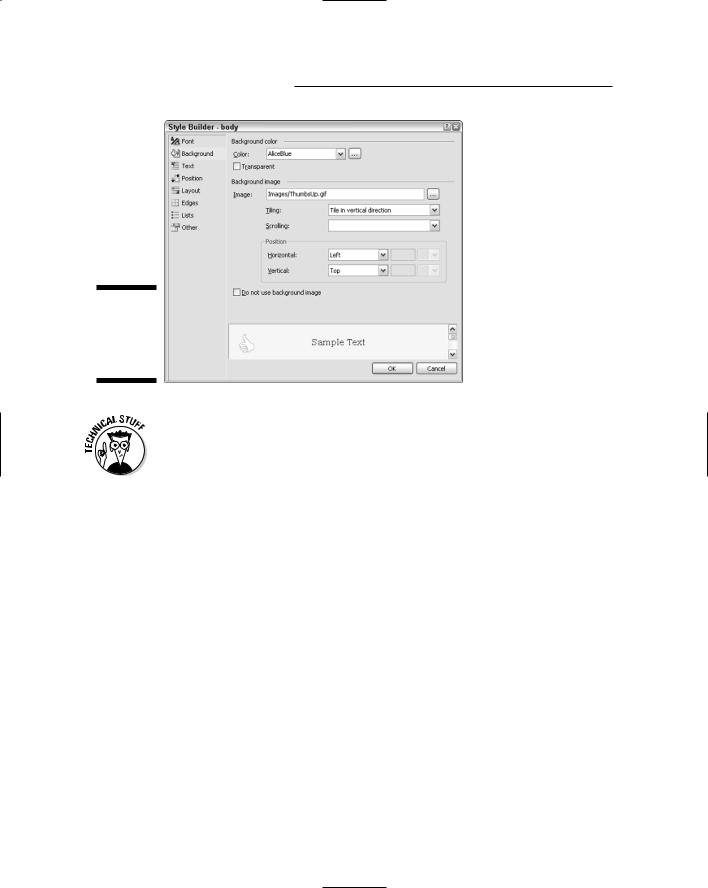
Styling the background
You can choose a background color or picture for the item you’re designing. Optionally, you can choose a picture to use as a watermark for the background. Click Background in the Style Builder to get to the Background options.
A watermark is a pale image that appears to be imprinted on the page, behind text and other items on the page.
To specify a background color, choose a color name from the Background Color drop-down list. Or click the Build button next to the Color option and choose a color from the Color Picker.
If you have a picture you’d like to use as a watermark, click the Build button next to the Image option and choose the picture you want to use. If it’s a small picture like a logo, you can choose a Tiling option to have the image repeated down, across, or all over the page. The scrolling options let you choose whether the background image scrolls with text, or remains fixed as the text scrolls over the image.
The Position options determine the starting position of the background image. The effect of the Position option depends on how the Tiling option is set. The preview at the bottom of the Style Builder shows how your current selections will look on a page. Figure 6-10 shows an example with a background color, image, and some image options selected. The preview shows how those selections look.
108 Part II: Building Your Web Site
Figure 6-10:
Background
options in
Style
Builder.
In Figure 6-10, the background color shows through the background image because that image file has a transparent background. If you use a picture with an opaque background and tile that image in all directions, its background will hide whatever color you choose for the page background.
The options in the Background category of the Style Builder relate directly to the CSS properties that control background — color, backgroundimage, background-repeat, background-position, and backgroundattachment.
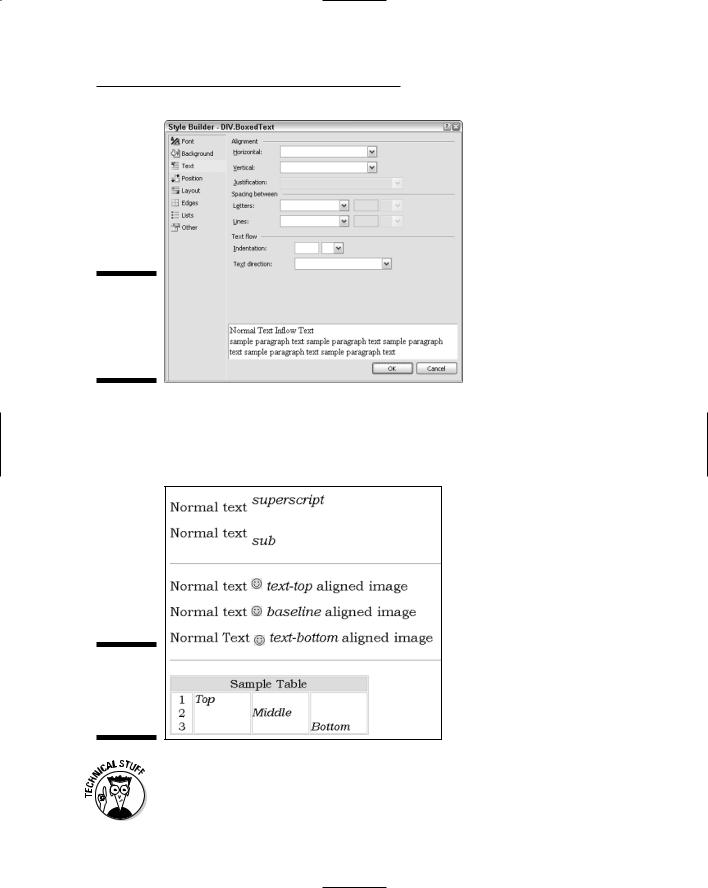
Styling text alignment and spacing
Clicking the Text button in the Style Builder takes you to styling options for text (Figure 6-11). Under the Alignment heading, the Horizontal option lets you choose how you want the text, or item, aligned between the margins of the parent object. For example, if you’re styling a table cell (<td> element), and set the horizontal alignment to Center, any text or picture you place in the cell is centered within the cell.
The Vertical alignment option offers several settings, not all of which apply to all types of elements. The sub and superscript elements, for example, apply to inline text only. Thus, they only apply to inline elements — those that don’t cause text, a picture, or a table to start on a new line. Examples of inline elements that don’t cause line breaks include <b>...</b> for boldface, as well as <em>...</em> and <span>...</span>.
Chapter 6: Designing with Styles 109
Figure 6-11:
Text category of options in Style Builder.
In Figure 6-12, the top two lines show examples of using superscript and sub vertical alignments. The superscript alignment raises the text from the normal flow. The sub alignment lowers it, as in a subscript.
Figure 6-12:
Examples of vertical alignment options.
Unlike the HTML <sup> and <sub> tags, the vertical alignment options don’t change the size of text. They change only its position relative to other text in the same line.