

Visual Web Developer™ 2005 Express Edition For Dummies - Alan Simpson
.pdf70 Part I: Planning a Web Site
If you want the new page you’re about to create to have the same name as the original page, you’ll need to rename that original page first. To do so, right-click its name in Solution Explorer and choose Rename. Type a new name (without changing the .aspx extension) and press Enter. For example, you might rename Default.aspx to OriginalDefault.aspx.
Then, to copy and paste the stand-alone page’s content into a new page’s Content placeholder, follow these steps:
1.Double-click the stand-alone page to open it.
In my current example, that would be the OriginalDefault.aspx page.
2.If the page opens in Source view, click the Design button to switch to Design view.
3.Select and copy everything in the page (press Ctrl+A, then press Ctrl+C).
4.Right-click the site name at the top of Solution Explorer and choose Add New Item.
5.In the Add New Item dialog box, choose Web Form, and make sure you also choose (check) the Select Master Page check box.
6.Name the page whatever you like.
Figure 4-29 shows an example where I’m about to create a new
Default.aspx page.
7.Click the Add button.
8.In the Select a Master Page box, click the folder that contains the Master, then click the Master Page.
For this example you’d click Masters in the left column, then click
MasterPage.master in the right column.
Figure 4-29:
About to create a new
Default.
aspx page
with a
Master.

Chapter 4: Creating Master Pages |
71 |
9.Click OK.
10.In the new page that opens, right-click the empty Content placeholder and choose Paste.
The copied content now appears in the Content placeholder. Now close and save the new page. To verify that things worked out as intended, view that page in a Web browser. Here, for instance, you’d right-click the new Default. aspx page in Solution Explorer and choose View in Browser.
The page opens in the browser, showing both the Master Page and the content you copied into its Content placeholder. Close the browser after checking things out.
Assuming the new page works as intended, you don’t need the original page anymore because its content is in the Content placeholder of the new page you created. To delete the original page (named OriginalDefault.aspx in this example), right-click its name in Solution Explorer and choose Delete. Then choose Yes when asked for confirmation.
The next chapter starts Part II of this book, which gets into the nitty-gritty details of creating individual pages that take advantage of the infrastructure elements you’ve defined.
If pictures don’t show in a Master Page
When you choose View in Browser to view a page that uses a Master page, pictures in the Master page should show up in the browser. If you see a red X where the picture should be, you need to make a slight change to the Master page. Here’s how:
1.Close the browser, then double-click the Master Page in Solution Explorer to open it.
2.With the Master Page open for editing, click the Source button at the bottom of the design surface to switch to Source view. Locate the <img...> tag for the picture, which should look something like this:
<img src=”../Images/Logo.gif” />
3.Add runat=”server” to the <img> tag. Make sure there’s a blank space before and after those new words and that the whole thing is inside the < and /> tags as follows:
<img src=”../Images/Logo.gif” runat=”server” />
4.Close and save the Master page. Then view in a browser any page that uses the Master to verify that the picture works correctly.

72 Part I: Planning a Web Site

Part II
Building Your
Web Site
In this part . . .
After you’ve laid out the basic foundation of your datadriven Web site, it’s time to start creating pages. As
you discover in this part, VWD pages use the same basic tools as any other Web page to format your site’s content: HTML and CSS. Visual Web Developer also offers powerful ASP.NET controls that can do a lot more than HTML and CSS alone. In this part, you get a look at how all that fits together, and see an example of creating a control that makes your site easy for your visitors to navigate.

Chapter 5
Creating Web Pages
In This Chapter
Creating and editing tables
Adding hyperlinks to pages
Adding and styling pictures
Working in Source view
No matter what program you use to create Web pages, you’re actually creating a document that contains text and HTML tags. That’s because
all Web pages use HTML as a markup language.
This chapter builds on Part I of this book, which focused on building the foundation of your Web site. With the foundation done, you can start creating content for individual Web pages.
As you’ll discover in this chapter, creating and editing Web pages in VWD is much like creating and editing word-processing documents — although some of the procedures differ from typing content into a program such as Microsoft Word or FrontPage. This chapter shows you what to look for, and covers all the basics of creating and editing pages in Visual Web Developer.
Creating a New Blank Page
Visual Web Developer offers you two types of Web pages to create:
Web Forms: Can contain HTML and ASP.NET Server controls. The filename extension is .aspx.
HTML Pages: Can contain HTML but no ASP.NET controls. The filename extension is .html.
So if you want your page to use any ASP.NET capabilities at all, even if you just want to use a Master Page with the page you’re creating, you want to create a Web form. You would only use HTML to create pages that don’t use a master, and don’t use ASP.NET controls.
76 Part II: Building Your Web Site
To create a new page, start in Solution Explorer. If you want to put the page in the root folder, right-click the site folder at the top of the Solution Explorer page and choose Add New Item. To put the page into a particular folder in Solution Explorer, right-click that folder’s icon in Solution Explorer and choose Add New Item. Either way, the Add New Item dialog box opens.
If you want to create an HTML page that doesn’t use ASP.NET server controls, click the HTML Page icon. The programming-related controls, and the option to select a Master Page, are dimmed because you can’t use those items in an HTML page. Just type the filename for your new page and click the Add button. The page opens in the Design surface ready for editing in either Design or Source view.
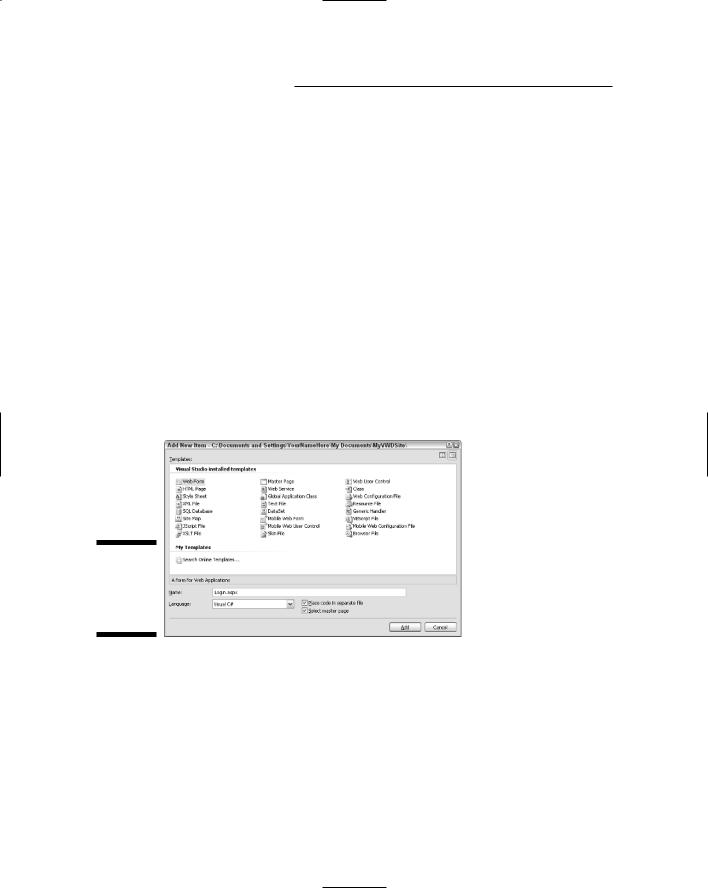
To create a new .aspx page from the Add New Item dialog box, click Web Form; then choose your programming language, whether or not you want to put code in a separate file (you should always choose this option), and whether you want to include a Master Page. Then click the Add button. In Figure 5-1, for example, I’m about to create a new page named Login.aspx that uses C# as its programming language, places code behind the form, and uses a Master Page.
Figure 5-1:
Creating a new .aspx page (Web form).
If you choose “Select master page,” then clicking the Add button calls up a dialog box that asks which Master Page you want to use. Just click the name of the folder that contains the Master Page, click that page’s name, and then click OK.
If you opted to use a Master Page, you’ll do all your work in the white Content box that appears on the page. Although the box doesn’t look as large as a whole page, it grows to accommodate whatever you add. What’s most important to

Chapter 5: Creating Web Pages 77
understand is that the techniques described in this chapter work the same whether you’re creating an HTML page, a particular .aspx page without a master, or another .aspx page controlled by a Master Page.
After you have a page (whether .aspx or .html) open in the Design surface, use the Design and Source buttons at the bottom of the Design surface to switch between the WYSIWYG Design view and HTML Source view.
Creating HTML Tables
After you have a page open in Design view, creating the page is not too different from creating a document in a word processing program. Text flows as it would when typing a normal business letter. If you want to organize text into columns and rows, you can insert a table into the page and use its cells to organize content.
Adding a table to a page
You can add a table to any page (including the Content page in a page that uses a Master Page). One way to do so is as follows:
1.In your page, click where you want to put the table.
2.Choose Layout Insert Table from the menu bar.
The Insert Table dialog box opens.
3.Choose the Custom option.
4.Specify the number of rows and columns you want.
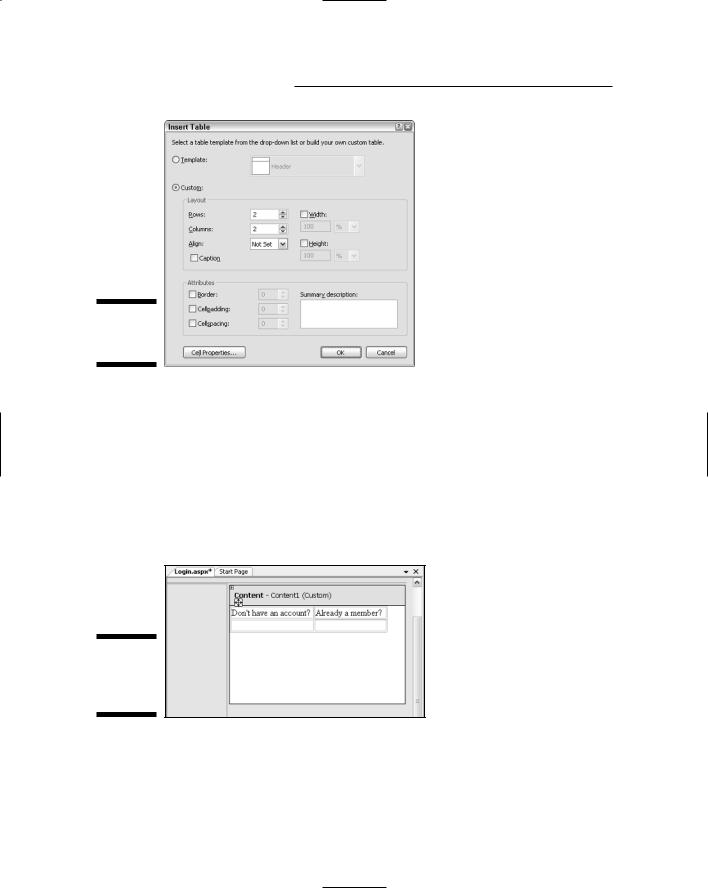
For example, in Figure 5-2 I’m about to create a table with two rows and two columns.
5.Optionally, choose other formatting options under Layout and Attributes.
Instead of choosing options in the Insert Table dialog box to format every table you create, you can use CSS to create a general style that applies to all tables. (Chapter 6 gives you the goods on CSS.) Here, it is sufficient to choose only the number or rows and columns you want.
6.Click OK.
An empty table with the number of rows and columns you specified appears on the page.
78 Part II: Building Your Web Site
Figure 5-2:
Insert Table
dialog box.
Typing in table cells
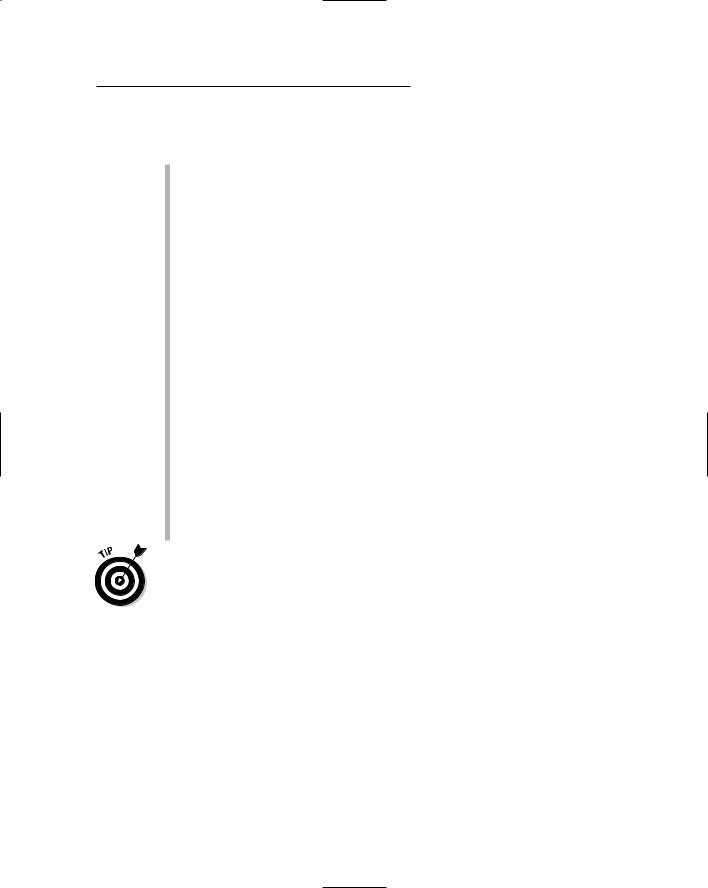
If you have any experience at all with Microsoft Word or an HTML editor, you’ll find there’s nothing unique to working with text in table cells. To type in a cell, you just click the cell and start typing; Figure 5-3 shows where I’ve inserted a table with two rows and two columns. Then I typed a question into each of the top two cells. I widened each column by dragging its right border to the right until the text in the table cell no longer wrapped to two lines.
Figure 5-3:
Text typed into top two cells.
Working with HTML Tables
You can change a table or its contents at any time. Options for managing the table as a whole, and for inserting and deleting columns, are on the Layout menu in the toolbar — but make sure you click somewhere inside the table
Chapter 5: Creating Web Pages 79
before you choose options from that menu. Here’s a quick rundown of how to perform common tasks:
Add a column: Click a column that will be next to the new column, and then choose Layout Insert Columns to the Left or Columns to the Right.
Add a row: Click a row that will be next to the new row, and then choose Layout Insert Rows Above or Rows Below.
Insert a cell: Click the cell that’s to the left or right of where you want the new cell to be placed. Then choose Layout Insert Cells to the Left or Cells to the Right.
Delete an entire table: Click anywhere inside the table you’ve decided to delete. Then choose Layout Delete Table.
Delete a column: Click in the column you want to remove and choose Layout Delete Column.
Delete a row: Click in the row you want to remove and choose Layout Delete Row.
Delete a cell: Click the cell you want to remove and choose Layout Delete Cell.
Resize a column: Drag the right border of the column left or right. Or, click in the column, choose Layout Resize Resize Column, set your width, and then click OK.
Resize a row: To make a row taller or shorter, drag its bottom border up or down. Or click the row, choose Layout Resize Resize Row, set the row height, and then click OK.
As always, if you don’t like a change you’ve made to a table, press Ctrl+Z or choose Edit Undo to undo that change.
Selecting rows and columns
You can change the appearance of any cell, or its contents, at any time. You can work with individual cells. Or, you can select multiple cells first, and then apply your change to all of the selected cells.
There are several methods you can use. To select a column or row, first click in the column or row you want to select. Then right-click the cell and choose Select Column or Select Row. As an alternative to right-clicking, choose Format Select Column or Format Select Row.