

Visual Web Developer™ 2005 Express Edition For Dummies - Alan Simpson
.pdf90 Part II: Building Your Web Site
Figure 5-14:
Text flow and pictures.
Figure 5-15:
The Edges category in Style Builder.
If you want to put a border around your picture, choose All from the “Select the edge to be changed” drop-down list. Then choose the style, width, and color of the border. Click OK, and the selected picture will take on the new style.
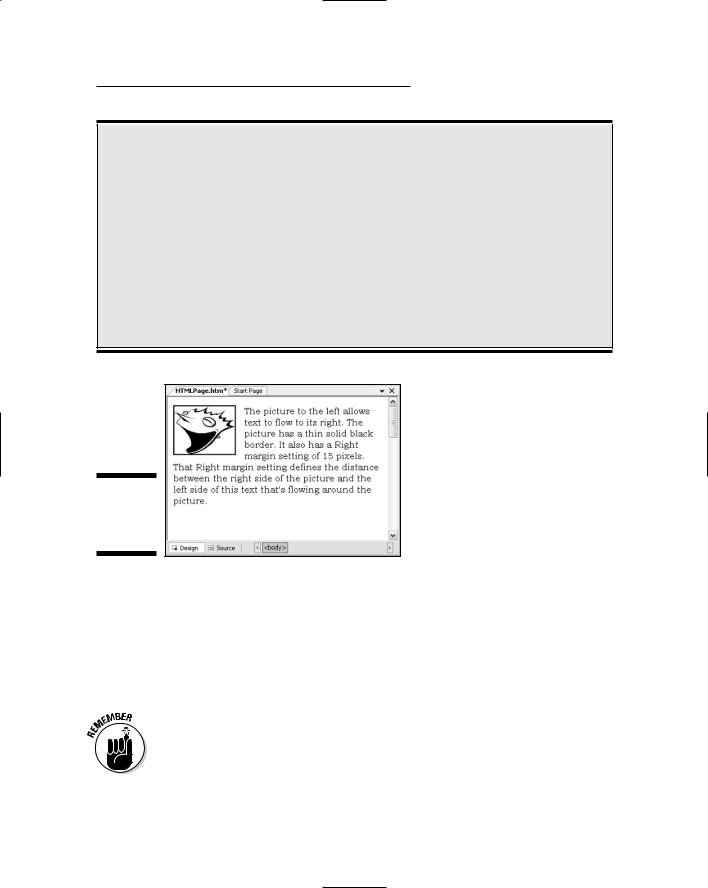
Figure 5-16 shows an example that allows text to flow to the picture’s right. The border around the picture comes from the selections under Borders in Figure 5-15. The gap between the picture border and the text to the right of the picture is defined by the 15 pixel right margin setting in Figure 5-15.
Chapter 5: Creating Web Pages 91
Why can’t I center a picture?
If you’re familiar with HTML, you may be accustomed to using the align= attribute in <img> tags to align pictures. That attribute is being phased out in favor of using CSS styles to align pictures. To align a picture to the left or right margin, just choose the “To the left” or “To the right” option from the Allow Text To Flow dropdown list. To center a picture, enclose the
<img> tag in a pair of <div>...</div> tags that have the text-align property set to Center, as follows:
<div style=”text-align:center”>
<img src=”Images/Laugh.gif” alt=”laughing” />
</div>
You can type the required tags manually in Source view. (More on using the Source view a little later in this chapter.)
Figure 5-16:
Picture with border and right margin.
Padding pictures
The Padding options in the Edges category define the amount of empty space between the picture and its outer border. For example, Figure 5-16 shows the border actually touching the bottom of the picture (the character’s chin).
Increasing the Padding options to 5 pixels or more would increase the size of the box (but not the picture in the box) to put more room between the picture and the border surrounding the picture. When you’re done choosing options, click OK in the Style Builder.
Choices you make in the Style Builder aren’t set in concrete. If you don’t like a change you’ve made, you can undo it by pressing Ctrl+Z. Or, just reopen the style builder and change whatever options you want.
92 Part II: Building Your Web Site
Adding Lines
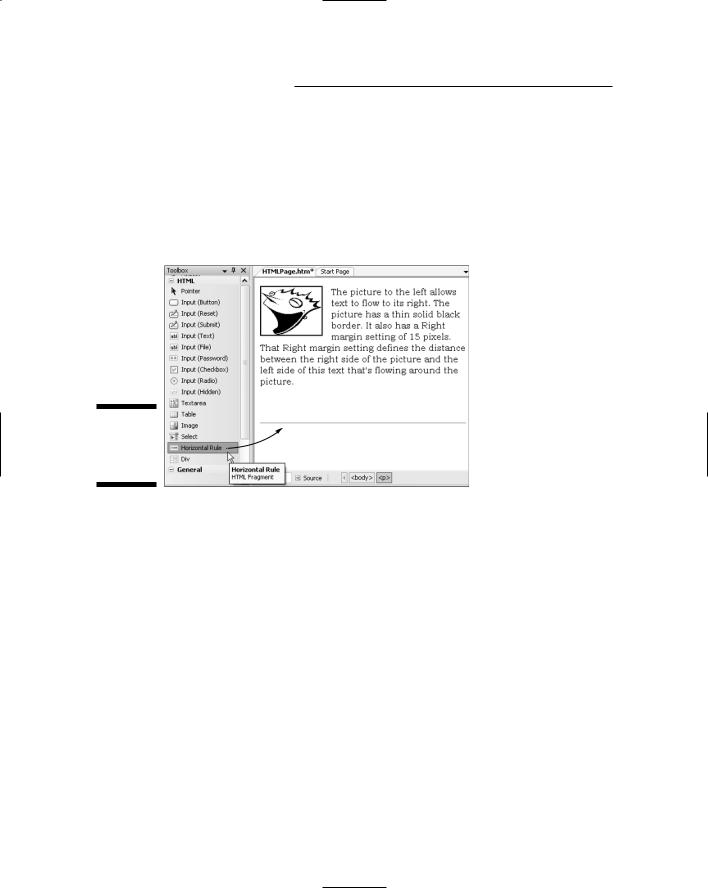
If you want to add a horizontal rule to a page, expand the HTML category in the Toolbox. Then drag a horizontal rule onto the page, as illustrated in Figure 5-17. To style the line after placing it on the page, right-click the line and choose Style. Then, in the Style Builder, use Style and Color options under the Borders heading to choose the line’s appearance and color.
Figure 5-17: |
|
|
Horizontal |
Drag to page |
|
rule added |
||
|
||
to a page. |
|
Editing in Source View
Everything you do in Design view gets translated to HTML (as well as CSS and ASP.NET) in your page. When you click the Source button at the bottom of the Design surface, you see all the tags. If you’re familiar with (and like working in) HTML, you can add, change, and remove tags in Source view.
When you click one member of a pair of tags, like <td> or </td> for table cells, or <p> or </p> for a paragraph, both the opening and closing tags for the pair are boldfaced. That lets you see immediately what’s contained within the paired tags.
When you’re in Source view, you can use the + and – signs at the left side of the page to expand or collapse whole sections of the page. Doing so reduces clutter and allows you to focus on whatever portion of the page you’re working on.
Chapter 5: Creating Web Pages 93
Selecting in Source view
You can select text and tags using all the standard techniques, such as dragging the mouse pointer through whatever you want to select. After you’ve selected something, you can move it by dragging it, or delete it by pressing the Delete (Del) key.
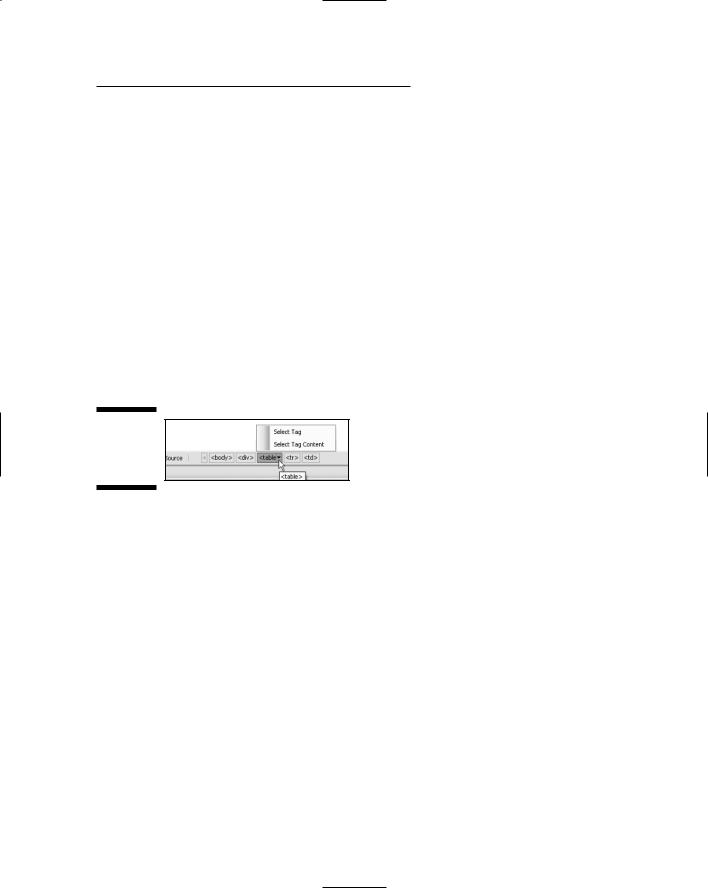
As you move the cursor about the page in Source view, tags that are near the cursor are represented by little buttons at the bottom of the Design surface. If you want to select a tag, its ending tag, and everything in between, just click the button. Or, right-click the button and choose Select Tag.
Alternatively, you can select everything between a pair of tags, and exclude the opening and closing tags. To do so, click the right side of the button that represents the tag, as at the bottom of Figure 5-18. Then choose Select Tag Content. (The Select Tag option has the same effect as just clicking the button — it includes the opening and closing tags in the selection.)
Figure 5-18:
Selection options on a button.
Typing tags and attributes
If you know HTML (and CSS) well enough, you can edit your page right in Source view. To add a new tag, just position the cursor to where you want to place the tag, and start typing the tag.
As soon as you start typing a tag, an IntelliSense menu appears, showing tags that match what you’ve typed so far. Rather than continue typing, you can double-click the tag name in the menu to finish what you’ve started typing.
To add attributes to a tag by typing, get the cursor just to the right of the tag text (and inside the > bracket if there is one) and press the spacebar to insert a blank space. The IntelliSense menu changes to show acceptable attributes for the tag you’re typing. Again, you can continue typing, or double-click a name in the IntelliSense menu.
94 Part II: Building Your Web Site
If you’re validating your tags against a current XHTML spec, many attributes that you may be accustomed to may not show up in the IntelliSense menu. That’s because XHTML has replaced many of the original attributes from HTML with CSS styles. When you use the Style Builder, you’re actually adding CSS styles to your tags.
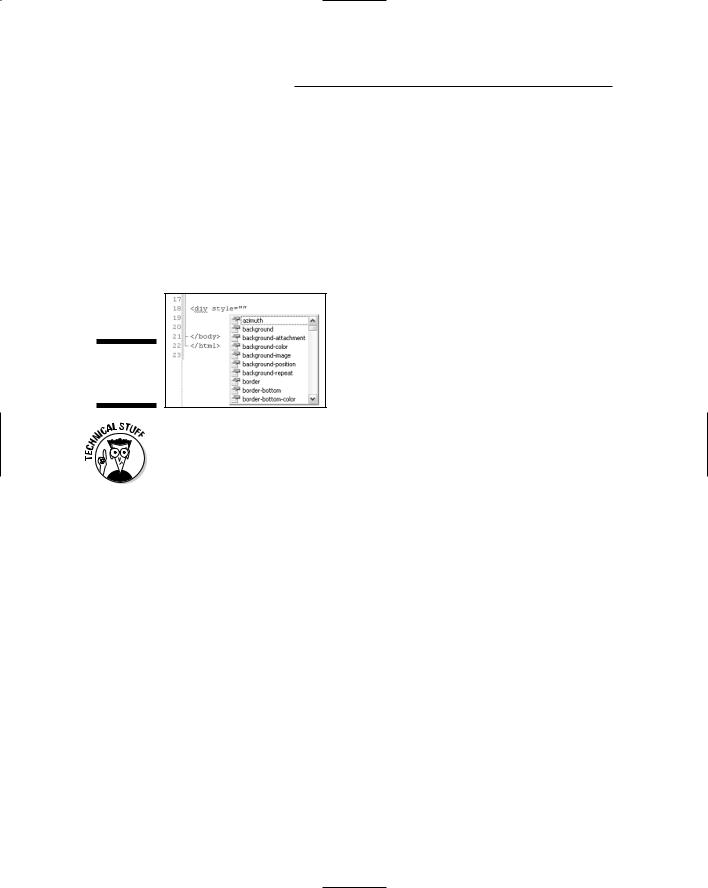
As an alternative to using the Style Builder, you can type CSS styling attributes right into the tag. Type style= (preceded by a blank space) into the tag. Then you can either just continue typing, or choose a CSS property from the IntelliSense menu that appears (Figure 5-19).
Figure 5-19:
IntelliSense
menu.
If you don’t know a CSS from a cinderblock, don’t worry about it at this point. Chapter 6 explains what CSS is about.
If you don’t remember the exact CSS property:value pair you want to type, you can still use the Style Builder to design the element. Here’s how:
1.First, make sure you click the tag you want to style, so the tag appears at the top of the Properties sheet.
2.In the Properties sheet, click the Style property, and click the Build button that appears.
The Style Builder opens.
3.In the Style Builder, choose your formatting options then click OK.
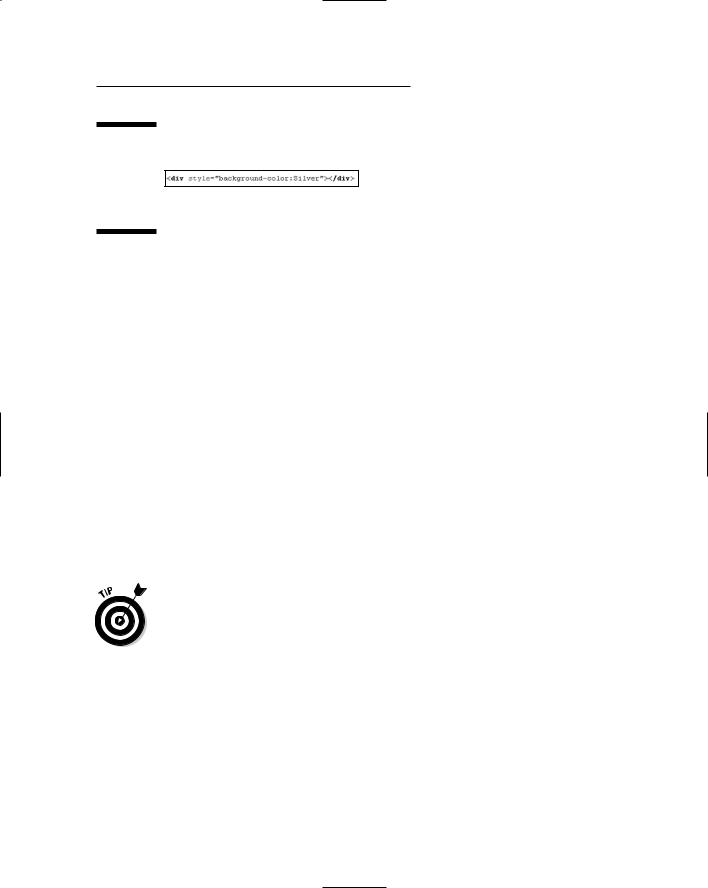
As soon as the Style Builder closes, the appropriate style= text is added to the tag. For example, Figure 5-20 shows how a <div> tag would look after choosing Silver as the background color in the Style Builder.
When you type the closing bracket of an opening paired tag, the closing tag for the pair is inserted automatically. For example, in Figure 5-20, the closing </div> tag was inserted automatically after I typed the closing angle bracket on the opening <div> tag.
Chapter 5: Creating Web Pages 95
Figure 5-20:
Paired
<div>...
</div> tags with a style.
To put text into the HTML element you just created, get the cursor right between the opening and closing tags. Then just start typing your text. Or, if you’ve already typed the text you want to put in the tag, just cut and paste it between the two tags.
Debugging HTML
All HTML and CSS that you type directly into Source view is validated against whatever version of HTML you’ve decided to use for your site. To review,
or change, that selection, right-click any empty space in Source view and choose Formatting and Validation. In the Options dialog box that opens, click Validation under the Text Editor HTML heading. Then choose your HTML (or XHTML) preference from the Target drop-down list and click OK.
VWD won’t be too fussy about rules as you type in Source view. But if you’ve created any problems while editing, you’ll know about them as soon as you click the Design button to switch to Design view. If there are any problems, you’ll see a message saying you can’t go to Design view until you fix those errors. All you can do is click OK to stay in Source view and try to correct your errors.
If you haven’t made any significant changes to the page, you can just close the page and choose No when asked about saving your changes.
Any problems in a page that prevent you from switching from Source view to Design view are listed in the Error List pane below the Design surface, as in Figure 5-21. If that pane doesn’t open, choose View Error List from the menu bar to make it visible.
The severity of each error is marked by an icon. Errors that are marked with a red X have to be fixed before you can switch to Design view. Errors marked as Warning or Message are more like “suggestions” than actual errors.

96 Part II: Building Your Web Site
Figure 5-21:
Sample
Error List
pane,
showing
errors.
To quickly locate the source of an error, double-click its message in the Error list. The offending tag will be selected so you can make your change.
If you’re not already an XHTML expert, you may want to stay out of Source view altogether, and stick to designing your page in Design view. That way, you won’t make any errors that have to be corrected manually. However, if you’re serious about being a Web developer, learning XHTML should be high on your to-do list. Things will be much easier after you understand what’s going on with all those tags in Source view.
Chapter 6
Designing with Styles
In This Chapter
Defining styles for your entire Web site
Creating CSS style sheets
Defining CSS style rules
Linking style sheets to your pages
Using CSS styles in your pages
If you want your Web site to have a unique character and be easy for visitors to get around in, it’s important to maintain a consistent look and feel
throughout all pages in your site. This involves thinking about what kinds of design elements you might use in your site. Examples of design elements
include things like main headings, subheadings, body text, tables, picture borders, lines, and other items that might appear on pages throughout your site.
To maintain a consistent look and feel, it’s best to predefine the exact appearance of all these items in style sheets. Doing so up front saves you a lot of time because you don’t have to style every single heading, table, and picture as you add it to your page. Instead, you just format things normally and they automatically take on the appropriate appearance as you create them.
The real beauty of style sheets goes beyond consistency and ease of use to, well, preserving your sanity. If you ever decide to change the style of some element in your Web site, you don’t have to go through every single page and make the change. You just change the style in the style sheet, and the new style is automatically displayed in every page. The technology you use to create style sheets goes by the name Cascading Style Sheets, or CSS for short.
Understanding CSS
CSS is a language that works in conjunction with HTML to define the exact appearance of any element in a Web page. You can use it in conjunction with the style= attribute in any HTML tag. When you choose options from the Style Builder introduced in earlier chapters, your selections get converted to a CSS style= attribute in the HTML tag.

98 Part II: Building Your Web Site
If you want to give your site a consistent look and feel, you don’t want to have to memorize and apply every style in every page. Instead, why not define the style once, in one place, and apply it everywhere? Now you’re talking — and that’s where Cascading Style Sheets come into play. They are the “one place” you define your styles for all your site’s pages to share.
Before I talk about the sheets, let me talk about the “cascading.” The explanations in the official specs are daunting, to say the least. So let’s take it from the top. Most HTML tags define elements in your Web page, things like the body of the page (between <body>...</body> tags), headings (<h1>...</h1> tags), paragraphs (<p>...</p> tags), and so forth. Some tags are contained within other pairs of tags. For example, the heading and paragraph (and the tags that define them) are between the <body> and </body> tags.
<body>
<h1>I’m Heading</h1>
<p>I am Paragraph. Heading and I are children of body.</p>
</body>
Here the heading and paragraph elements are both children of the body element, because they’re contained within <body> and </body> tags. Like a family tree, the page body is the parent to the heading and paragraph elements, because both of those elements are contained within its opening and closing tags.
Now, suppose we use a CSS style to change the font of the body tag, as given here? What effect will that have? Behold:
<body style=”font-family: ‘Monotype Corsiva’”> <h1>I’m Heading</h1>
<p>I am Paragraph. Heading and I are children of body.</p> </body>
The effect is that both the heading and the paragraph are shown in the Monotype Corsiva font in the Web browser. The reason is that both the <h1> and <p> tags inherit their default font from the parent element. Because the <body> element is the parent element to both the heading and paragraph, they both inherit its font style.
That brings up the main reason for “Cascading” Style Sheets: Certain stylistic elements cascade down through child elements. There’s an “unless otherwise specified in the child tag” addendum to that rule. In other words, if a child tag has its own style= attribute, than that one child’s element overrides the inheritance. Suppose (for example) we style the <h1> tag like this:
<body style=”font-family: ‘Monotype Corsiva’”>
<h1 style=”font-family: ‘Arial Black’”>I’m Heading</h1>
<p>I am Paragraph. Heading and I are children of body.</p> </body>

Chapter 6: Designing with Styles |
99 |
When this code is viewed in a browser, the heading (only) is shown in the Arial Black font. The paragraph is still shown in the Monotype Corsiva font set in the
<body> tag. That’s because the new style=”font-family: ‘Arial Black’” style overrode the inheritance for that one element (the heading) only. The paragraph, which is its own separate element, has no style= attribute and hence still inherits the font specified in its parent element, the page body.
So, who wants to be bothered typing style= all over the place in HTML tags? Nobody. That’s where style sheets come in. In the style sheet, you just define the rules of how each element will look, and all the elements take on the look you specified automatically.
The style sheet is the place where you define these rules. You don’t use normal HTML tags and style= attributes in style sheets. Instead, you define CSS rules by using a different syntax: You simply type the name of the element you’re designing, and then specify its style in a pair of curly braces. Here’s an example of a simple CSS rule in a style sheet:
body {font-family: ‘Bookman Old Style’}
Of course, there are lots of buzzwords that go with CSS. So let me first point out that every CSS rule (including the example above) consists of two major components:
Selector: The name that appears to the left of the first curly brace.
Declaration: The text inside the curly braces.
In the example given here, the selector is the word body and the declaration is font-family: ‘Bookman Old Style’. In English, the rule says All pages in this Web site will use Bookman Old Style as the default font for body text (and everything that inherits the body tag’s font). Brevity is the soul of CSS.
The declaration describes a style using one or more property:value pairs in which a colon (:) separates the property name from its value. In the example just given, font-family is the property and ‘Bookman Old Style’ is the value of that property.
A rule can contain multiple property:value pairs, provided you separate them with semicolons (;). The rule shown in Figure 6-1, for example, has two property:value pairs in its declaration.
Figure 6-1: |
Selector |
Declaration |
|
|
|
|
|
A sample |
|
|
|
CSS style |
|
|
|
rule. |
Property |
Value |
Property Value |
|