

Visual Web Developer™ 2005 Express Edition For Dummies - Alan Simpson
.pdf60 Part I: Planning a Web Site
When you’ve finished making your selections in the Style Builder, click OK. The Style Builder closes and your selections are applied to the cell you styled.
Styling the left pane
The examples above work for the top pane of a Master Page. To style the left pane, right-click some empty space in that left pane and choose Style. Again, the Style Builder opens. But this time the selections you make are applied to the left pane only.
For example, maybe you want to change the background color in the left pane. To do so, click Background, then use the Color Builder to choose a different color. In Figure 4-11, I chose a light blue, which shows up as #ccffff.
Figure 4-11:
Choosing a light blue color for the left pane.
For text alignment in the left pane, click Text in the Style Builder. To center text in the left pane, and make it align toward the top of the pane, set the Horizontal and Vertical options to Centered and Top, respectively, as shown in Figure 4-12.
Figure 4-12:
Text alignment for the left pane.
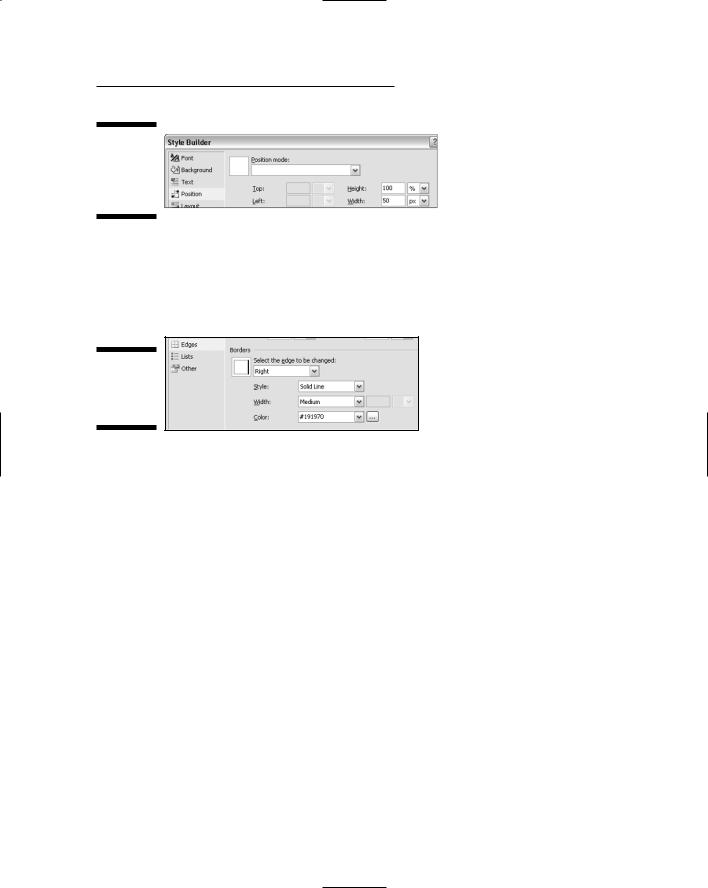
As a rule, you’ll want the left pane’s height to be equal to the height of the browser window. The width of that pane can be anything you like. To set the height and width, click Position in the Style Builder. Then set the height to 100% and the width to however many pixels you think you’ll need. If you’re unsure, just pick any number — such as 50 pixels, as shown in Figure 4-13.
Chapter 4: Creating Master Pages |
61 |
Figure 4-13:
Setting the left pane’s height and width.
You might also want to style the right border of that left pane. To do so, click Edges in the Style Builder. Then choose Right as the edge to change. Choose a style, width, and color. Figure 4-14 shows an example where #191970 is again just a dark blue color I chose. You can use any color you like.
Figure 4-14:
Styling the left pane’s right border.
Click OK in the Style Builder to save your changes and apply them to the page. The left border then reflects the choices you made in the Style Builder.
Styling the ContentPlaceHolder pane
The pane that contains the ContentPlaceHolder doesn’t really need to be styled in terms of color, width, or height, because the page that appears in place of the ContentPlaceHolder will eventually fill that pane completely.
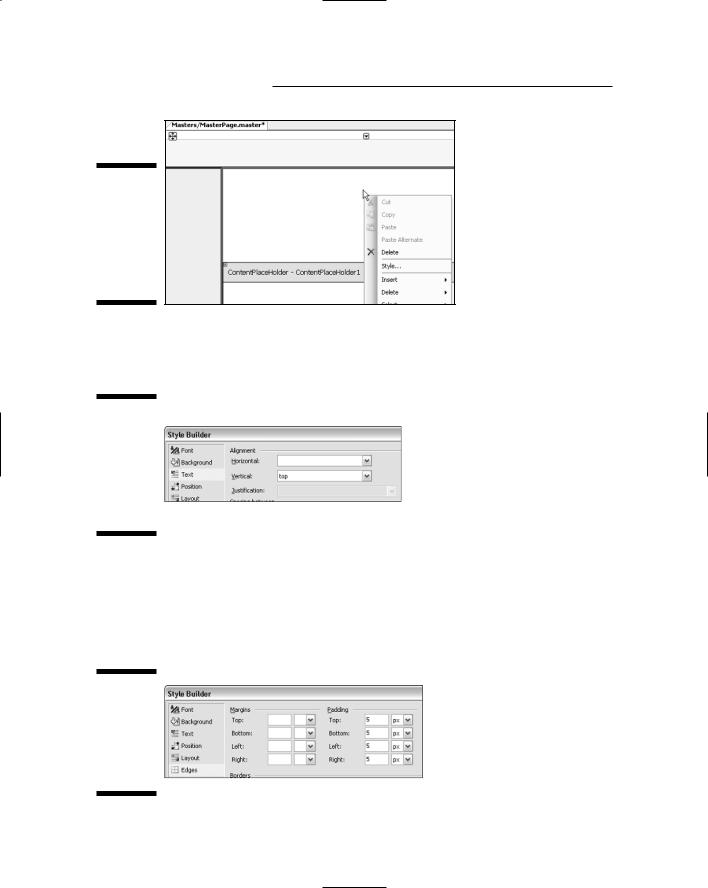
However, if you start with the ContentPlaceHolder aligned to the top of its table cell, you may find it easier to work with Master Pages. To make that change to the Master Page, first right-click some empty space within the ContentPlaceHolder pane. Make sure the mouse pointer is in the same cell as the ContentPlaceHolder, but not on the ContentPlaceHolder as shown in Figure 4-15. Then choose Style from the menu that appears.
62 Part I: Planning a Web Site
Figure 4-15:
Right-click the cell (but not the
Content
Place
Holder
itself).
In the Style Builder, click on Text. Then choose Top as the Vertical alignment as shown in Figure 4-16.
Figure 4-16:
Alignment
setting
for the
Content
Place
Holder
pane.
You might find it useful to add some padding to the Content pane as well, because doing so provides a margin for content that will later appear in that pane. To pad the pane, click Edges in the Style Builder. Then set the Padding options to whatever you think is appropriate. For example, in Figure 4-17, I’ve set the padding inside that cell to 5 pixels all the way around.
Figure 4-17:
Padding the Content pane to provide a small margin.

Chapter 4: Creating Master Pages |
63 |
Click OK in the Style Builder to apply your style choices. The ContentPlace Holder now aligns to the top of its cell. There’s a small margin above and to the left of the ContentPlaceHolder because of the 5-pixel padding added in the Style Builder. The top and left panes have the color and border styles you applied, as shown in Figure 4-18. (Here in the book, of course, the colors I chose show up as shades of gray.)
Figure 4-18:
The Master Page after a bit of styling.
Remember that Figure 4-18 is just an example: You can style things in your own Master Pages as you see fit. You haven’t made any lifelong commitments here. If you change your mind about some stylistic setting you’ve made, just right-click the pane, choose Style, and use the Style Builder to choose whatever style options you like.
Eventually, you’ll want to put some content (text, pictures, or whatever) into those panes. Keep in mind that whatever you put into those panes will be visible on every page that uses the Master Page. But, at this early stage of the design and development process, just having a Master Page with the basic look and feel you want is sufficient. You can worry about specific content later. Right now your time is better spent getting a feel for how you use Master Pages.
Before you can use a Master Page, you need to close and save it. Use the same technique you’d use to close any other item: Click the Close (X) button in the upper-right corner of the Design surface.
Using a Master Page
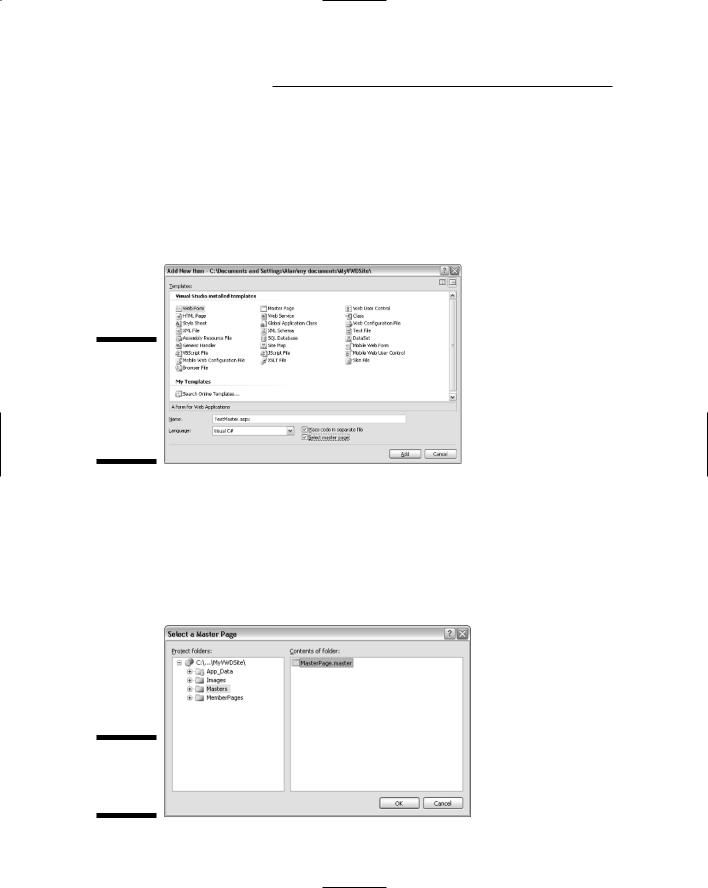
To use a Master Page, you must create a new Web Form. As you go through the process, choose the Select Master Page check box in the Add New Item dialog box. To try it out, create a simple page, perhaps named TestMember.aspx, by following these steps:
64 Part I: Planning a Web Site
1.Right-click the site name at the top of Solution Explorer and choose Add New Item.
2.In the Add New Item window that opens, choose Web Form.
3.In the Name box, enter a name for the page.
4.I’ll use the name TestMaster.aspx because this is just a test page.
5.Choose the Select Master Page check box as shown in Figure 4-19.
Figure 4-19:
Ready to create a new page that uses a Master Page.
6.Click the Add button.
7.In the Select a Master Page dialog box that opens, click the name of the folder that contains the Master Page (Masters, in this example). Then click the name of the Master Page you want to use, as shown in Figure 4-20.
8.Click OK.
Figure 4-20:
Choosing a
Master
Page to use.

Chapter 4: Creating Master Pages |
65 |
Note that the page doesn’t look exactly as it will in a Web browser; everything on the Master Page is dimmed and uneditable. That’s because in this new page, you want to create and edit only the content of this one page, not the Master Page content, which appears on many pages.
The white area under the Content heading (which represents the Content PlaceHolder you see while creating the Master Page) is the only place you can compose your Web page. That white area is the content page, so named because it holds the content that’s unique to the page you’re creating right now. (As opposed to the Master Page, which shows content that appears on all pages that use the Master Page.)
Creating a content page is no different from creating a page that gives you the whole page to work with. For example, within the content page, you can type, edit, and format text using all the usual tools and techniques, as described in Chapter 2. You can add pictures by dragging their icons from Solution Explorer onto the page as was also described in Chapter 2. You can add controls from the Toolbox to the page. (Later chapters detail adding controls, and more basic formatting techniques as well.) Figure 4-21 shows an example in which I typed and formatted some text in the content page.
Figure 4-21:
New text in the content page.
Don’t worry about the small size of the content page in these figures, or on your own screen. Likewise, don’t worry about the width of the content page’s left pane. Things will adjust automatically as you work. It’s nothing to be alarmed about because what you see in the Design surface isn’t exactly how things will look in the Web browser.
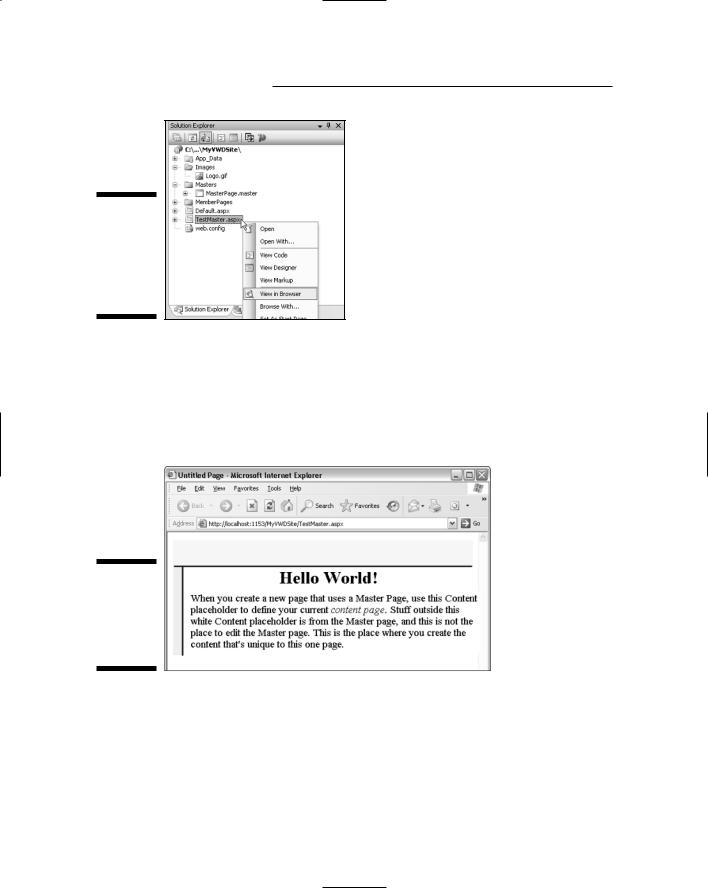
When you’ve finished working on a content page, just close and save it as you would any other page. It will be placed in its folder with the usual .aspx extension. To get a better idea of how the page will actually look to people who visit your site, view the page in a Web browser. That is, right-click the page name (not the Master Page name) in Solution Explorer, as shown in Figure 4-22, and choose View in Browser.
66 Part I: Planning a Web Site
Figure 4-22:
About to view Test
Master. aspx in a Web browser.
When the page opens in the browser, you’ll see the panes from the Master Page above and to the left of the content page. At the moment, those panes are just strips of color (gray in Figure 4-23). But again, don’t worry about the width of the panes or anything else. All that matters at this stage of the game is that you create a general layout for your Master Page, and understand how to use it when creating new pages. You can think about specific content later.
Figure 4-23:
Test
Master. aspx in a Web browser.
When you’ve finished viewing the TestMaster page, close your Web browser to return to Visual Web Developer.
Editing a Master Page
You can put anything you want into a Master Page. But it’s important to realize that any time you want to edit the Master Page, you have to open the
Chapter 4: Creating Master Pages |
67 |
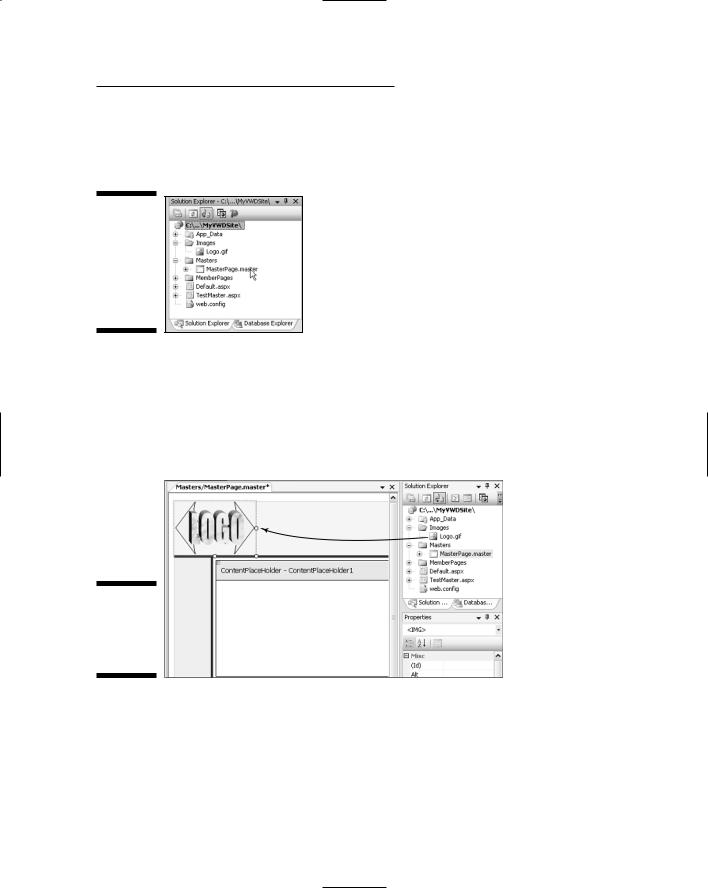
Master Page, not a page that just uses the Master. For example, to edit the Master Page created in this chapter, you’d double-click the MasterPage.master file, shown near the mouse pointer in Figure 4-24.
Figure 4-24:
To edit a Master Page, double-click its name in Solution Explorer.
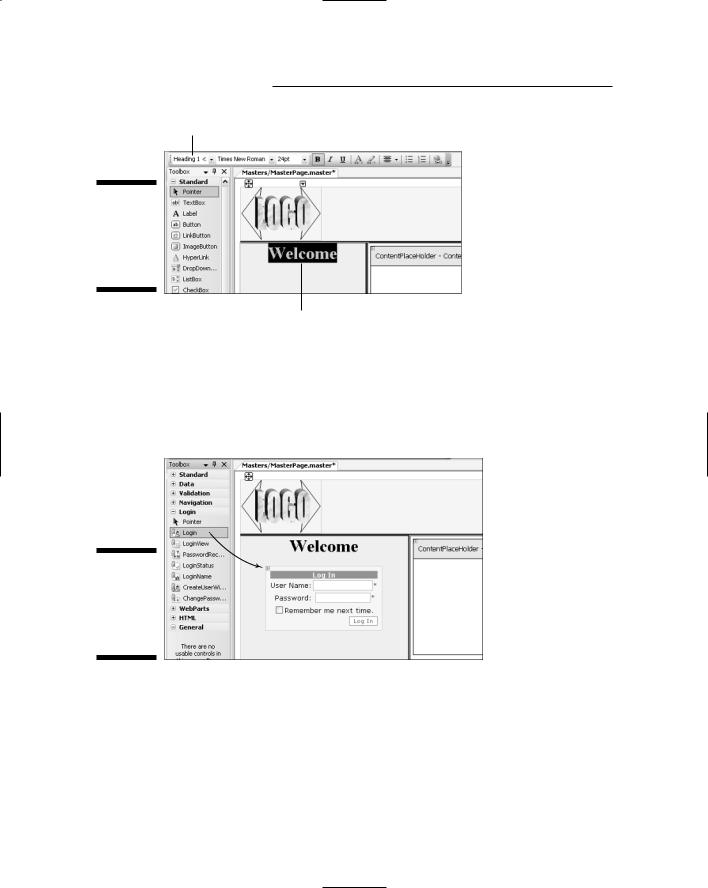
When the page opens, you can add content to either the top or left pane as you see fit. The content can be anything — text, pictures, tables, controls, whatever. For example, to add a picture to the top-left pane of a Master Page, just drag a picture icon from Solution Explorer into the pane. Figure 4-25 shows an example where I’ve dragged a picture named Logo.gif to the top page of my Master Page.
Drag
Figure 4-25:
Adding a picture to a Master Page.
To add text to a pane, just click in the pane and type your text. After you’ve typed the text, you can select it and apply formatting as described back in Chapter 2. Figure 4-26 shows an example where I’ve typed the word Welcome in the left pane. I then selected that text and choose the Heading 1 style from the Block Format drop-down list.
68 Part I: Planning a Web Site
Block formats
Figure 4-26:
Added some text to the Master Page left pane.
Selected text
You can also add any control from the Toolbox to a Master Page. (Controls in the Toolbox are discussed in Chapter 7.) For example, if you want people to be able to log in from any page in your site, you could add a Login control to the pane. It’s just a simple matter of dragging the control from the Toolbox into the top or left pane of the Master Page, as illustrated in Figure 4-27.
Drag
Figure 4-27:
Adding a Login control to the left pane.
As you add content to the left pane of the Master Page, the width of the pane changes to accommodate the content. Try not to let that bother you because it’s not always a direct reflection of how things will look in a Web browser.
After making your changes to the Web page, close and save it. Then, open any page that uses the Master. For example, after making the sample changes in the previous three figures and closing the Master Page, I right-clicked my TestMaster.aspx page and choose View in Browser. Figure 4-28 shows the result.

Chapter 4: Creating Master Pages |
69 |
Figure 4-28:
Test
Master. aspx after adding content to
Master
Page. master.
I’ll be the first person to admit that the page in Figure 4-27 is ugly. But I’m not suggesting you create your Master Page to look like the one in the figure. All that matters now is that you have a Master Page that you can use as you create new pages in your site. You can think about what specific things you’d like to put on your own Master Page later.
Visual Web Developer is mostly about creating the infrastructure for a dynamic, data-driven Web site. You can worry about making things “pretty” later in the process. Figure 4-28 is nothing more than an example of how you can put things into a Master Page.
At this point, you do have a working Master Page, and you’ll see more examples of ways you can use it in upcoming chapters.
Adding a Master Page to Existing Pages
If you’ve already created some pages in Visual Web Developer without specifying a Master Page, you can still get that content into a Master Page’s Content area using simple copy-and-paste techniques. Actually, you already have a page that has no Master Page: the Default.aspx page that Visual Web Developer created automatically when you first created the Web site.